
Rebuilding a Spicer 18 T-Case
Anyone who followed our trip for the 2007 Ultimate Road Trips knows how much time, effort, and Lucas oil we used in hopes of completing our road trip. Before hitting the road for the 2008 trip we wanted to rebuild the whole t-case just so we would know that condition of the internal parts and to stop as much of the leaking as we can.
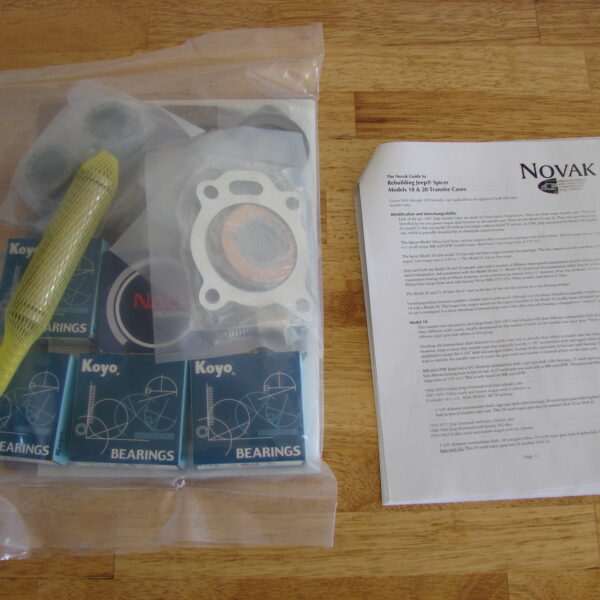
We decided to use what we felt would be the most complete kit that we could find that would come from a company that specialized in such rebuilds. What we found and decided was the best company for our needs was a company out of Logan Utah, Novak Inc. After talking with the folks there we knew they had what we needed and our shipment of parts went out right away so join us as we walk you through the rebuild of our Spicer 18.
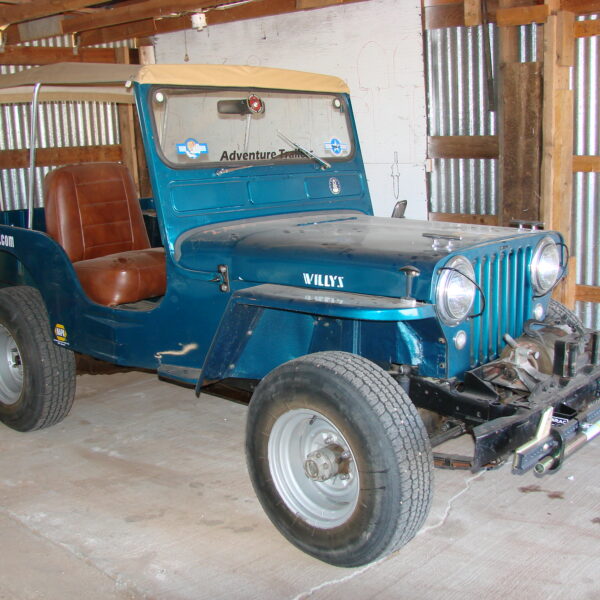
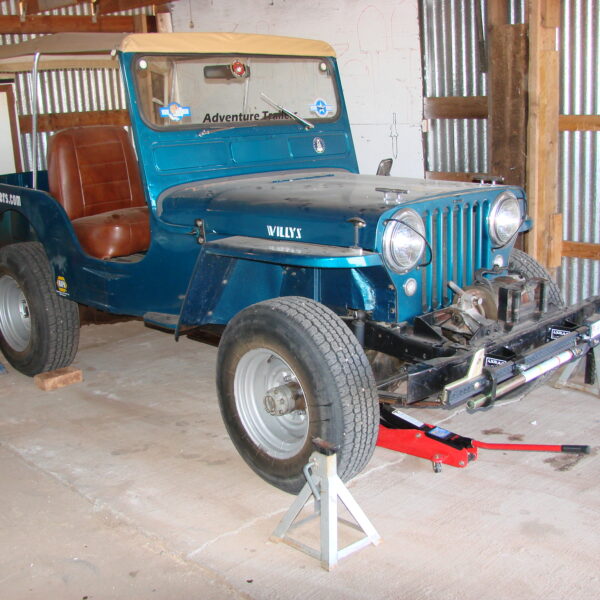
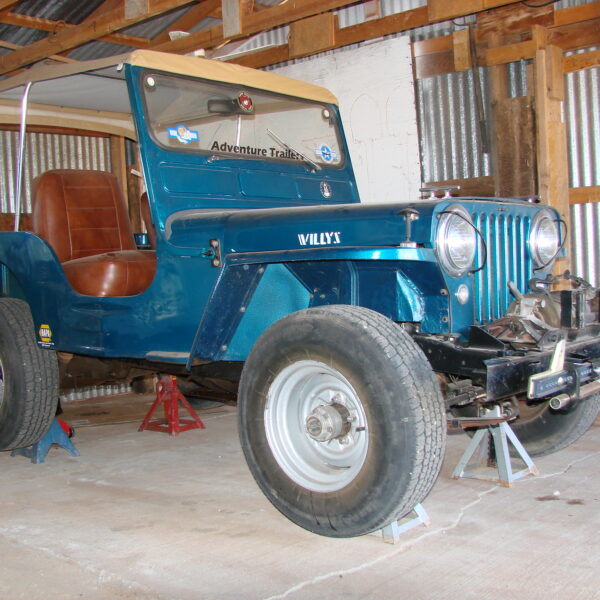
Since this Willys sits in one of our storage shops we decided to pull the t-case out and leave the Willys where it sat since it would be out of the way. Novak’s master kit came with all of the gaskets, bearings, seals, and parts we would need to complete the job as well as a set of very detailed instructions for the rebuild.
First we chalked the wheels and lifted the Willys up so we could get it on jack stands to give us a little more room to work underneath the vehicle. Safety should always be your first concern, make sure the vehicle is not going to move while you are raising by chalking the wheels. Once it was on the jack stands we made sure it was stable before we went underneath to start the removal of the t-case.
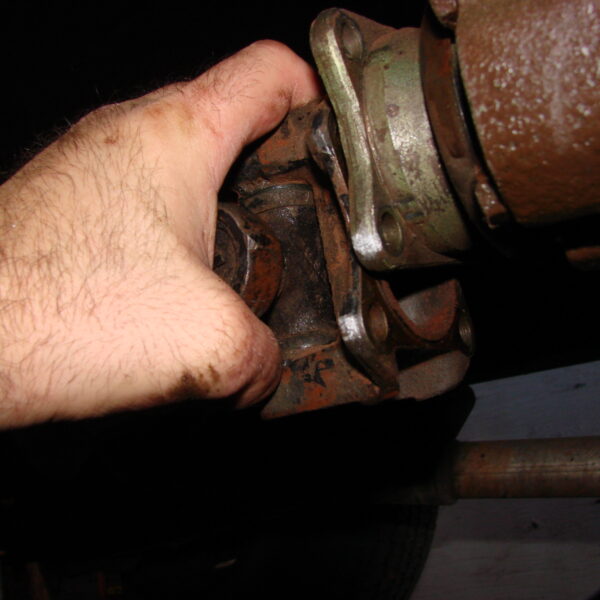
We started by removing the rear drive shaft, you will see in the pictures that I marked one of the corners as I was pulling the drive-line off. I simply like to mark things in accordance of how they came apart so I can assure that they will go back in the very same location and position. I also (and I have stated this before) put the nuts and bolts back the spot they came out of instead of throwing them all in a bucket and trying to sort them out later.
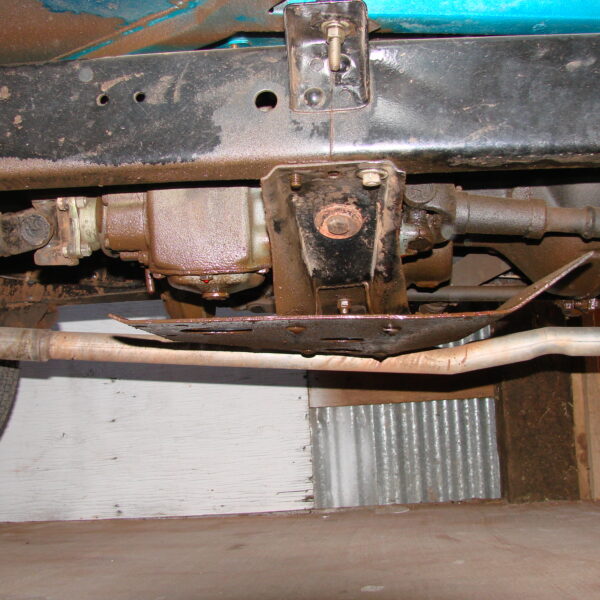
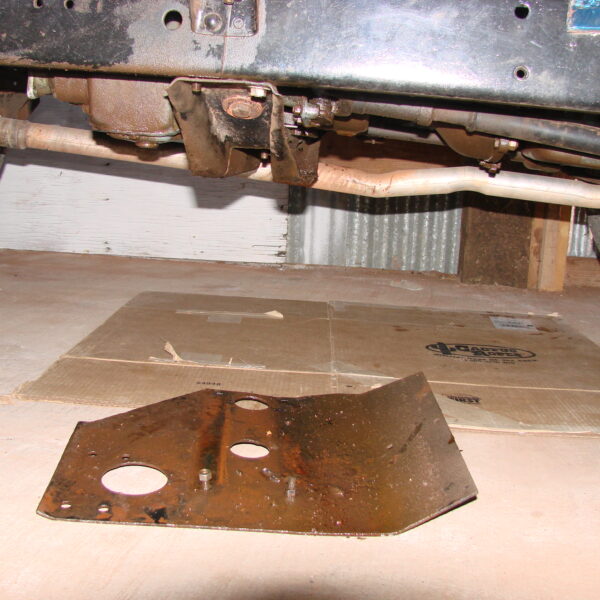
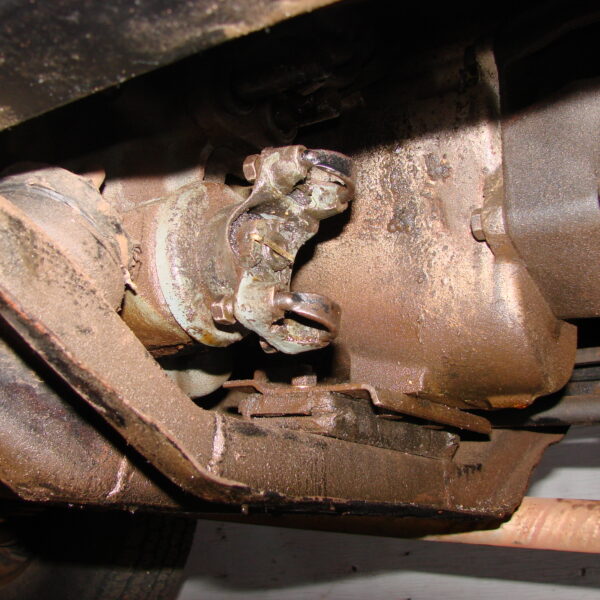
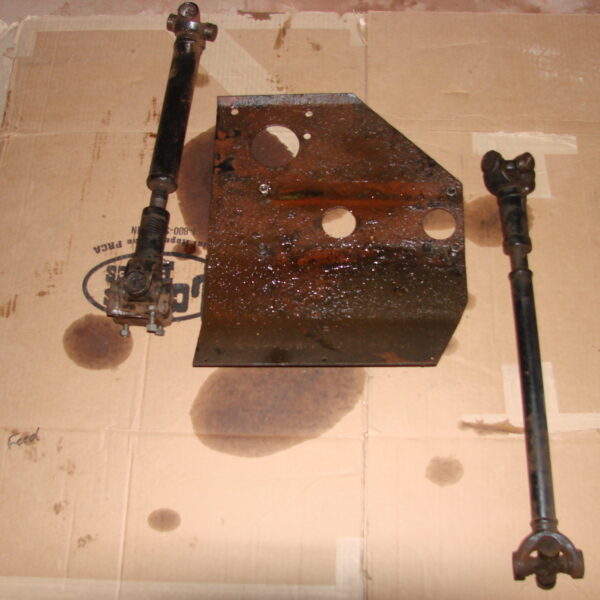
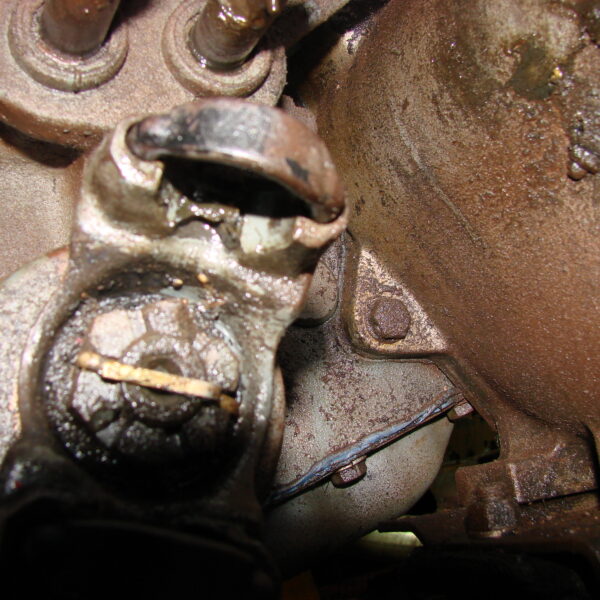
Next I wanted to get the skid plate out of the way so I would have a little more room to move and access the rest of what I needed to take apart.
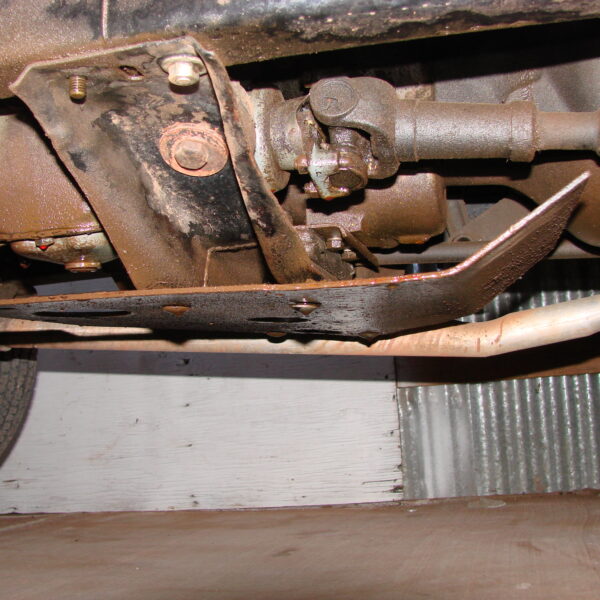
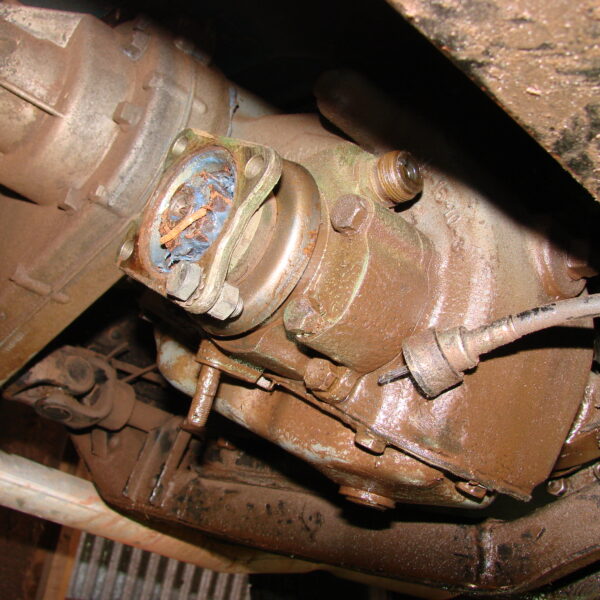
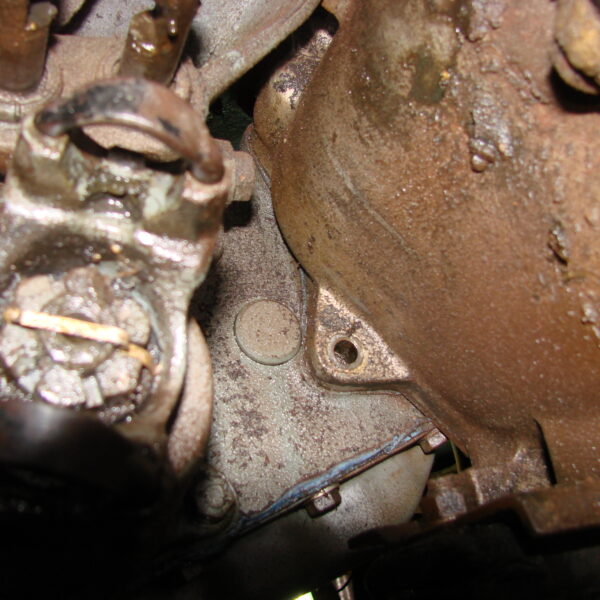
With the skid plate out of the way I have a little more room to disconnect the front drive-shaft.
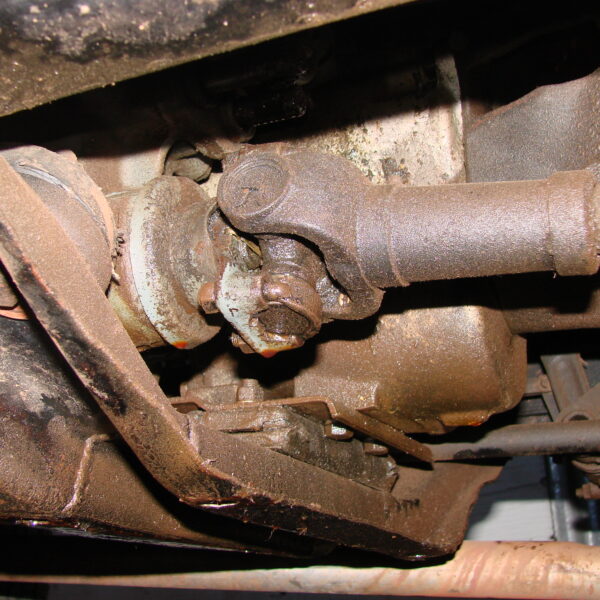
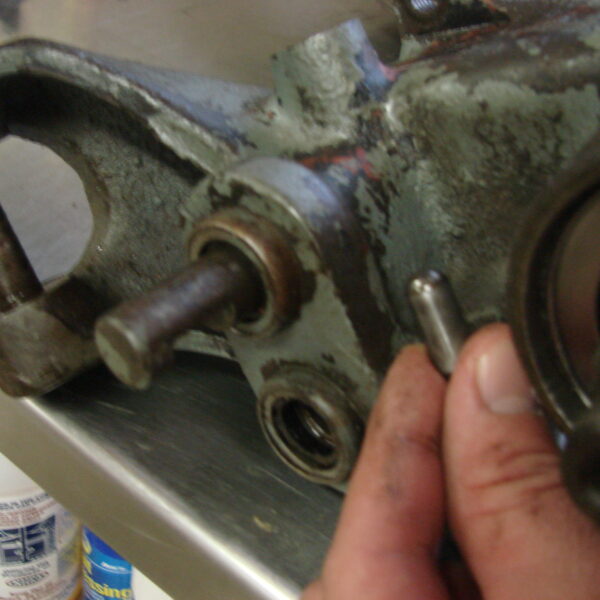
Now that the skid plate is out of the way I am going to remove the front drive shaft to help me access the one retaining bolt that is on the front of the transfer case to transmission by the front drive shaft yoke and of course to be able to remove the t-case.
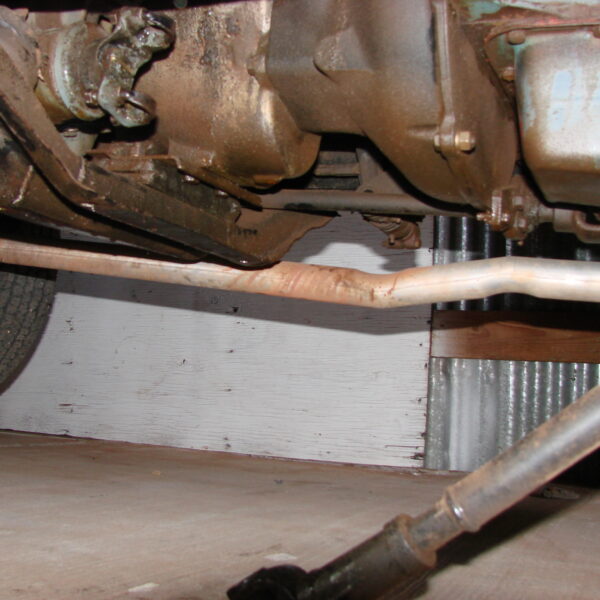
Now that I have removed both drive shafts, I put them off to the side with the skid plate.
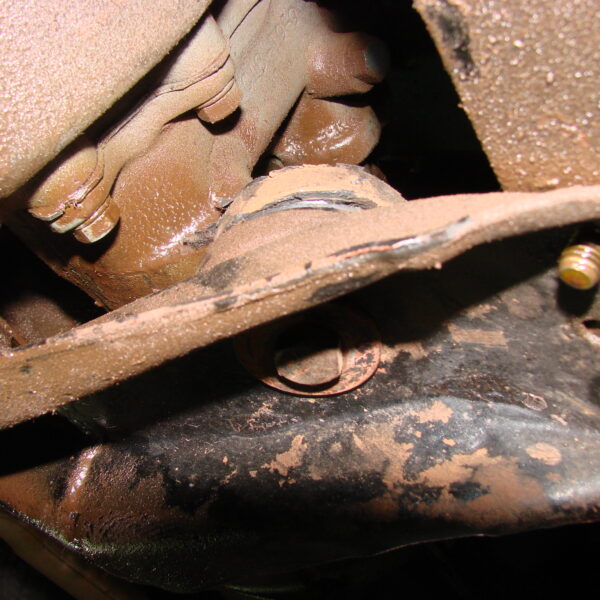
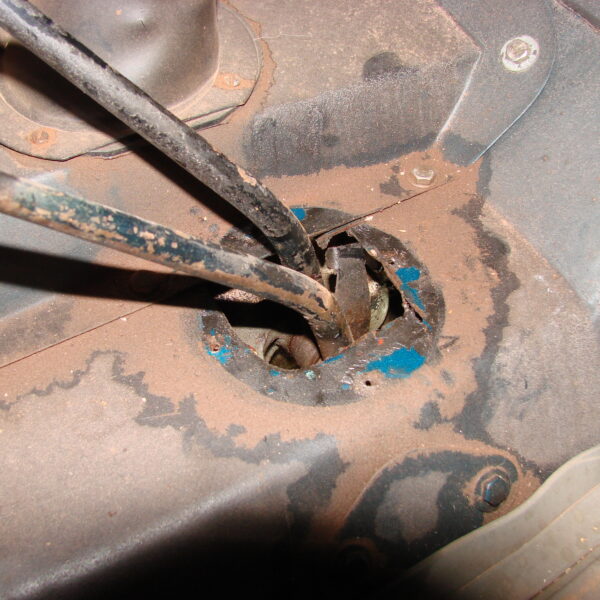
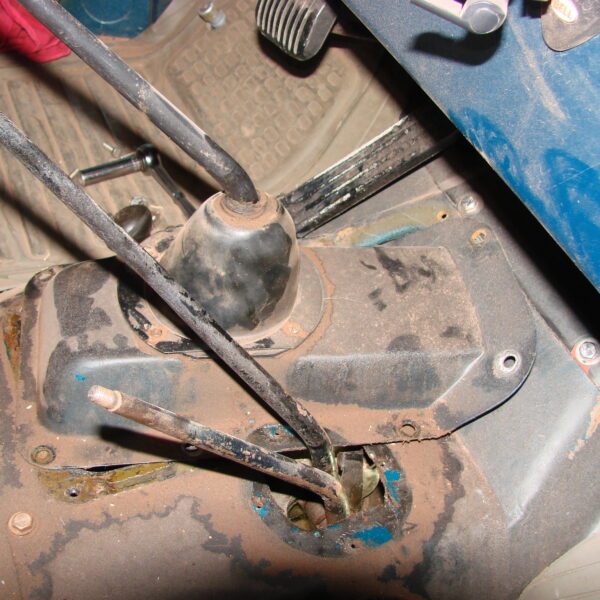
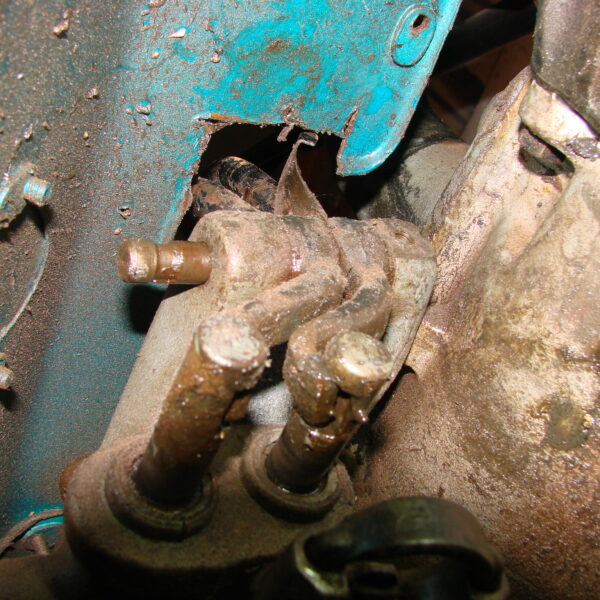
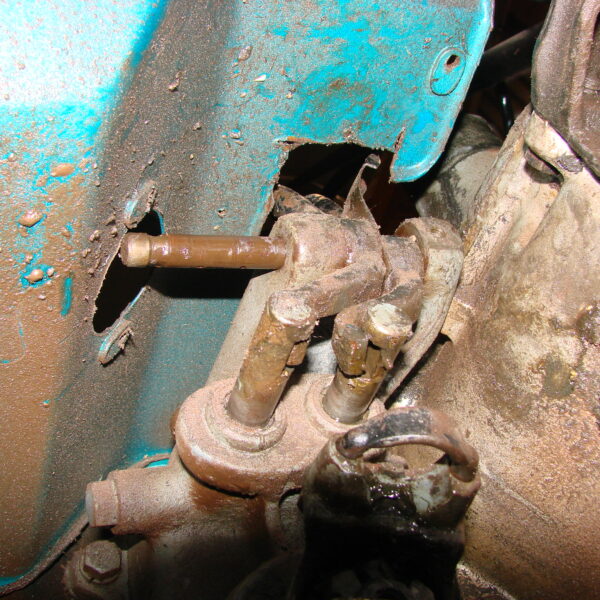
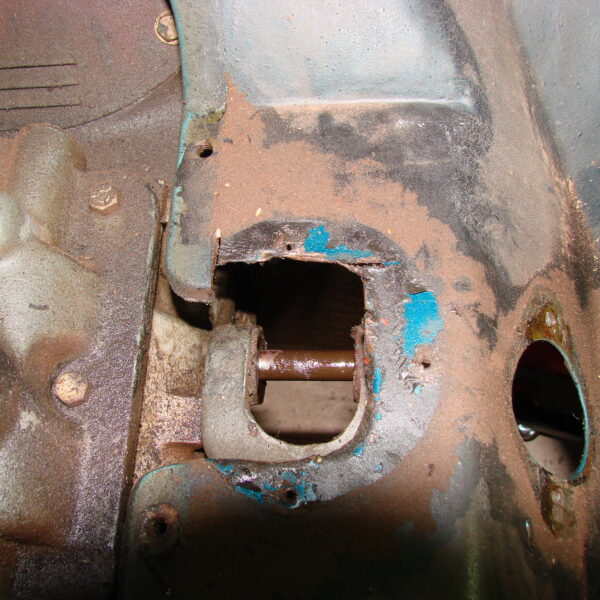
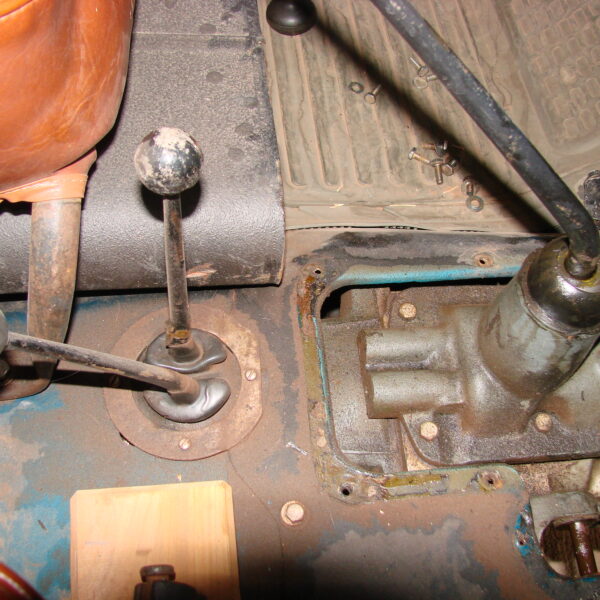
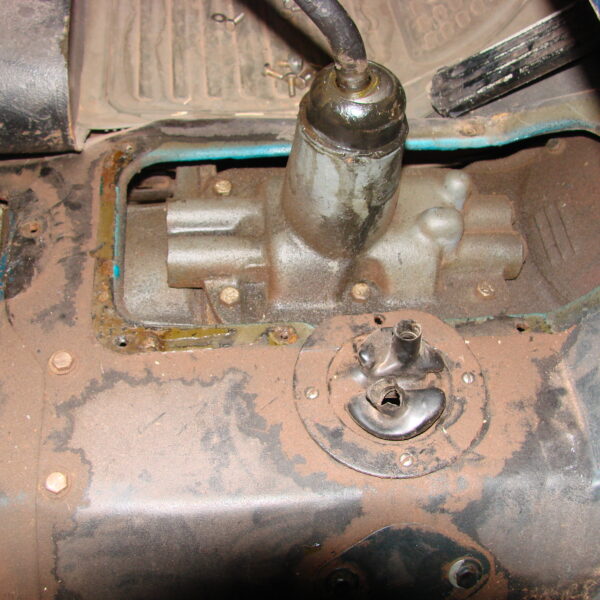
Next I am going to start removing the other items that are connected to the t-case that will need to be unhooked or removed before I can separate the t-case from the transmission like the speedometer cable, the bolt that holds the t-case onto the cross member, as well as the shaft that holds and controls the linkage which is bolted into the t-case on the drivers side and has to be unscrewed. You can disassemble the linkage bar and take the whole thing out but I chose to just disconnect it from the case and kept the linkage hooked up to make the reinstall easier (you’ll see in the pics that I did unhook one of the linkage rods temporarily). At the same time I pulled the floor cover off of the twin sticks so they would be ready to remove when I pulled the t-case out as well.
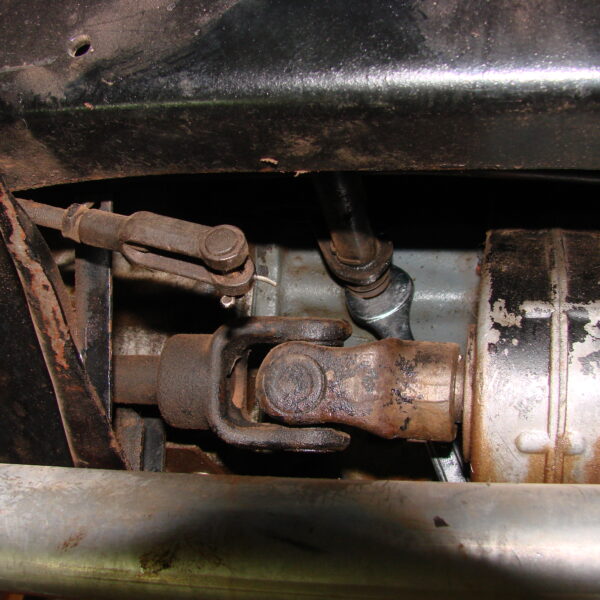
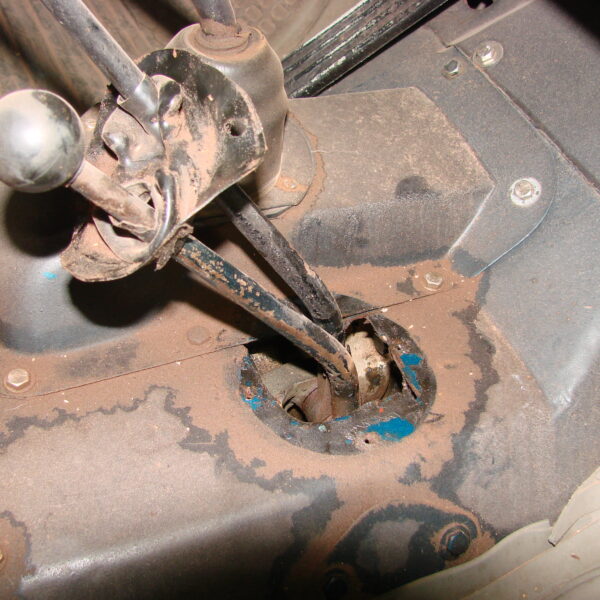
With the cover pulled I released the spring that keeps the shifters from rattling and loosened the screw that keeps the shaft that holds the shifter handles in place. It is easier to access this screw from the top and when it is loosened the shaft can be removed, it also is easier to access to shaft from the top, I removed the plate above the transmission to allow me the room needed to push the rod from the inside out.
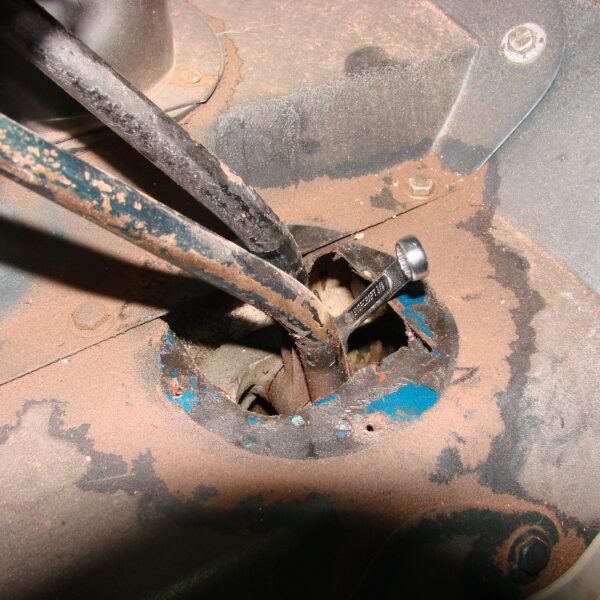

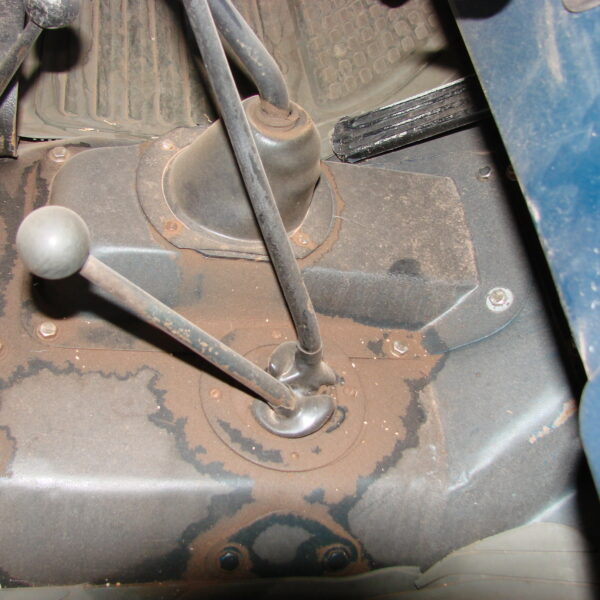
On the passenger side of the floor board you will see another cover that can be removed to allow a little more room to slip this shaft out. After removing the cover I was able to reach the shaft and pull it far enough out that I could remove the shift handles. Once they were out I installed the shaft and set screw back into place so I wouldn’t loose them.

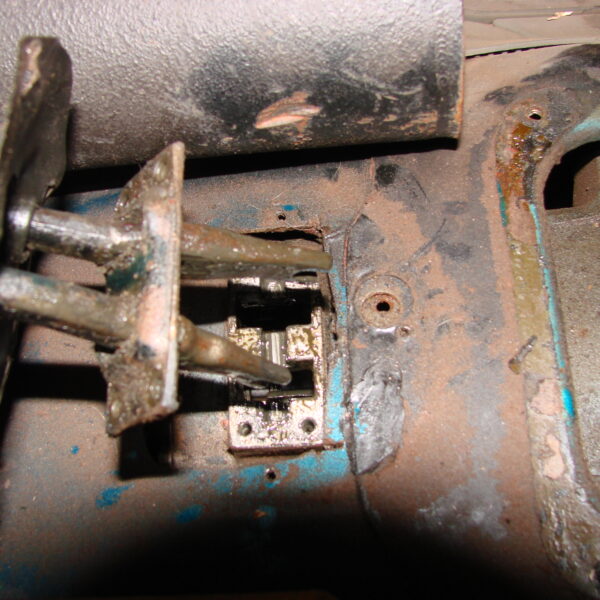
Next the shifters for the PTO that controls our winch needed to be removed, after the cover is removed there are 4 screws on the top that need to be removed. Once the 4 screws are out the shifter assembly simply lifts up and out off of the top of the PTO.
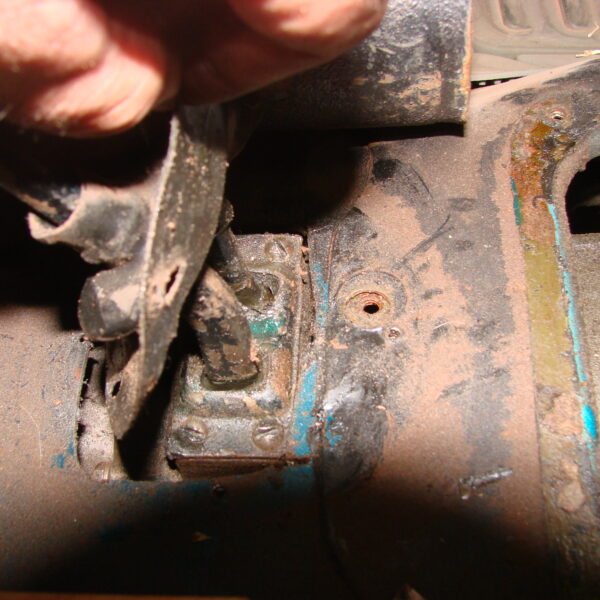
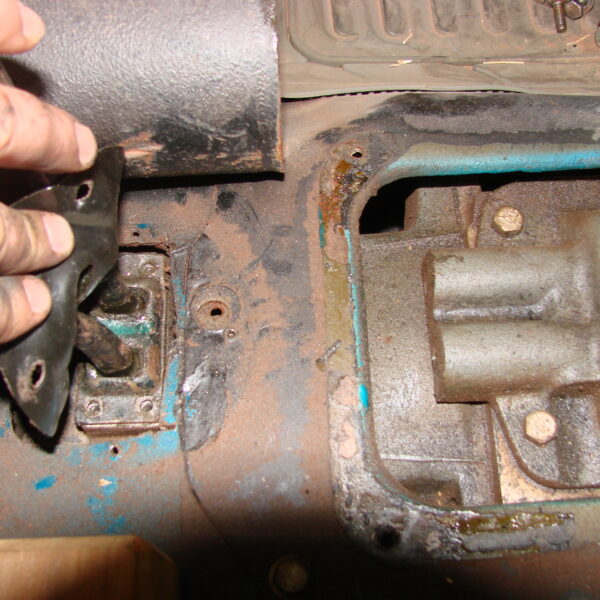
Since I am done in the body I went ahead and put the shifter covers back in place to once again help me keep track of what goes where when it comes time to reinstall the components. While I was at it I went ahead and drained the fluid from the Spicer 18.
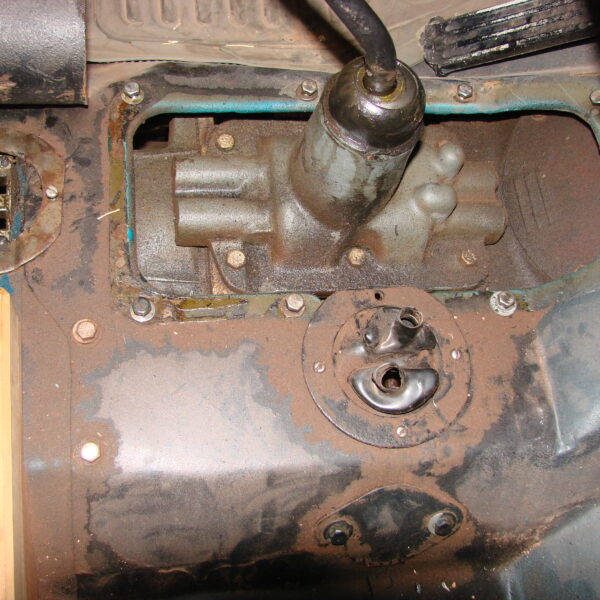
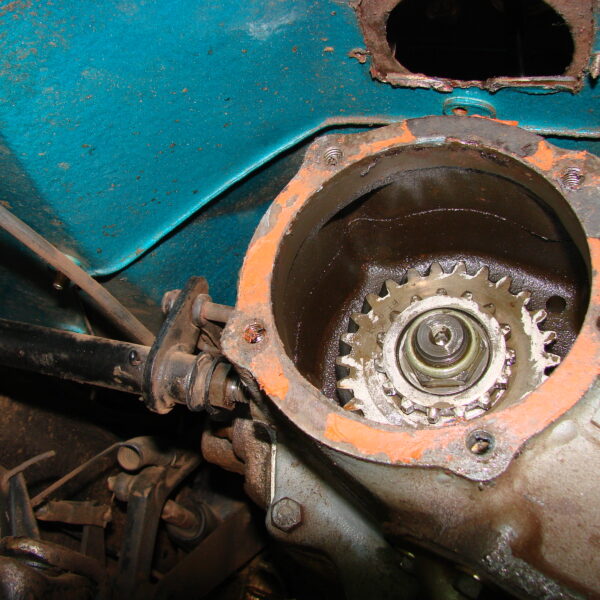
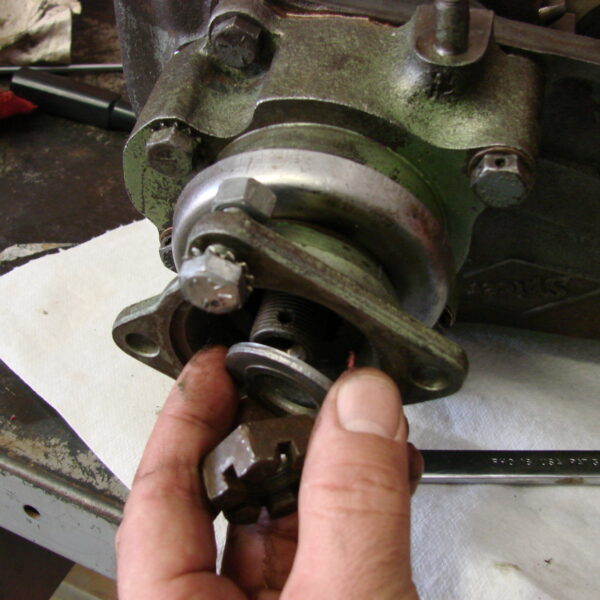
The PTO needs to be removed in order to access the nut that holds the Spicer and the transmission together. There are 5 bolts that either holds a cover in place where the PTO mounts or the PTO will be attached and in need of removal. There are also overdrives that mount in that spot and may need removed in order to access the nut. If there is a PTO the Allen set screw will need to be loosened so the front shaft that controls the winch will be able to come apart from the PTO when it is separated from the transmission.
If you have a long enough Allen wrench you can access the bolts through the holes when the caps are removed from the PTO, I didn’t have a set of allen wrenches long enough so I had to pull the PTO apart in order to access the bolts to remove them therefore I drained the oil. Once the bolts are removed the PTO simply slides off by pulling it towards the rear of the vehicle. If it is sticky you can GENTLY pry it to break it loose from the t-case.

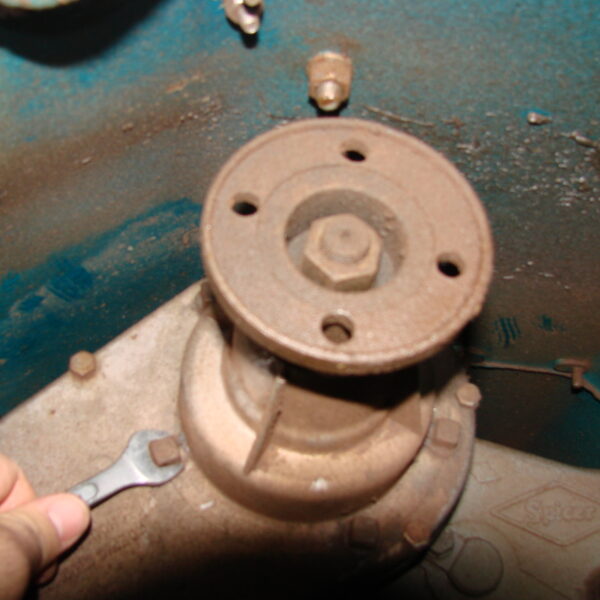
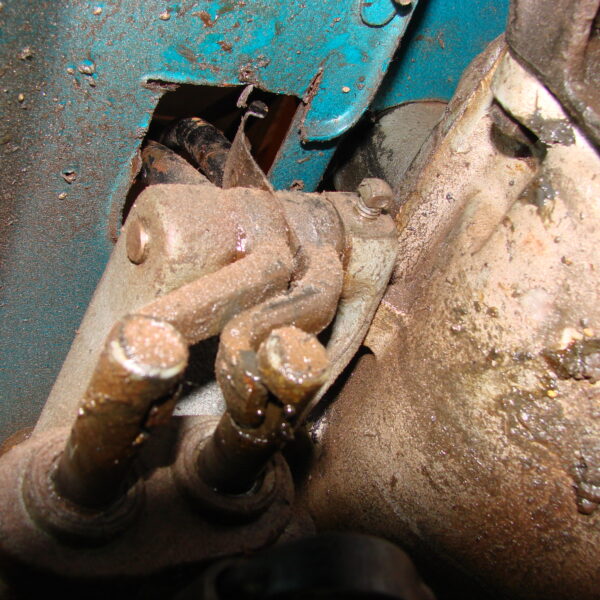
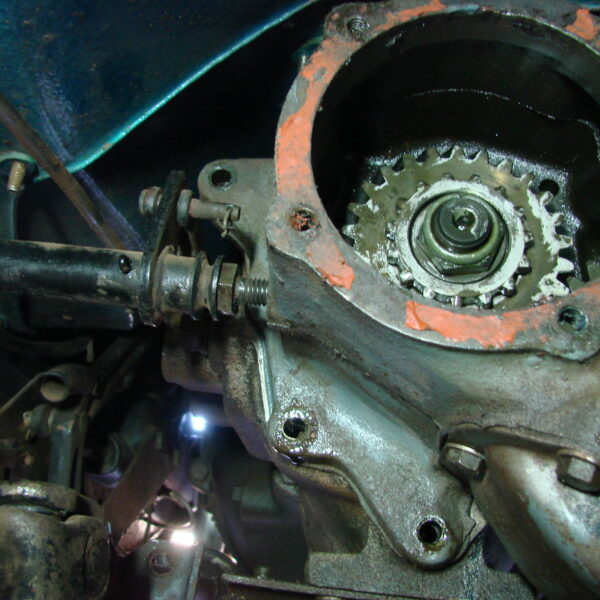
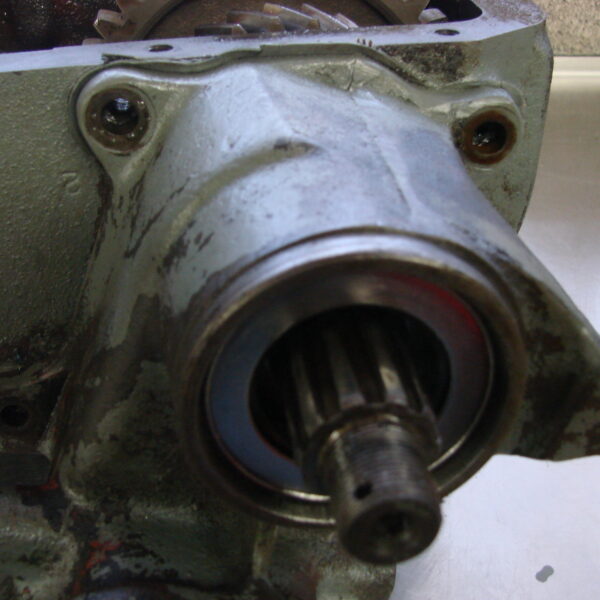
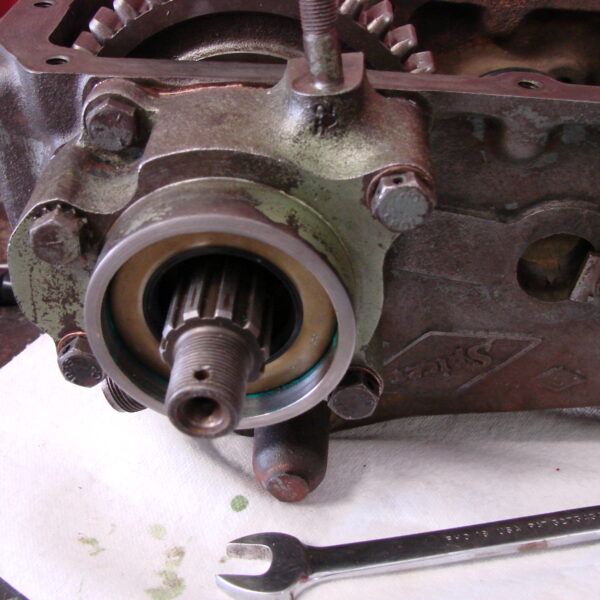
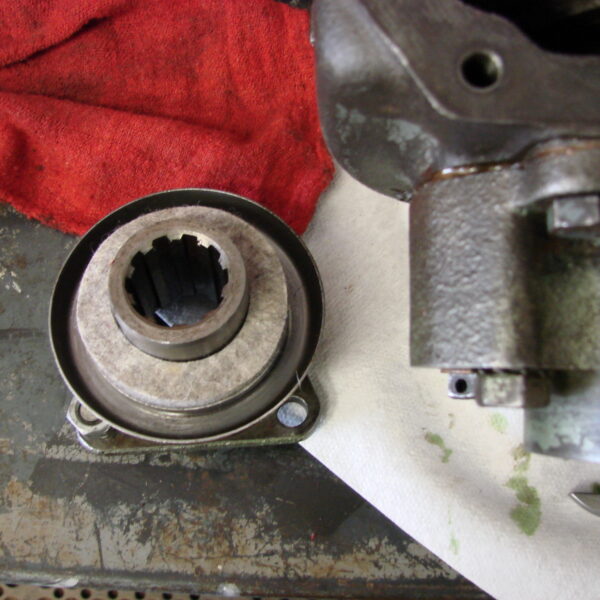
Once the PTO is removed you will see inside the Spicer that there is a nut that holds the assembly onto the output shaft of the transmission, it will either be a Nylock® nut or a nut with a Cotter Pin through it. The Nylock needs a 1 ¼” socket and the castle nut will need a 1 5/16” socket to remove.
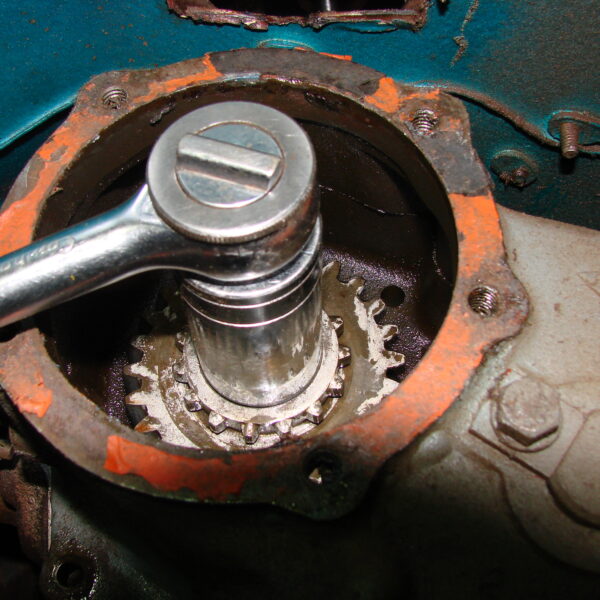
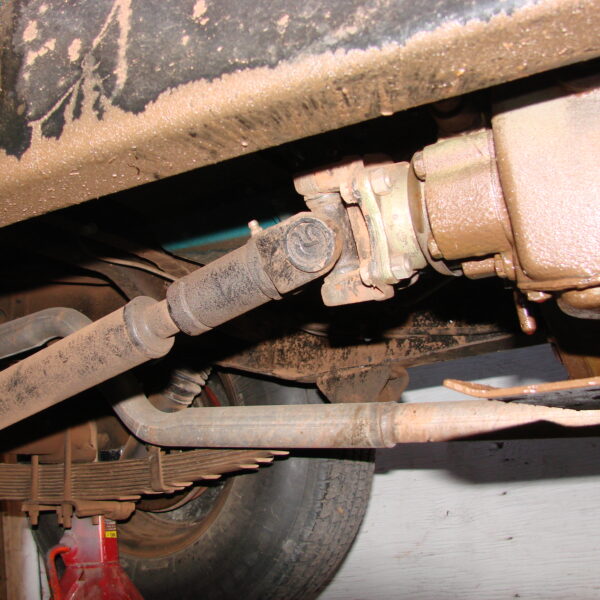
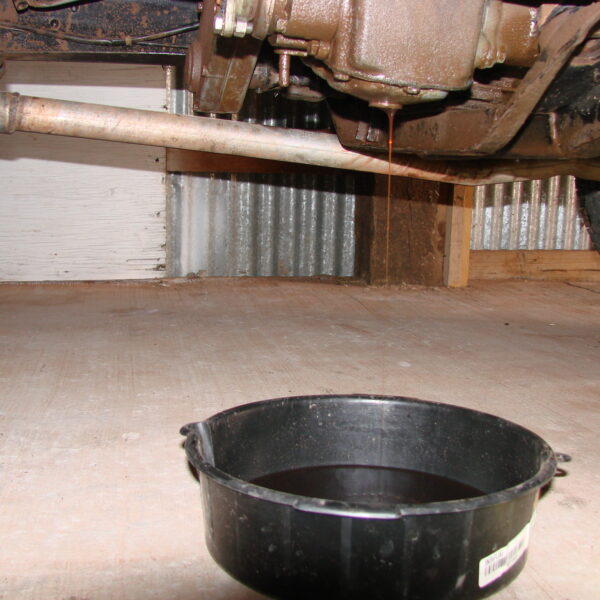
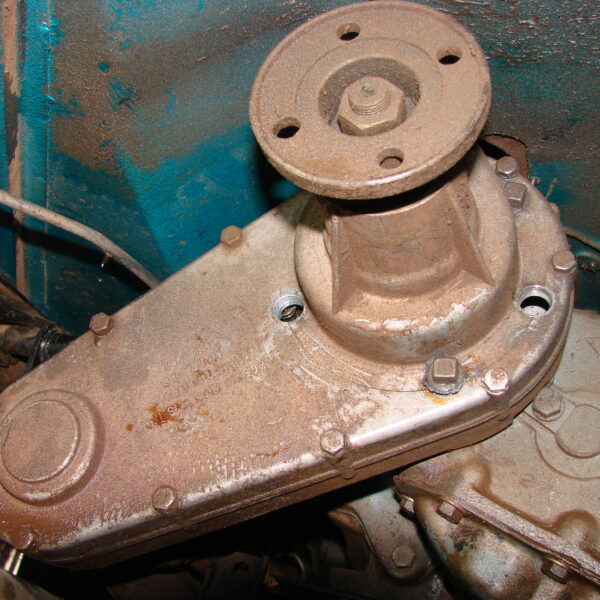
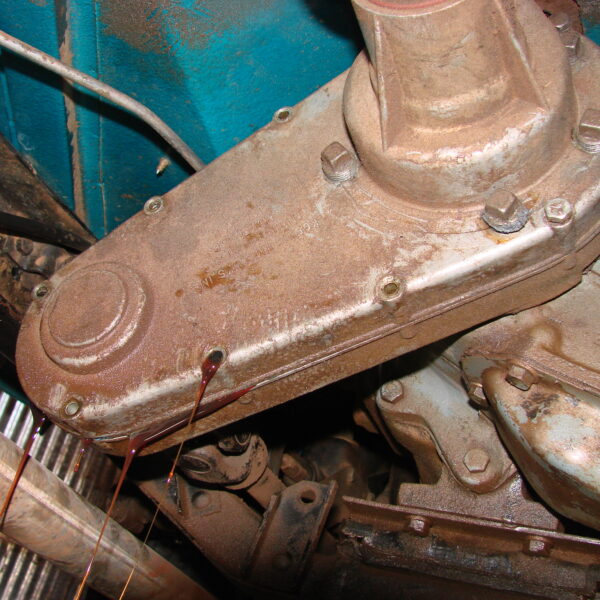
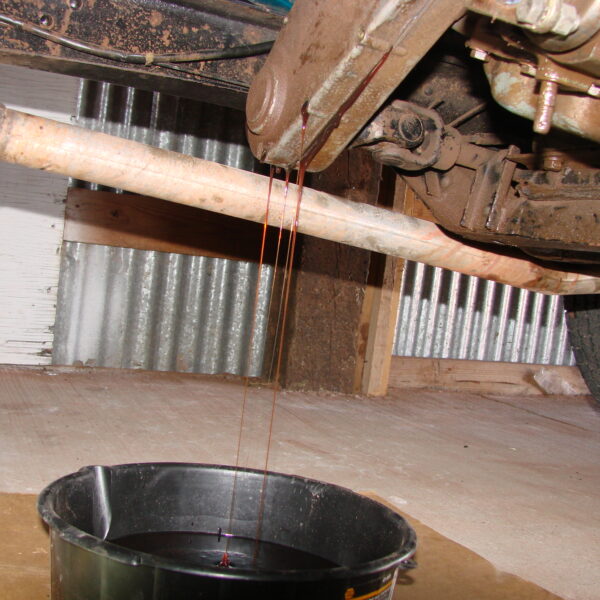
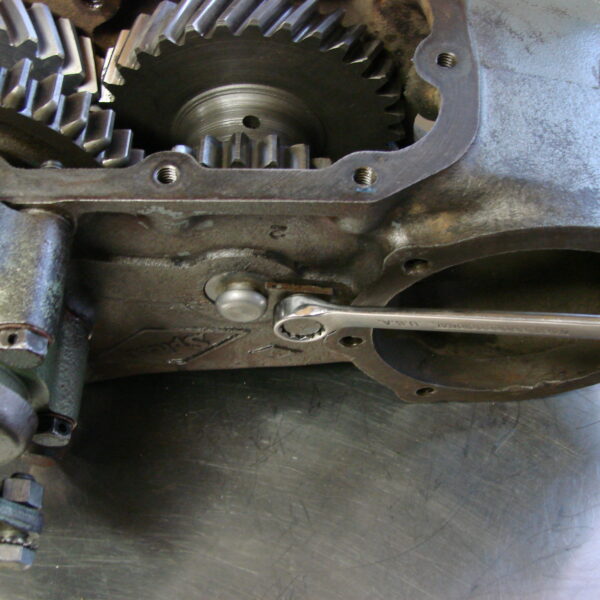
Next the 5 bolts that hold the Spicer to the transmission will need to be removed; there are four on the back side and one next to the front yoke. The transmission will need to be drained as well so that when the 5 bolts are removed you don’t wind up with a big puddle of oil on the floor.
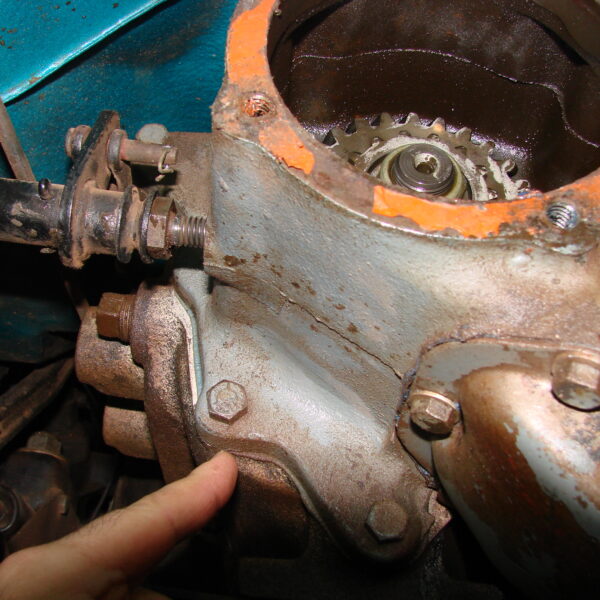
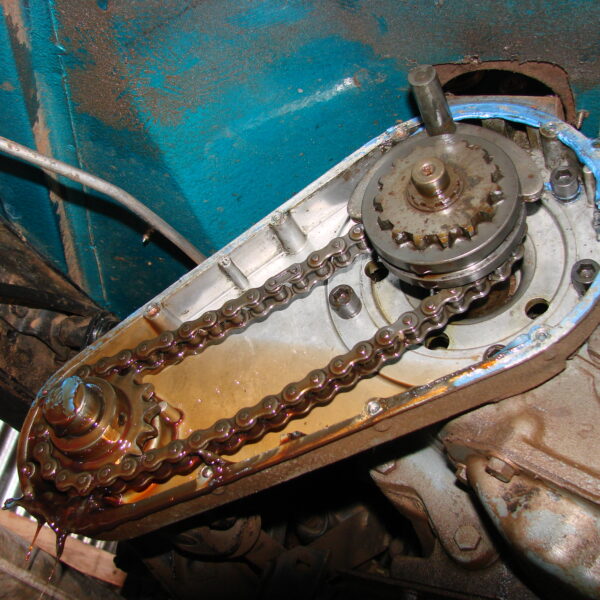
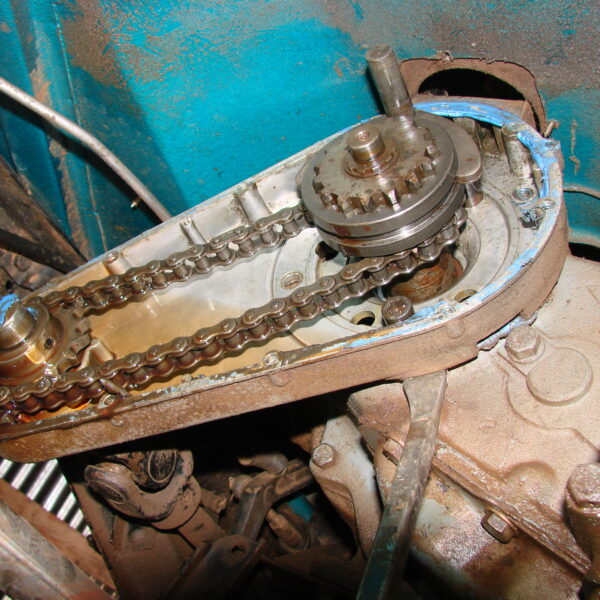
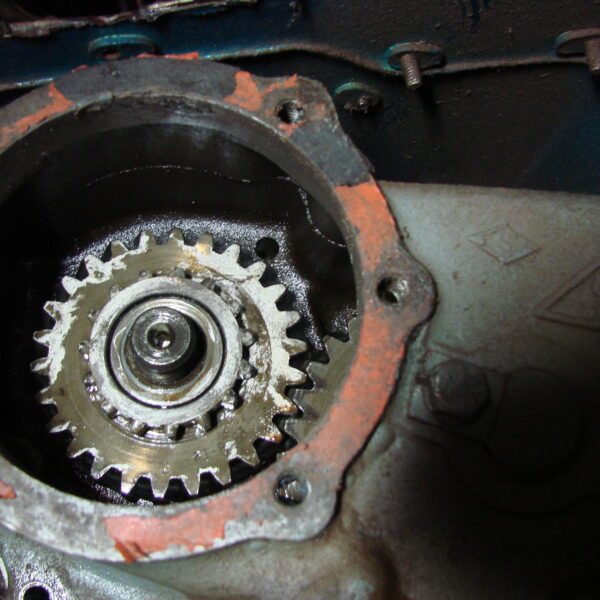
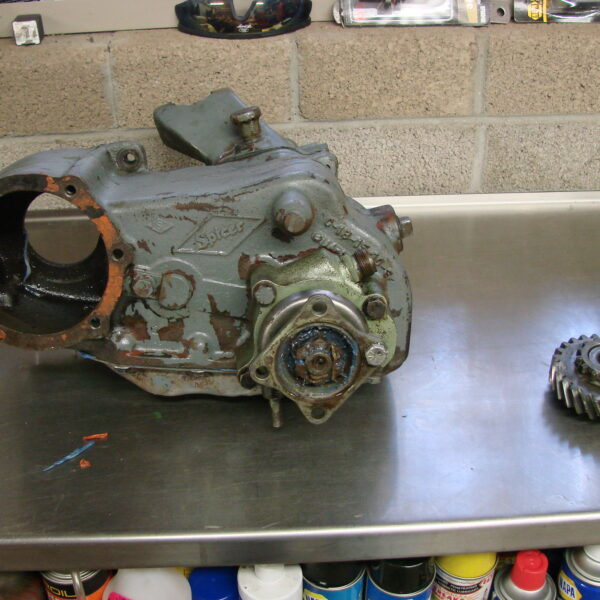
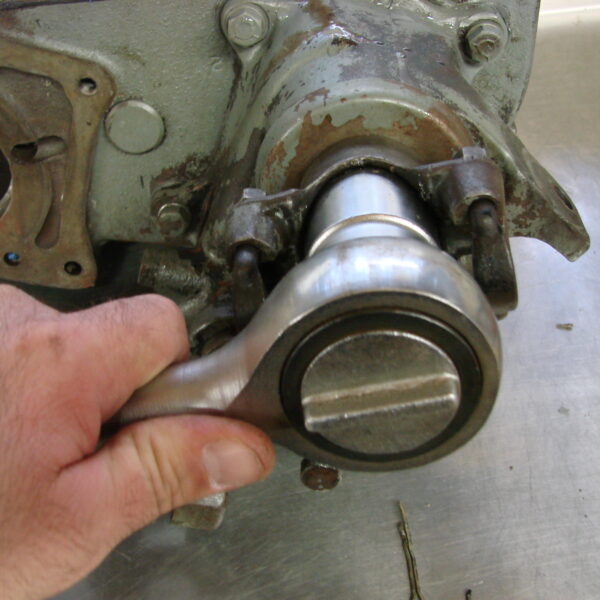
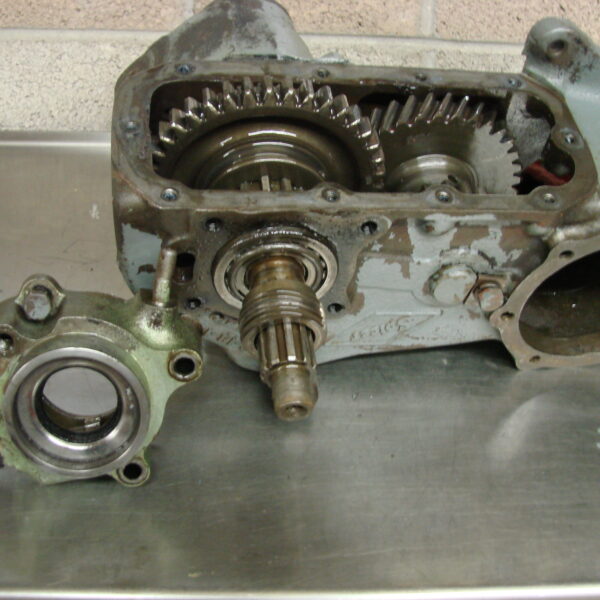
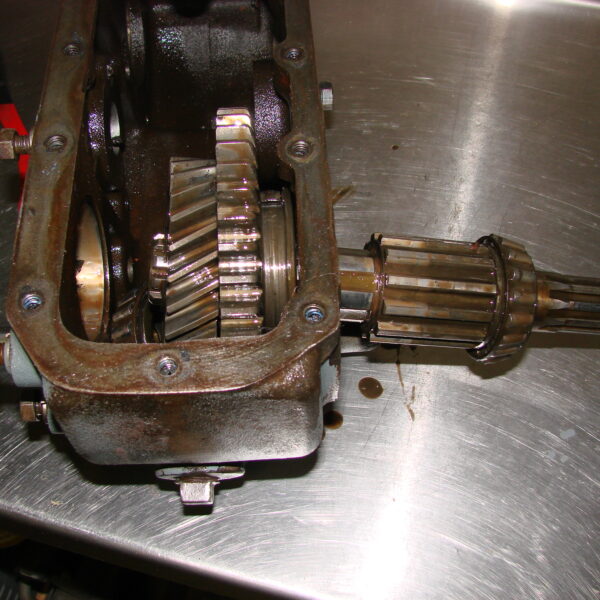
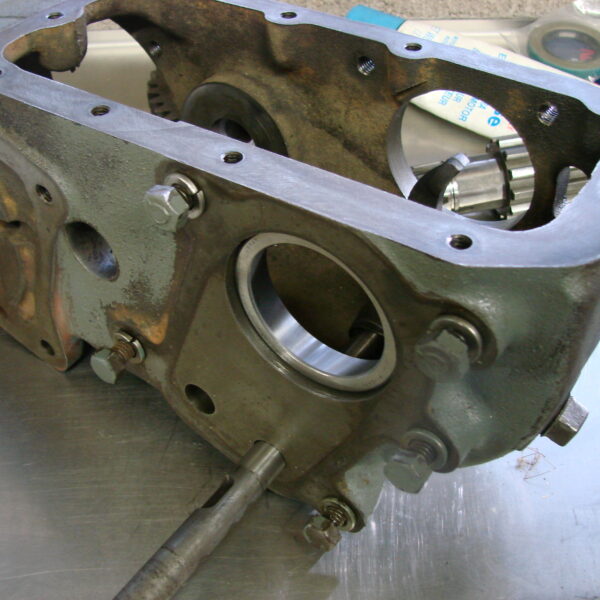
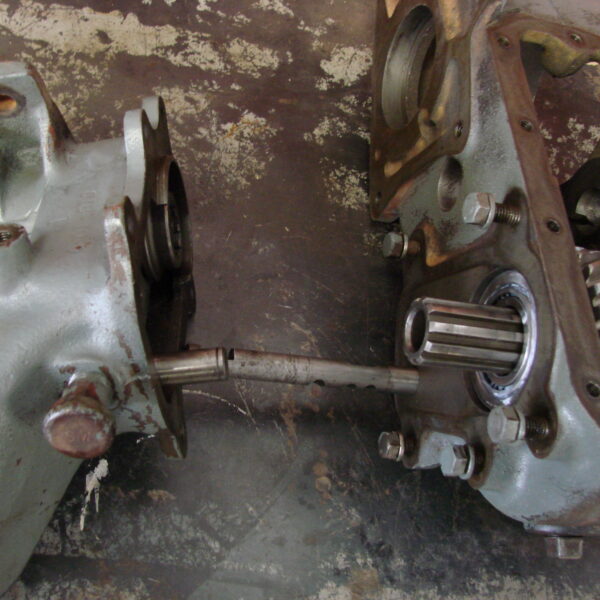
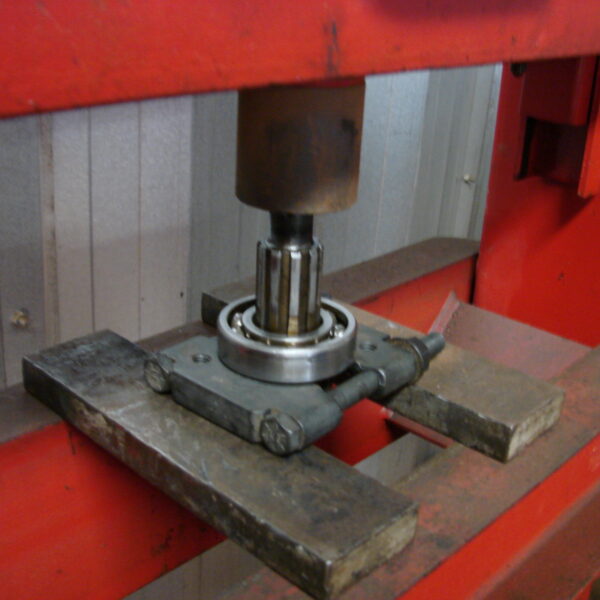
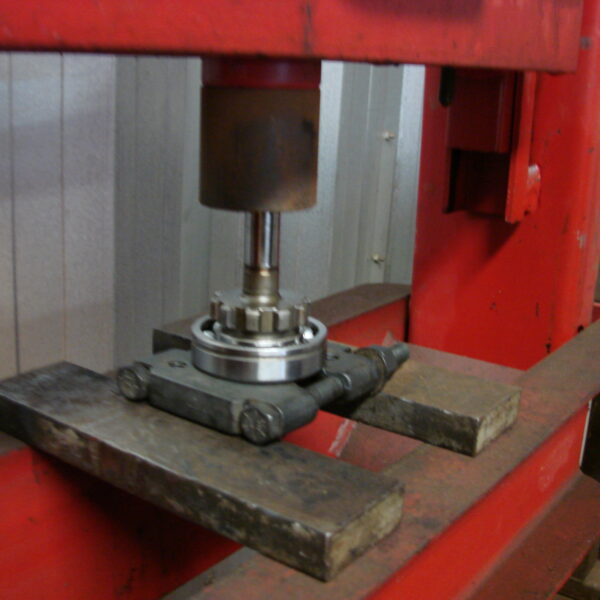
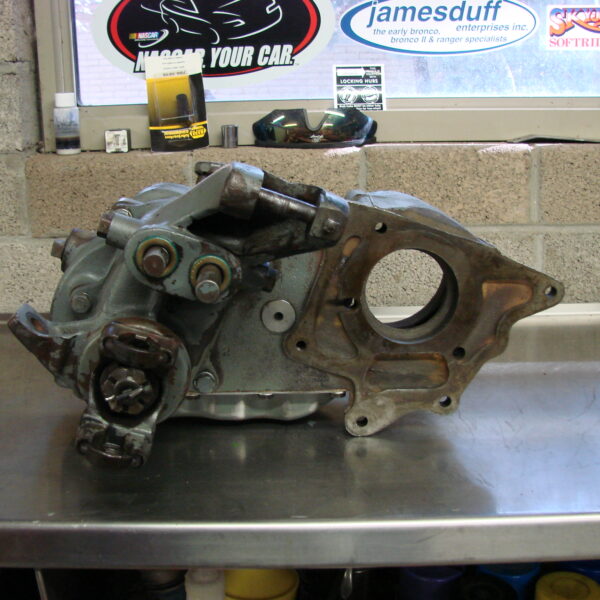
Now they are ready to be separated; removal is simply done by pulling the Spicer towards the back of the vehicle, this is a good time to have an extra set of hands if at all possible, the Spicer isn’t overly heavy but it can be a little awkward trying to get it out and on the ground. Now we are ready to start the rebuild using Novak’s Master rebuild Kit.

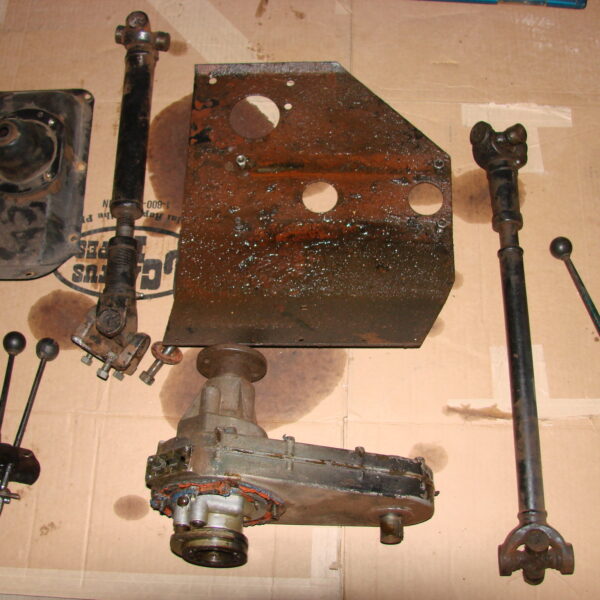
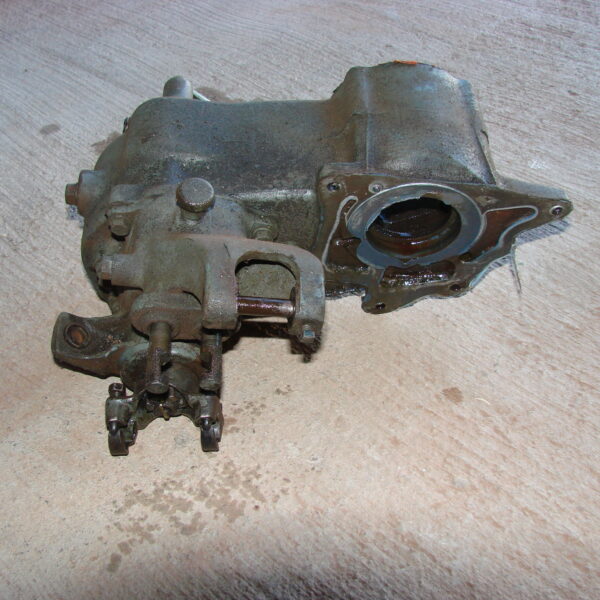
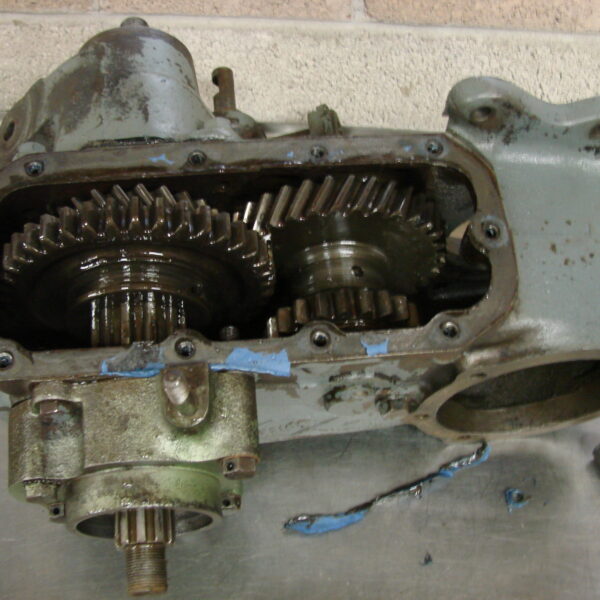
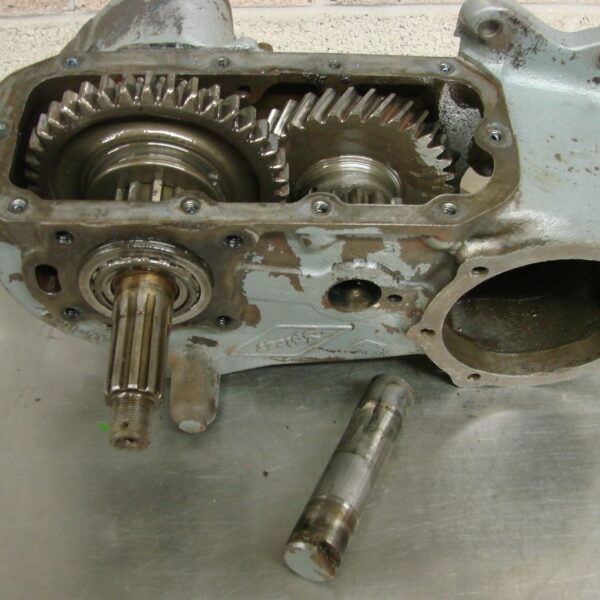
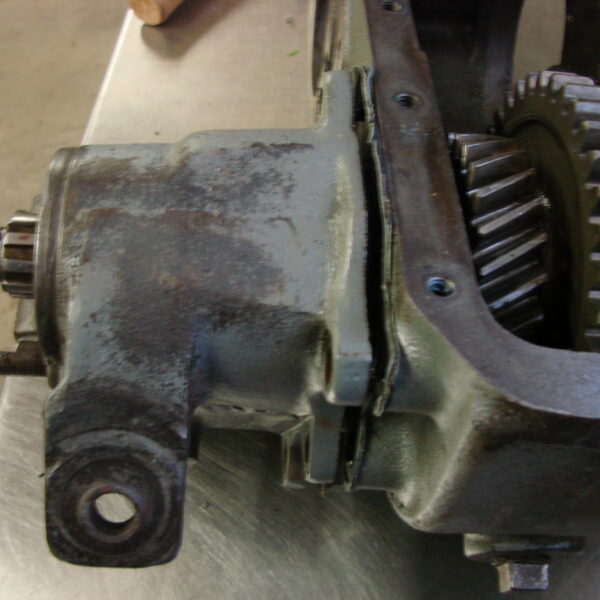
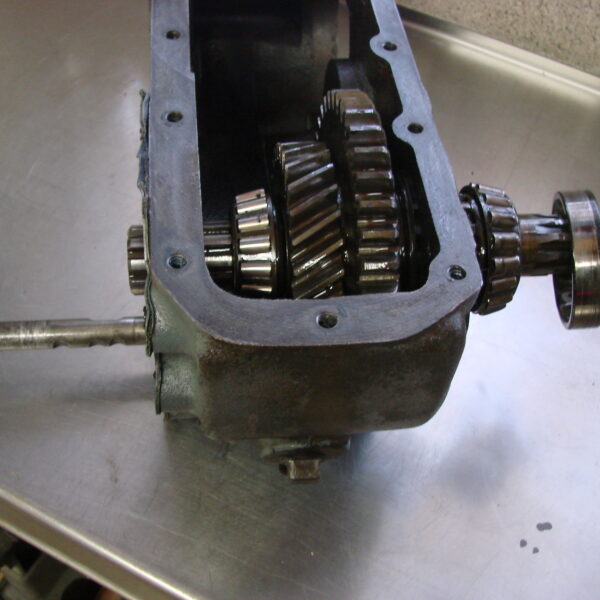
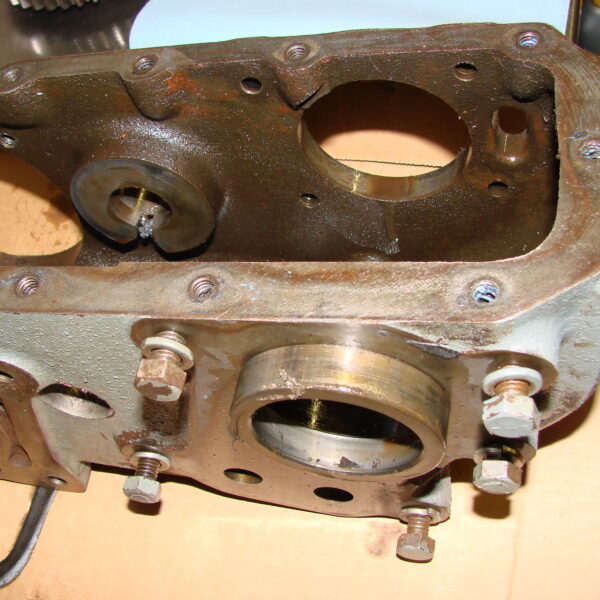
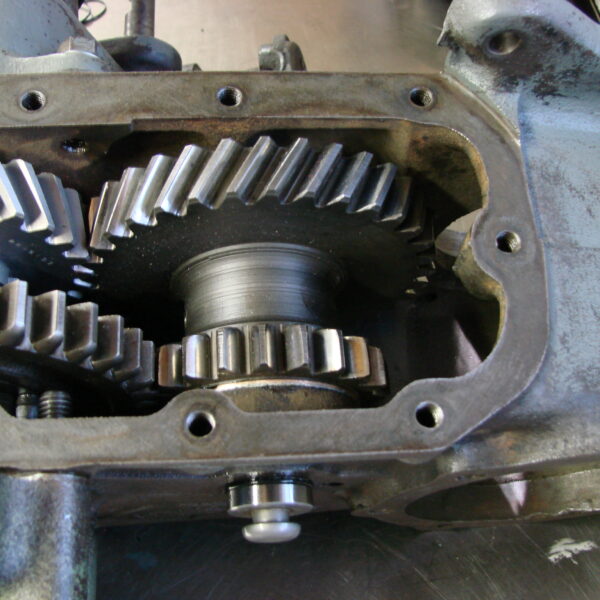
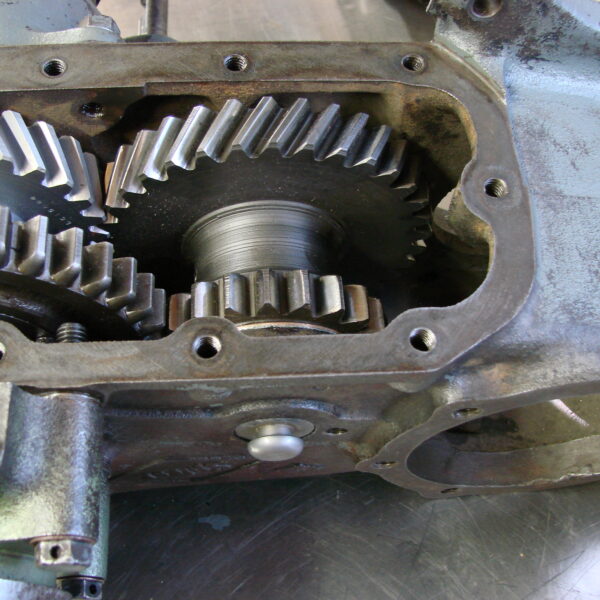
With the Spicer out of the vehicle and on the bench we are ready to begin disassembling the case. As we pull it apart we are going to clean it up as we go and one of the first things was to clean the silicone off of the mating points. It never ceases to amaze me at times how some people will excessively use duct tape and silicone in an attempt to solve a problem or prevent one. As we disassemble the case you will see in several places silicone where it doesn’t need to be.
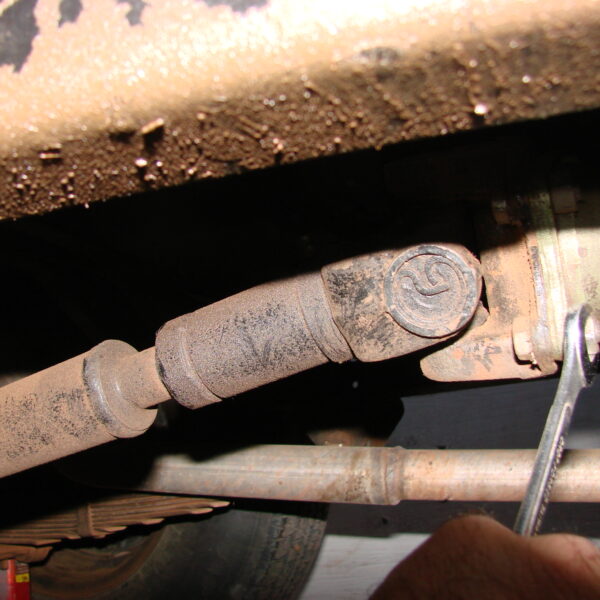
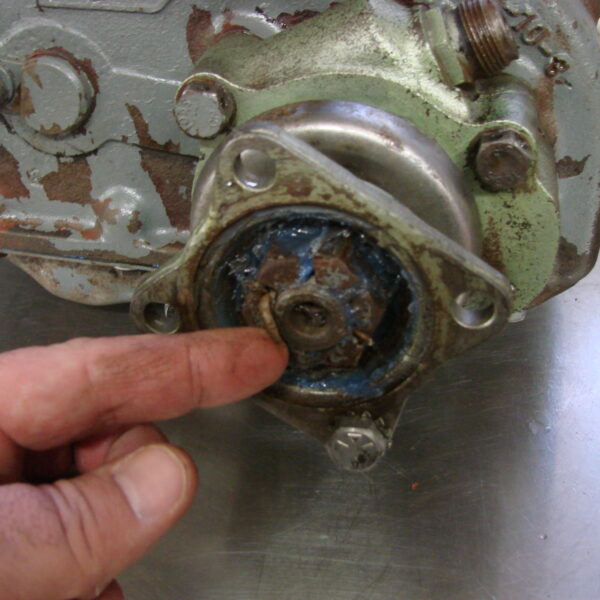
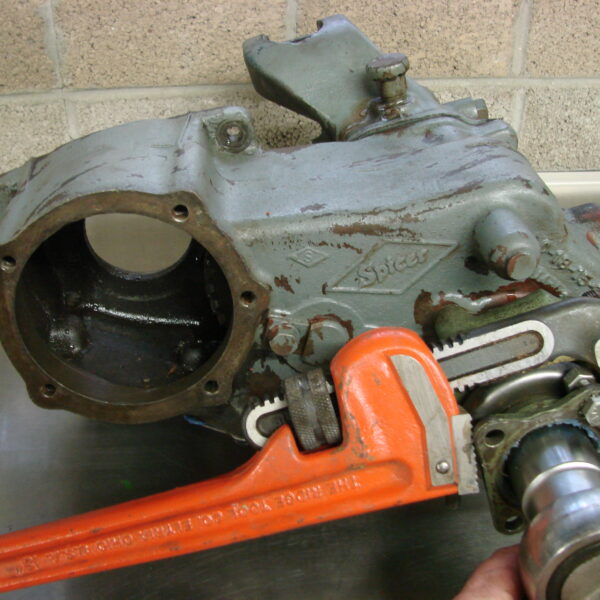
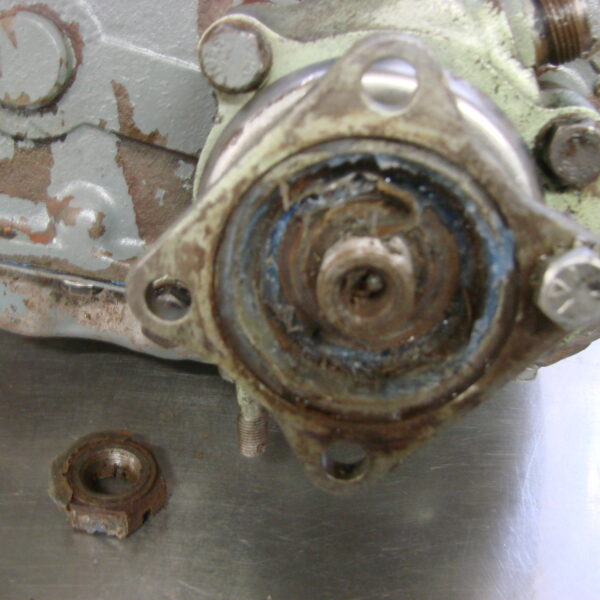
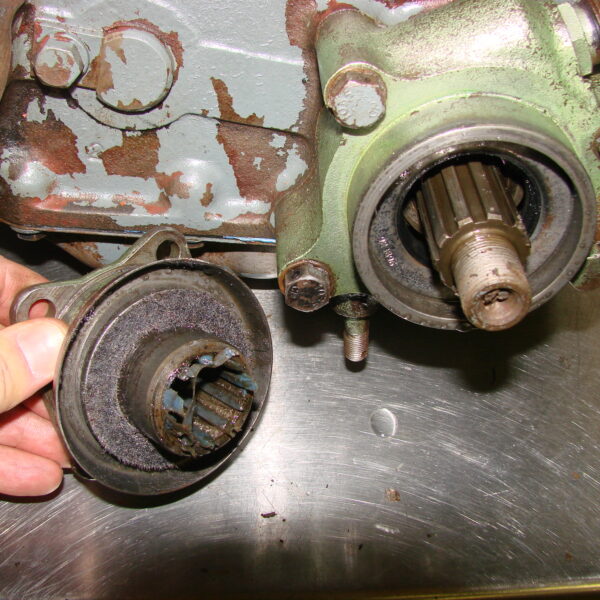
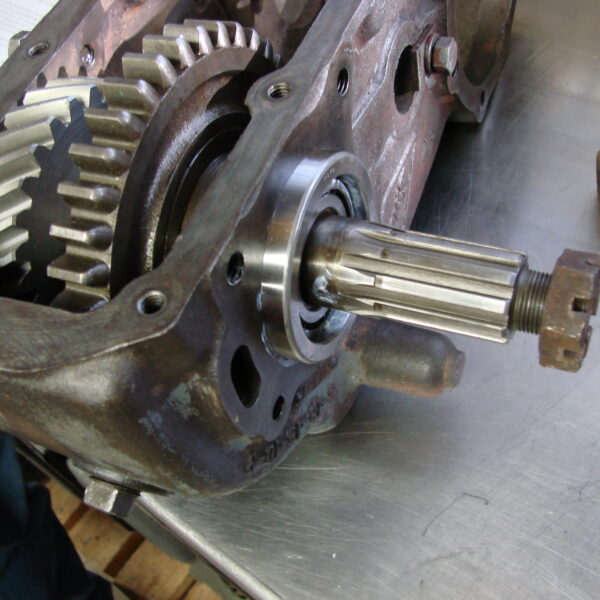
We being to disassemble the Spicer by removing both the front and rear drive-shaft yoke nuts and washers, you may need a vice or pipe wrench to keep the yokes from turning while removing the nuts. The yokes can be removed with a two-leg gear puller.

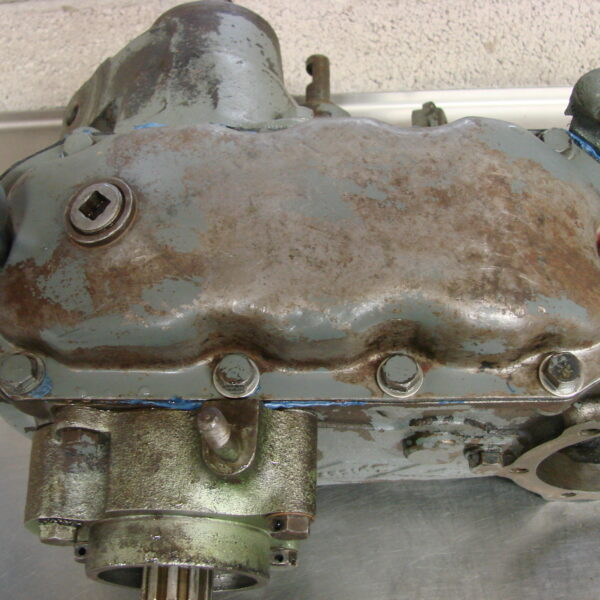
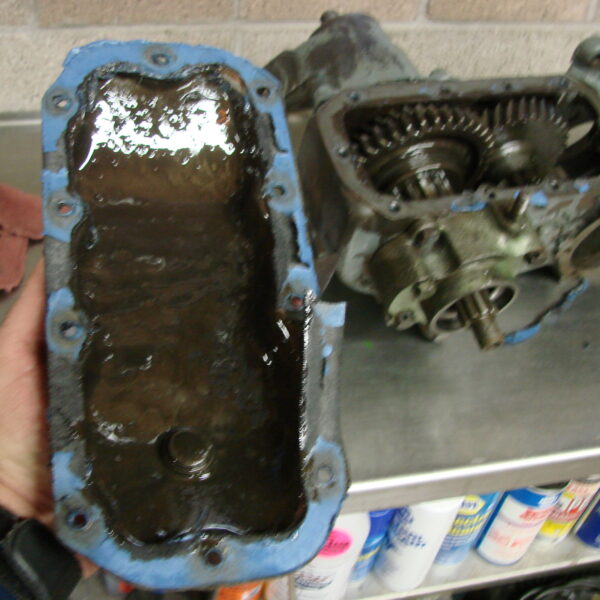
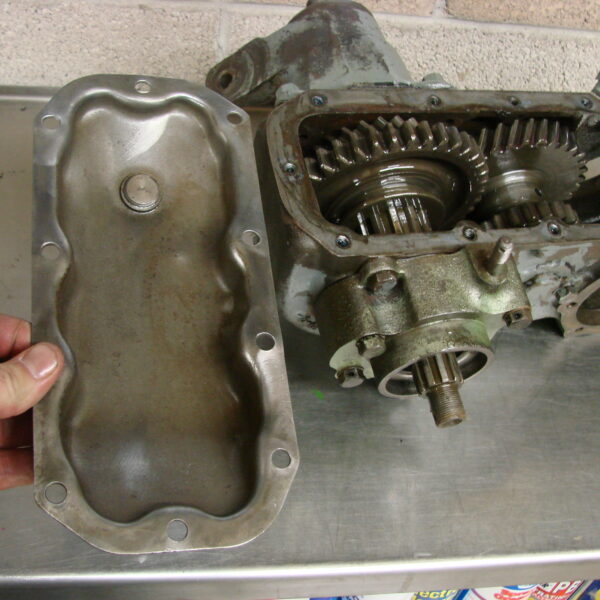
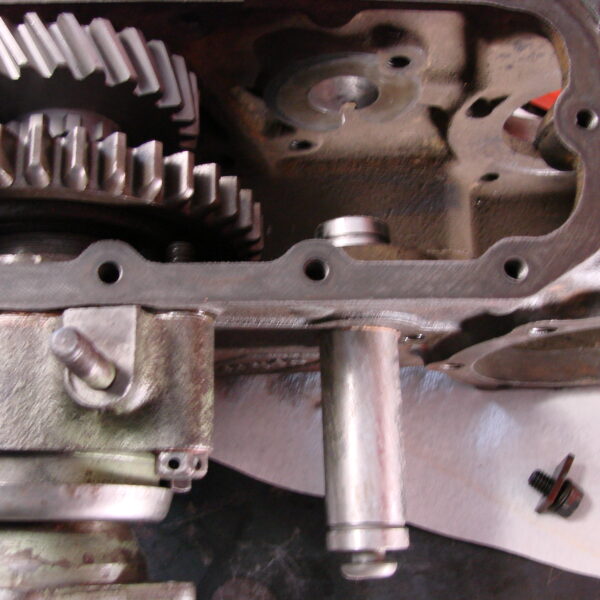
Next to come off was the bottom cover (oil pan) and again, it had way too much silicone and the old gasket needed to be cleaned off as well.
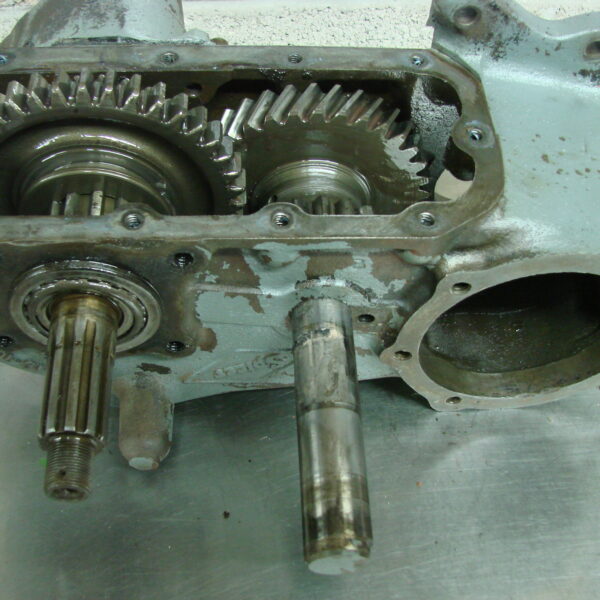
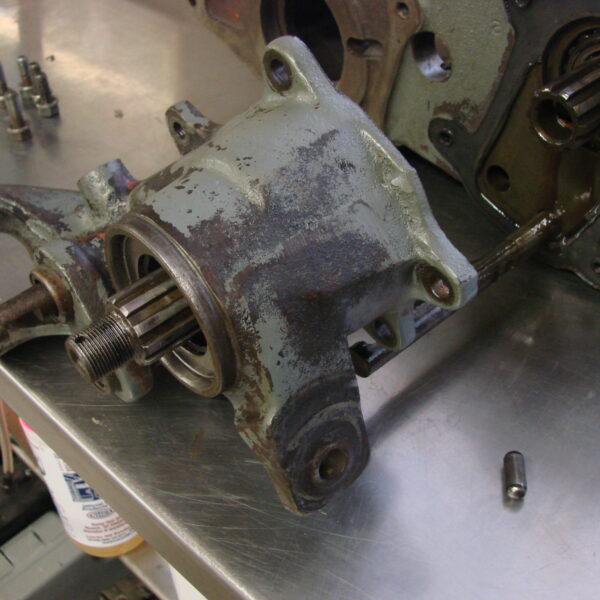
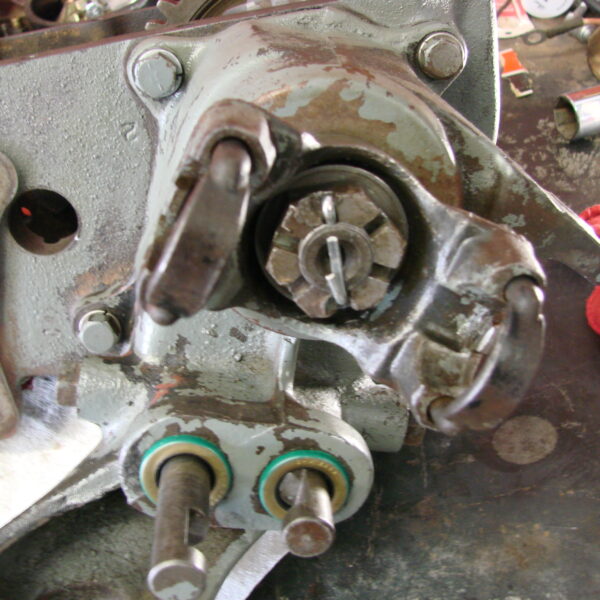
Remove the bolt and retainer plate from the intermediate shaft.

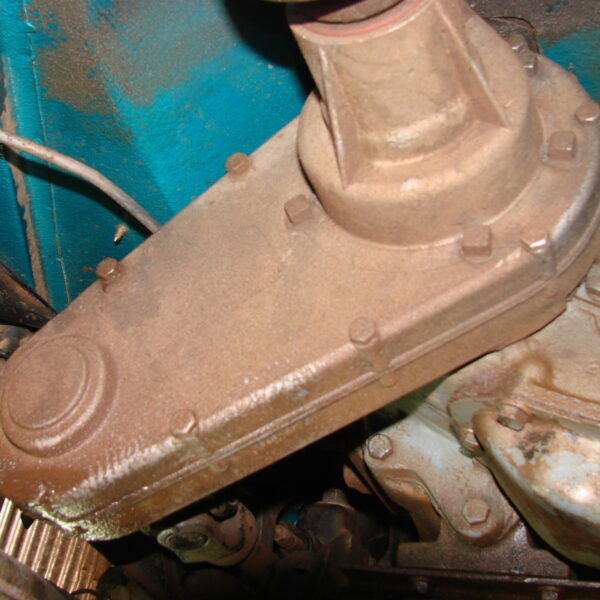
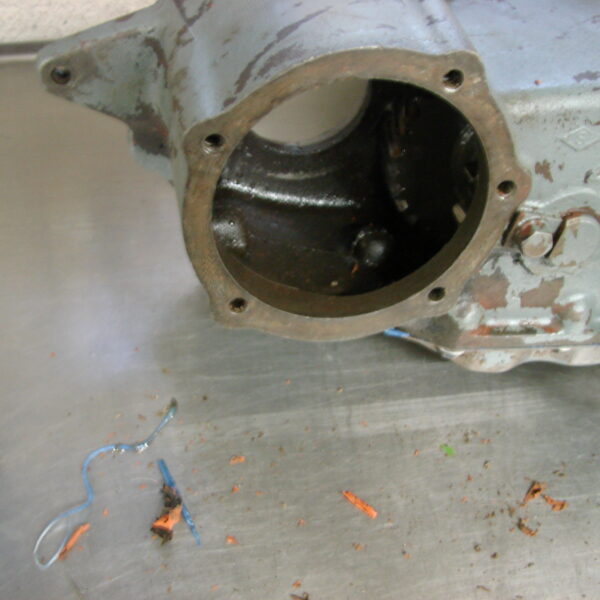
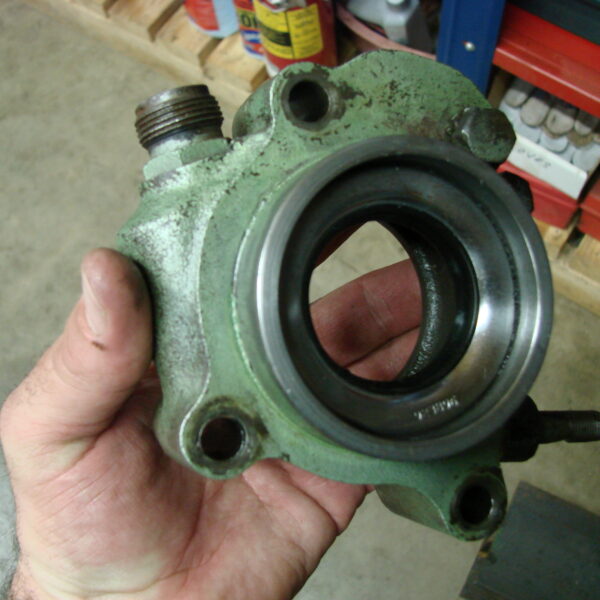
Remove the four bolts that hold the rear bearing cap to the case and remove the whole thing as am assembly with the speedometer gear. The parking brake backing plate is also retained by these bolts on Jeeps so equipped. Be careful with the adjusting shims that are between the cap and the case.
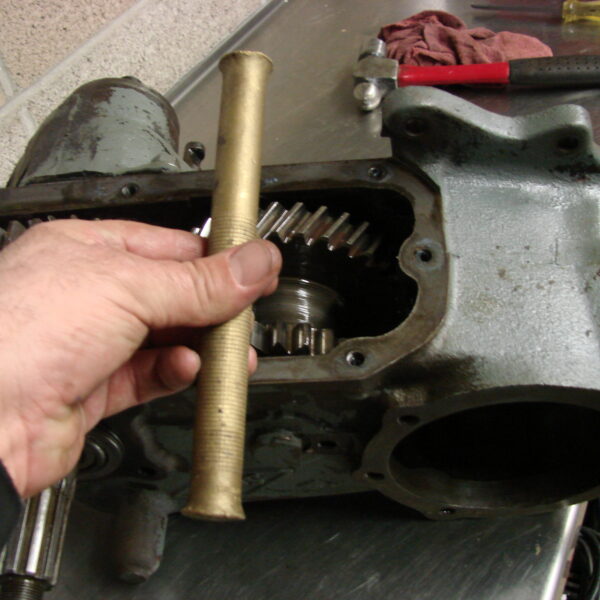
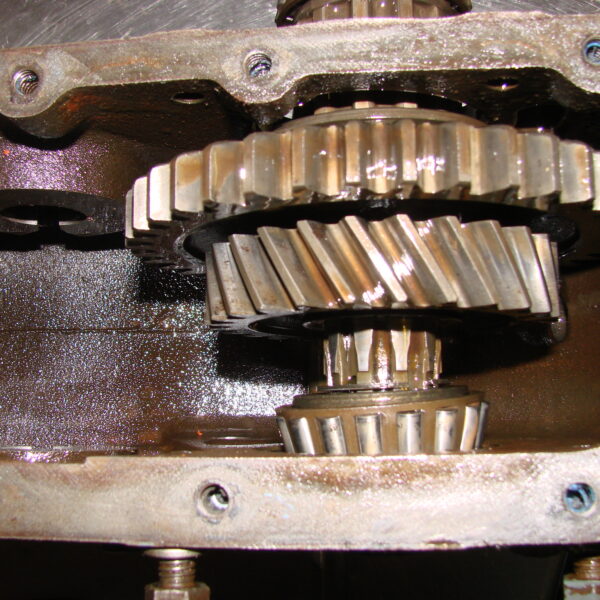
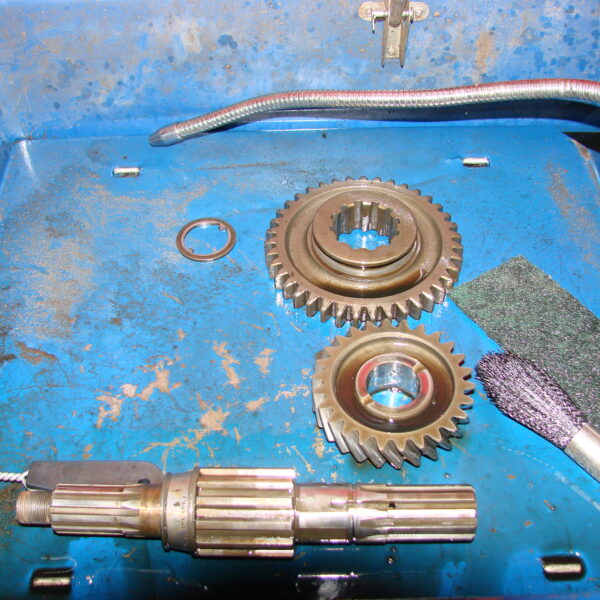
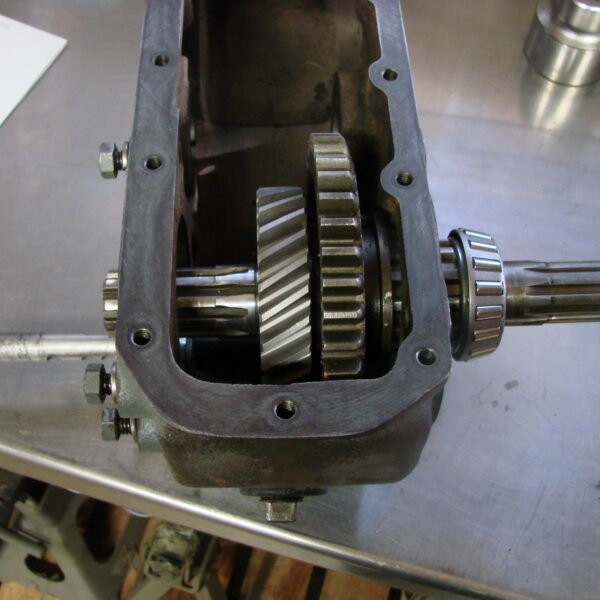
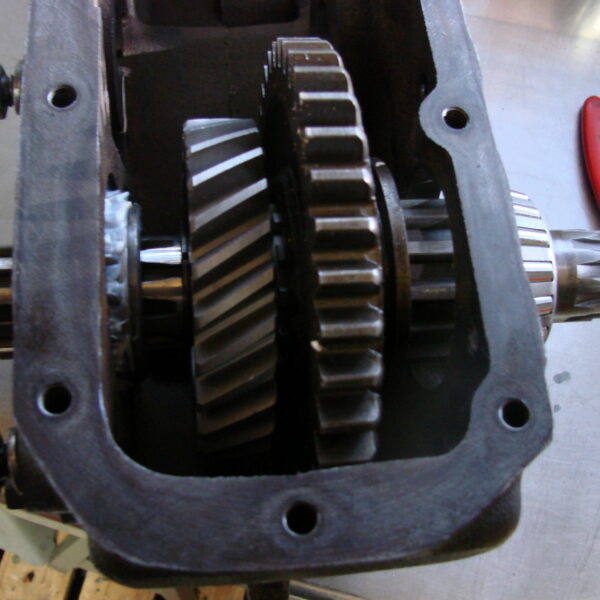
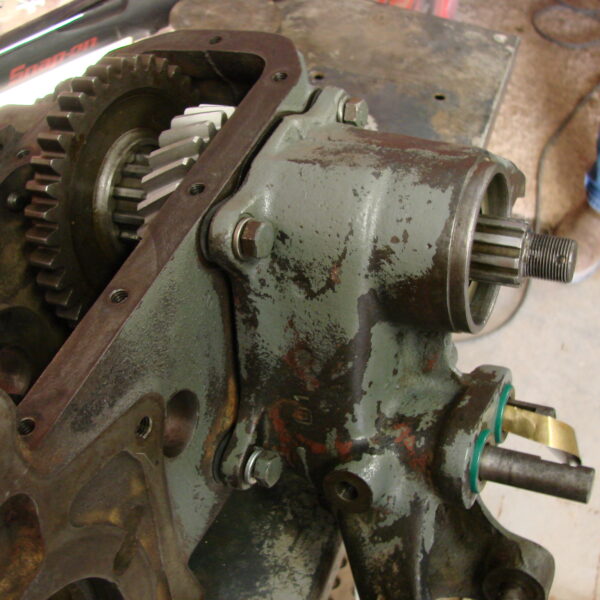
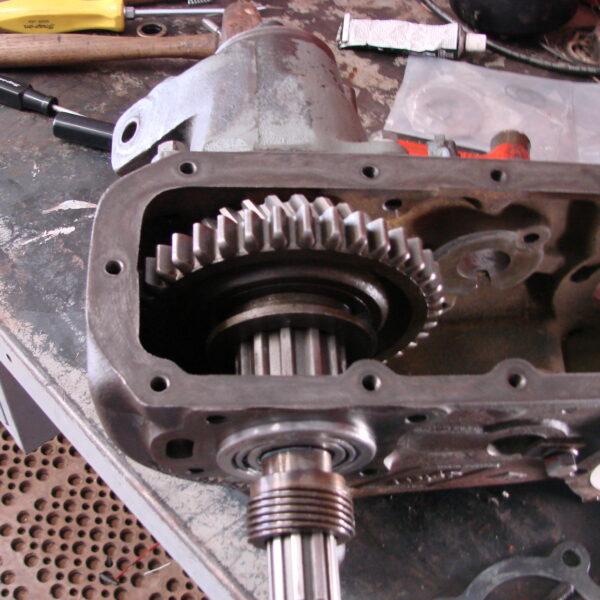
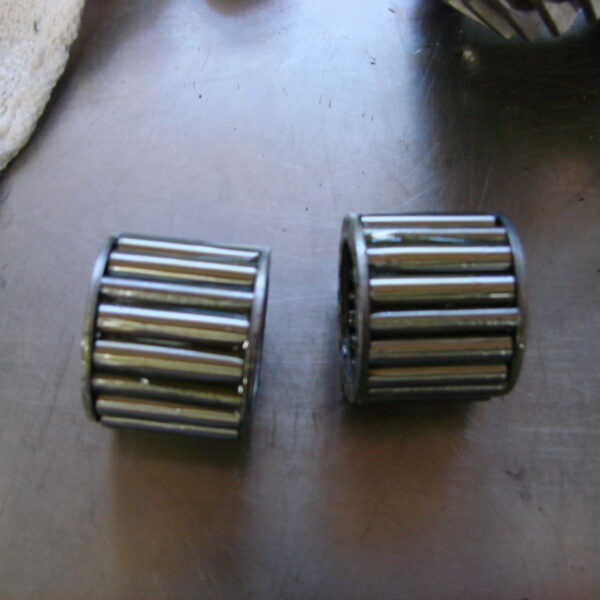
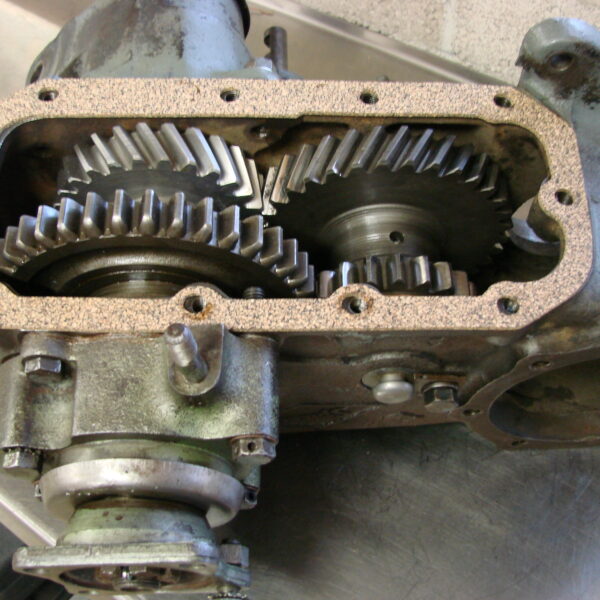
Use a soft drift to drive the intermediate shaft out (towards the rear of the case). Shaft is larger on rear, driving out forward will damage the case. Remove the intermediate gear, thrust washers, and bearings from the case.
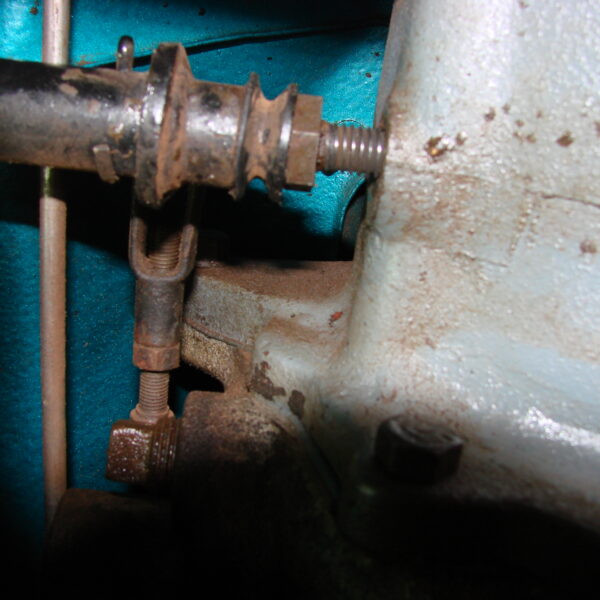
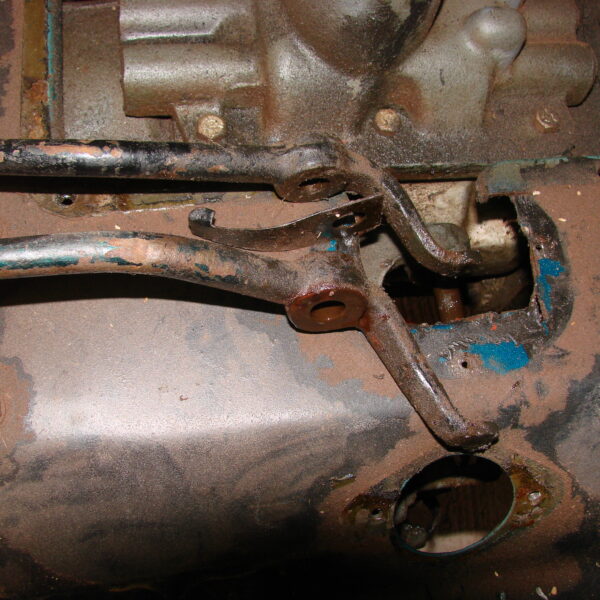
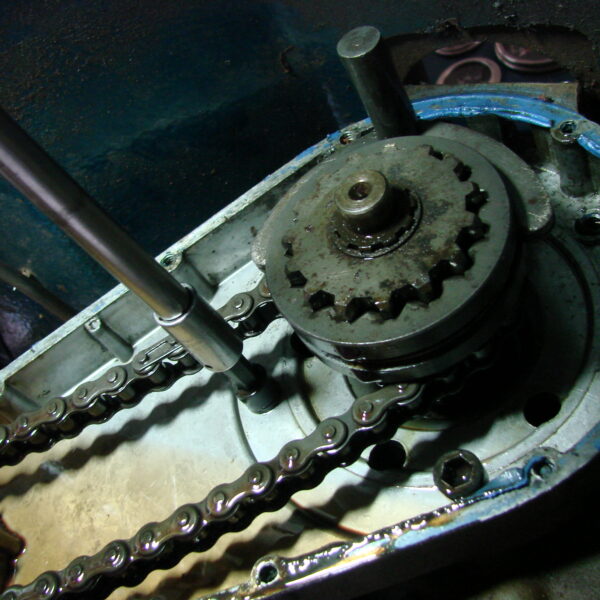
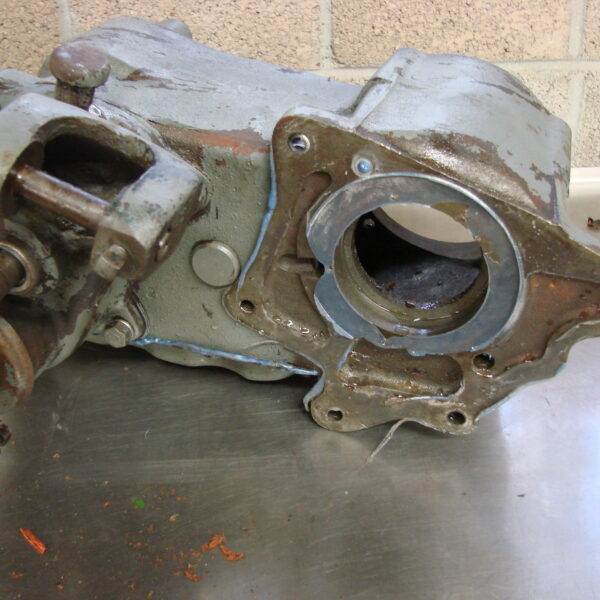
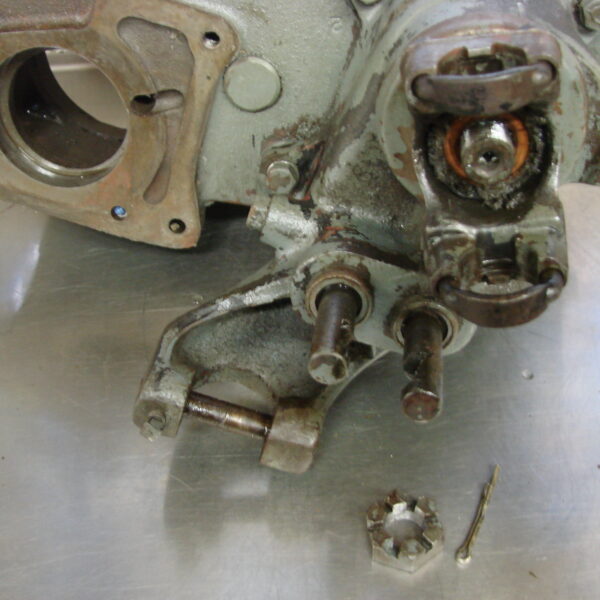
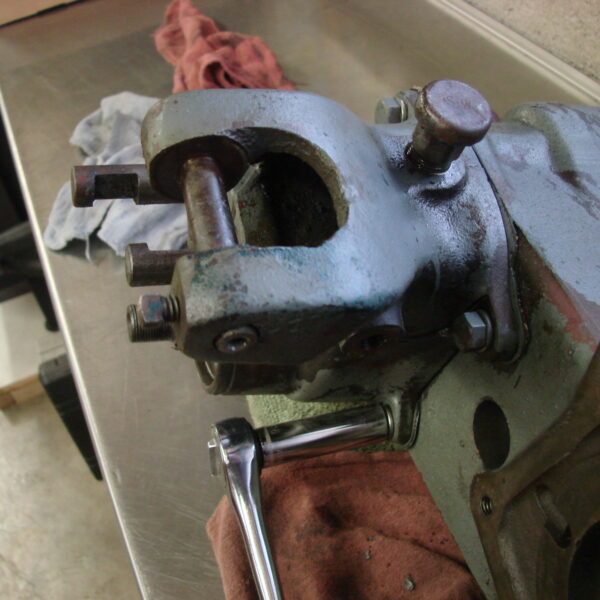
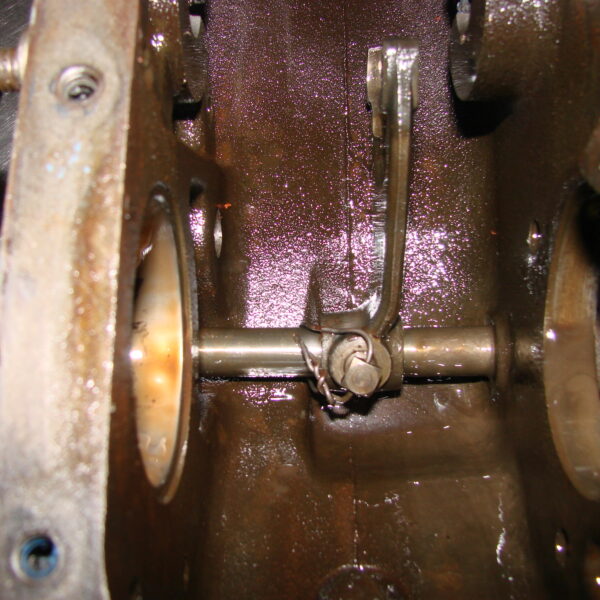
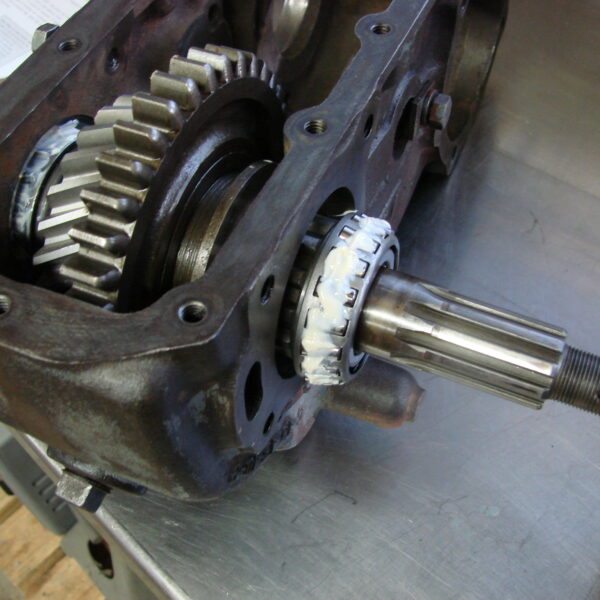
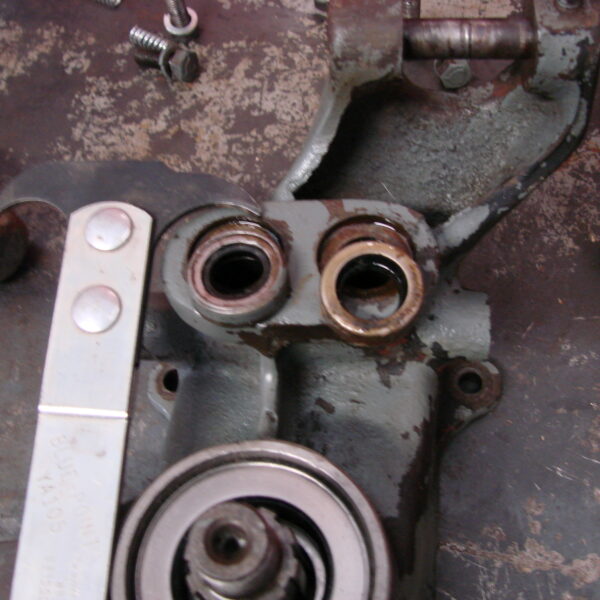
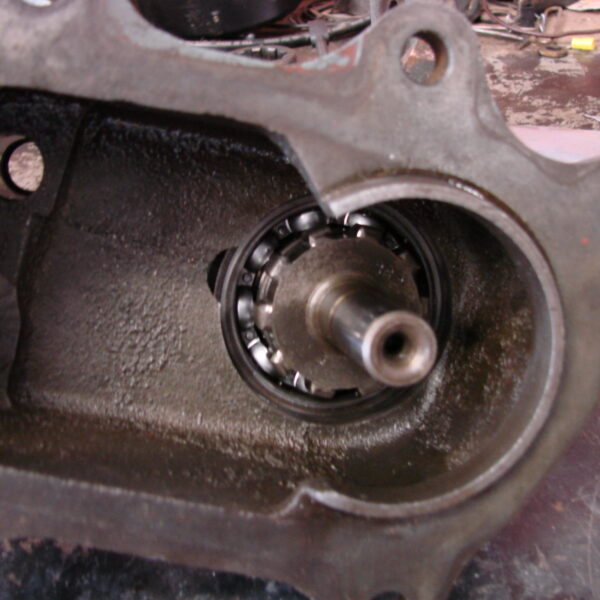
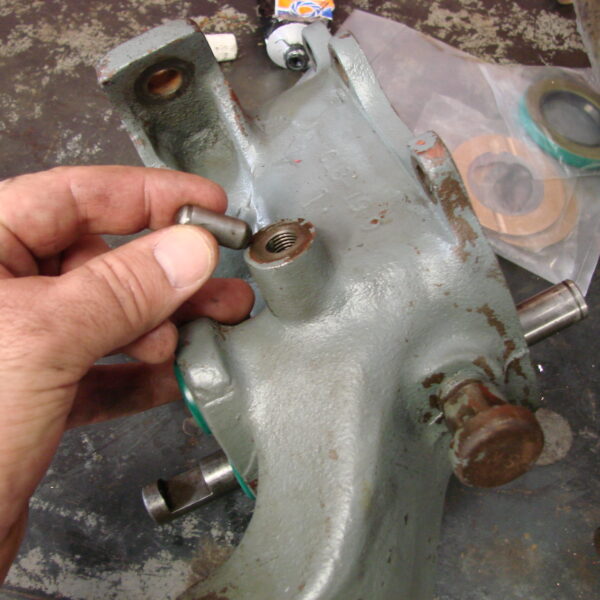
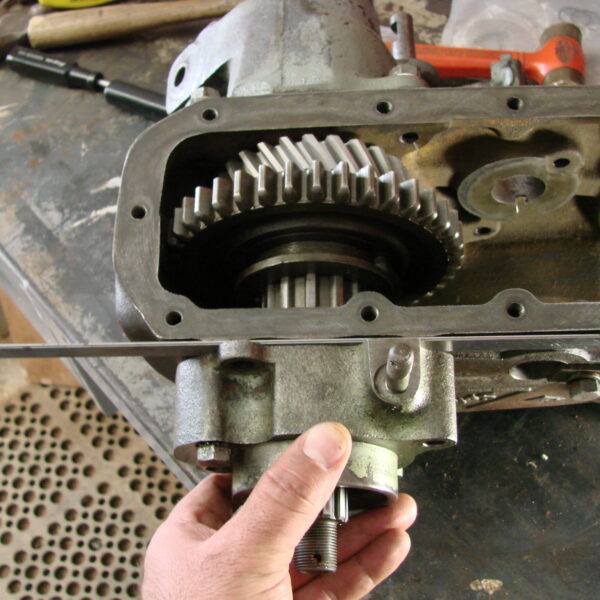
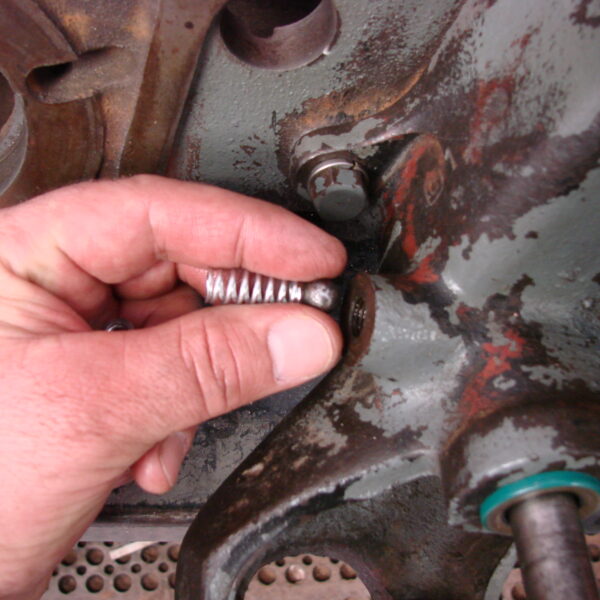
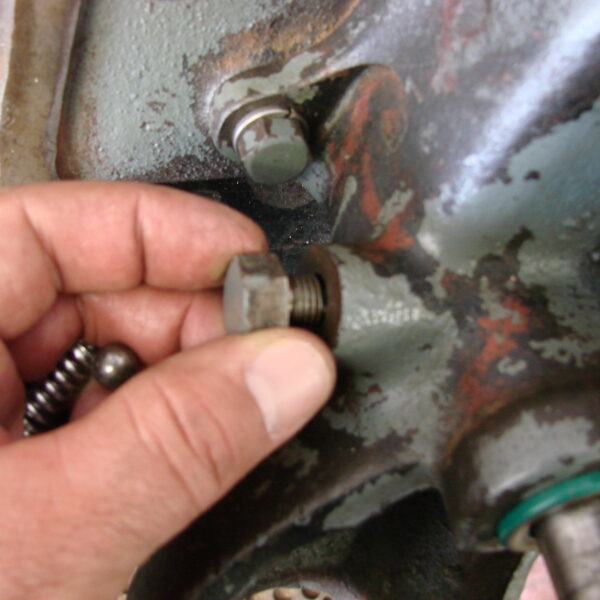
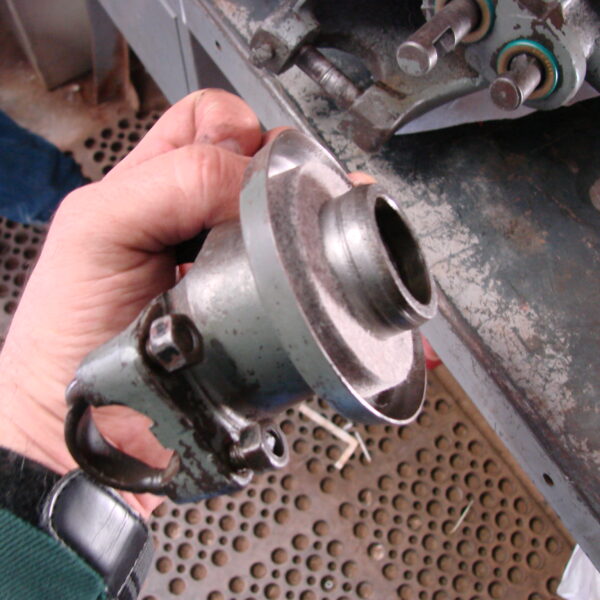
Remove the plugs, springs and poppet balls from both side of the front output bearing cap and engage the front wheel drive (left shaft forward).
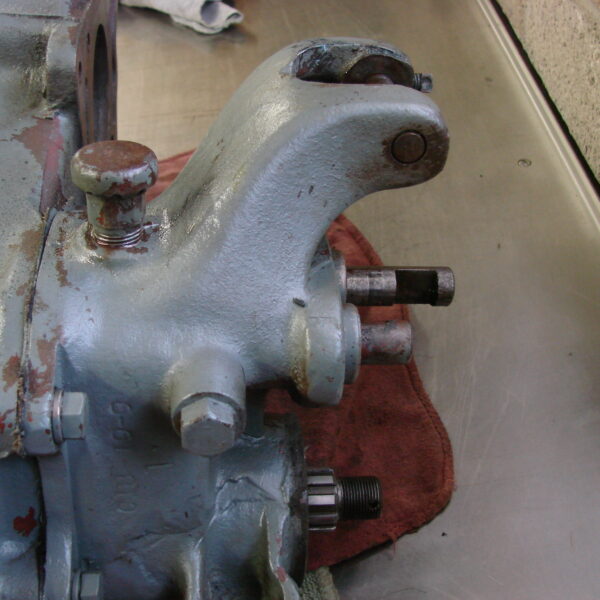
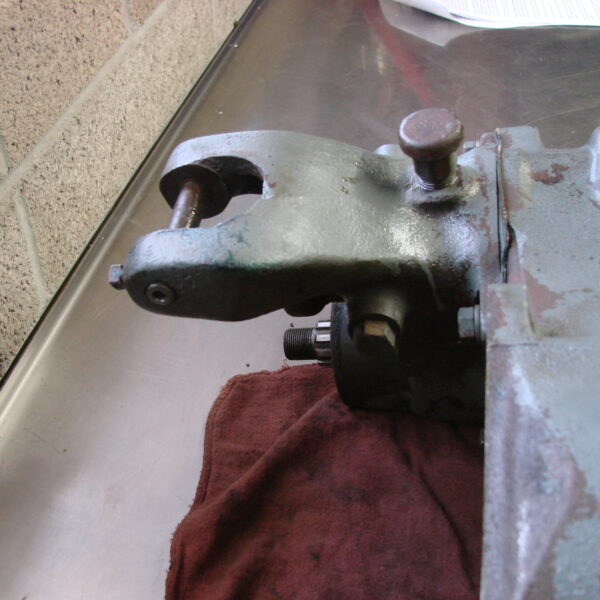

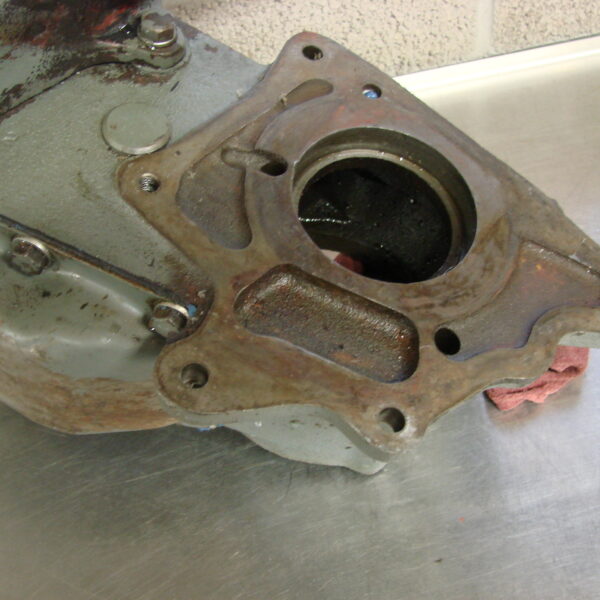
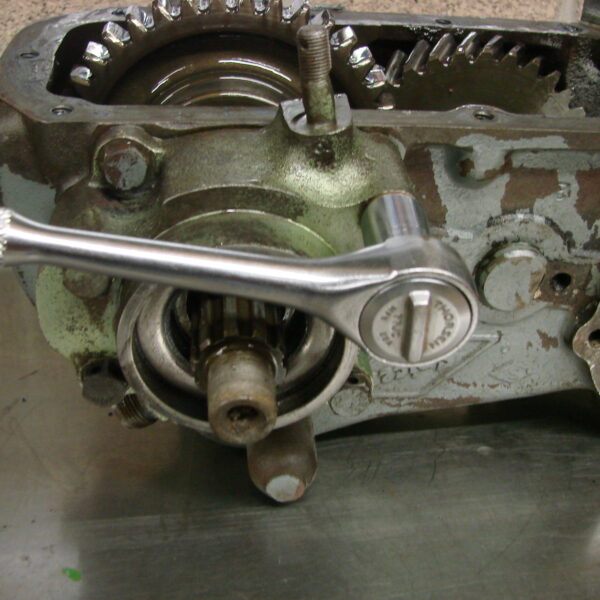
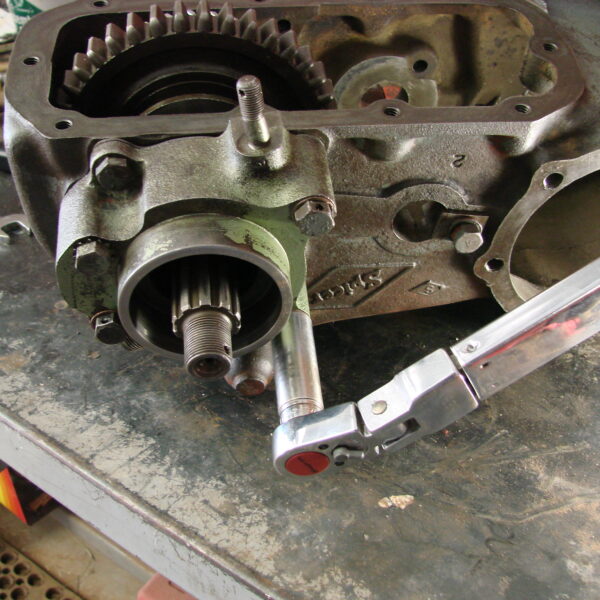
To remove the front output bearing cap fives bolts need to be removed, when they are out if the cap can’t be pulled off you may need to GENTLY tap it with a soft hammer. Remove the whole assembly at once with the shifter fork, shifter clutch, shaft, and shift rod; these will all sit inside of the cap when pulled apart.
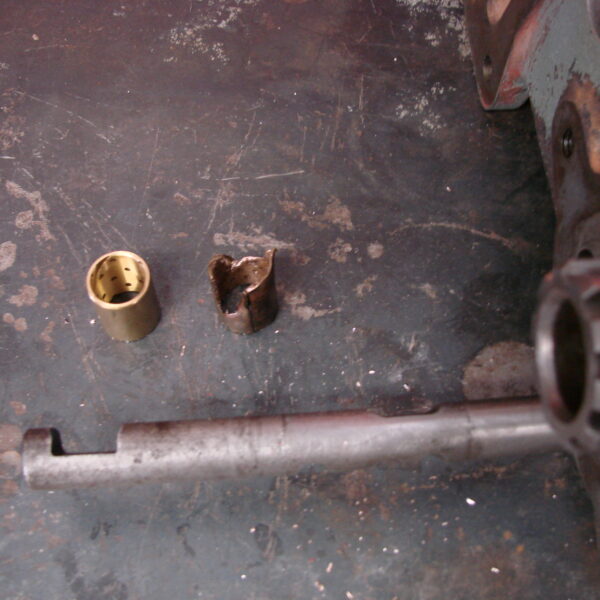
Be careful not to lose the little bullet-shaped interlock that “floats” in the passage between the shift rods.
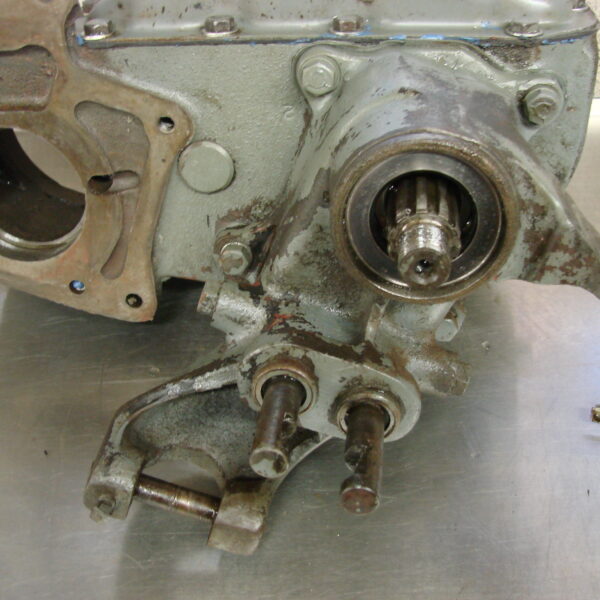
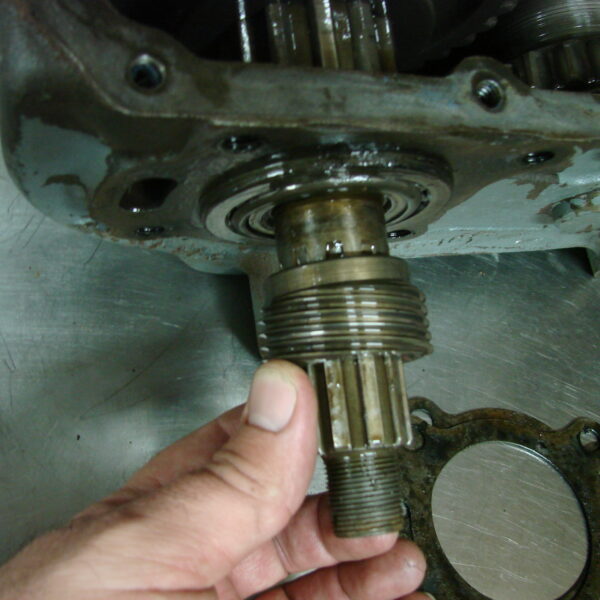
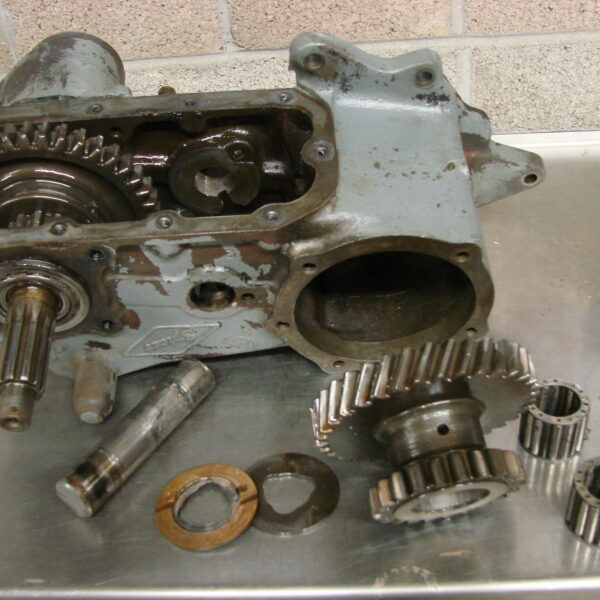
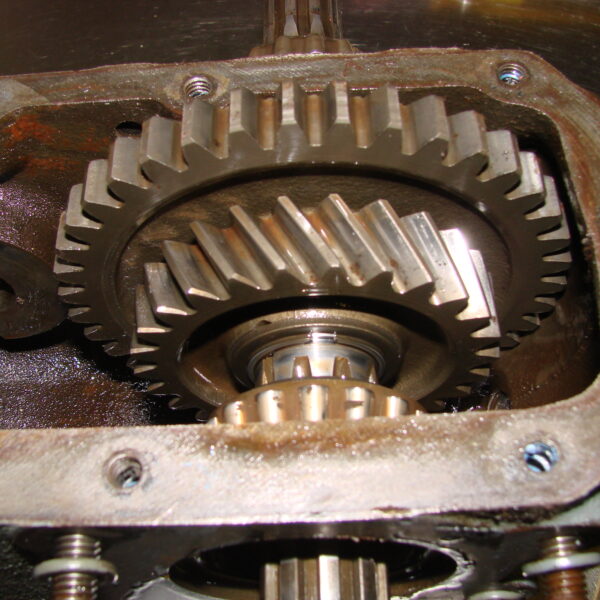
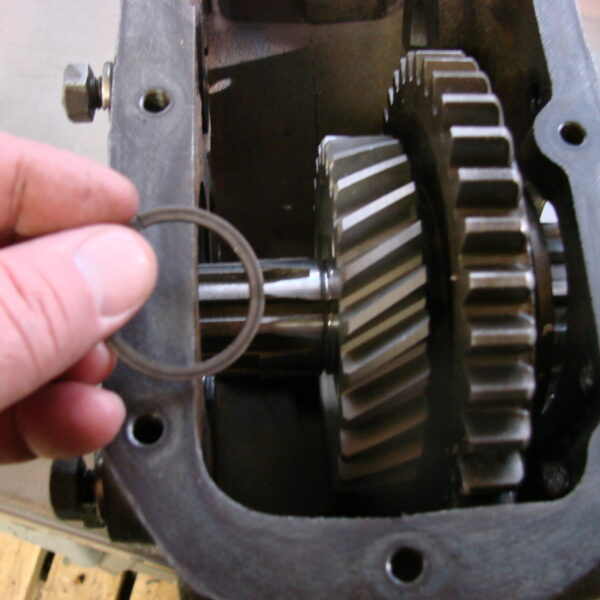
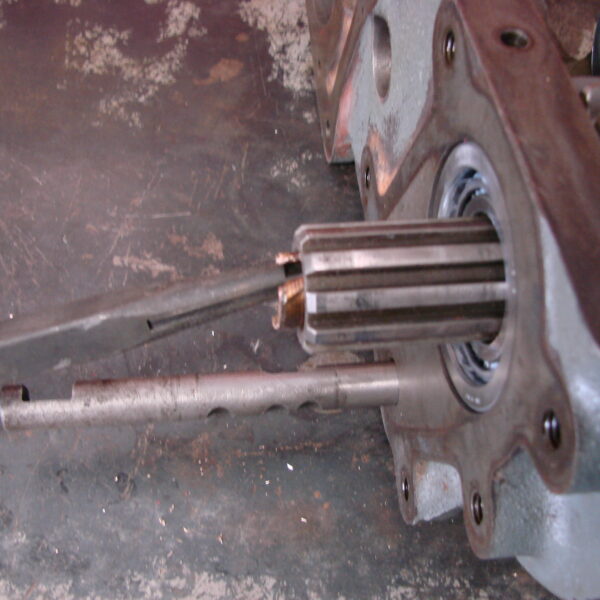
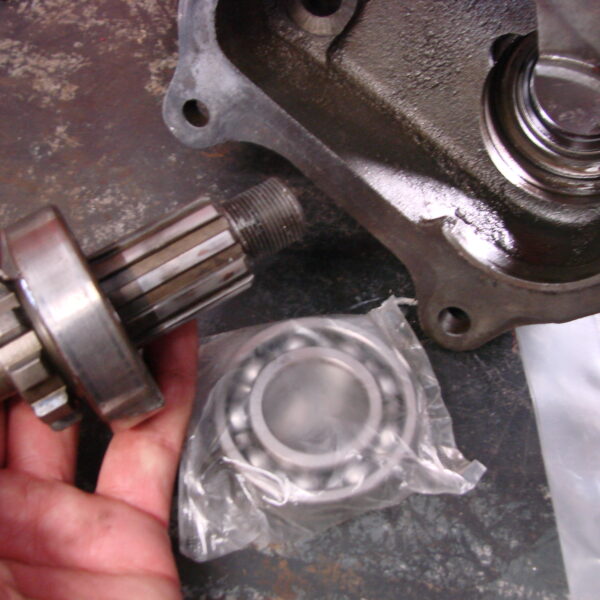
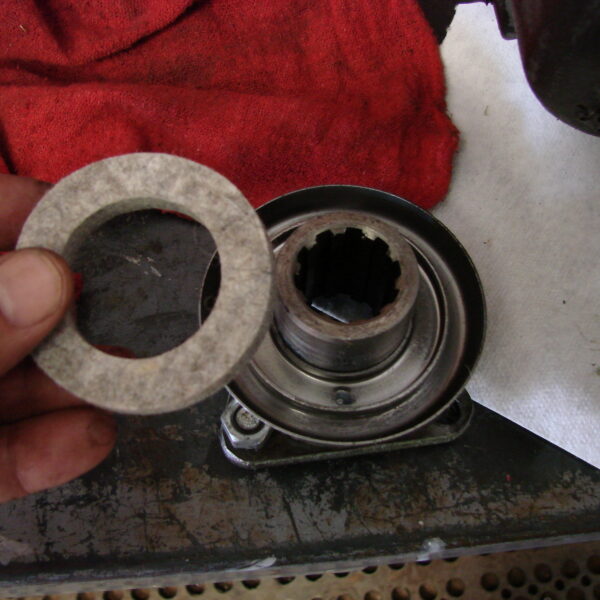
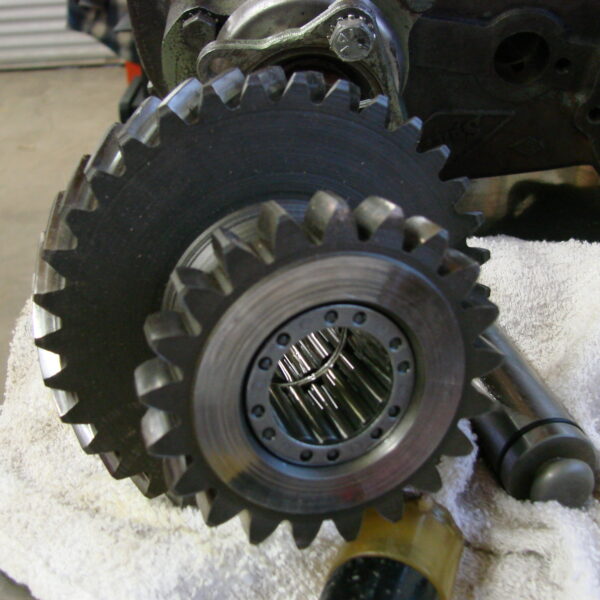
With a soft hammer or the end of a block of wood drive the output shaft towards the rear of the case to remove the rear bearing cup from the case. Use a large screwdriver or similar shaped tool to separate the front bearing and the output gear to allow enough room to access and remove the snap ring from the groove in the shaft. Never use the gear to pry against when removing this bearing; it has to potential to break a tooth! With the snap ring moved to the forward part of the output shaft the shaft can be pulled out of the gears towards the rear of the case. The gears, (low slider and output) thrust washers, and snap ring can be removed from the case. When the snap ring is removed from the groove in the output shaft it should never be re-used, always replace it with a new one! Novak’s Master Kit as well as their intermediate kits will have these included.


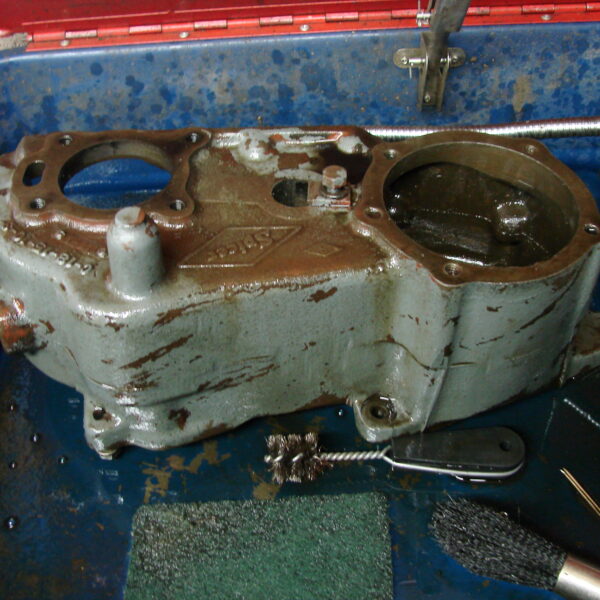
Remove the setscrew and remove the shift rail and fork from the case taking note of its position so it can be reinstalled in the same relationship as it was removed from. With everything now apart we are ready to hit the solvent tank and get this thing cleaned up so we can reassemble it and get it ready for the old Willys.
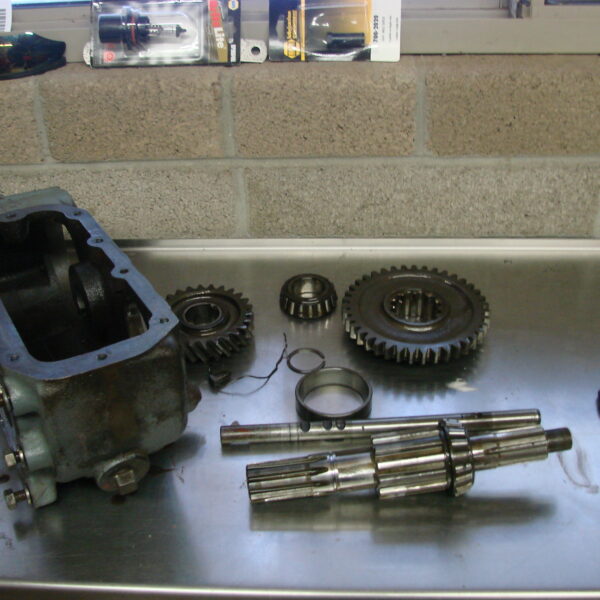
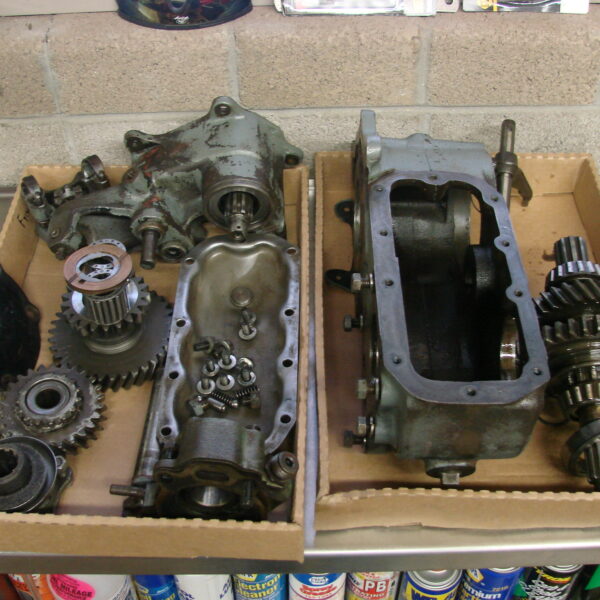
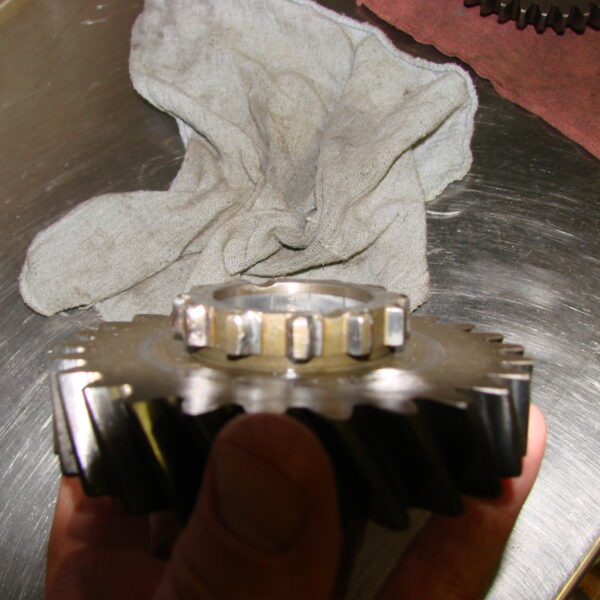
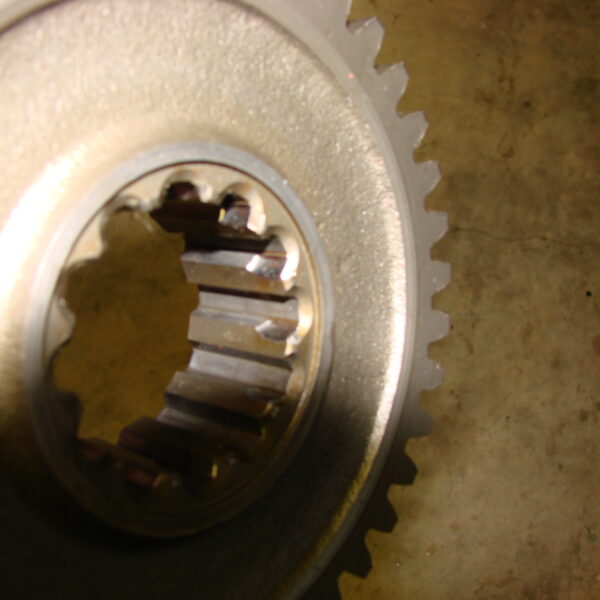
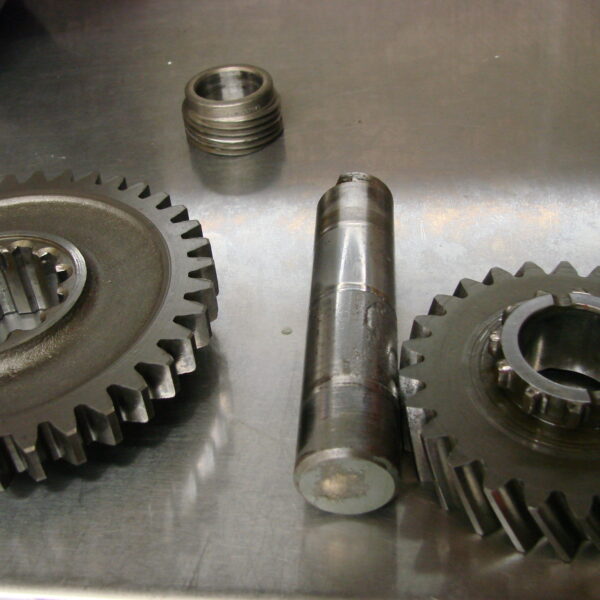
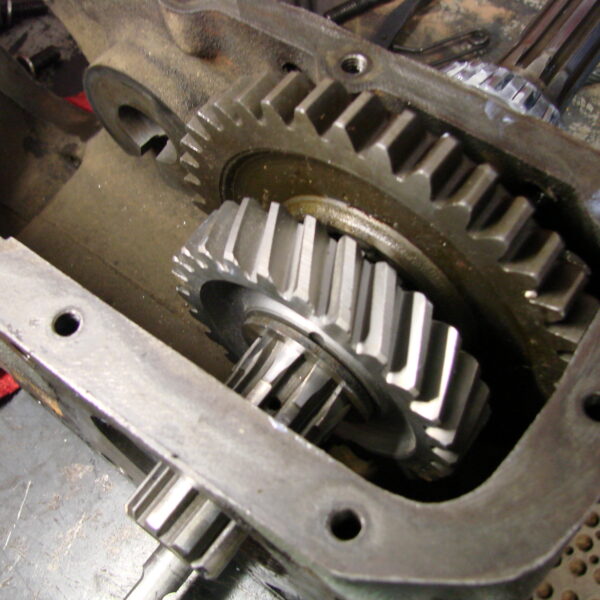
With all of the t-case disassembled it needs to be thoroughly cleaned and all parts need to be inspected for excessive wear or damage. The case needs to be checked for any cracks (they may be hairline so it helps to use a magnifying glass if one is available) , should the case be cracked it is best to replace instead of trying to repair it. Inspect all of the components to determine any that may be in need of replacement. As visible in our pictures here we had excessive wear to our Output Shaft Gear as well as our Output Shaft Sliding Gear so we will be calling on the guys at Novak to get us the gears we will need to make sure this Spicer goes back together with not only replacement gears, but the best we can get our hands on from a trusted company.

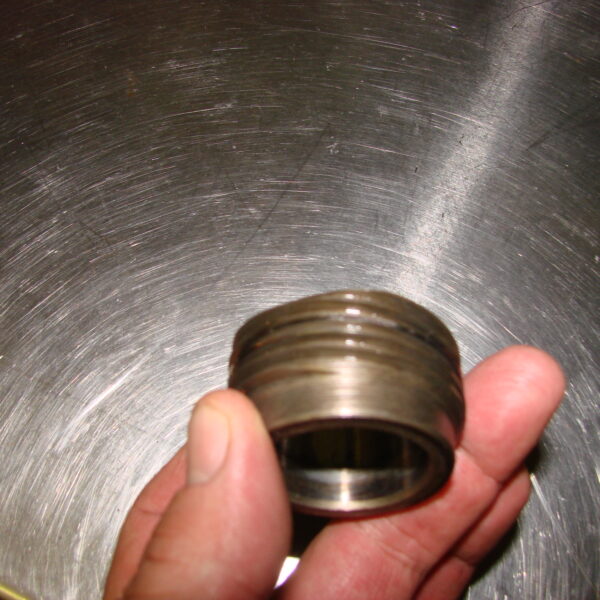
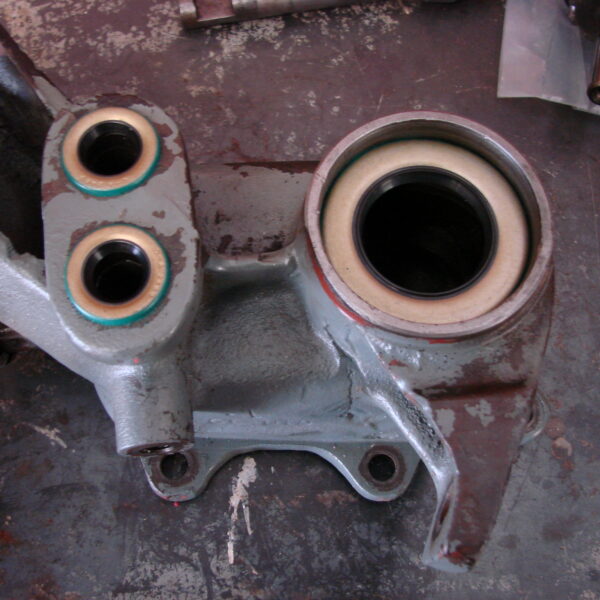
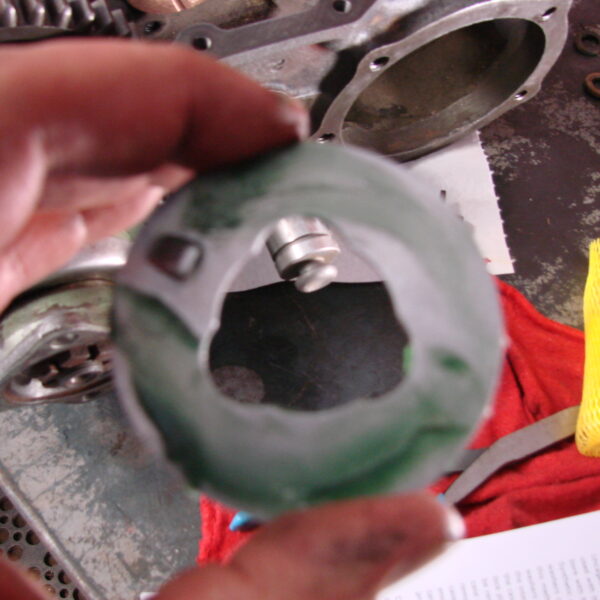
Before cleaning the case and the rear bearing cap we had a couple of races and seals to remove that we will be replacing with new as well.
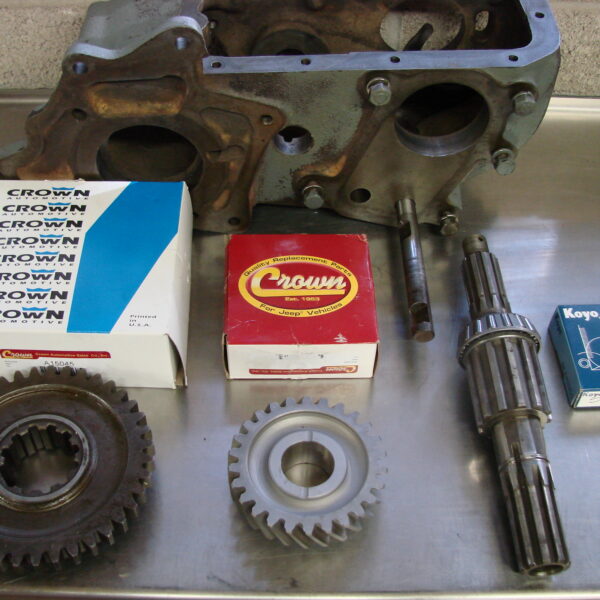
With all of the parts cleaned and separated we set them off to the side, separated the parts that we needed to get replacements for including the Speedometer Gear Drive and got the replacement parts ordered and on the way so we could get this Spicer put back together and back in our old Willys.
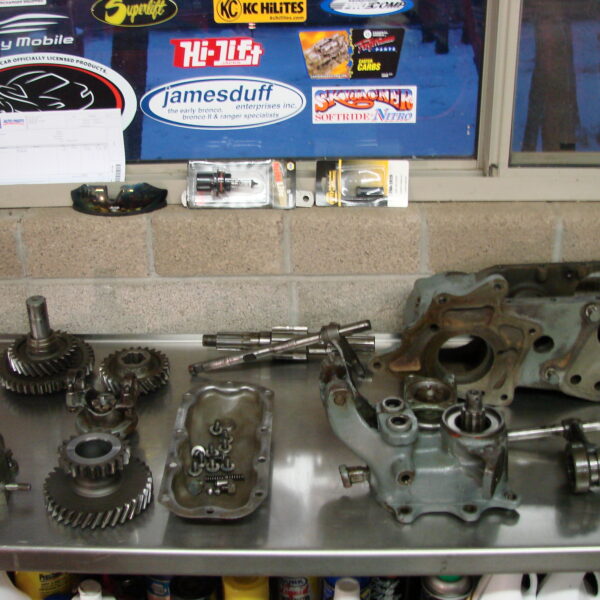
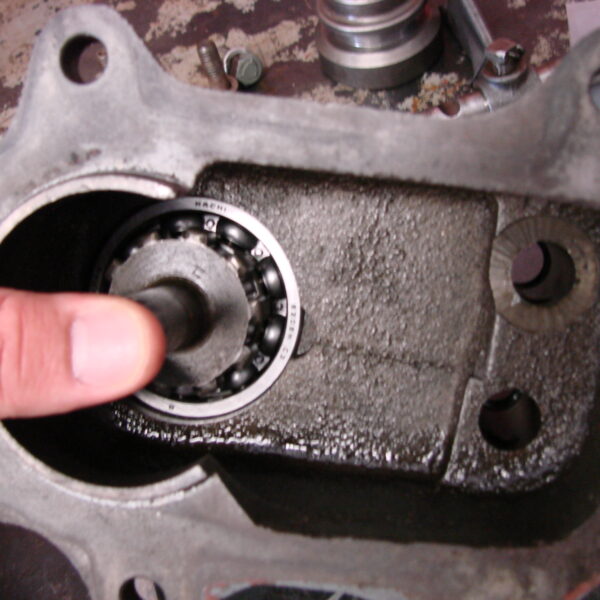
With the arrival of the new parts it’s time to get the Spicer back together so we can get ready for the trip coming up in just a few short weeks. The reassembly is pretty much the reverse of the dis-assembly. You will want to pay close attention to the recommendations of the supplier of your rebuild kit (Novak has some great advice included in their instruction sheets on what to expect and what to look out for). The front output cap gasket thickness is a factor in the end-play adjustment of the rear output shaft. The front cap must be reassembled and installed on the case along with both shift shafts and forks. If the shift fork retaining screws were drilled for safety wire, be sure to rewire.
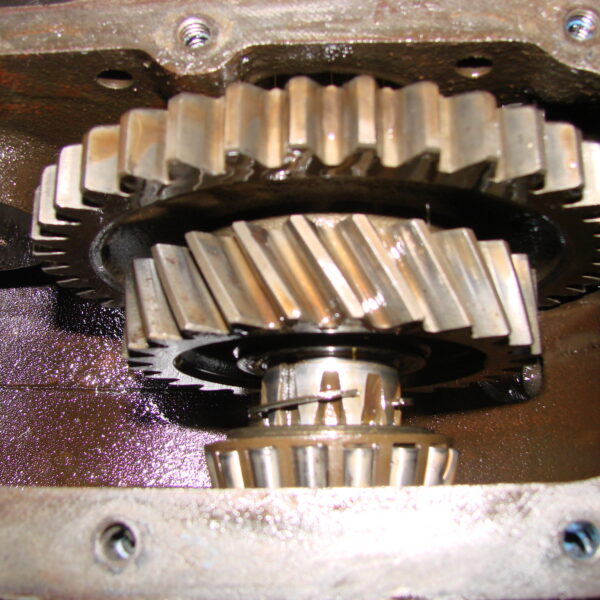
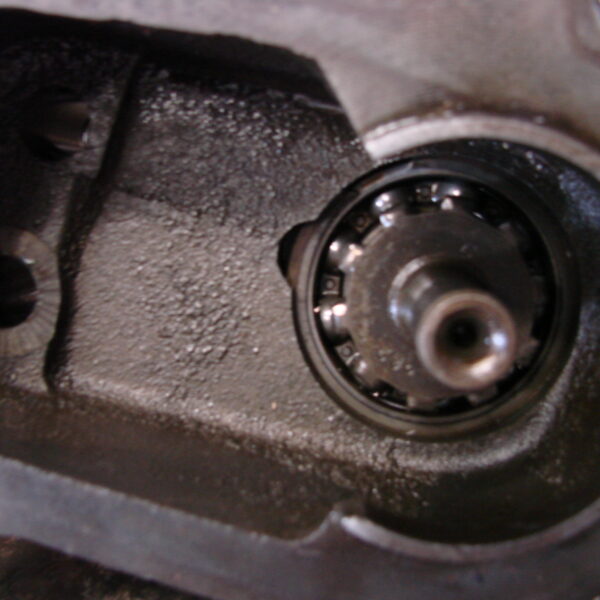
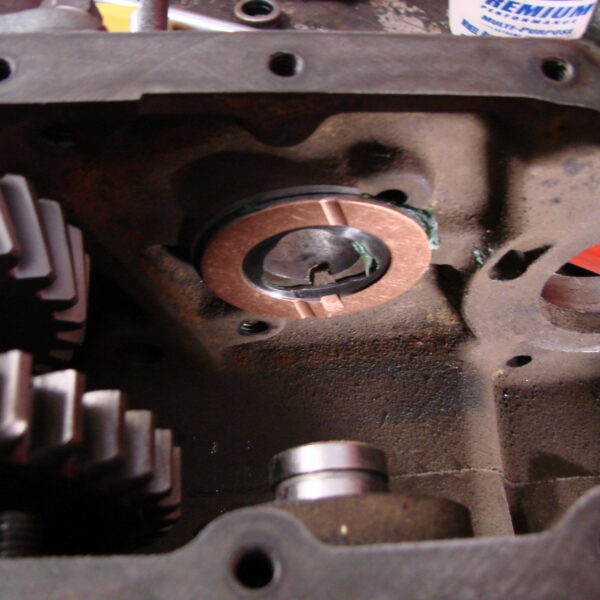
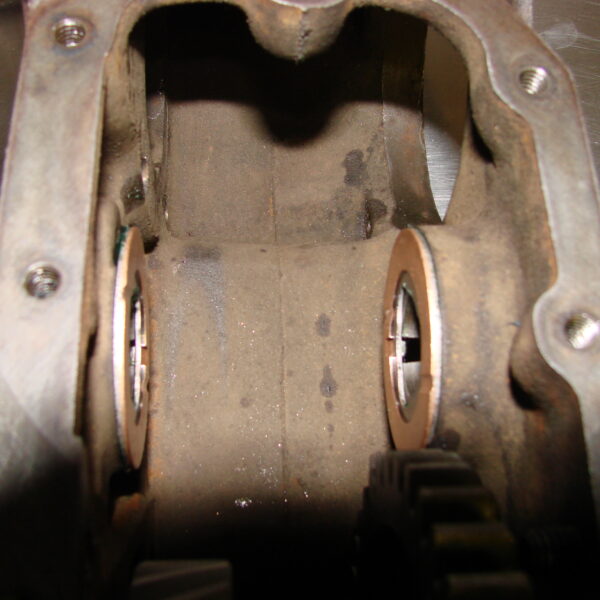
We placed the front bearing cup into the case knowing it will be adjusted when we put the rest of the gears and both front and rear output caps on and set the end play. Next we put the gears on the output shaft, put them through the case slid on the output thrust washer (tangs go in slots on output shaft). The snap ring will go on next as well as the front bearing; you will have to work the snap ring up the output shaft gradually as you go. Once the snap ring is locked in place I put some lithium grease on the bearings so they will have some lube for any movement during the reassembly process, next I put the rear bearing cap in place and temporarily put the rear bearing cap on to hold the bearing in place while I installed the front bearing cap.
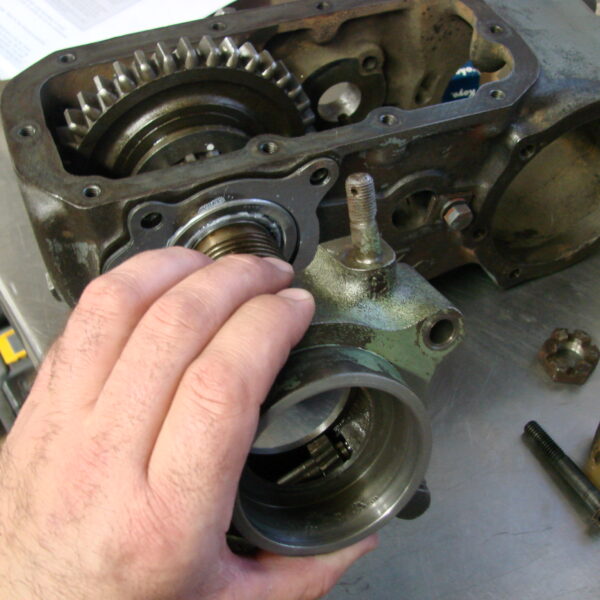
Before I could put the front bearing cap back into place I needed to essentially rebuild it with the new parts supplied by Novak including the oil seals as well as the new bearings for the Output clutch Shaft. The Pilot bushing took a little bit of effort and a little cursing to get out (thankfully we didn’t have to throw any tools or tantrums to finally get it out). We pressed off the old bearing, pressed on the new, swapped the seals and began the install of the front bearing cap (don’t forget the gasket that goes between the case and the front cap).

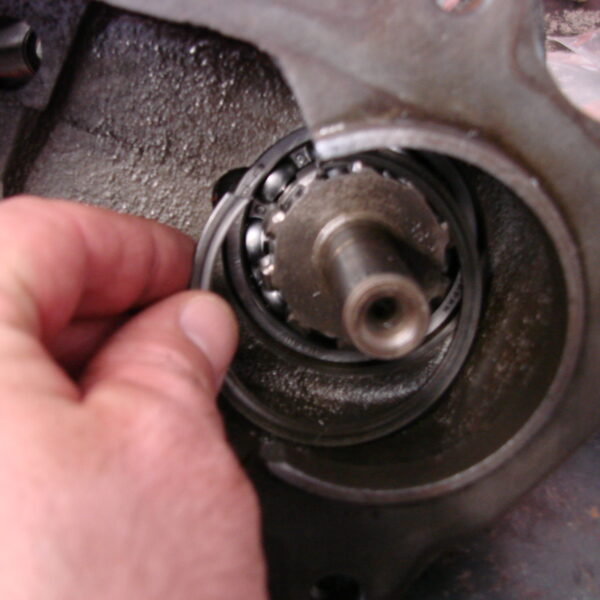
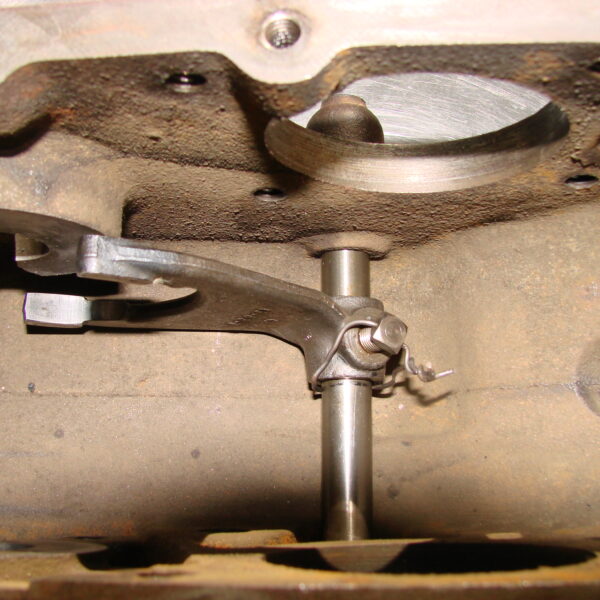
When you put the front cap on it has to go over the shift shafts, in doing so you want to be very careful not to tear the seals. If you take a very thin feeler gauge you can assist the shafts as they go through the seals to help prevent any damage. Also; don’t forget the bullet shaped interlock pin that floats between the shift rods. Install the front cap in place and tighten.
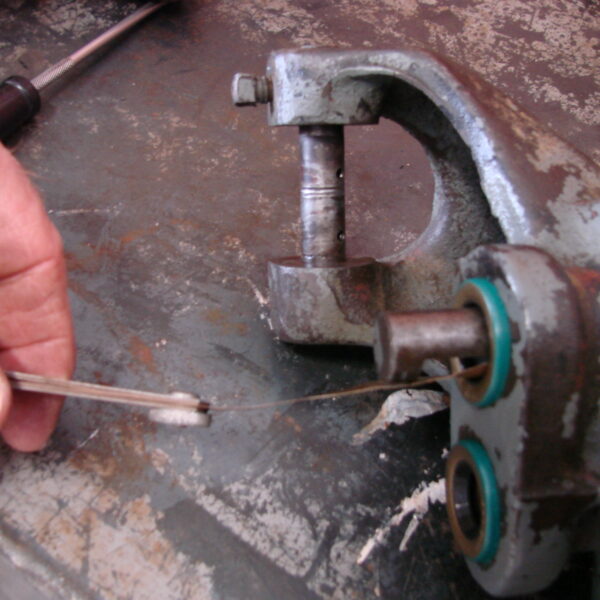
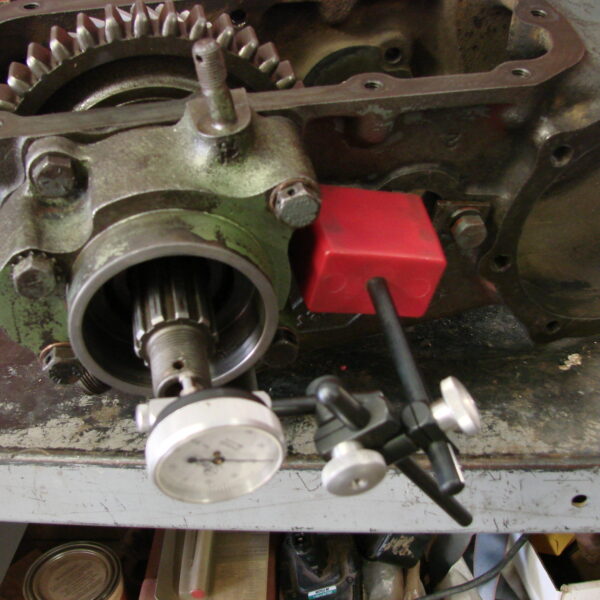
Hold the rear output cap on the rear bearing and measure the gap between the cap and the case with a feeler gauge. Add .010 to the gap thickness to obtain the thickness of the shim pack for the initial setting.
With a dial indicator attached to the case and the contact tip against the rear of the output shaft you need to pull and push the output shaft to get the reading of the end play. (Factory spec for end play is .004 to .008 but a better job results if you maintain .002 to .006) This is EXTREMELY IMPORTANT and must be measured with a dial indicator and not by feel or by eyeballing. It took us a couple of times mixing and matching the shims to get a reading of .003 so we felt comfortable with that. Once the proper thickness for the shim pack has been established, remove the rear cap and shims and apply a thin coat of RTV silicone sealer to each shim in the pack. Reassemble; torque the bolts to 30 ft. lbs. and recheck the end play, which should still be in the recommended range of .002 to .006.

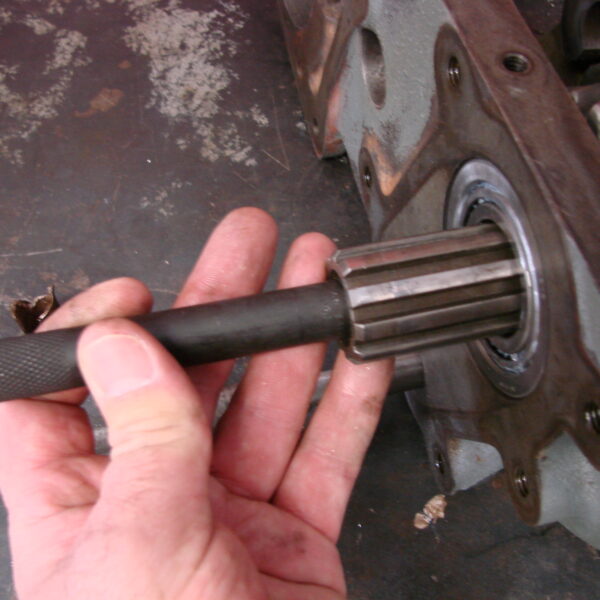
Next we were ready to put the Poppet Balls and springs back in the case (Novak supplies new springs with their master kit). With that finished we installed the new, felt out put shaft seals and reinstalled the front and rear yokes, also using new cotter pins in our castle nuts.
Next to go back together is the intermediate shaft, if you use a little bit of grease on the thrust washers they will stay in position inside the case while you are putting the intermediate gears, shaft, cage bearings into place. (Remember, the intermediate shaft is slightly tapered so it must be installed from the rear of the case as to not damage the case or the shaft).
With the thrust washers in place the intermediate shaft and gear can go into place (Don’t forget the o-rings on the intermediate shaft). It is best to lube or grease the cage bearings before you put the assembly together, use a light coating of gear oil and insert the cage bearings into the intermediate gear and hold in place in the t-case as you slide the intermediate shaft through the gear and into place. Lock the intermediate shaft down with the bolt and retainer plate.
Once that is back together you want to make sure the Spicer works in all ranges so it should be put into all positions of the case and check to make sure it all works properly. If so go ahead and put the new gasket on and tighten down so it will be ready to reinstall on the vehicle.
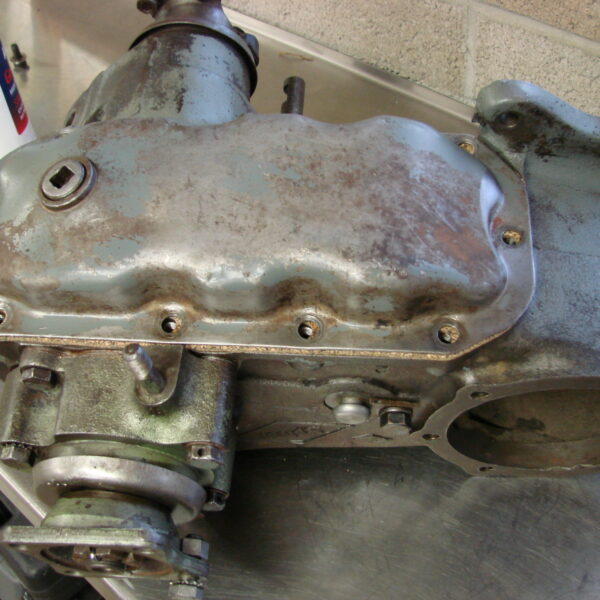
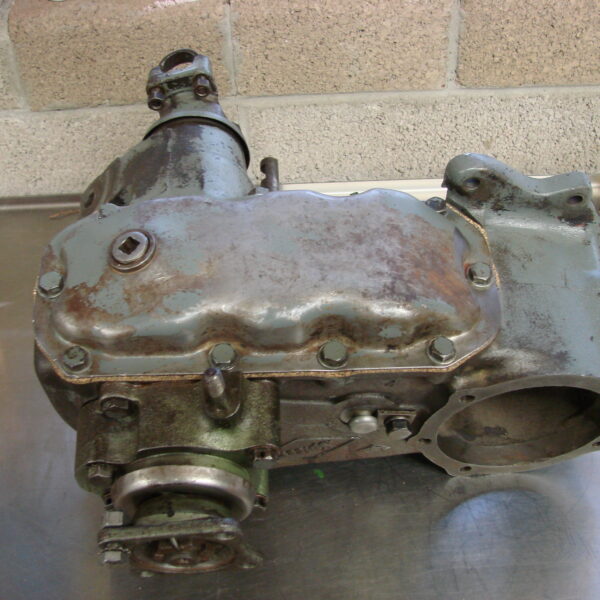
If you want to paint it now is a good time to do so. The reinstall is reverse of the removal shown earlier in this project.
Special Thanks: NOVAK Conversions for their donations to this project and for their help along the way!!