
Let the resurrection begin…
The story… “Behind The Find”
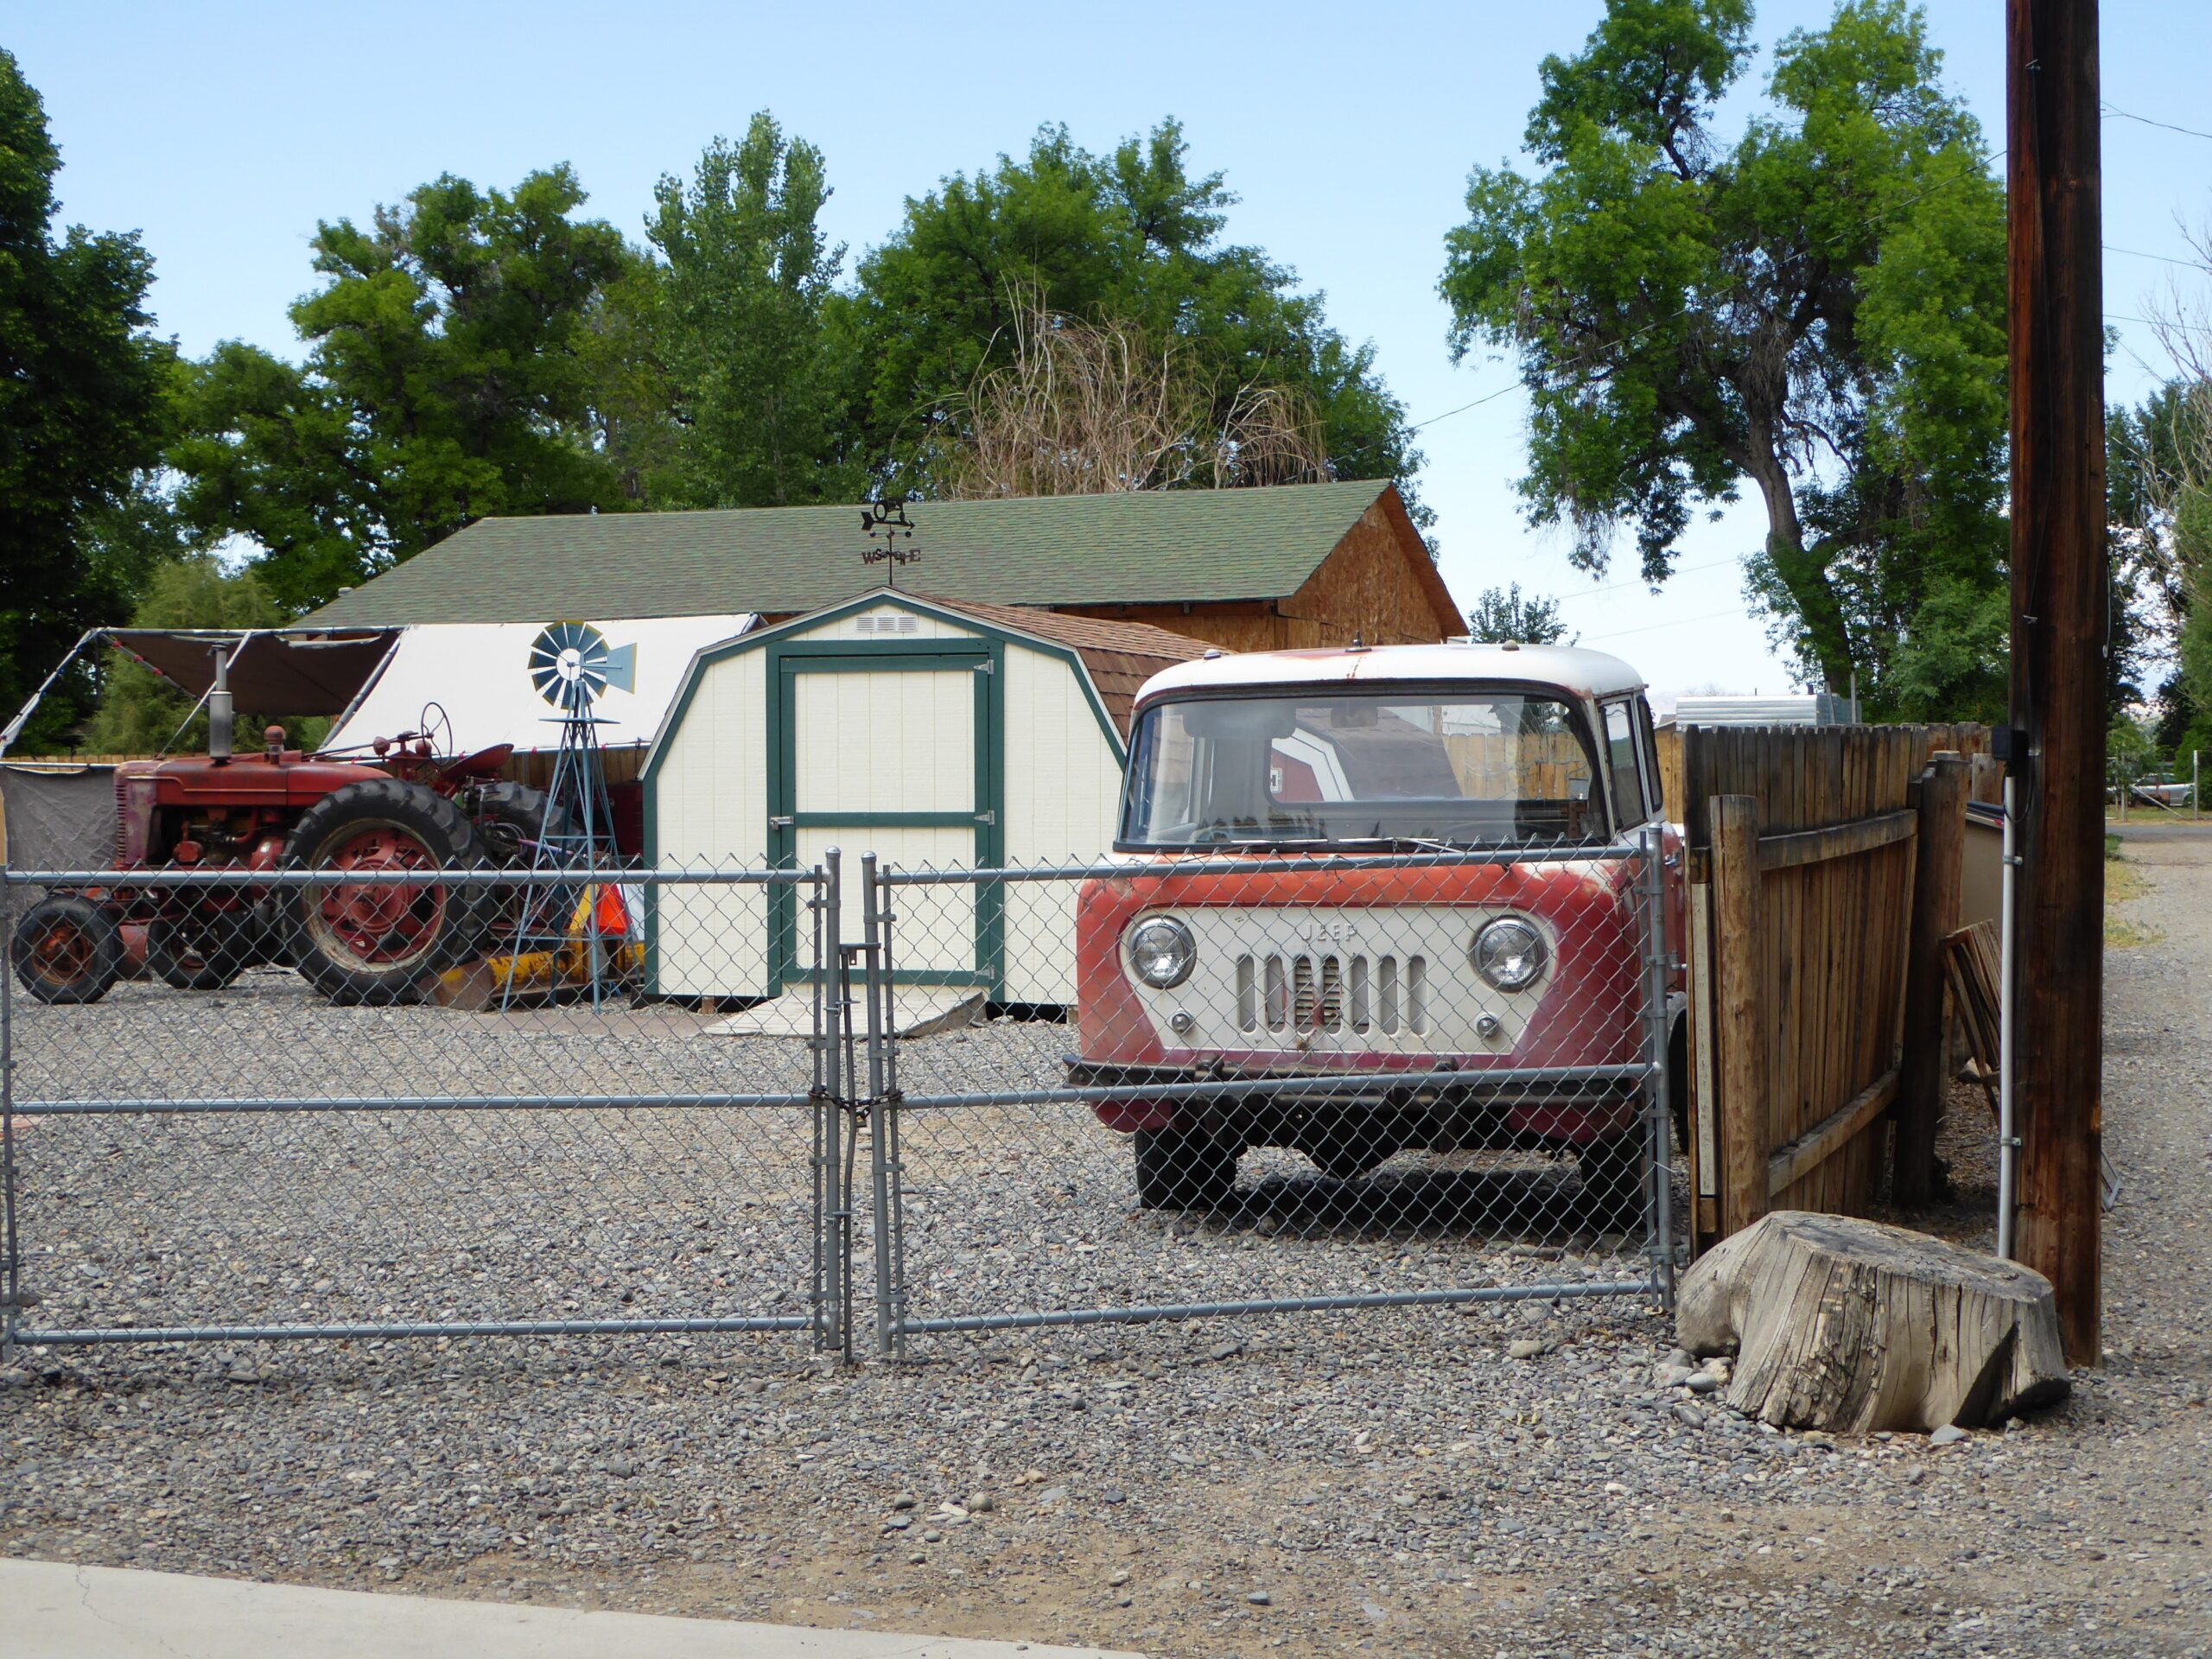
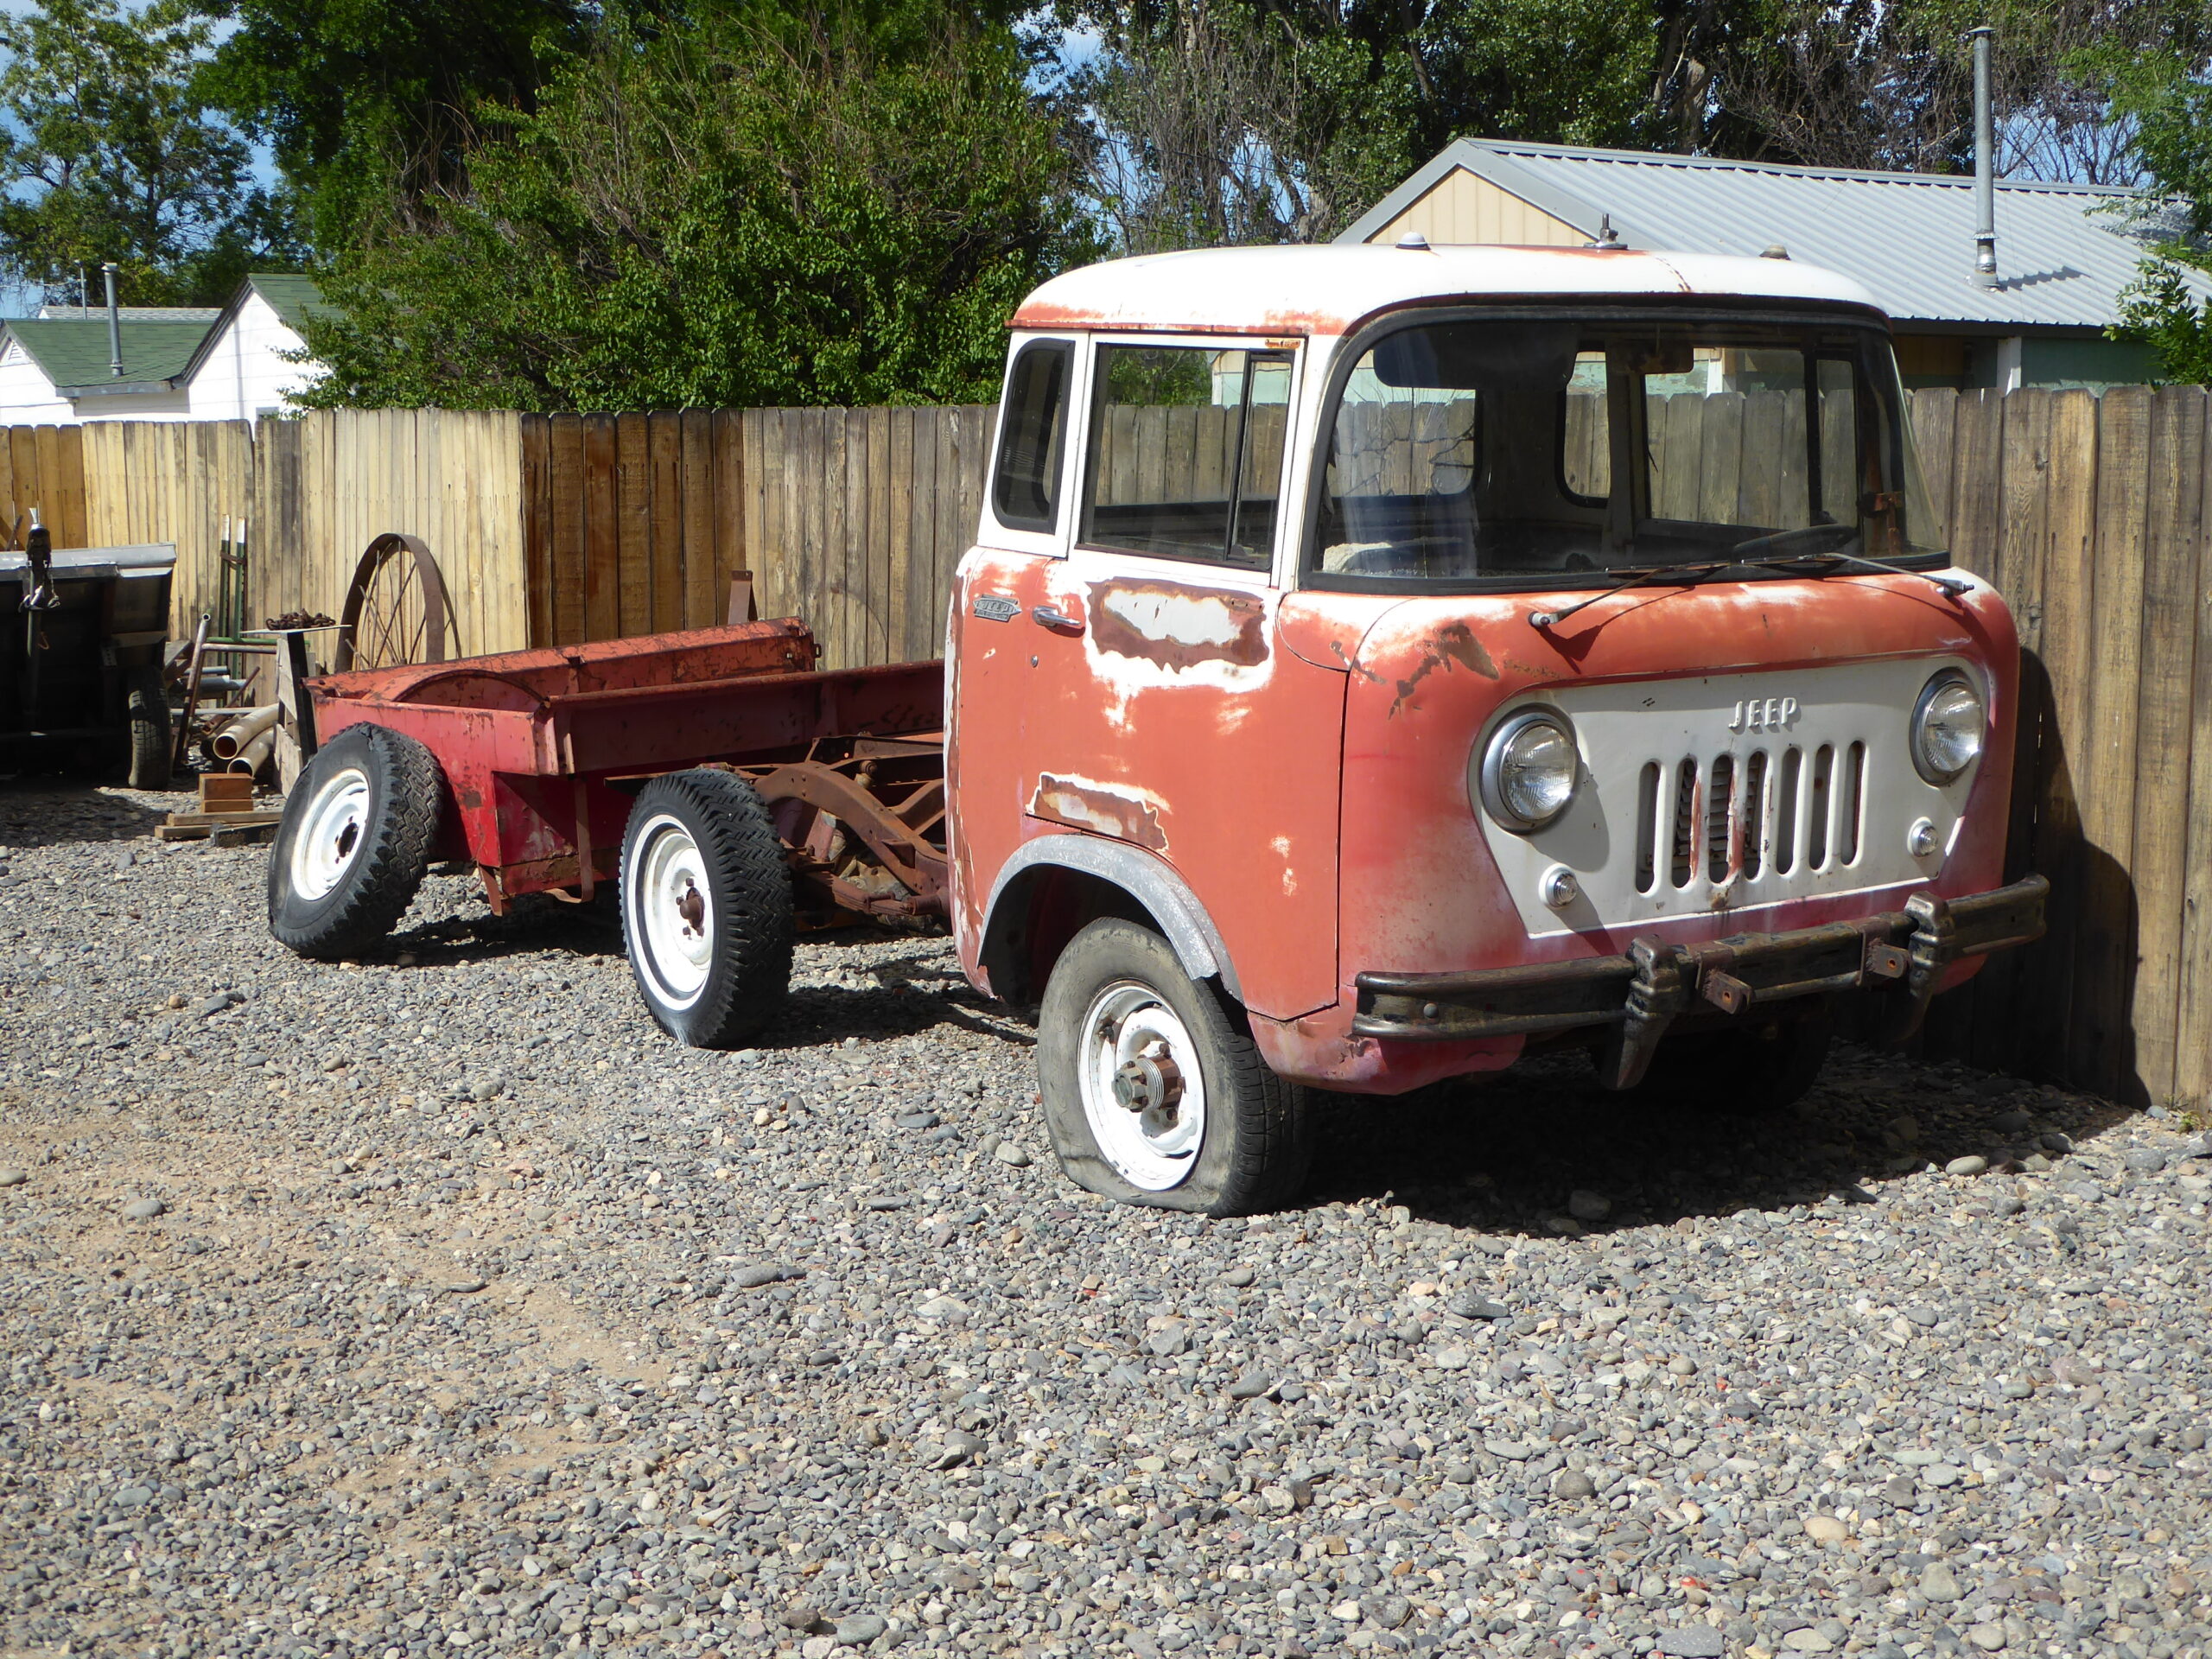
I truly believe that in some form or fashion most people have a desire to find some kind of hidden treasure. Whether you’re an antique collector, a muscle car fanatic or a motorcycle guy; there comes a time when we all dream of finding that limited edition anything buried in a barn or garage. Years ago I found one of those “rare finds” and I’ve always hung onto hope that I’d have my chance at another. While passing through a small town in north central Wyoming I spotted an old Willys wagon and of course being the Jeep enthusiast that I am at heart, I immediately had to turn around to get a closer look. As I turned the corner and made an attempt to glance down an alley to get a quick view of the waggy I wanted information on, something else caught my eye and my plan and focus immediately changed. An elusive Willys FC-150 was spotted!
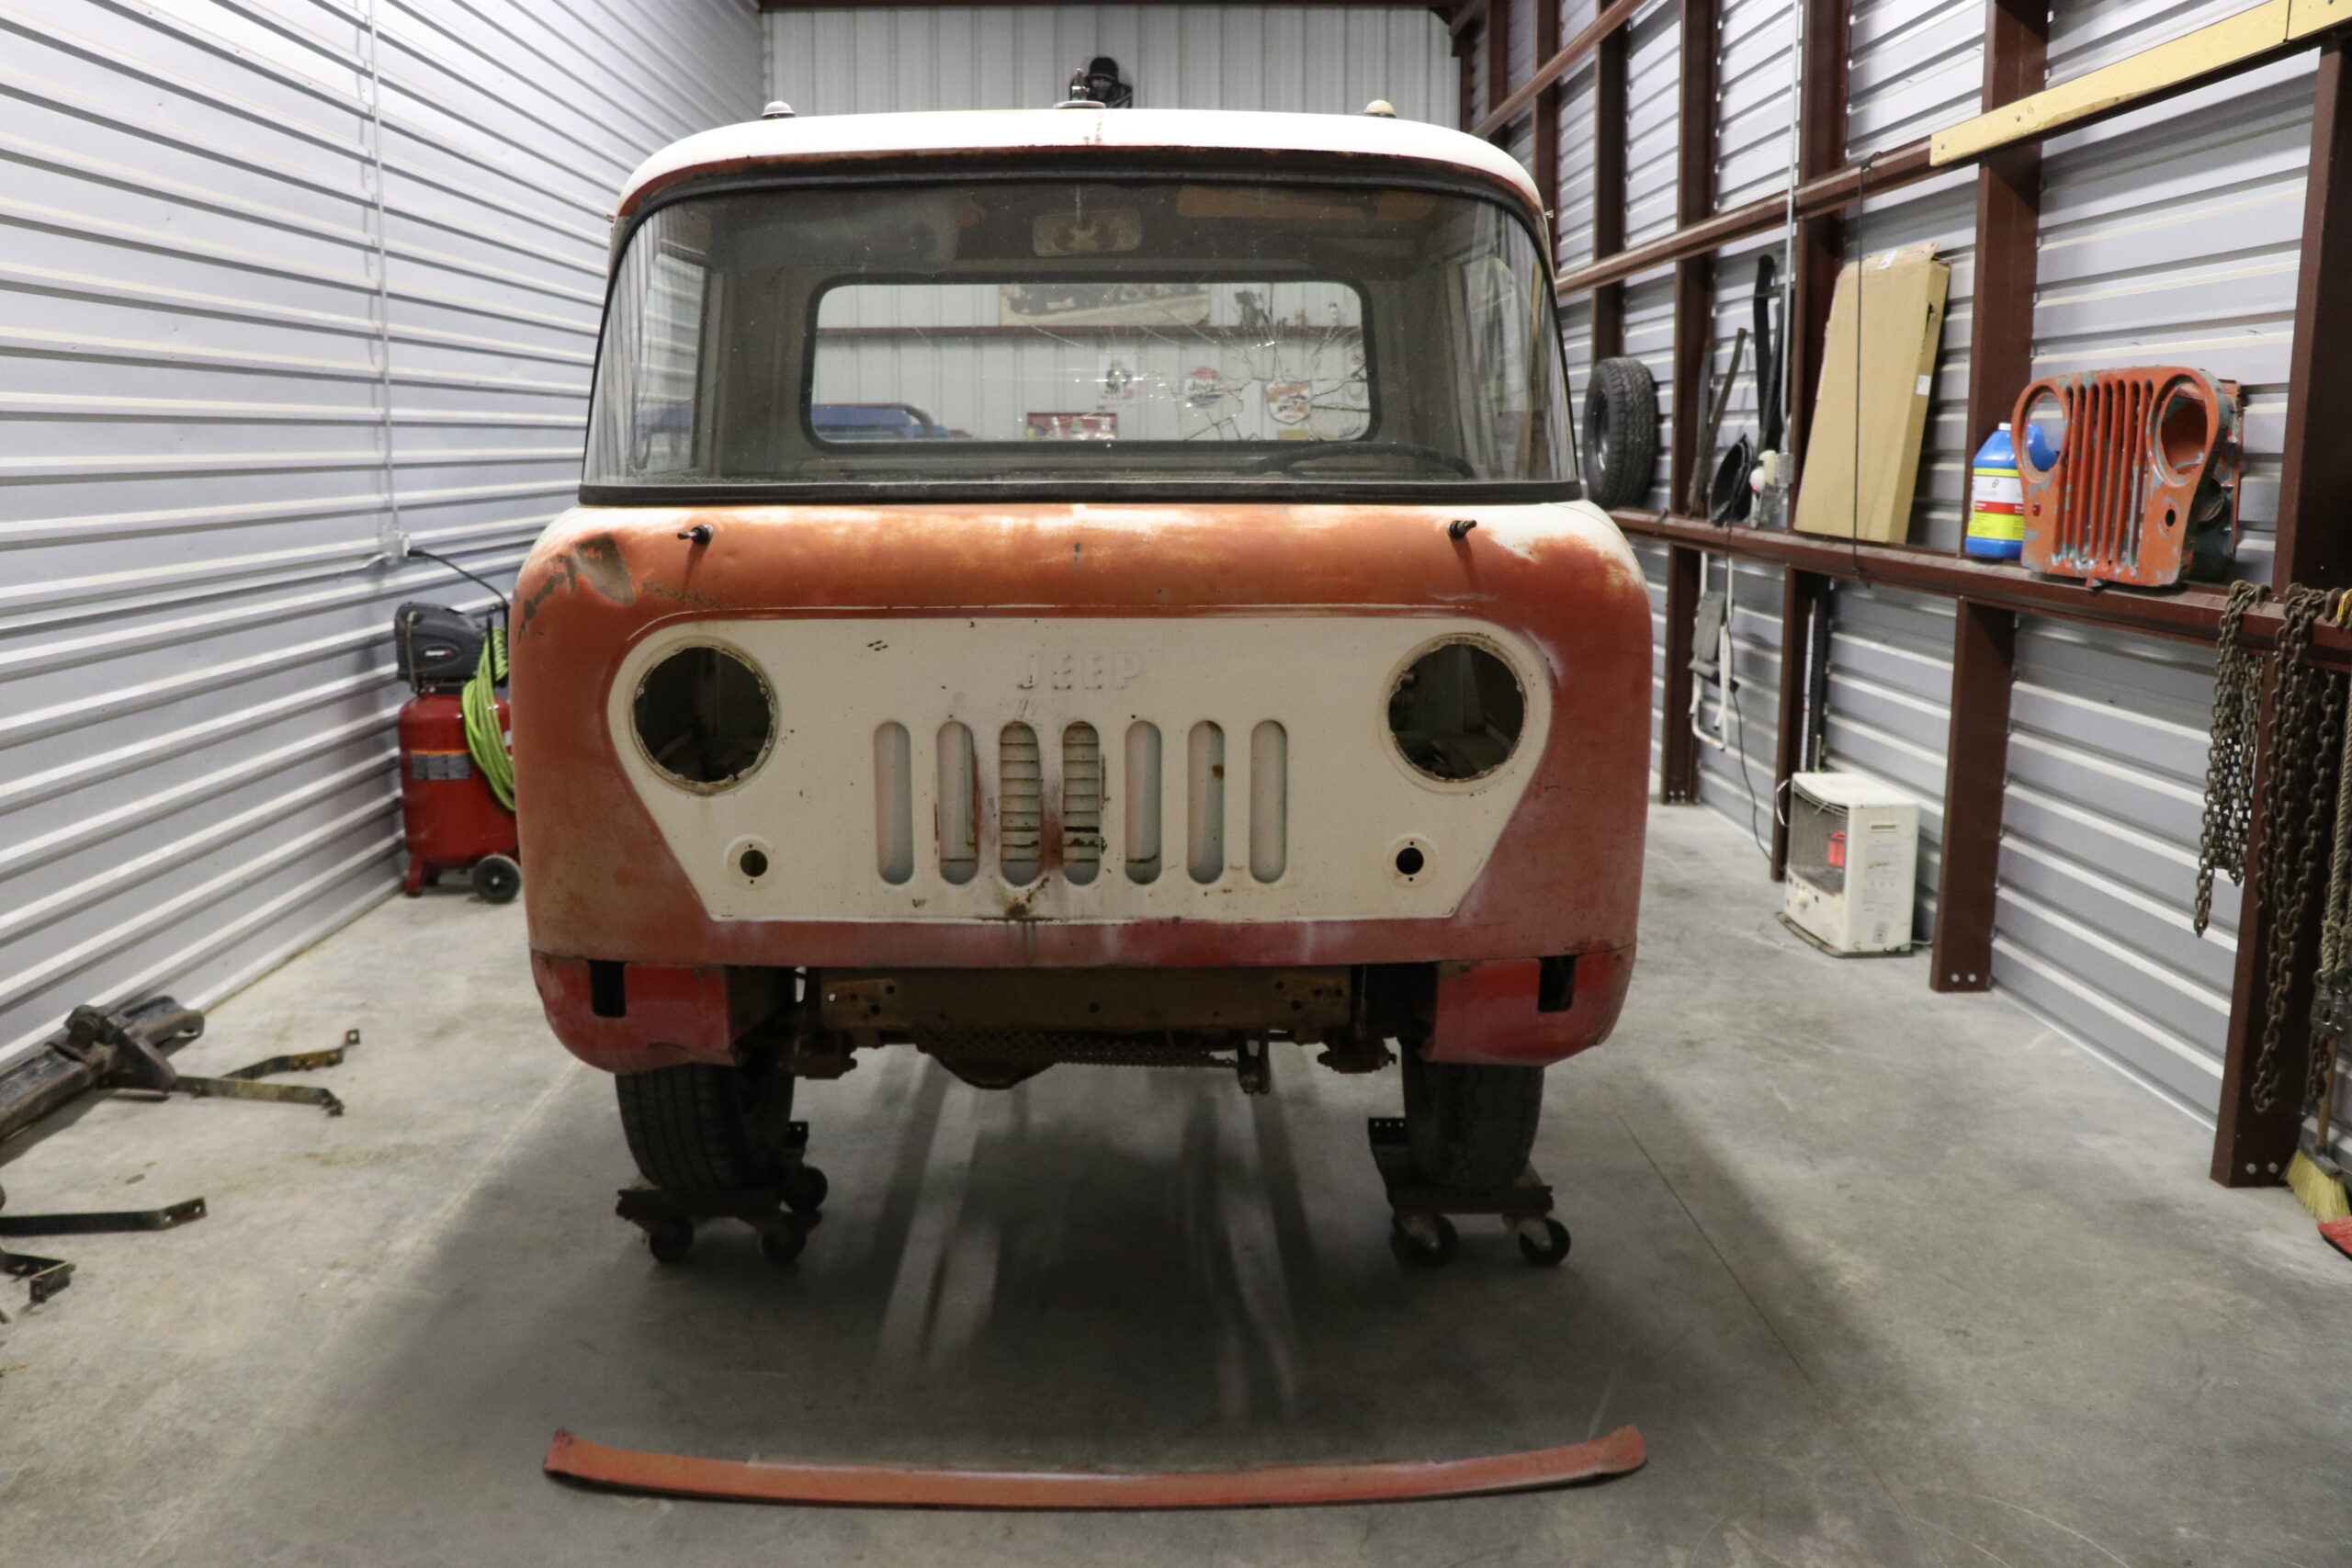
Halfway down the alley I spotted the front end of an old Forward Control Jeep tucked away in the backyard. At this point I should share that I had been looking for an FC-150 for at least a year prior and hadn’t had much luck finding one for sale so to come across this one by chance, I was given a renewed hope that there might still be enough out there that I may be able actually locate one. My real hope was that the owner might be able to offer up a little more information on it and might even be willing to part with it but if not, maybe he would know where another one was hiding.
As I pulled into the alley to get a closer look there a car pulled out of a garage by the property, while marveling at my luck of timing, I asked the woman if the little relic happened to be hers and if she would tell me the story behind it. I was informed that it belonged to her husband who she summoned to the back yard with a quick phone call and headed off to where ever she intended to be before I delayed her schedule with my inquisitive interruption. Her husband Bob showed up a couple of minutes later allowing me to get the details of this FC-150 that was in much need of being rescued, we stood outside in the cold temps and falling snow of mid November in Wyoming as I heard the story. Bob informed me that he had purchased the FC about a year earlier with hopes and intentions of eventually restoring it. He planned to start by getting the motor out and planned to have it rebuilt by a local shop so he could at the very least enjoy and drive it a bit. When I finally got down to the real question on my mind as to whether or not he had any interest or willingness to part with his back yard project, I was sadly disappointed to hear that he really didn’t want to let go of it just yet since he had hopes and plans for it.
Now being a Jeep guy that is always on the hunt, I cannot count how many times I have met and talked to the “Twenty year guy.” This is the guy who buys or collects vehicles that he intends to build or says he’s going to restore; but never accomplishes the restoration of a single one. These are also the same guys that will never let go of these collectables and will instead let them sit and rust away until there is no real chance of them being brought back to life. I certainly hoped that I wasn’t standing is the presence of one of those “Twenty year guys.” From the collection of beautifully restored tractors that Bob had in the back yard and the care of which their home was in, it gave me a sense of comfort that if I wasn’t going to own it, I might see the FC-150 driving down the road in running and restored condition one day. Before Bob and I parted ways I left him with a business card and asked him to reach out should the day ever come that he would be willing to part with his lil 150.
Over the next few months I would periodically drive by if I happened to be passing through the area to see if the FC had moved or if it looked as though any progress had been made. After roughly six months had gone by I stopped into the shop that happens to be owned by a couple of guys who are not just friends, they are also Jeep guys. As we stood around and chatted they asked if I knew that Bob had passed away just a couple weeks after I had met and spoken with him. Shocked to hear the news and saddened to know that he wouldn’t achieve the hope of driving his FC one day I couldn’t help but wonder what might become of the backyard FC.
Within a few weeks of hearing the news that Bob had passed away I received a call from one of his close friends asking if I was still interested in the old Jeep. After some discussion and a couple of additional phone calls, we set a day and time that I could head back to the small Wyoming community to pick the old Jeep up and take it home so I could have the opportunity to help Bob’s dream come to fruition, and bring his FC-150 back to life.
We hope you’ll follow along as we give this classic a second chance at life to be enjoyed for years to come, but before we delve into the tear-down and rebuild, we’ll share a touch of the history behind the Forward Control Jeep.
The History
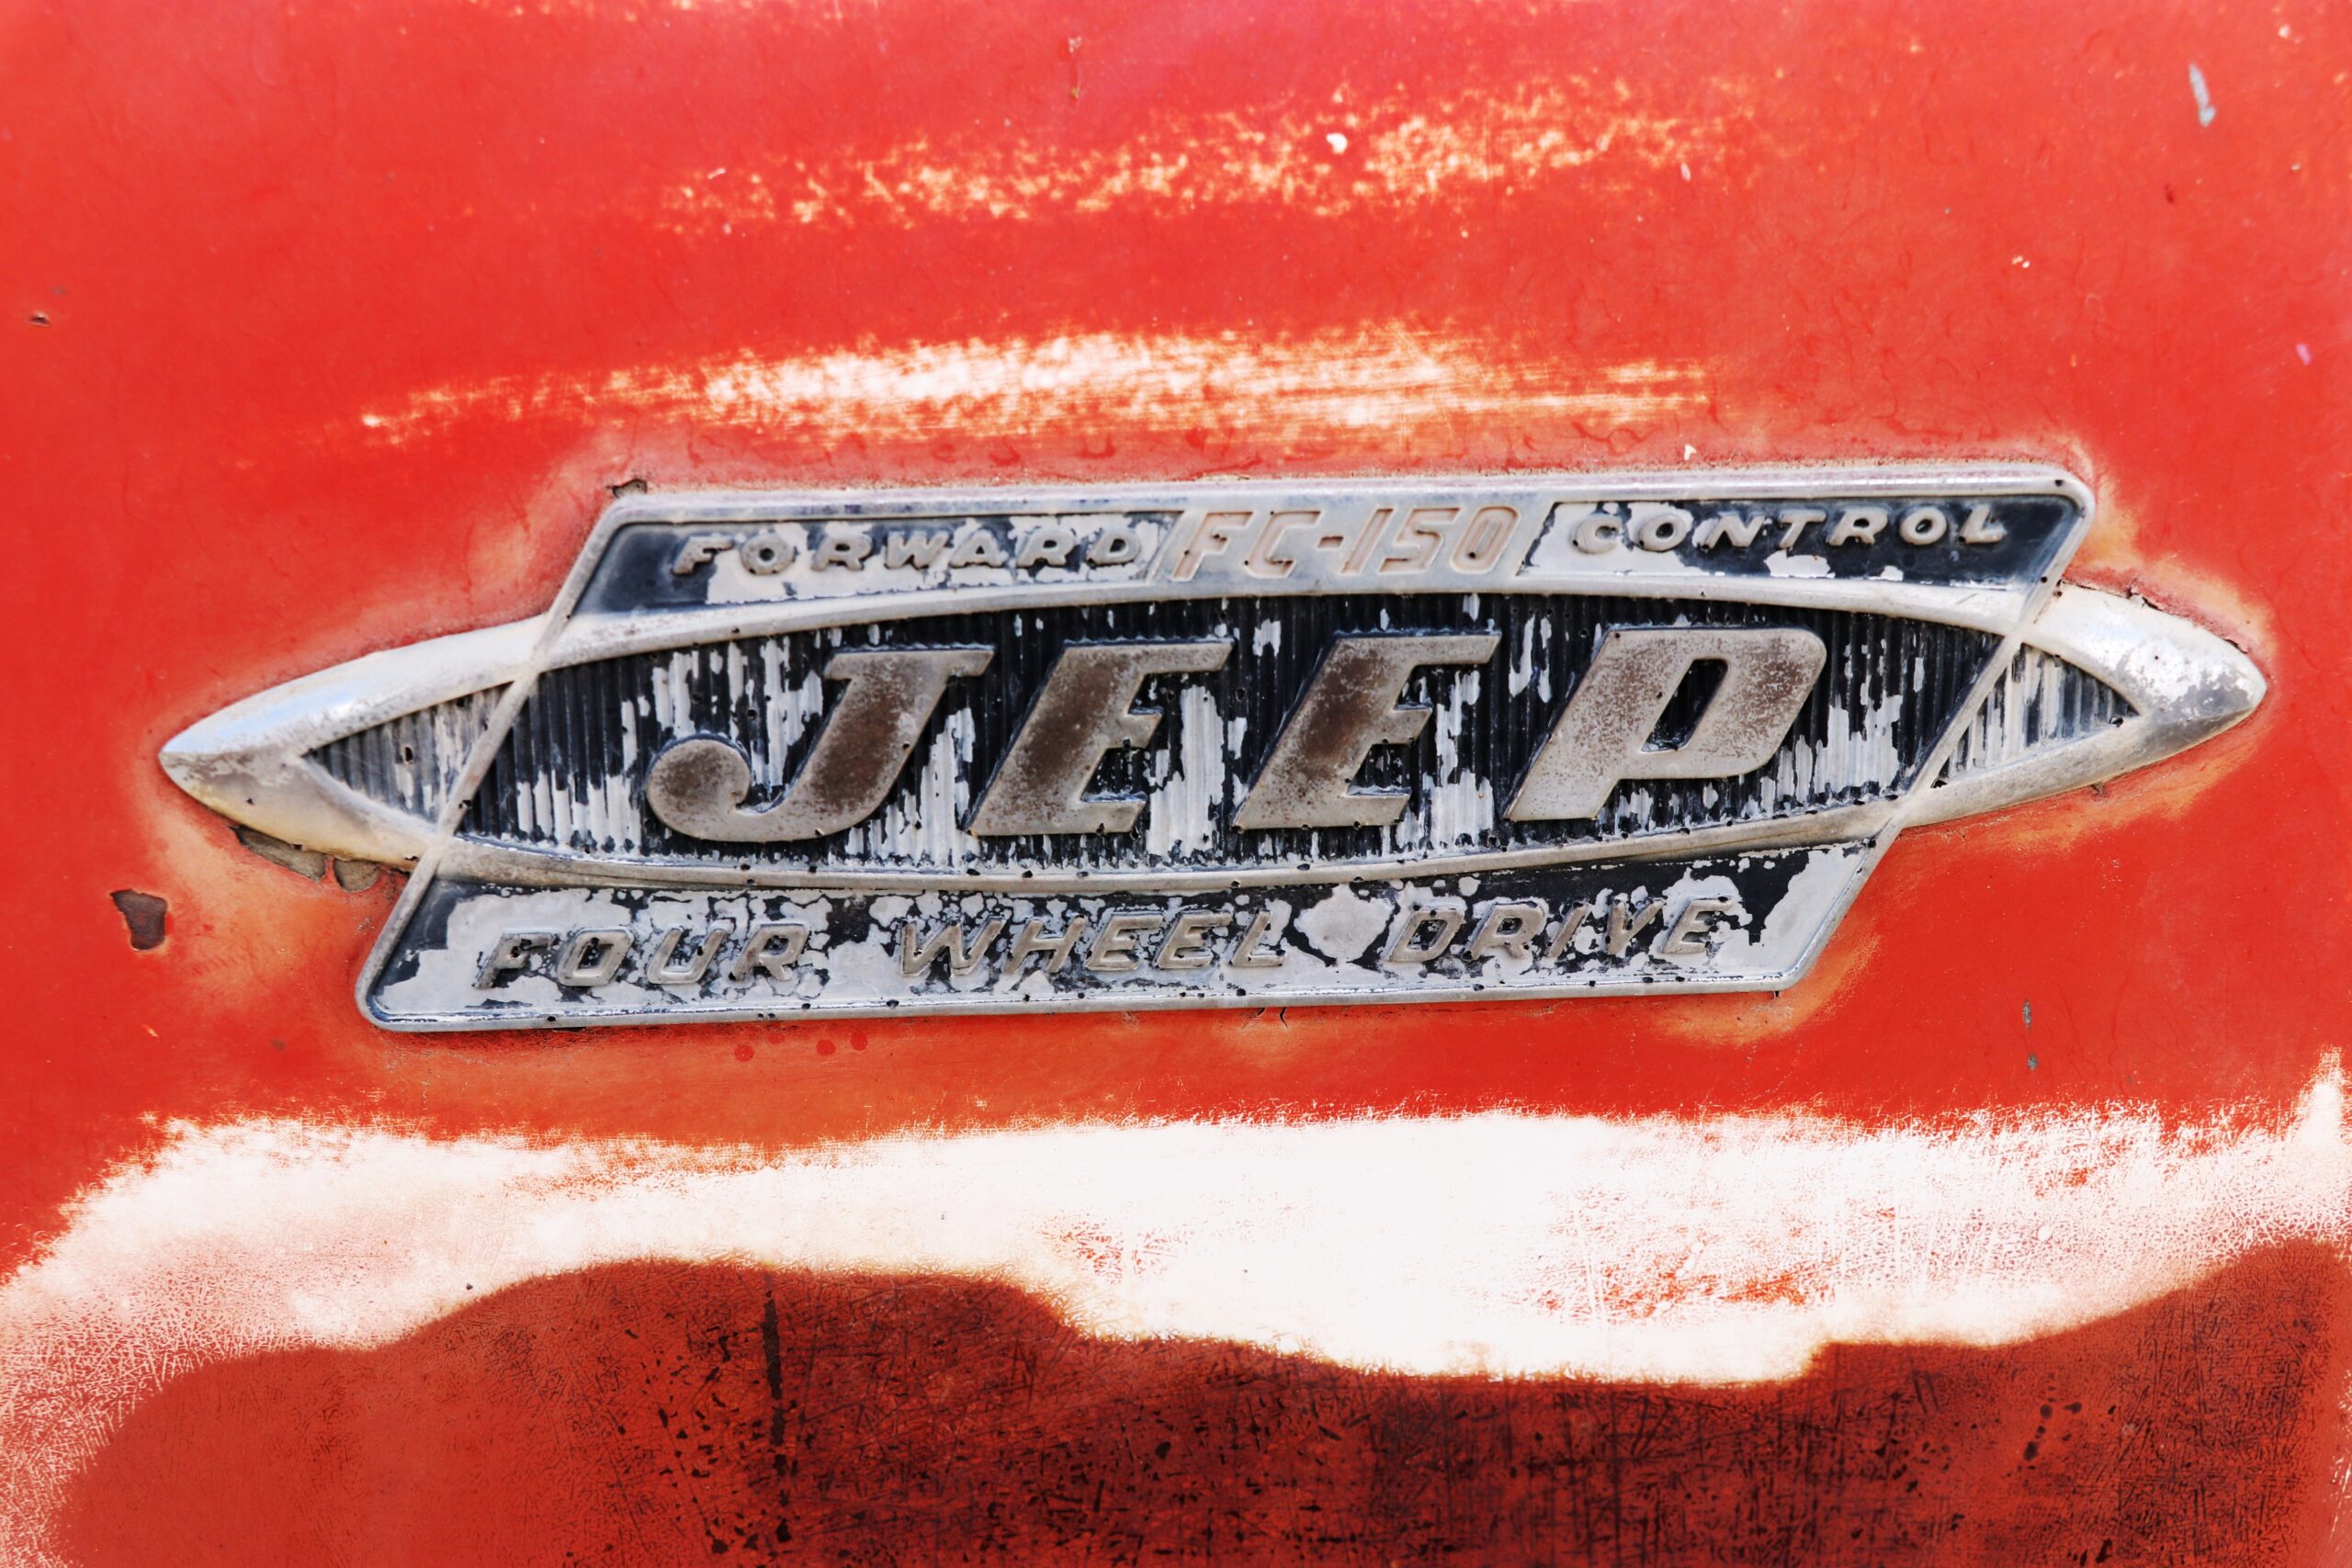
The Willys FC concept was introduced in 1956 and came out as a utility vehicle with a few platform options available. The FC-150 was based on the CJ-5 frame with an 81” wheelbase and 78“ bed, while the FC-170 came in at 103” with a 108” bed. Think about that for a second, an impressive amount of bed space on the FC-170’s making them great for use as utility vehicles.
During the period of production there were roughly 33,000 units produced factoring in all models including an ambulance, a stake side, a dually and a crew cab. These are a few packages worth noting which prove to be even rarer finds when they can be located.
In addition to the U.S. market there was an international market, India as well as Spain had versions of this platform of these vehicles but for the purpose of this restoration and build, we’ll save more of that info for another project and time. There is a wealth of additional information on these unique vehicles so if this build creates an interest or desire to find more information, we’ll direct you here and you can follow the digital breadcrumbs to find answers to any questions you may have. https://en.wikipedia.org/wiki/Jeep_Forward_Control
Phase 1: The Tear-down
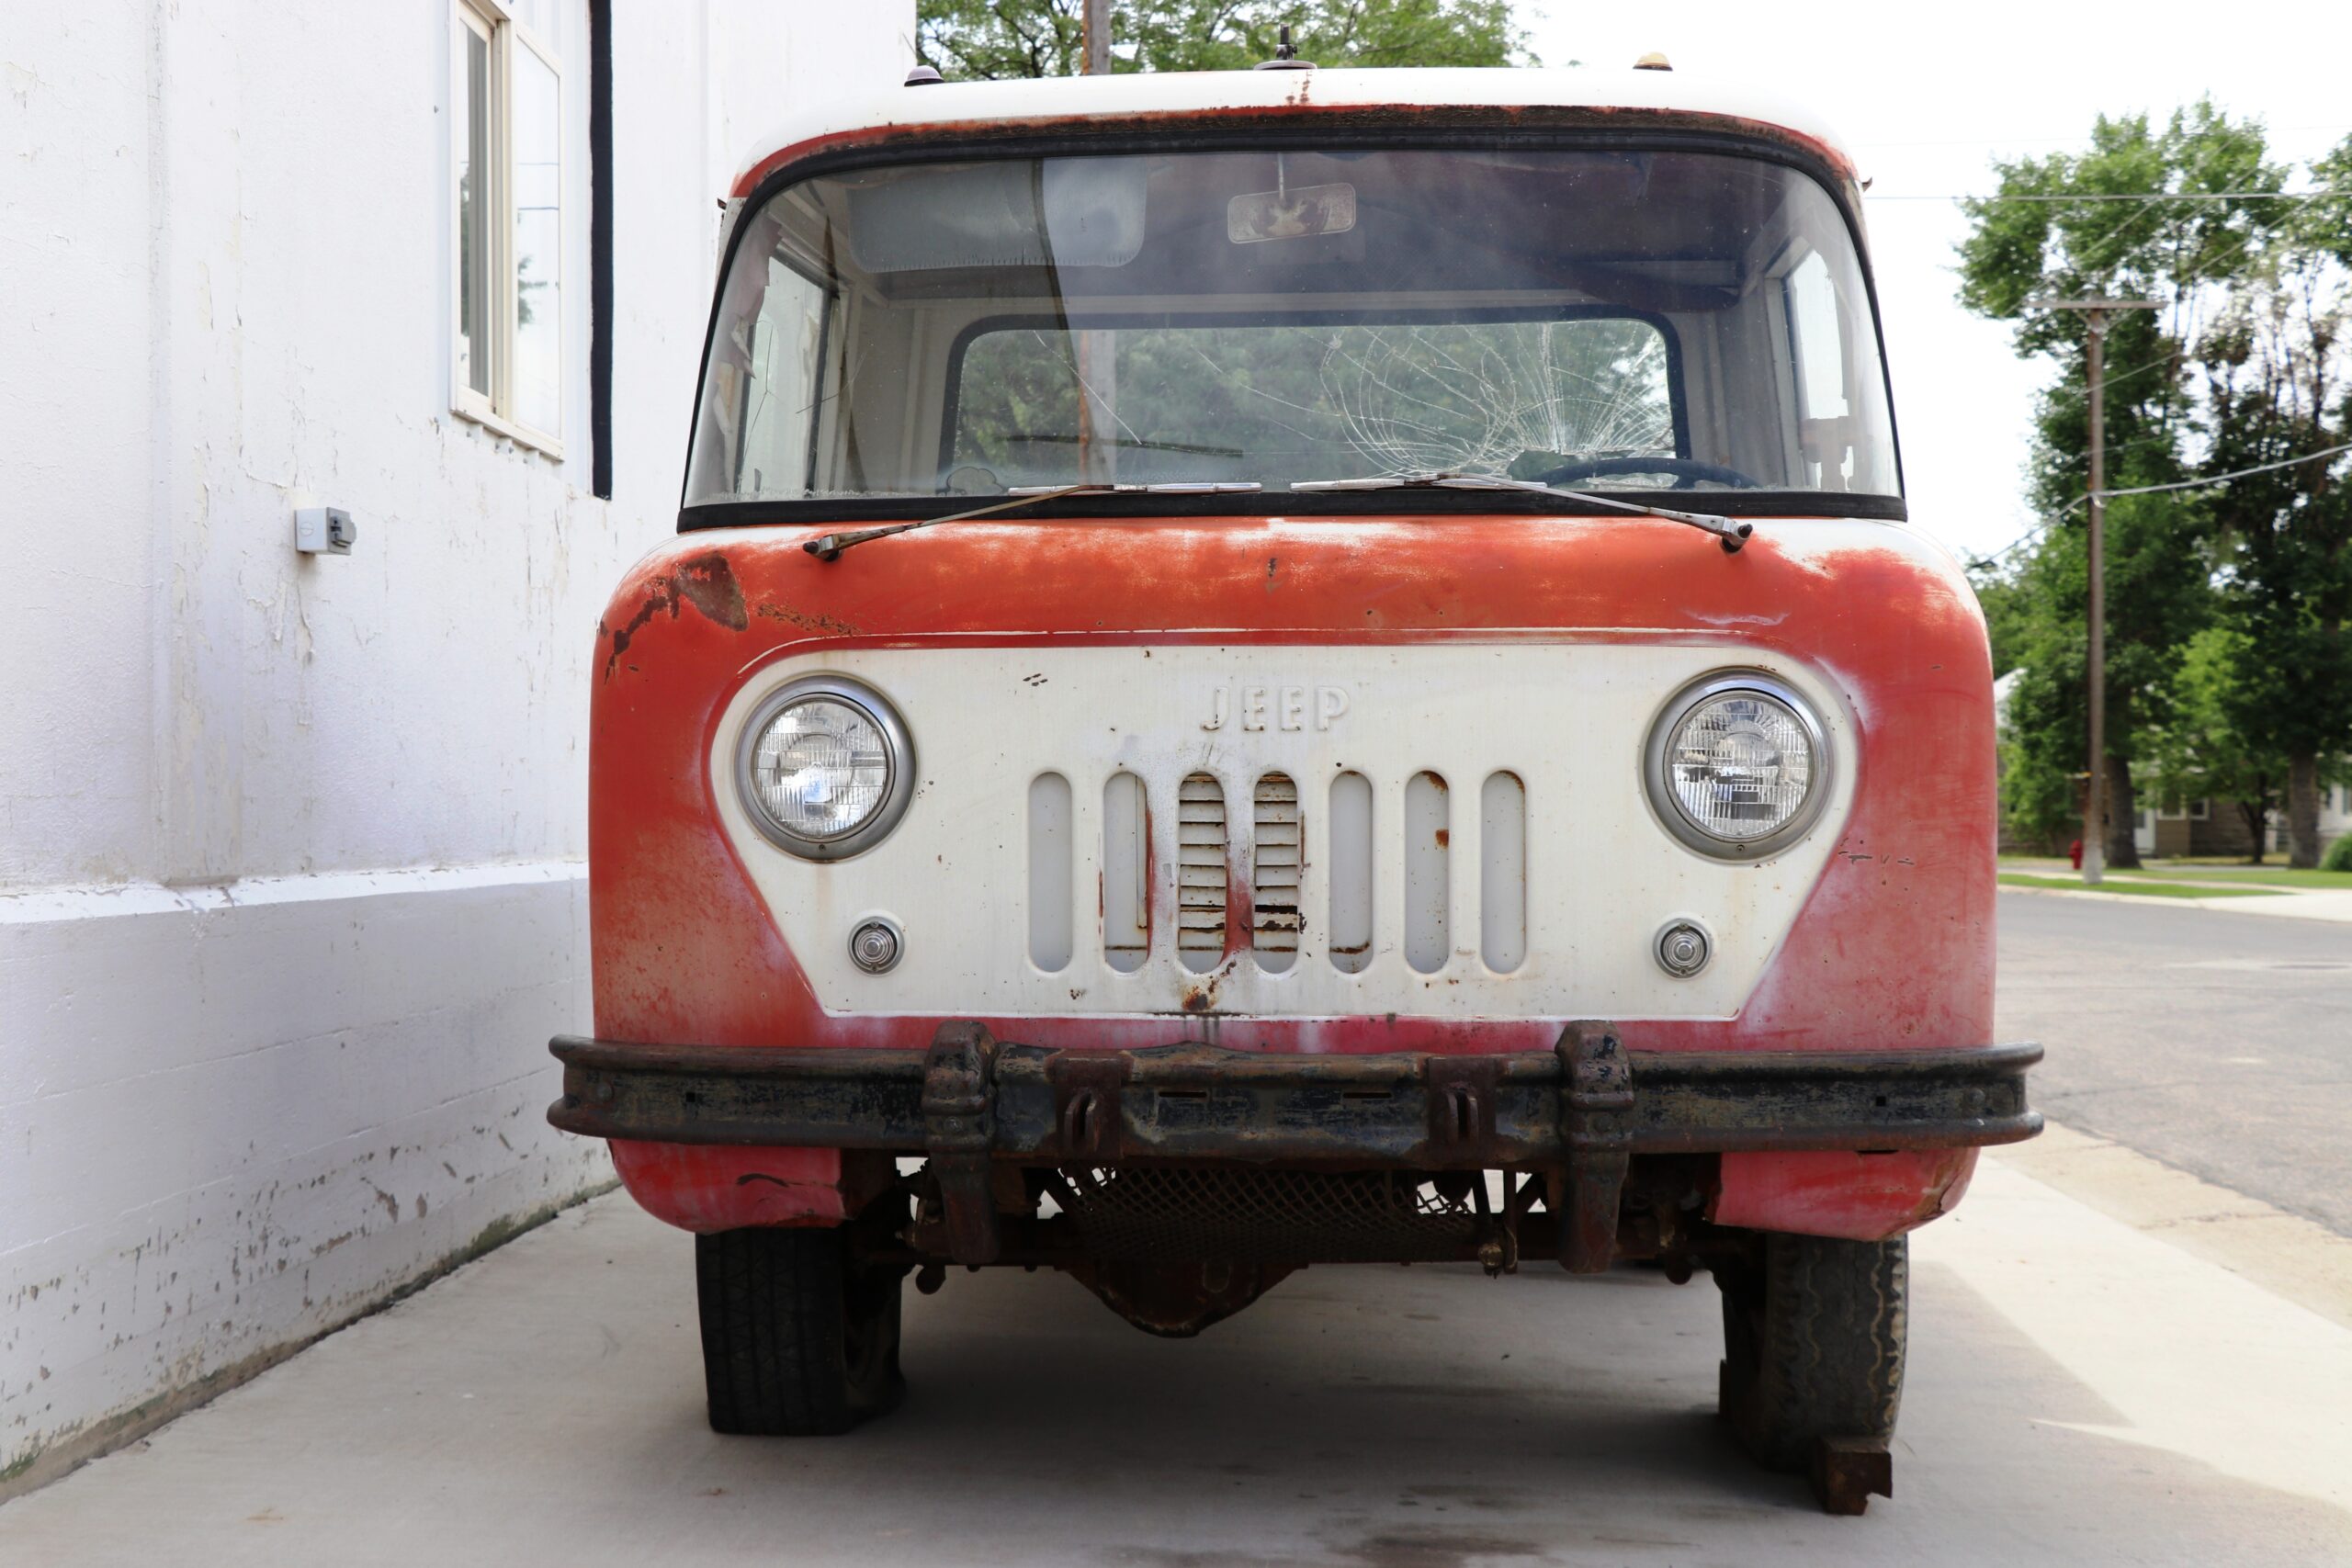
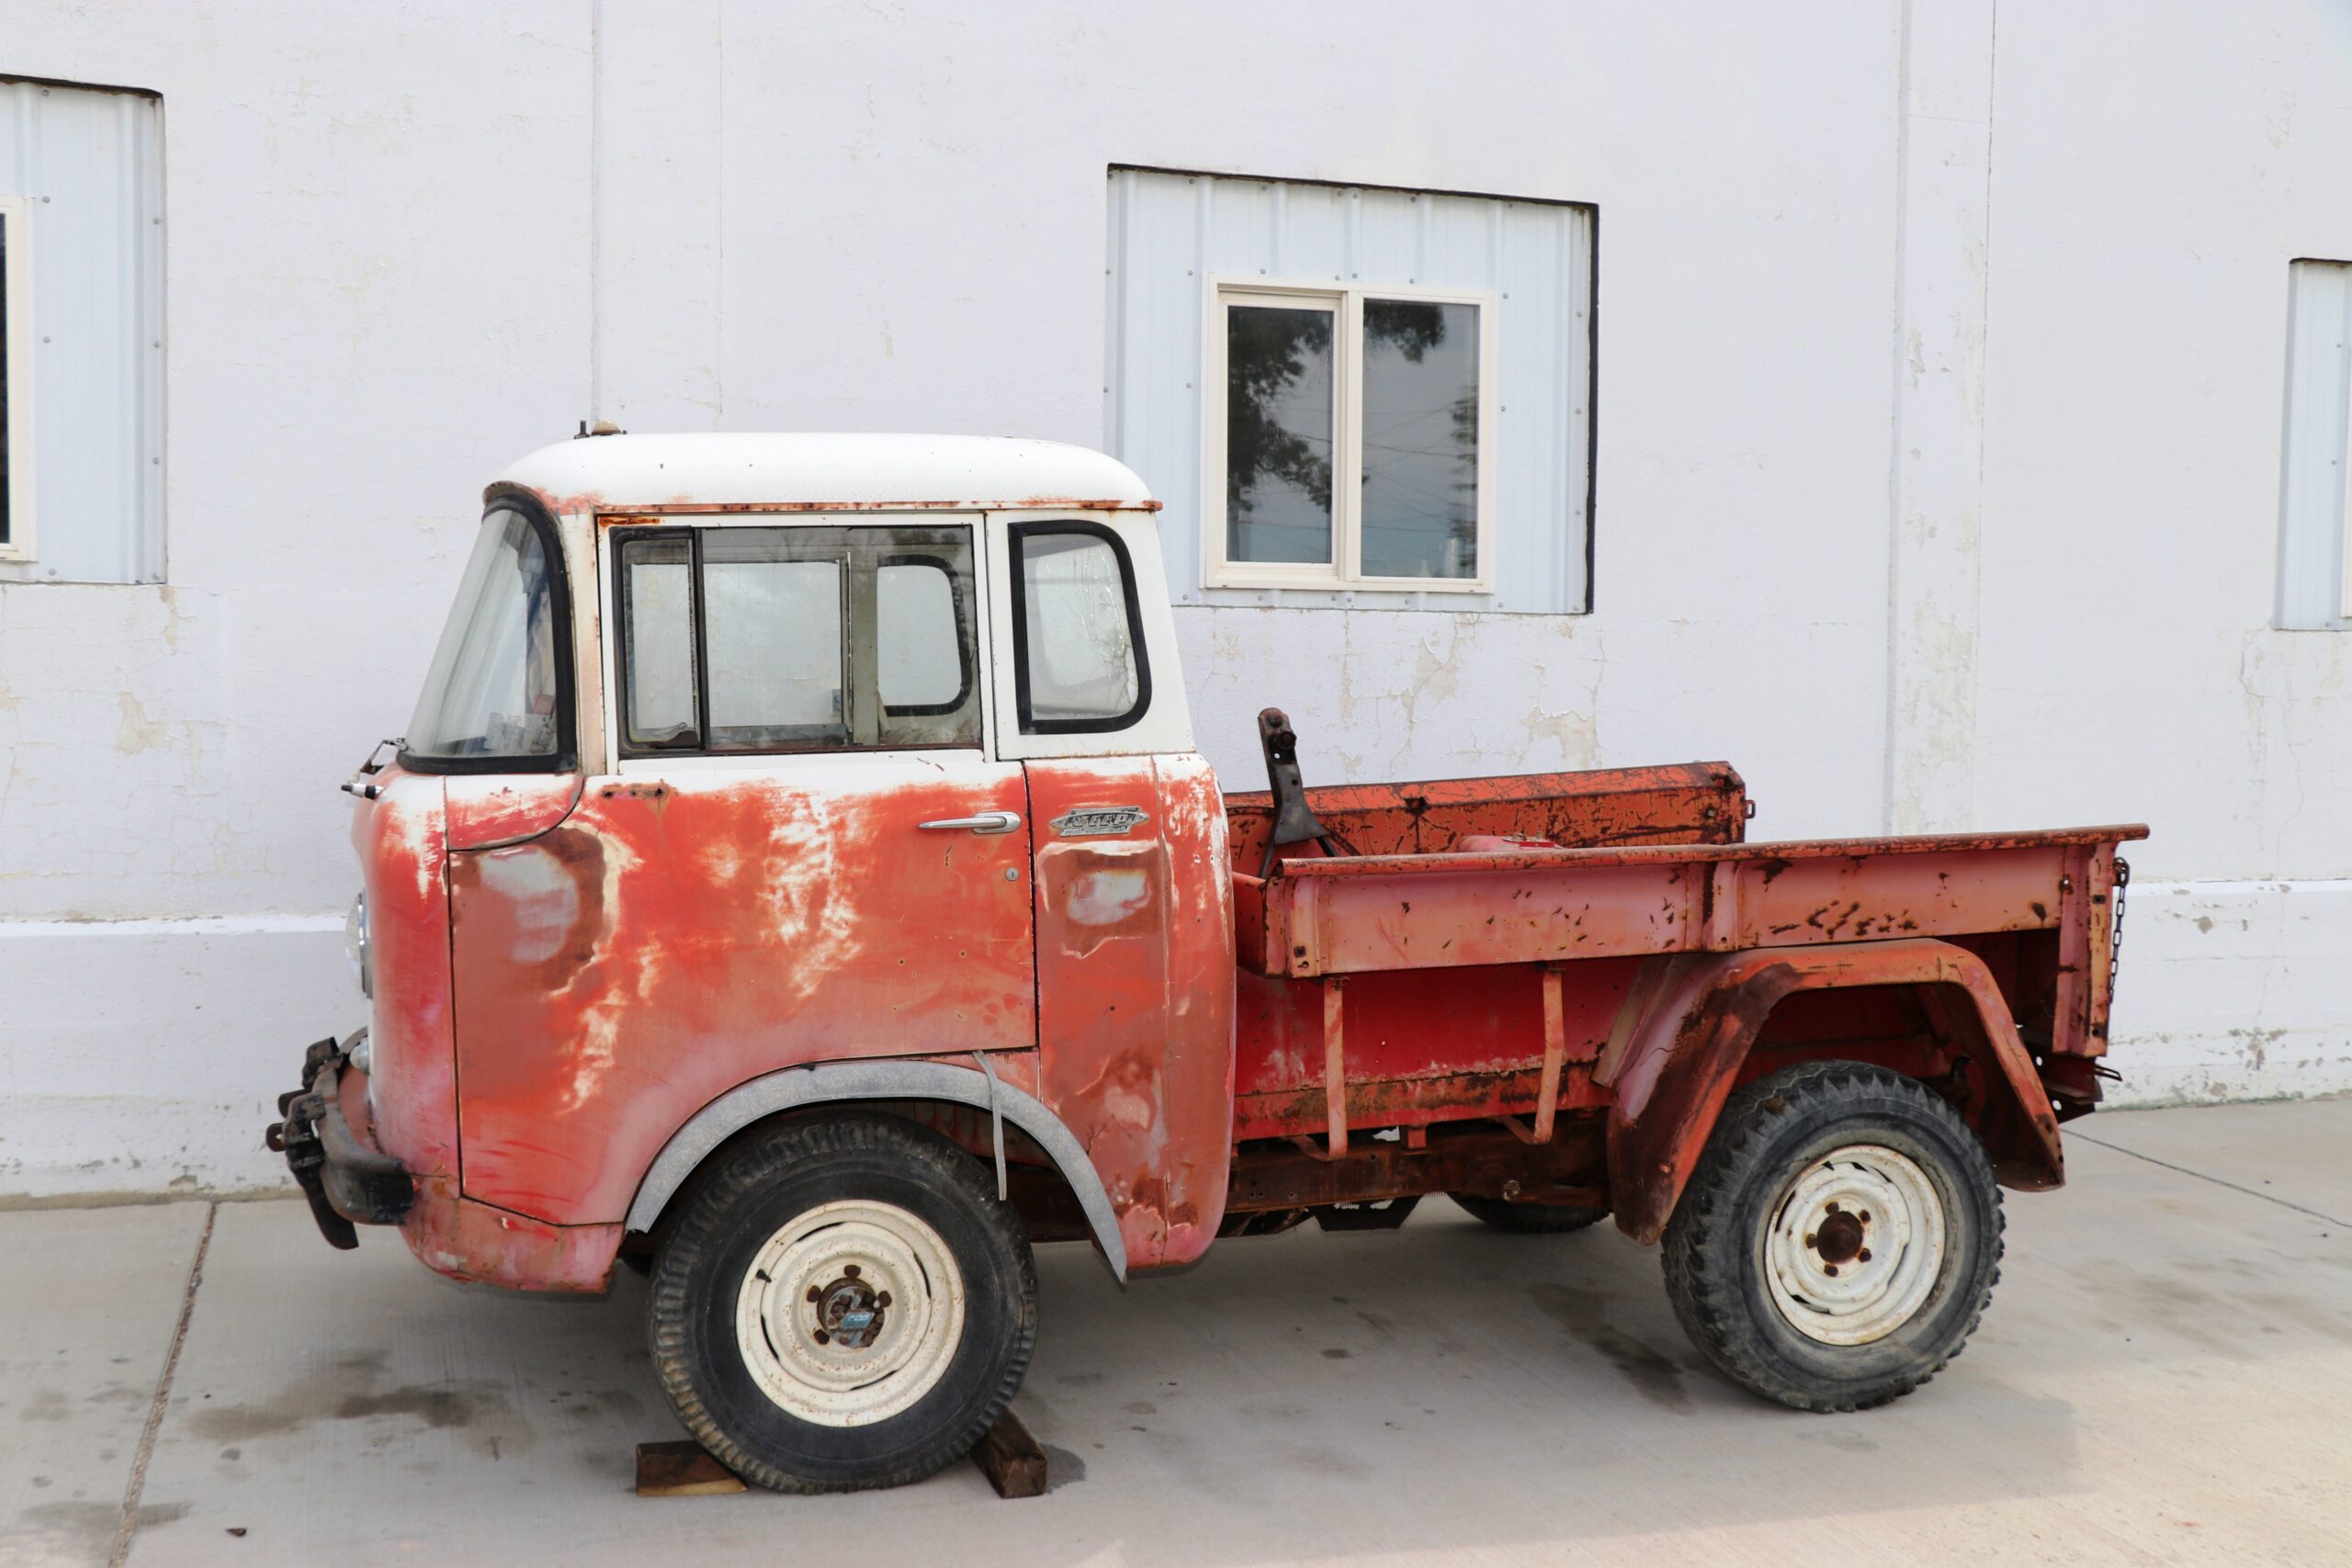
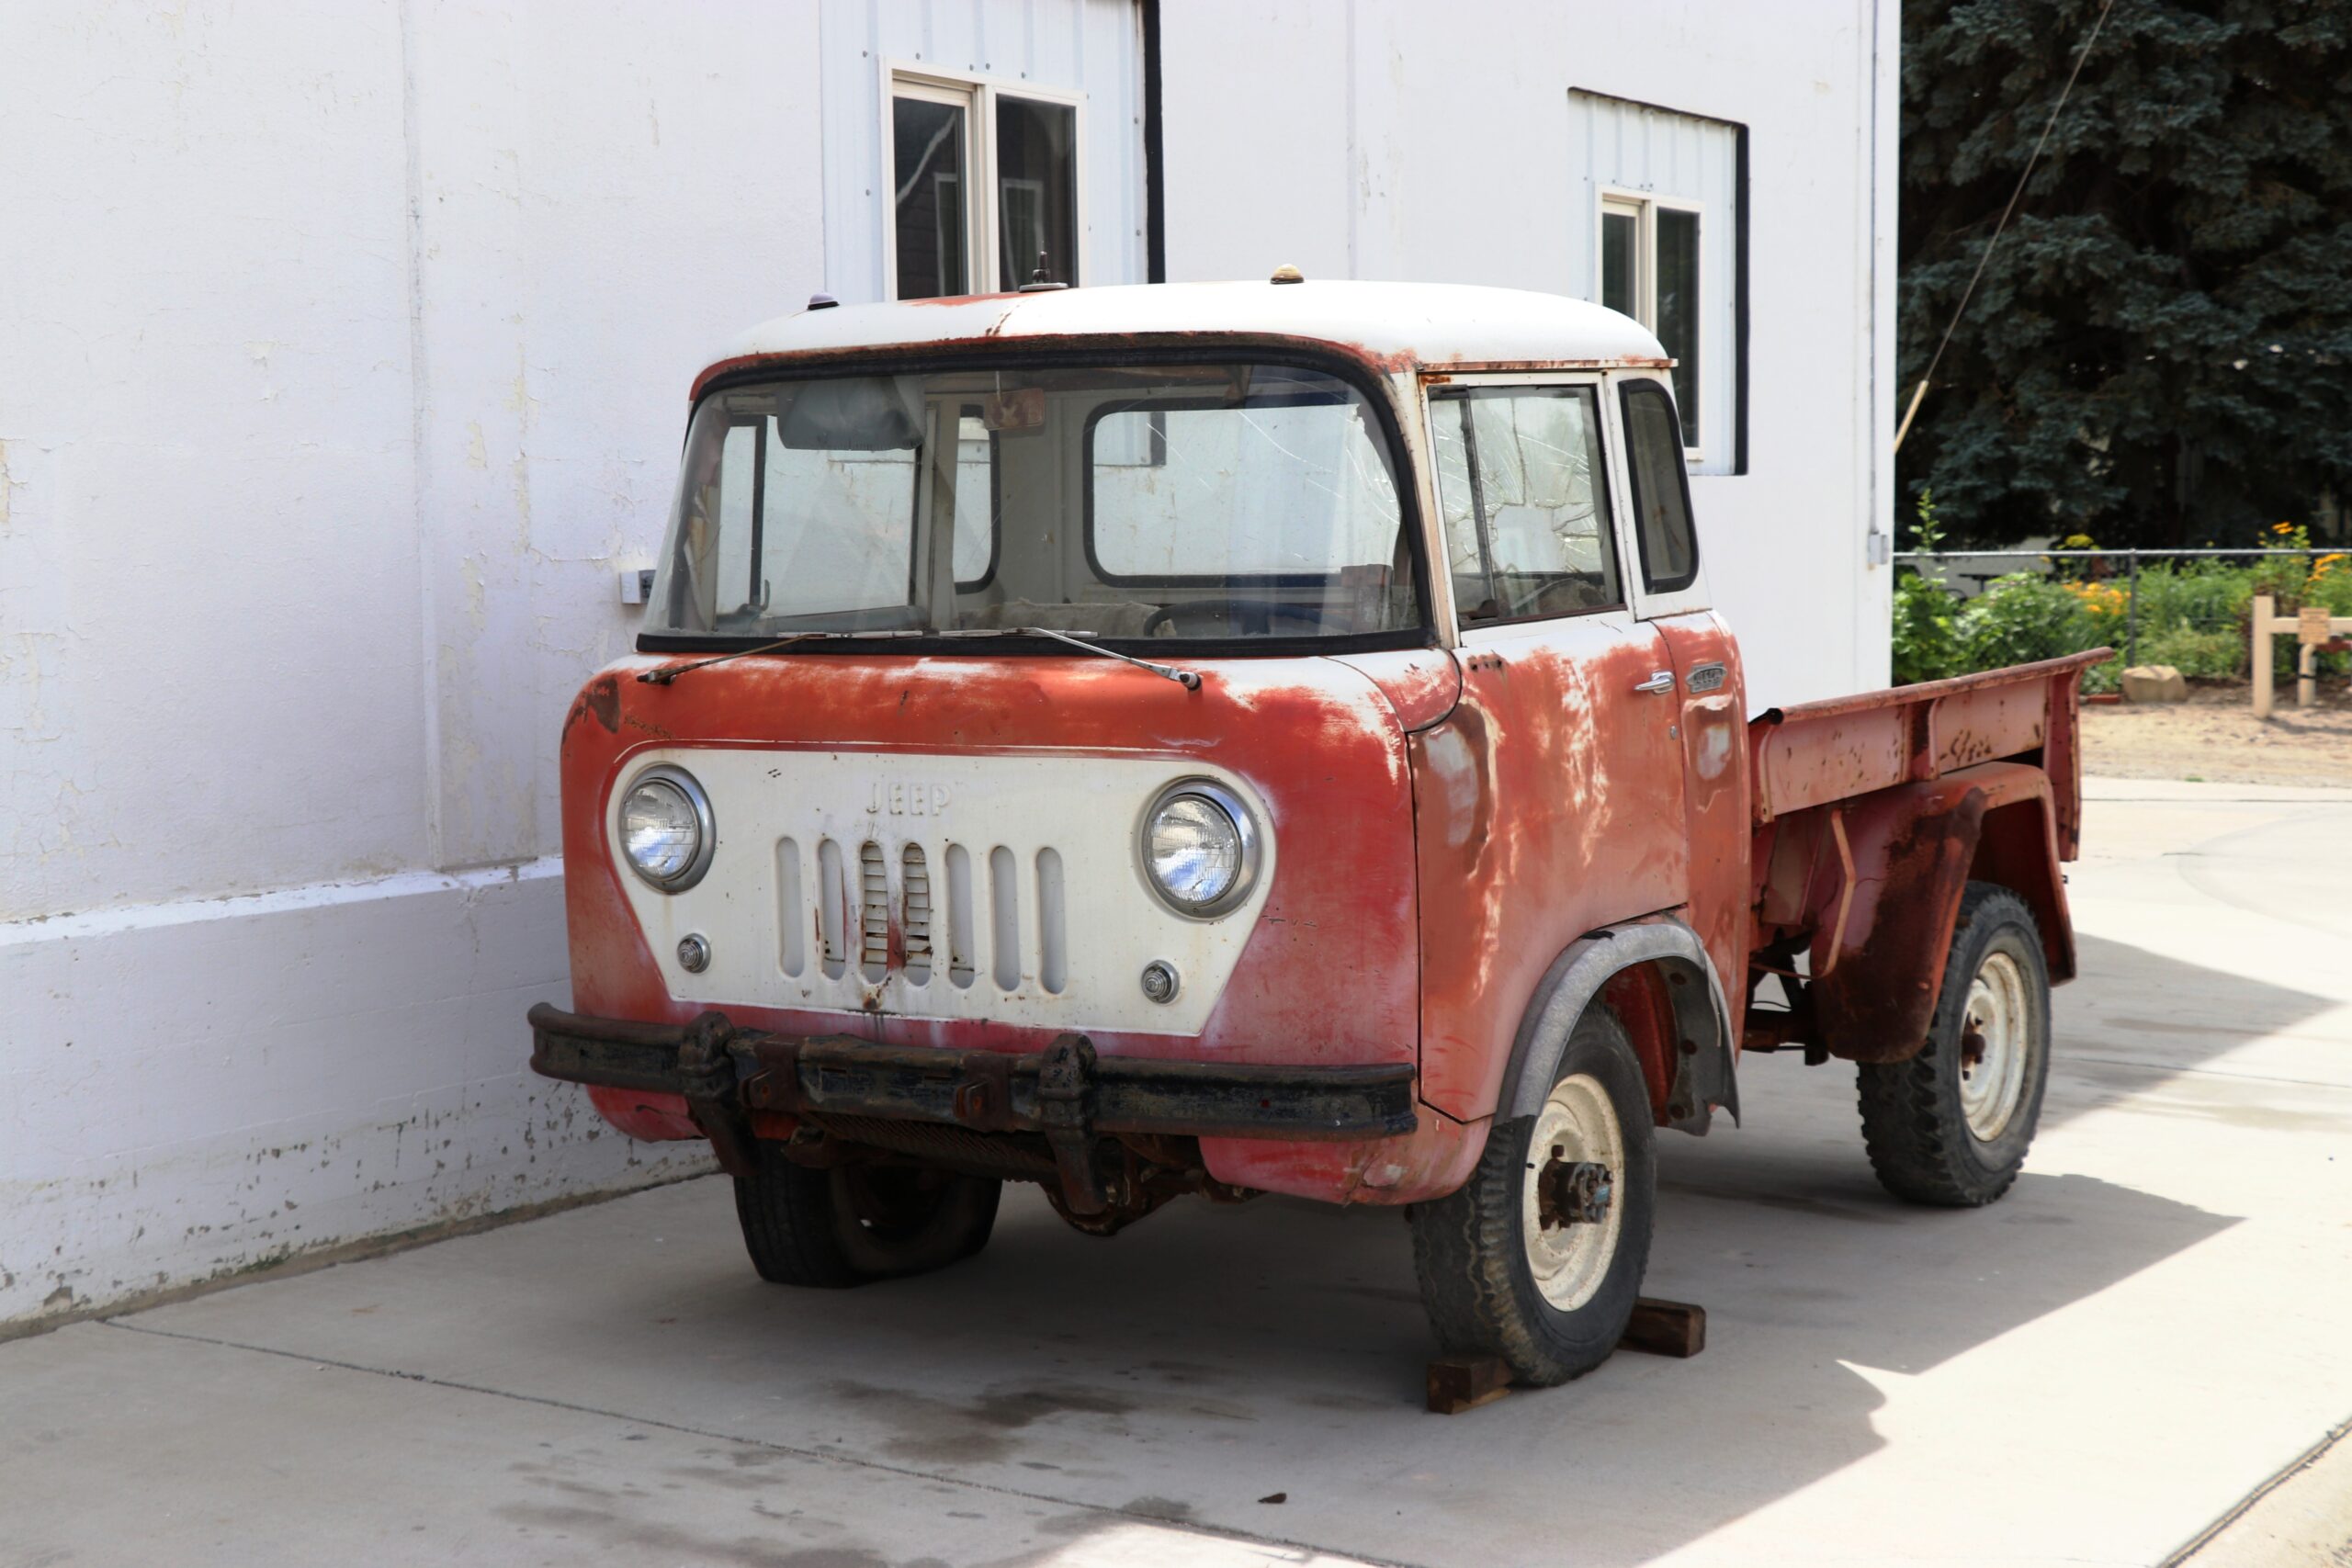
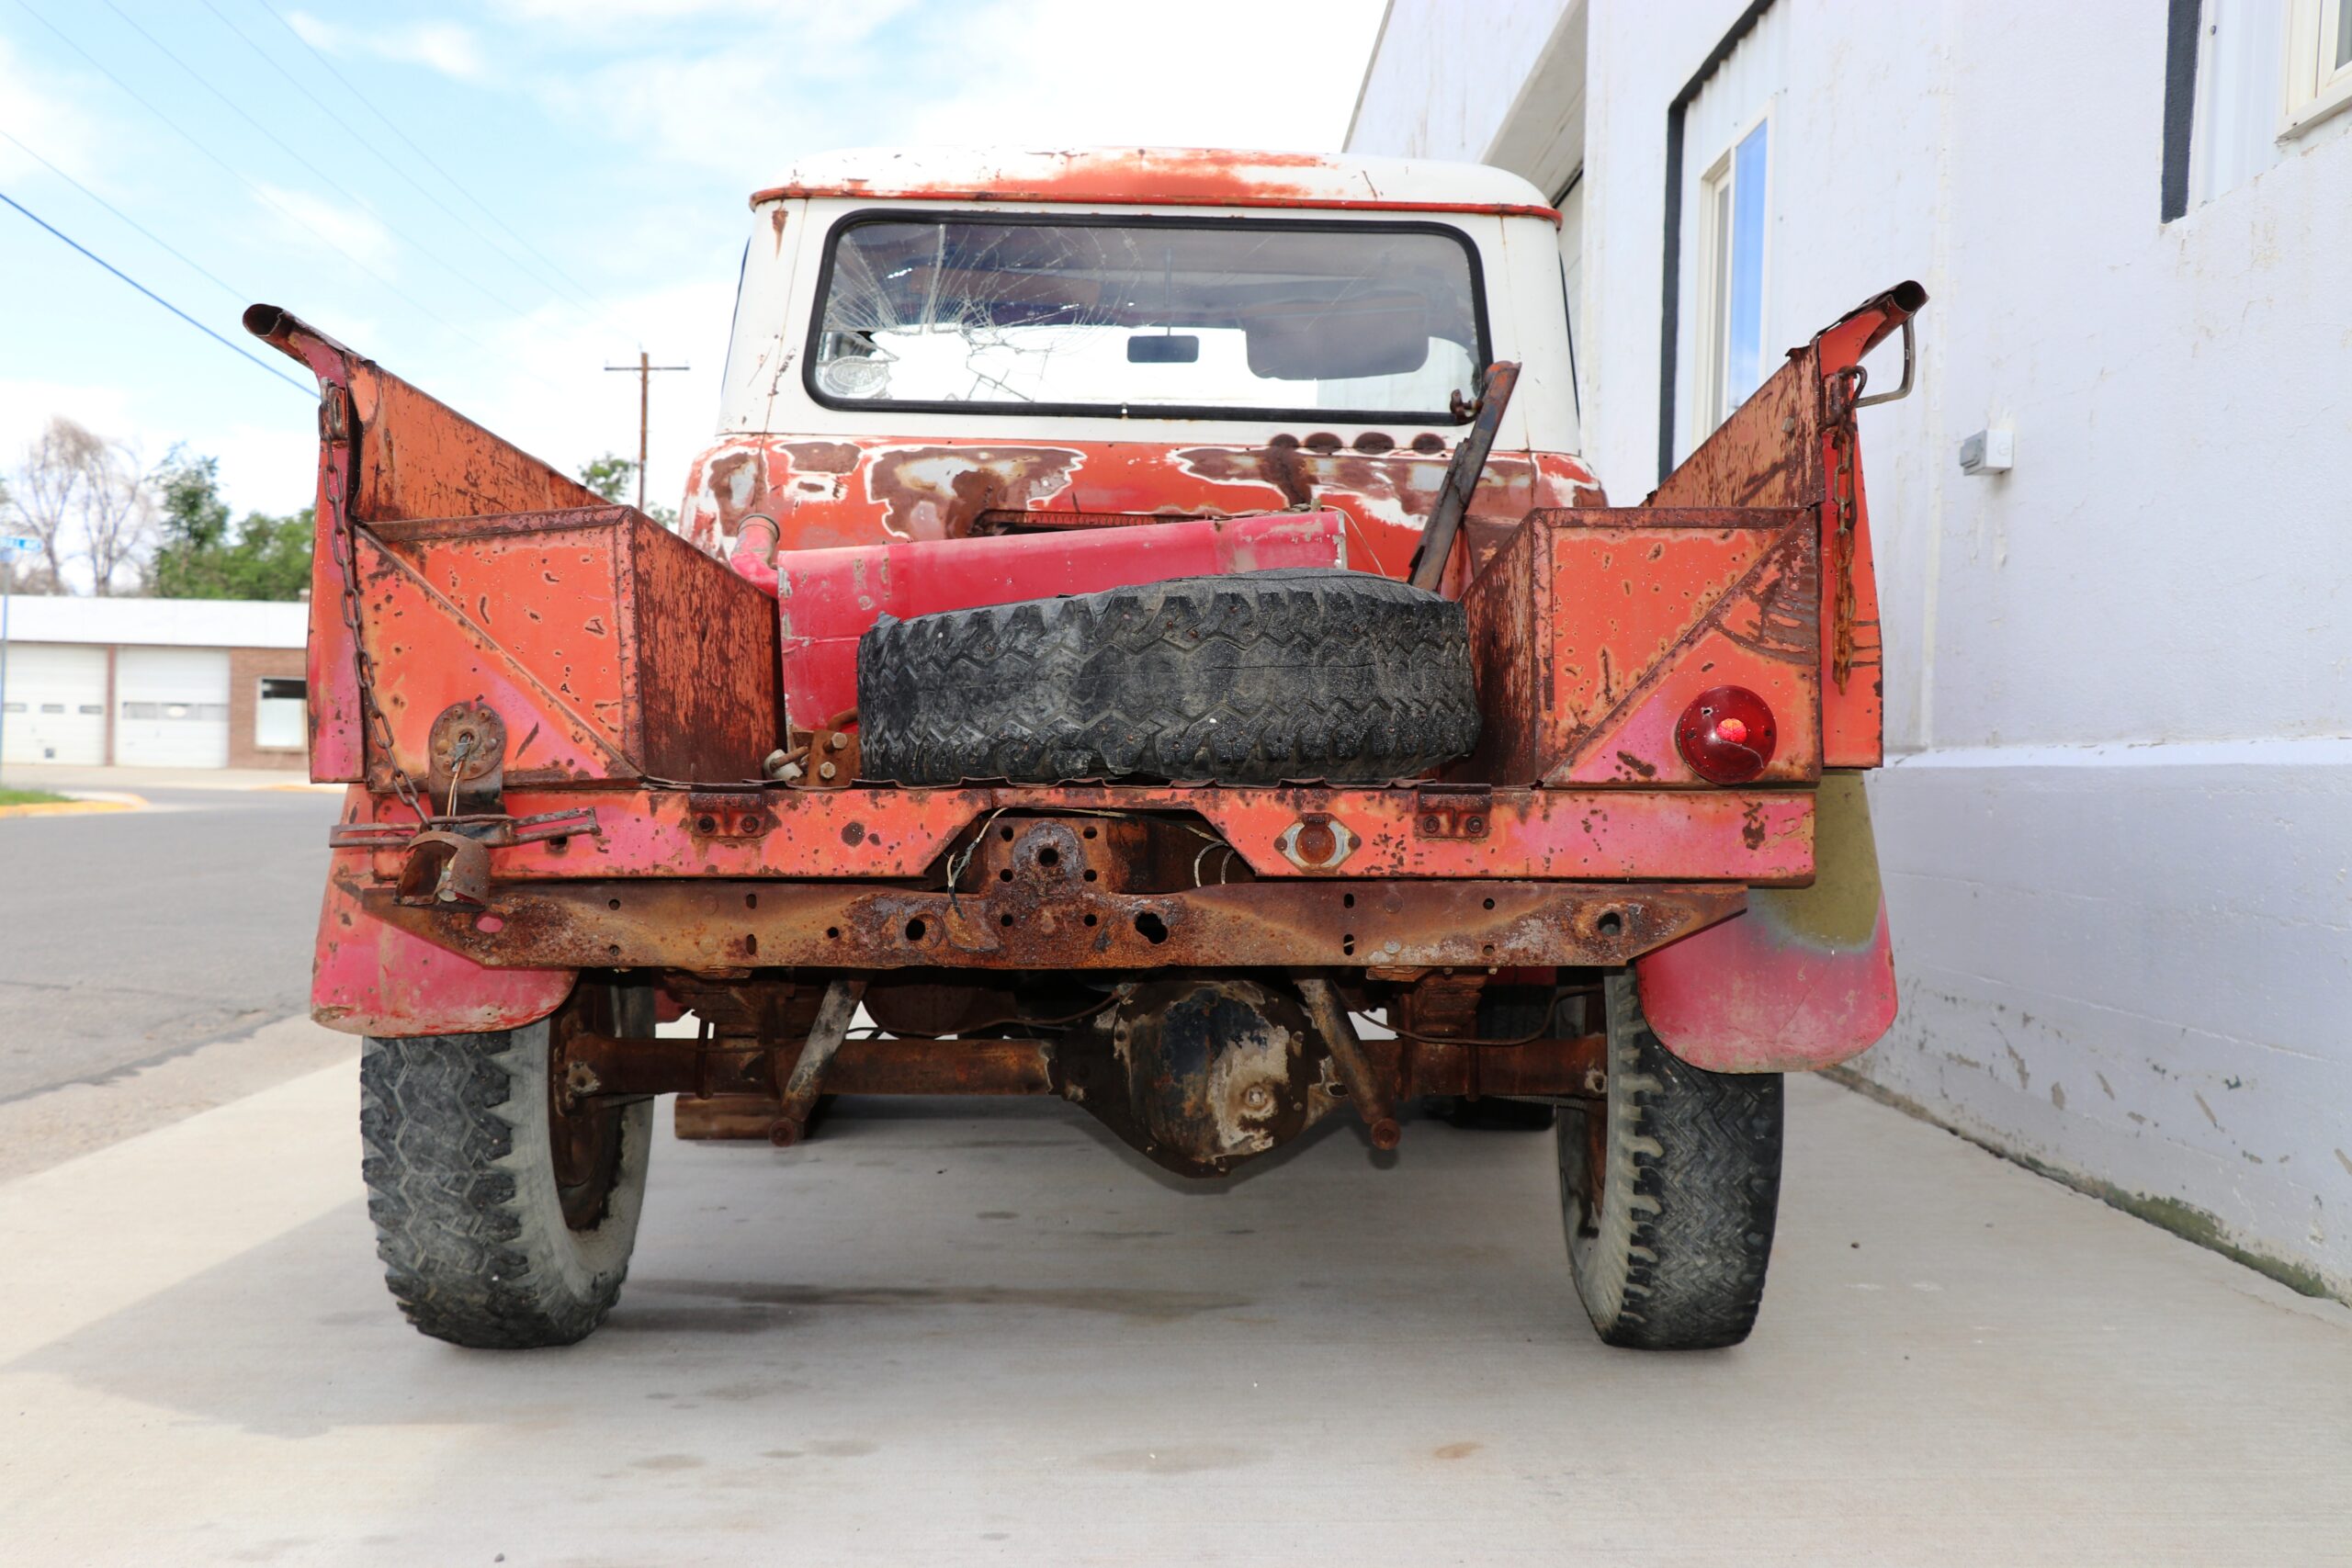
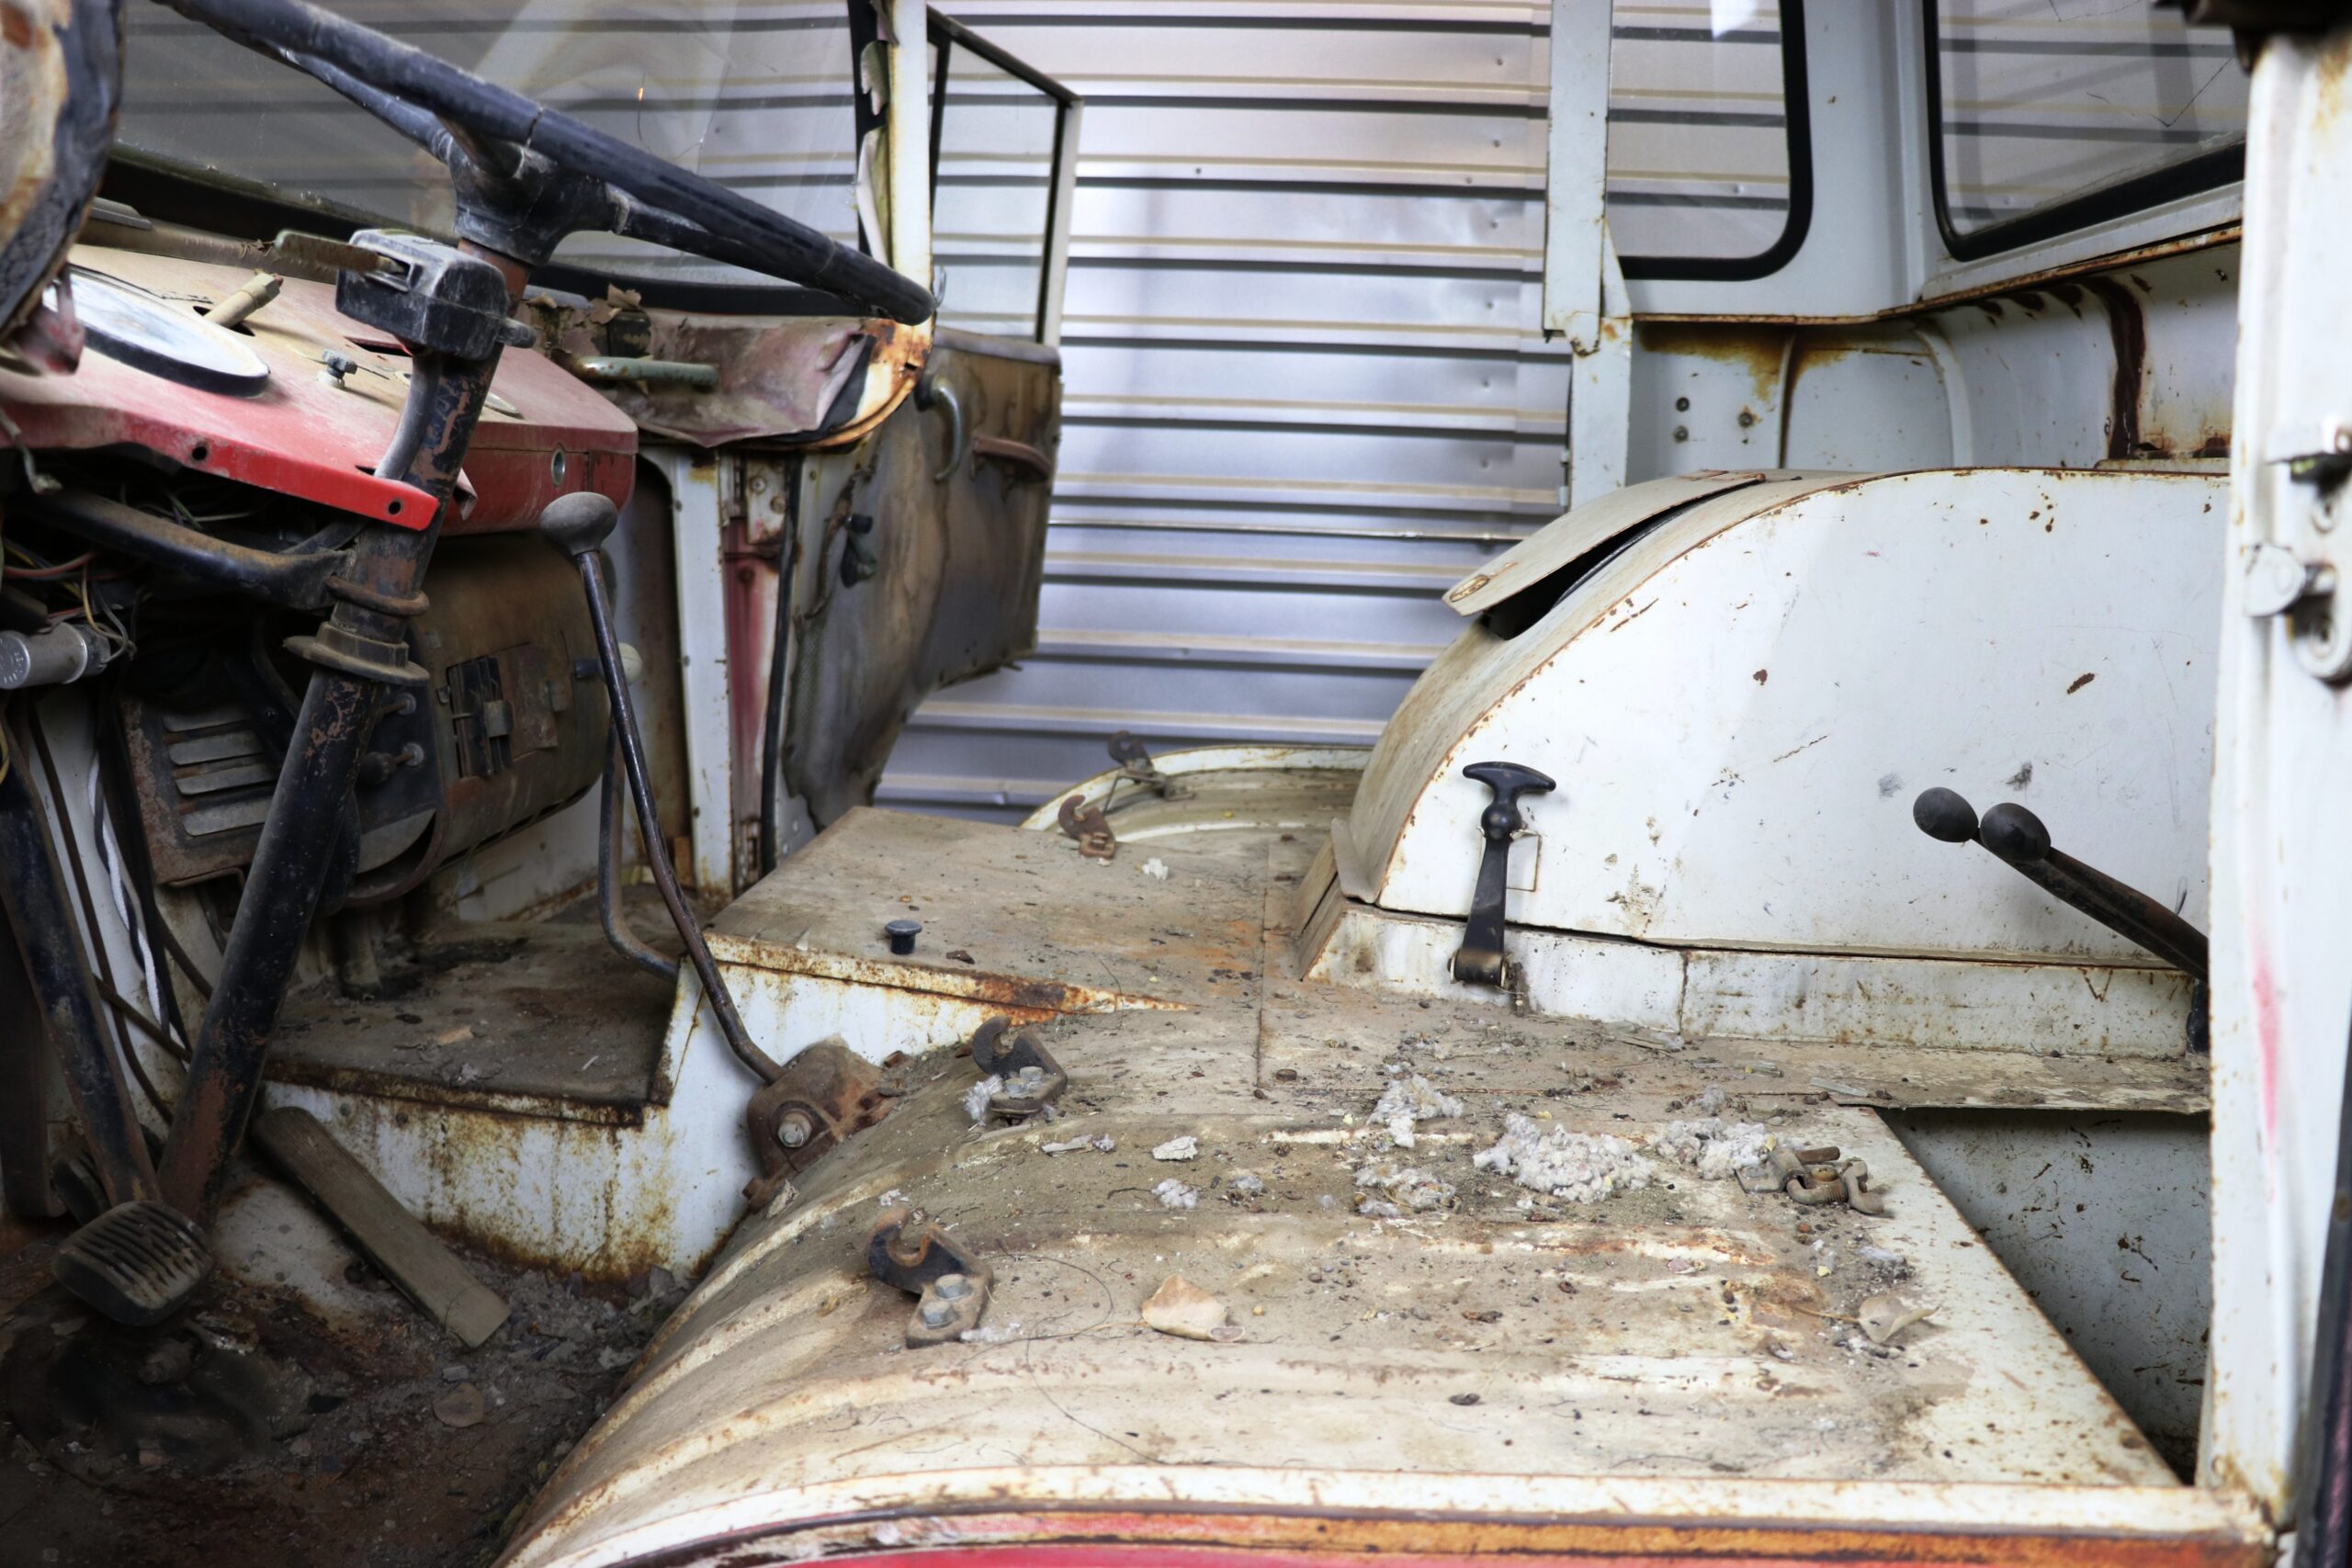
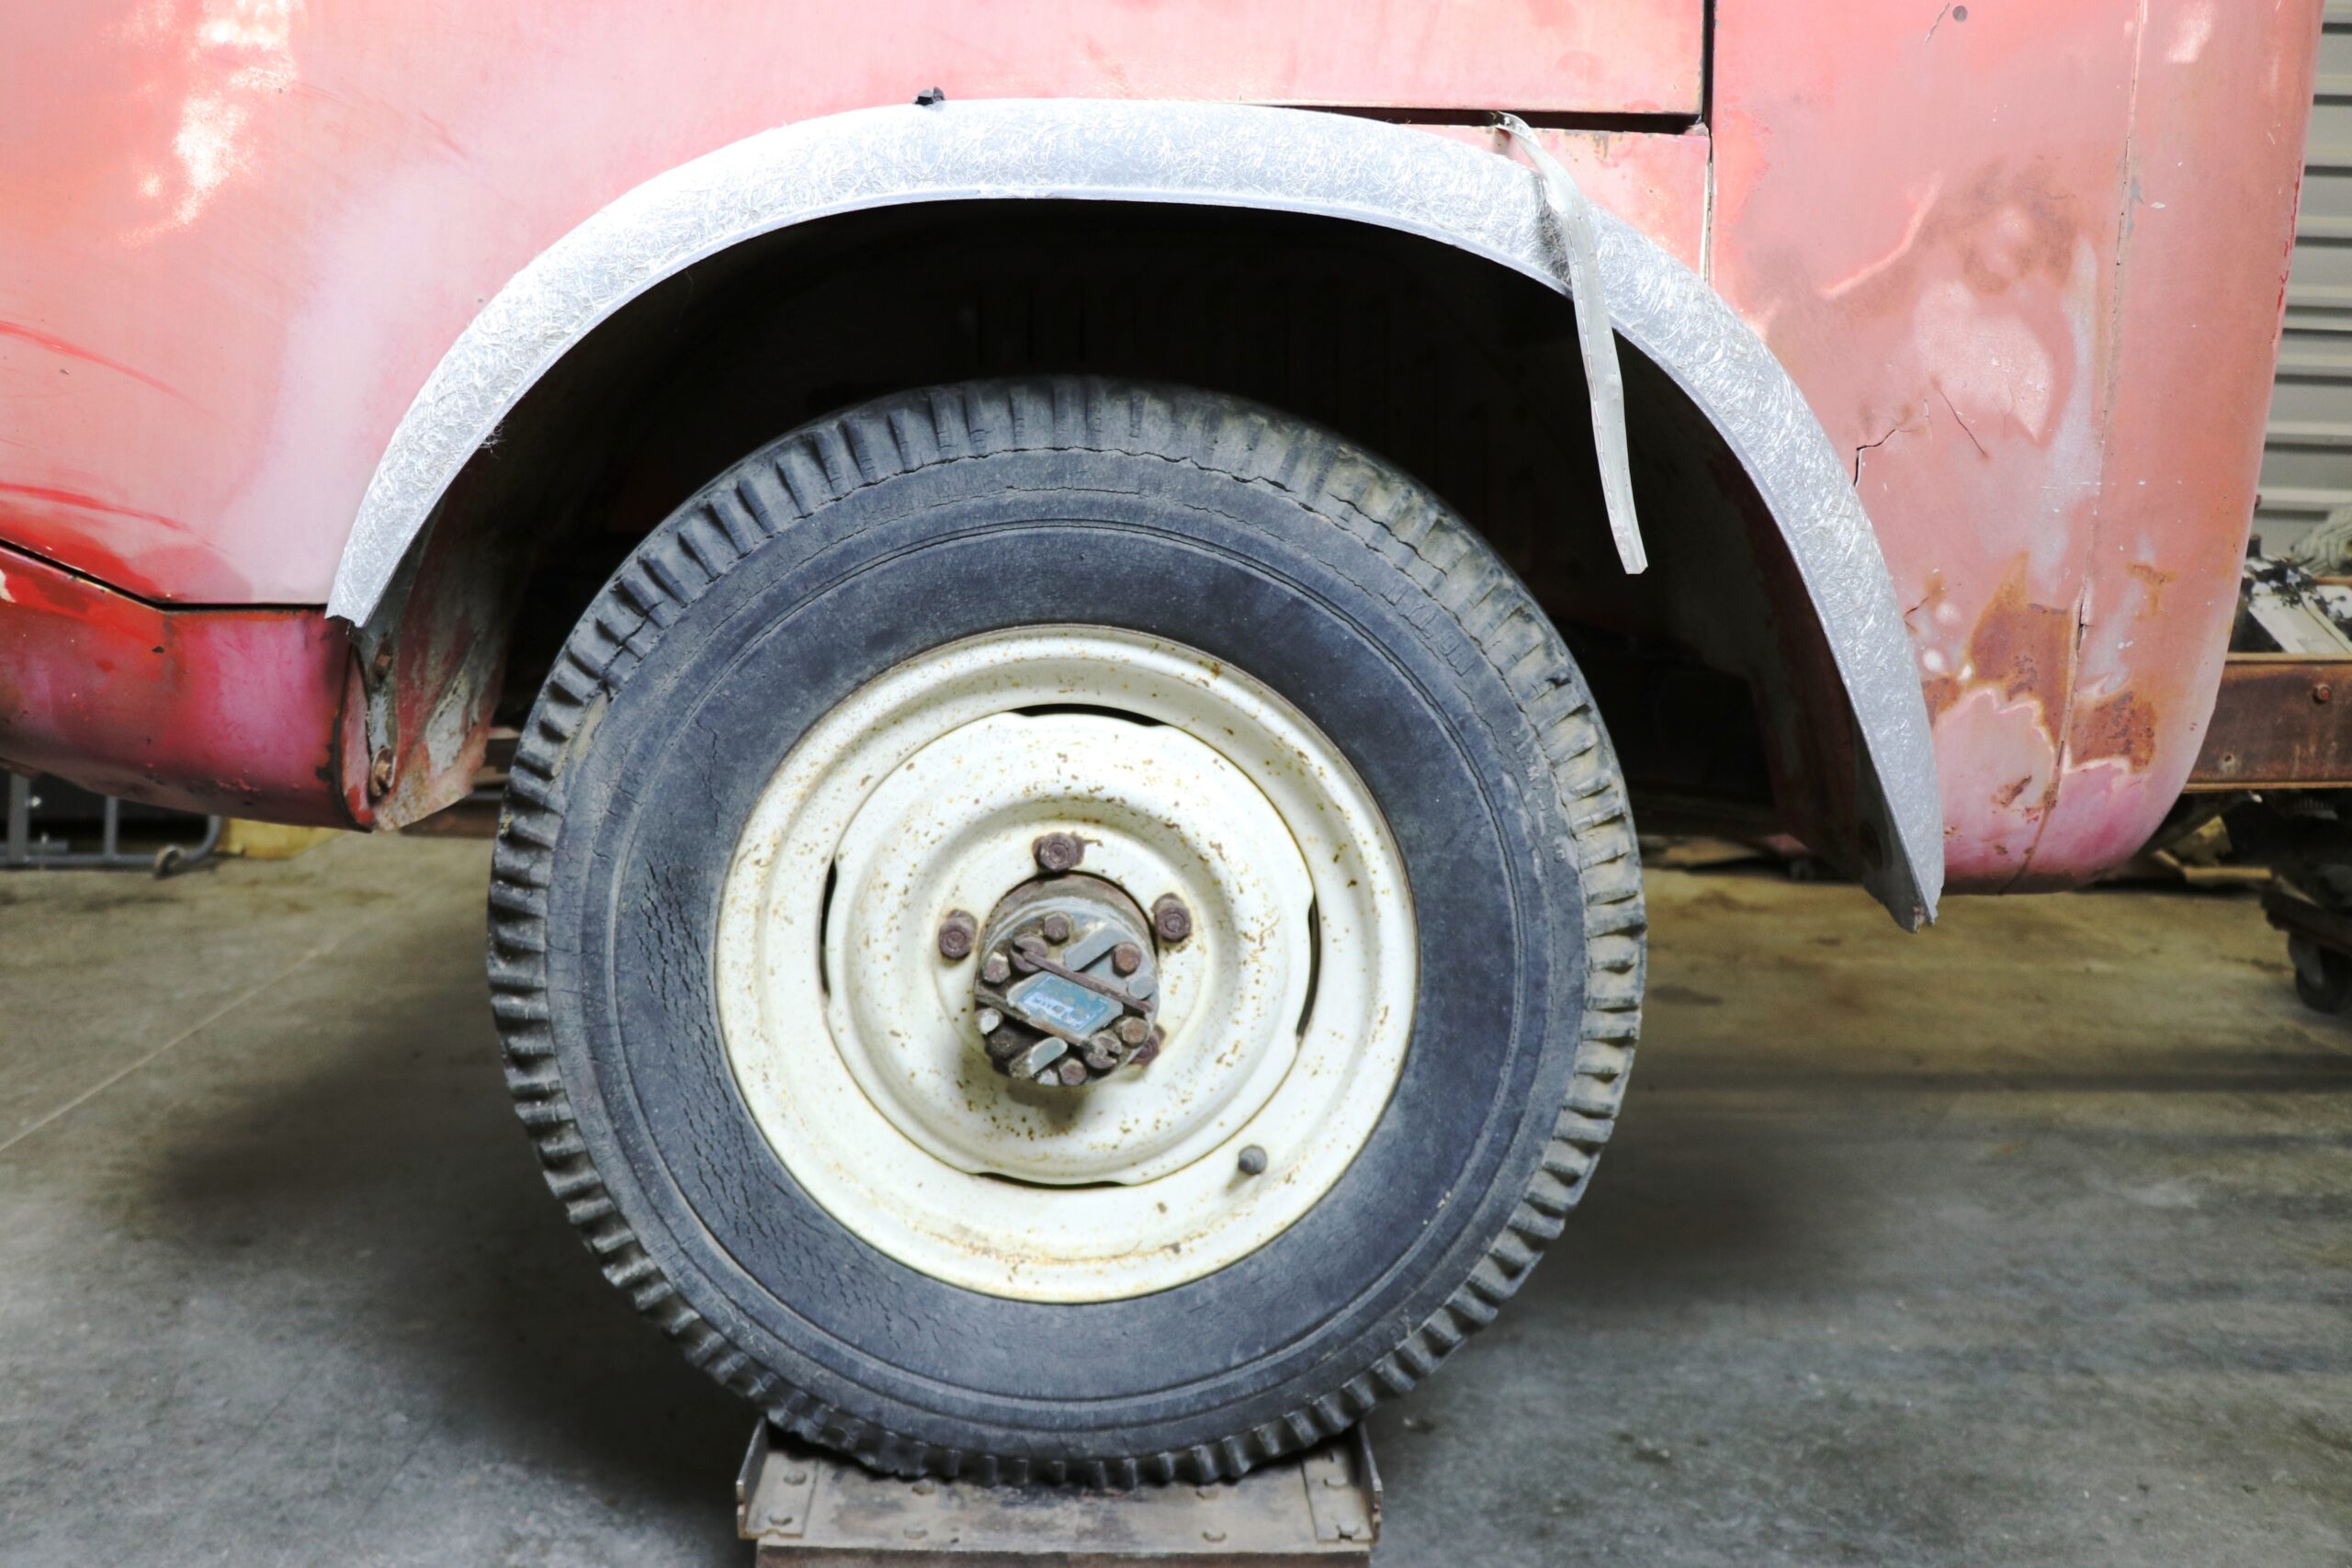
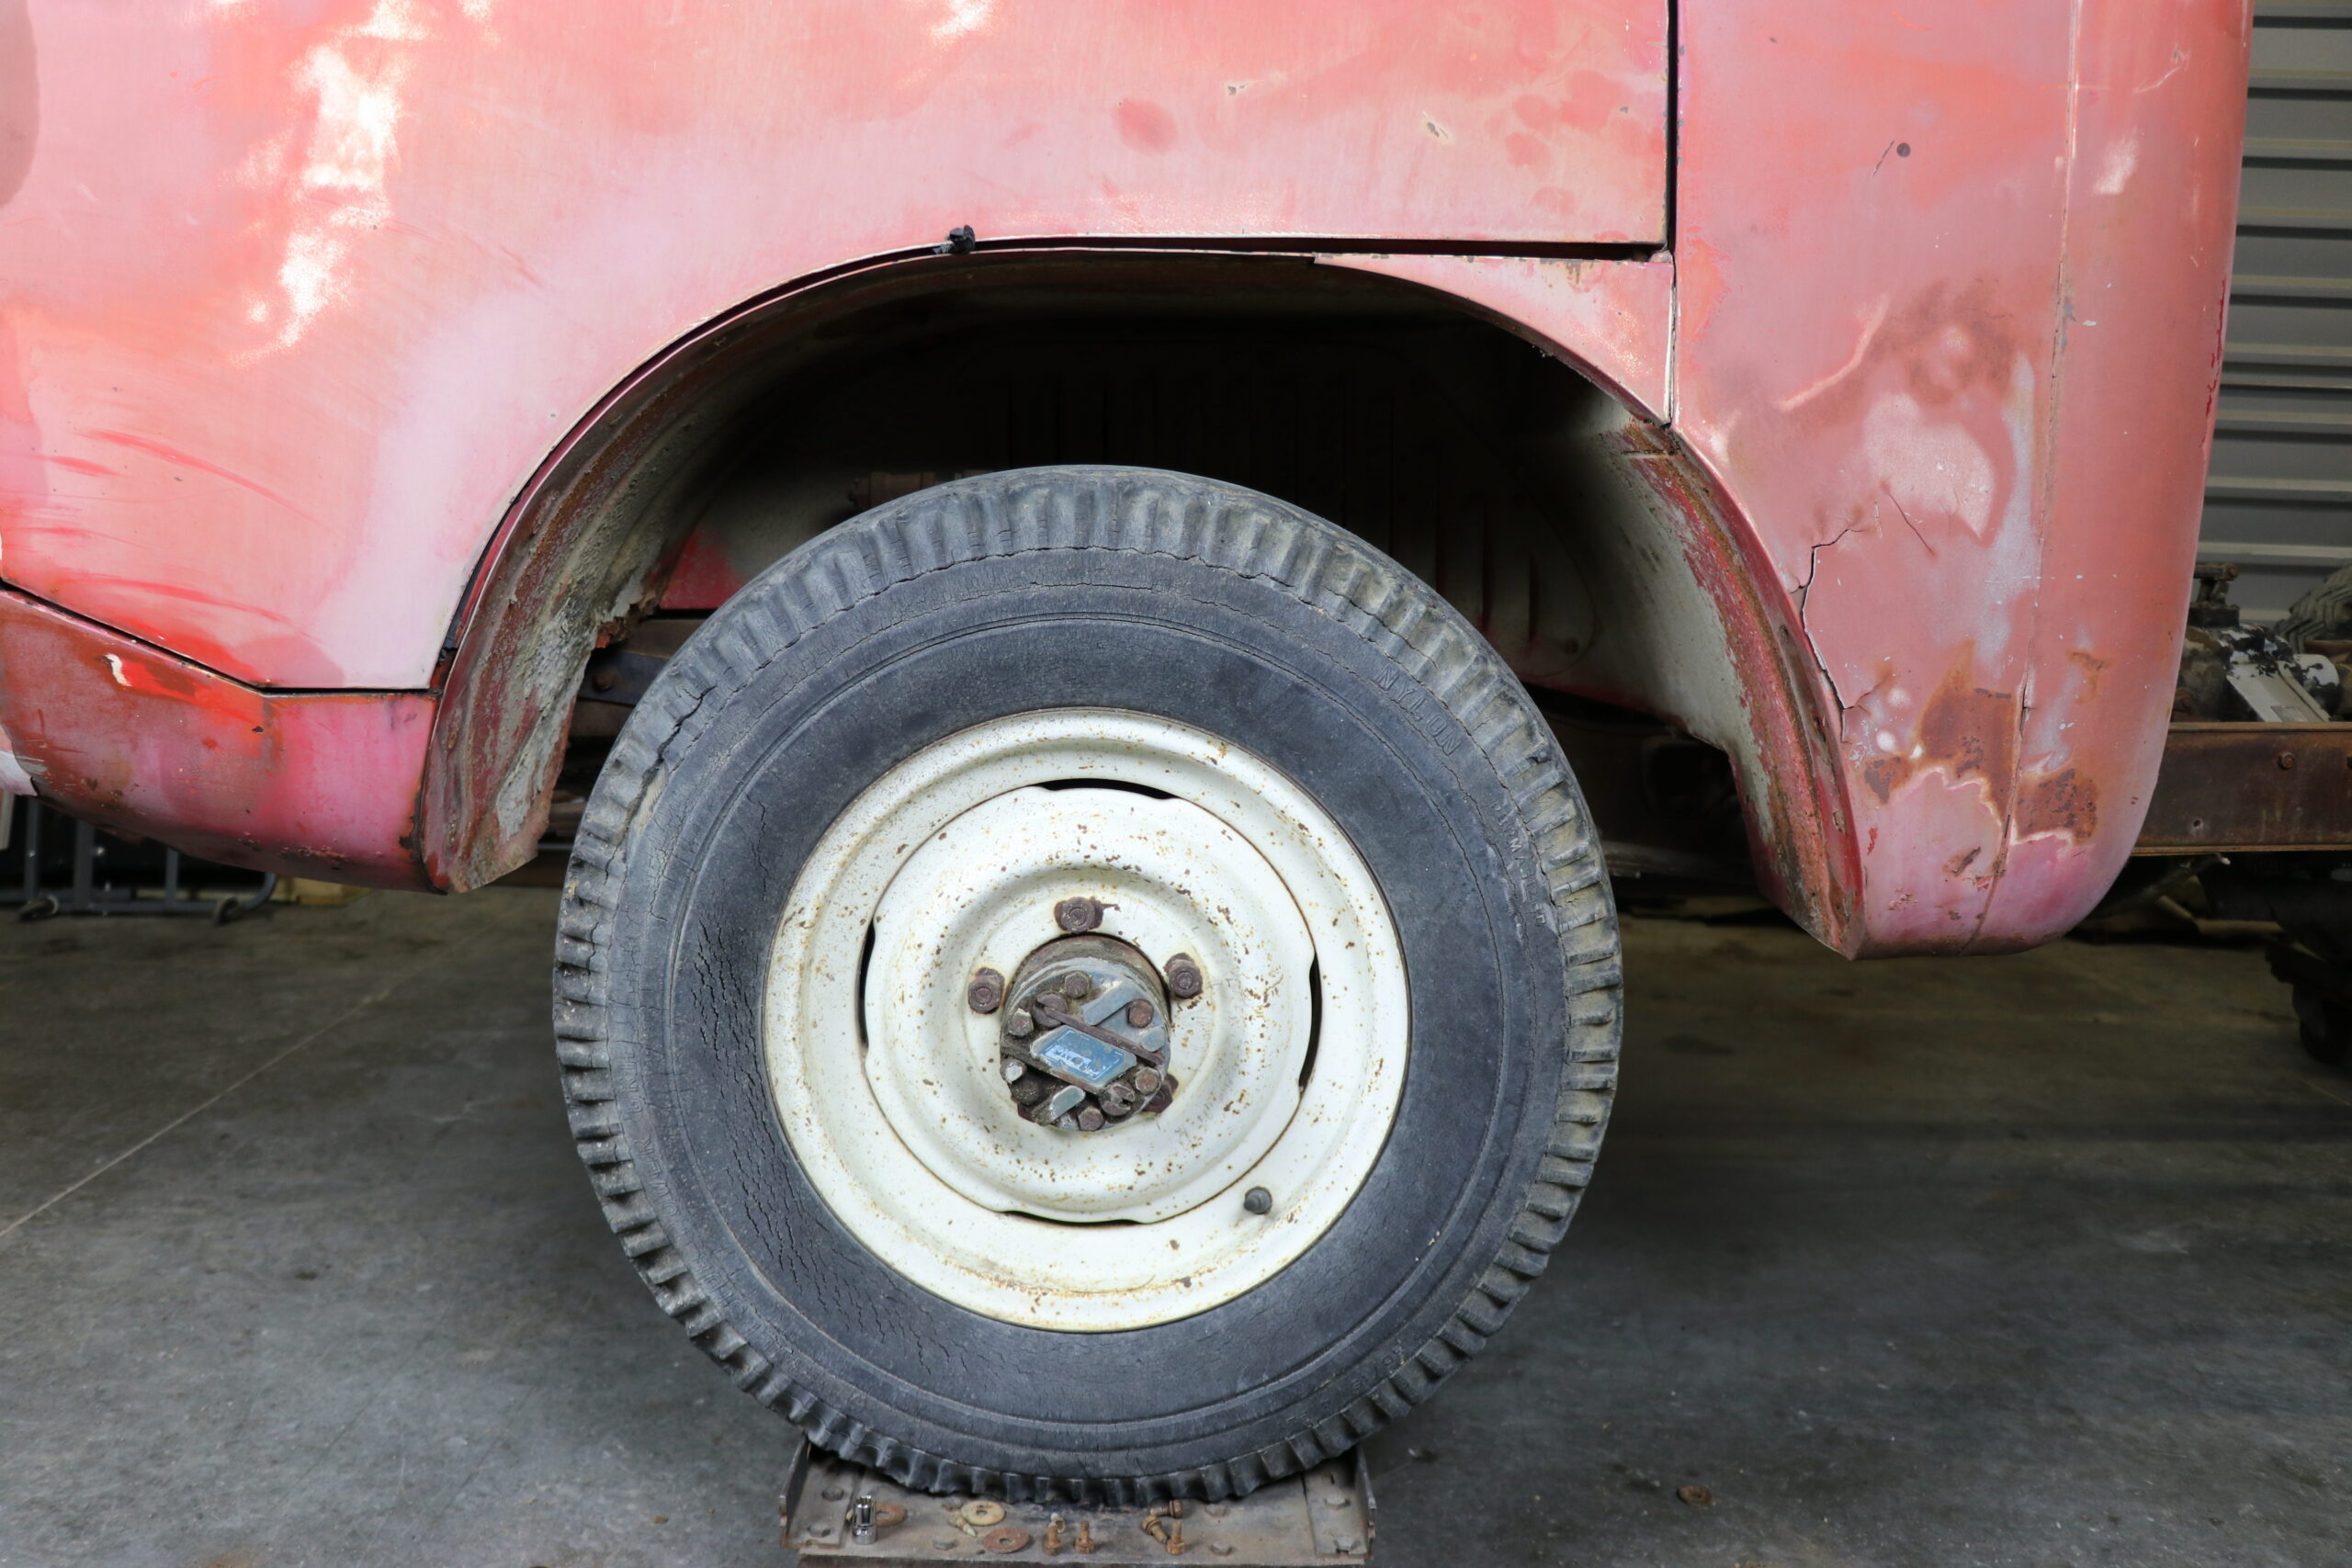
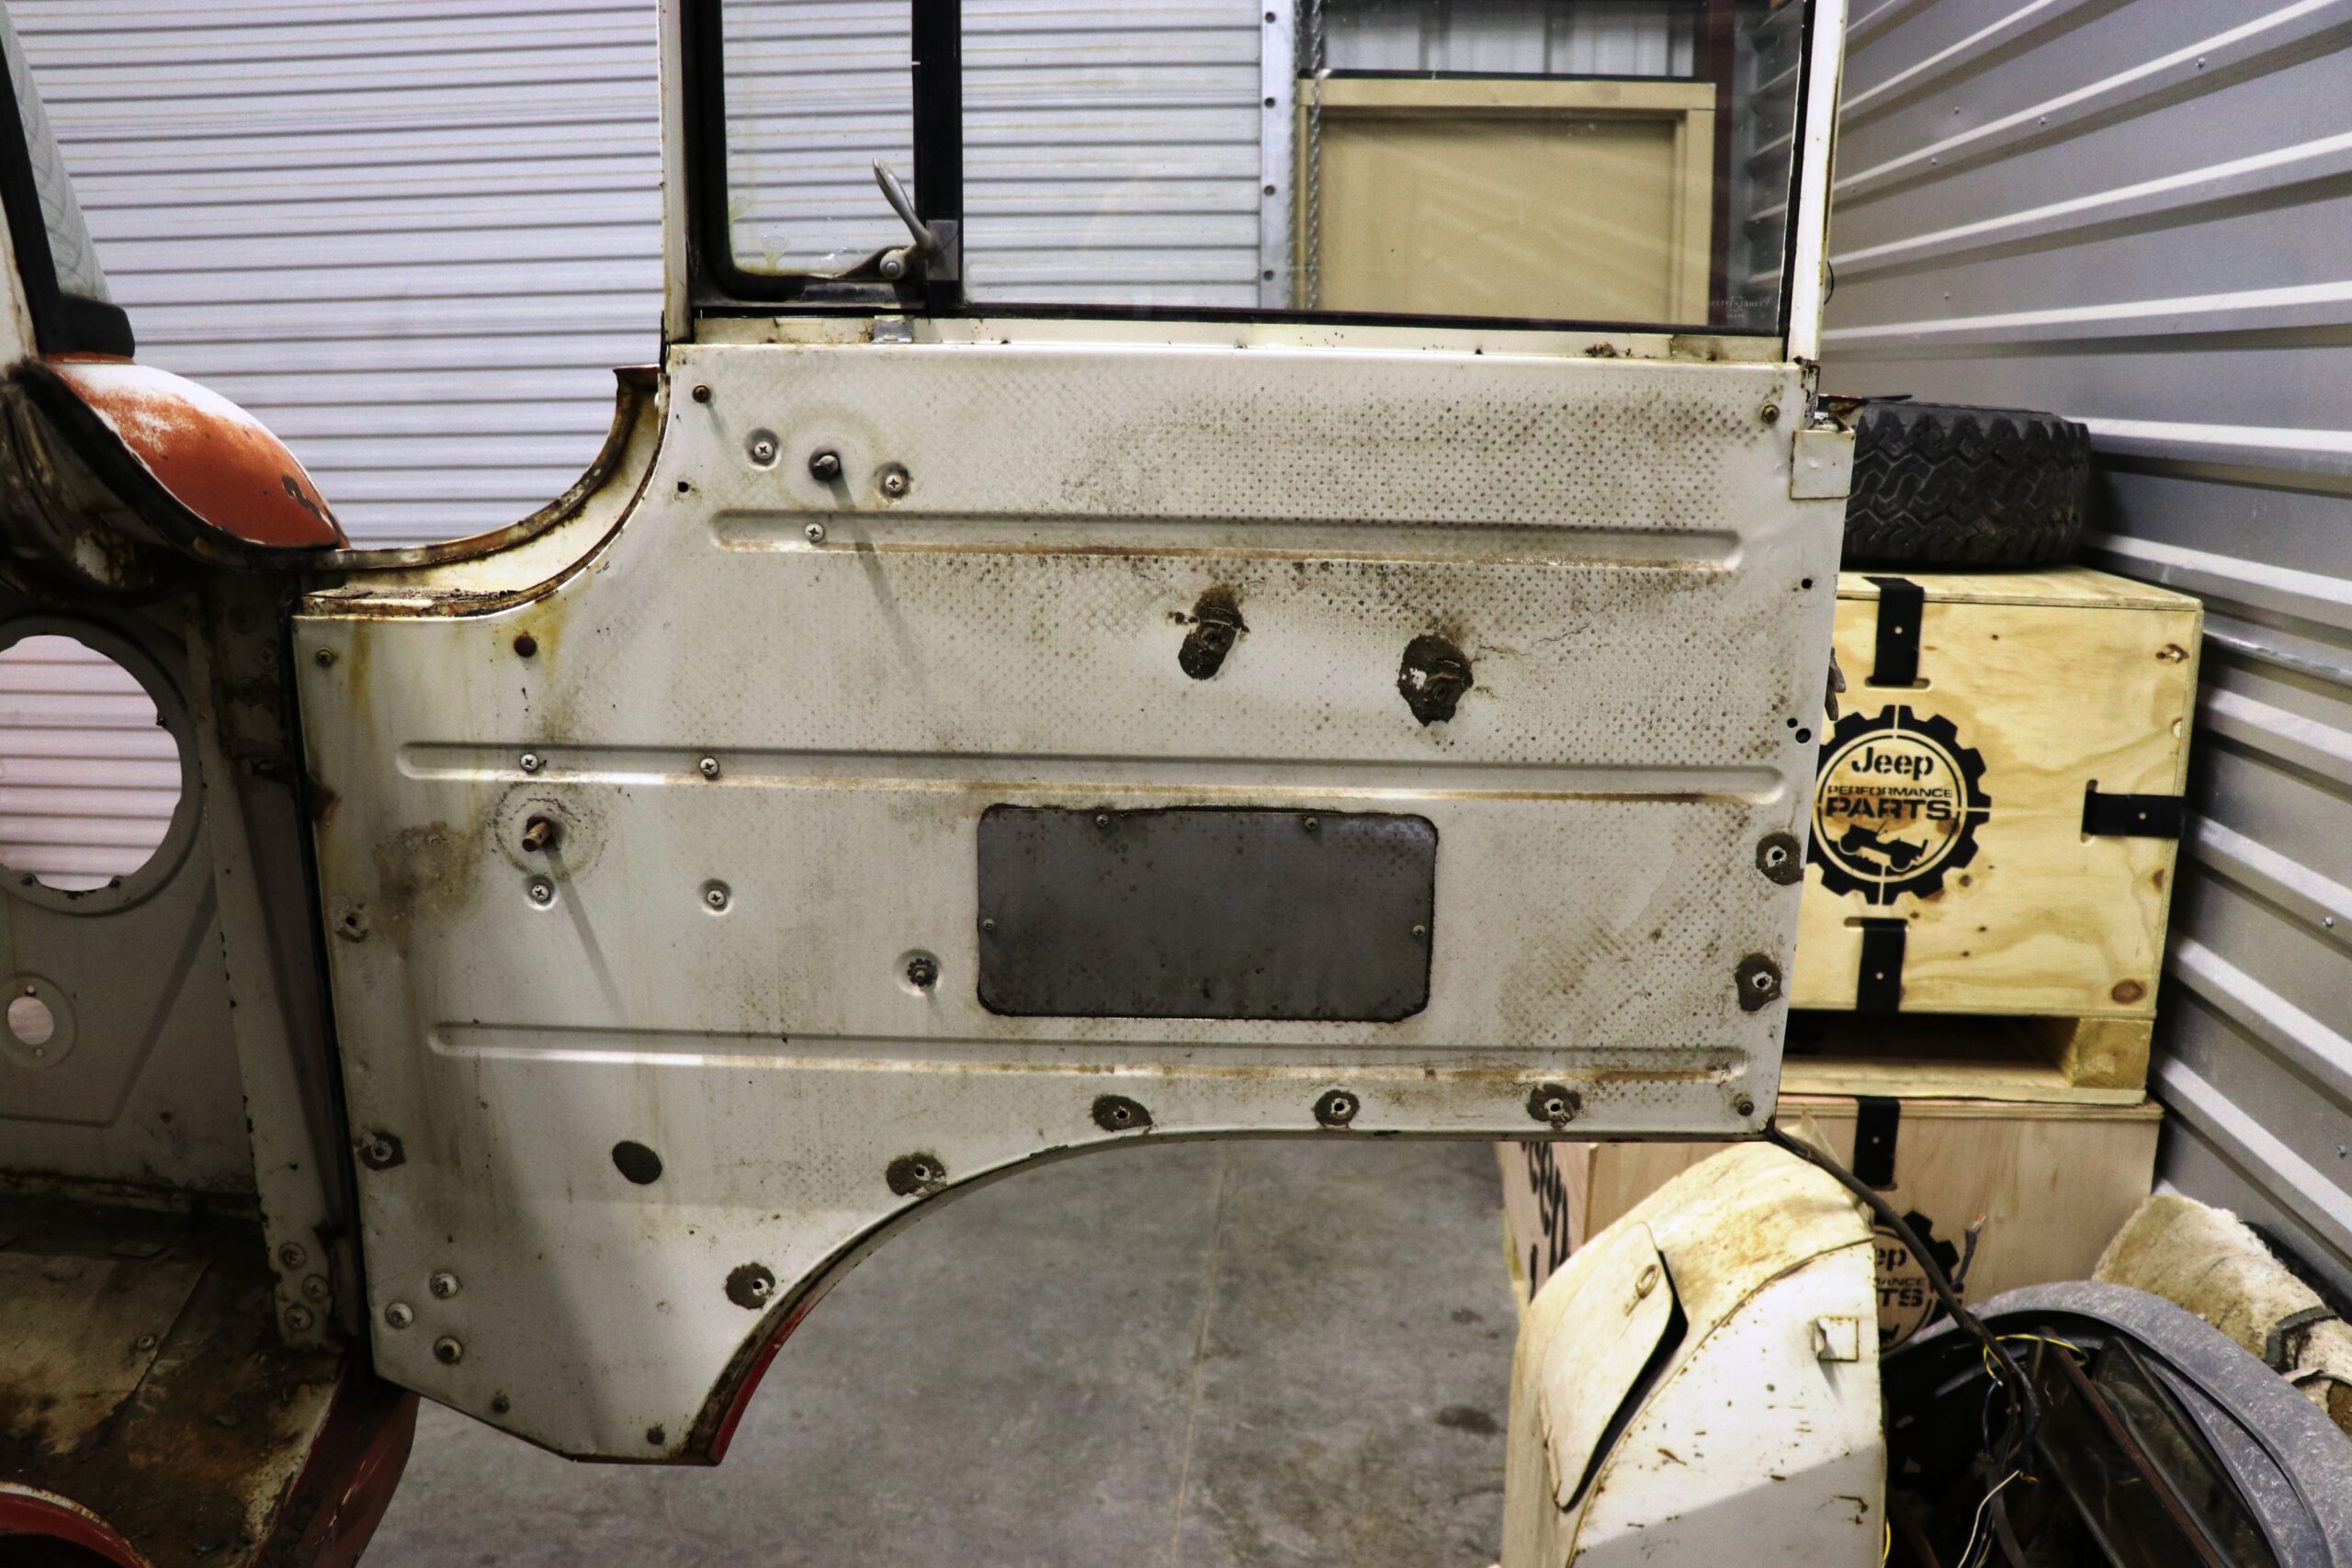
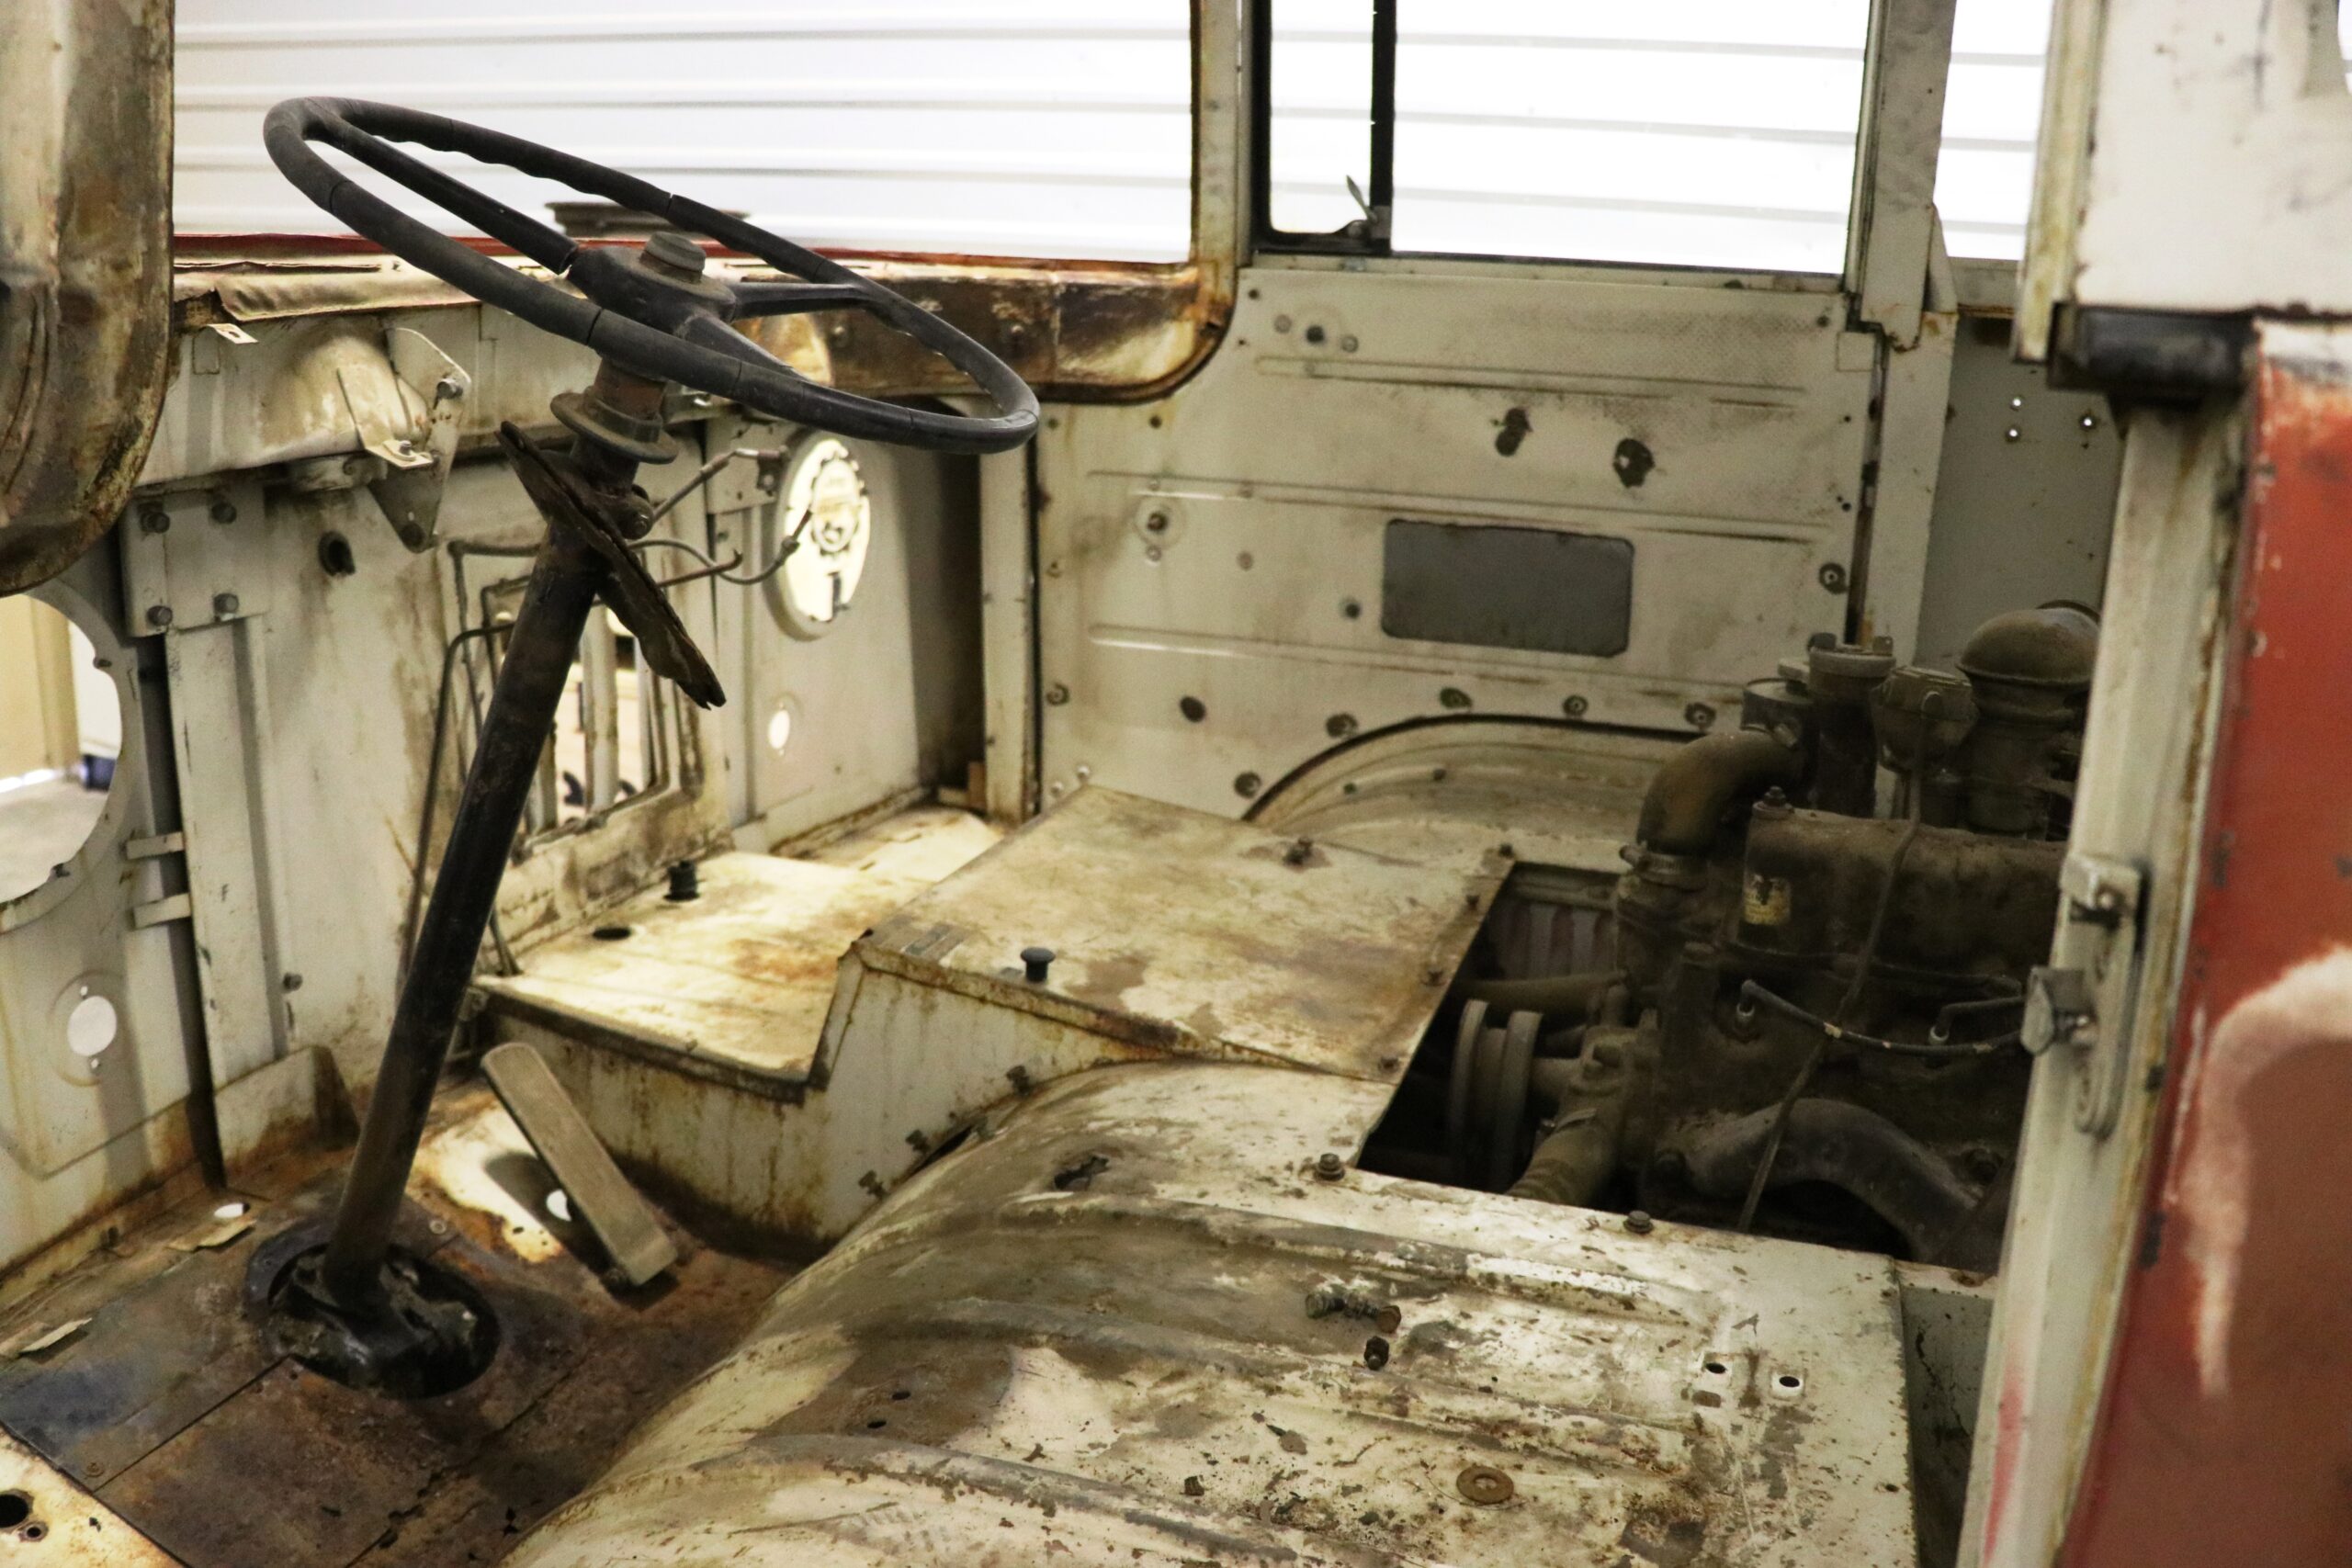
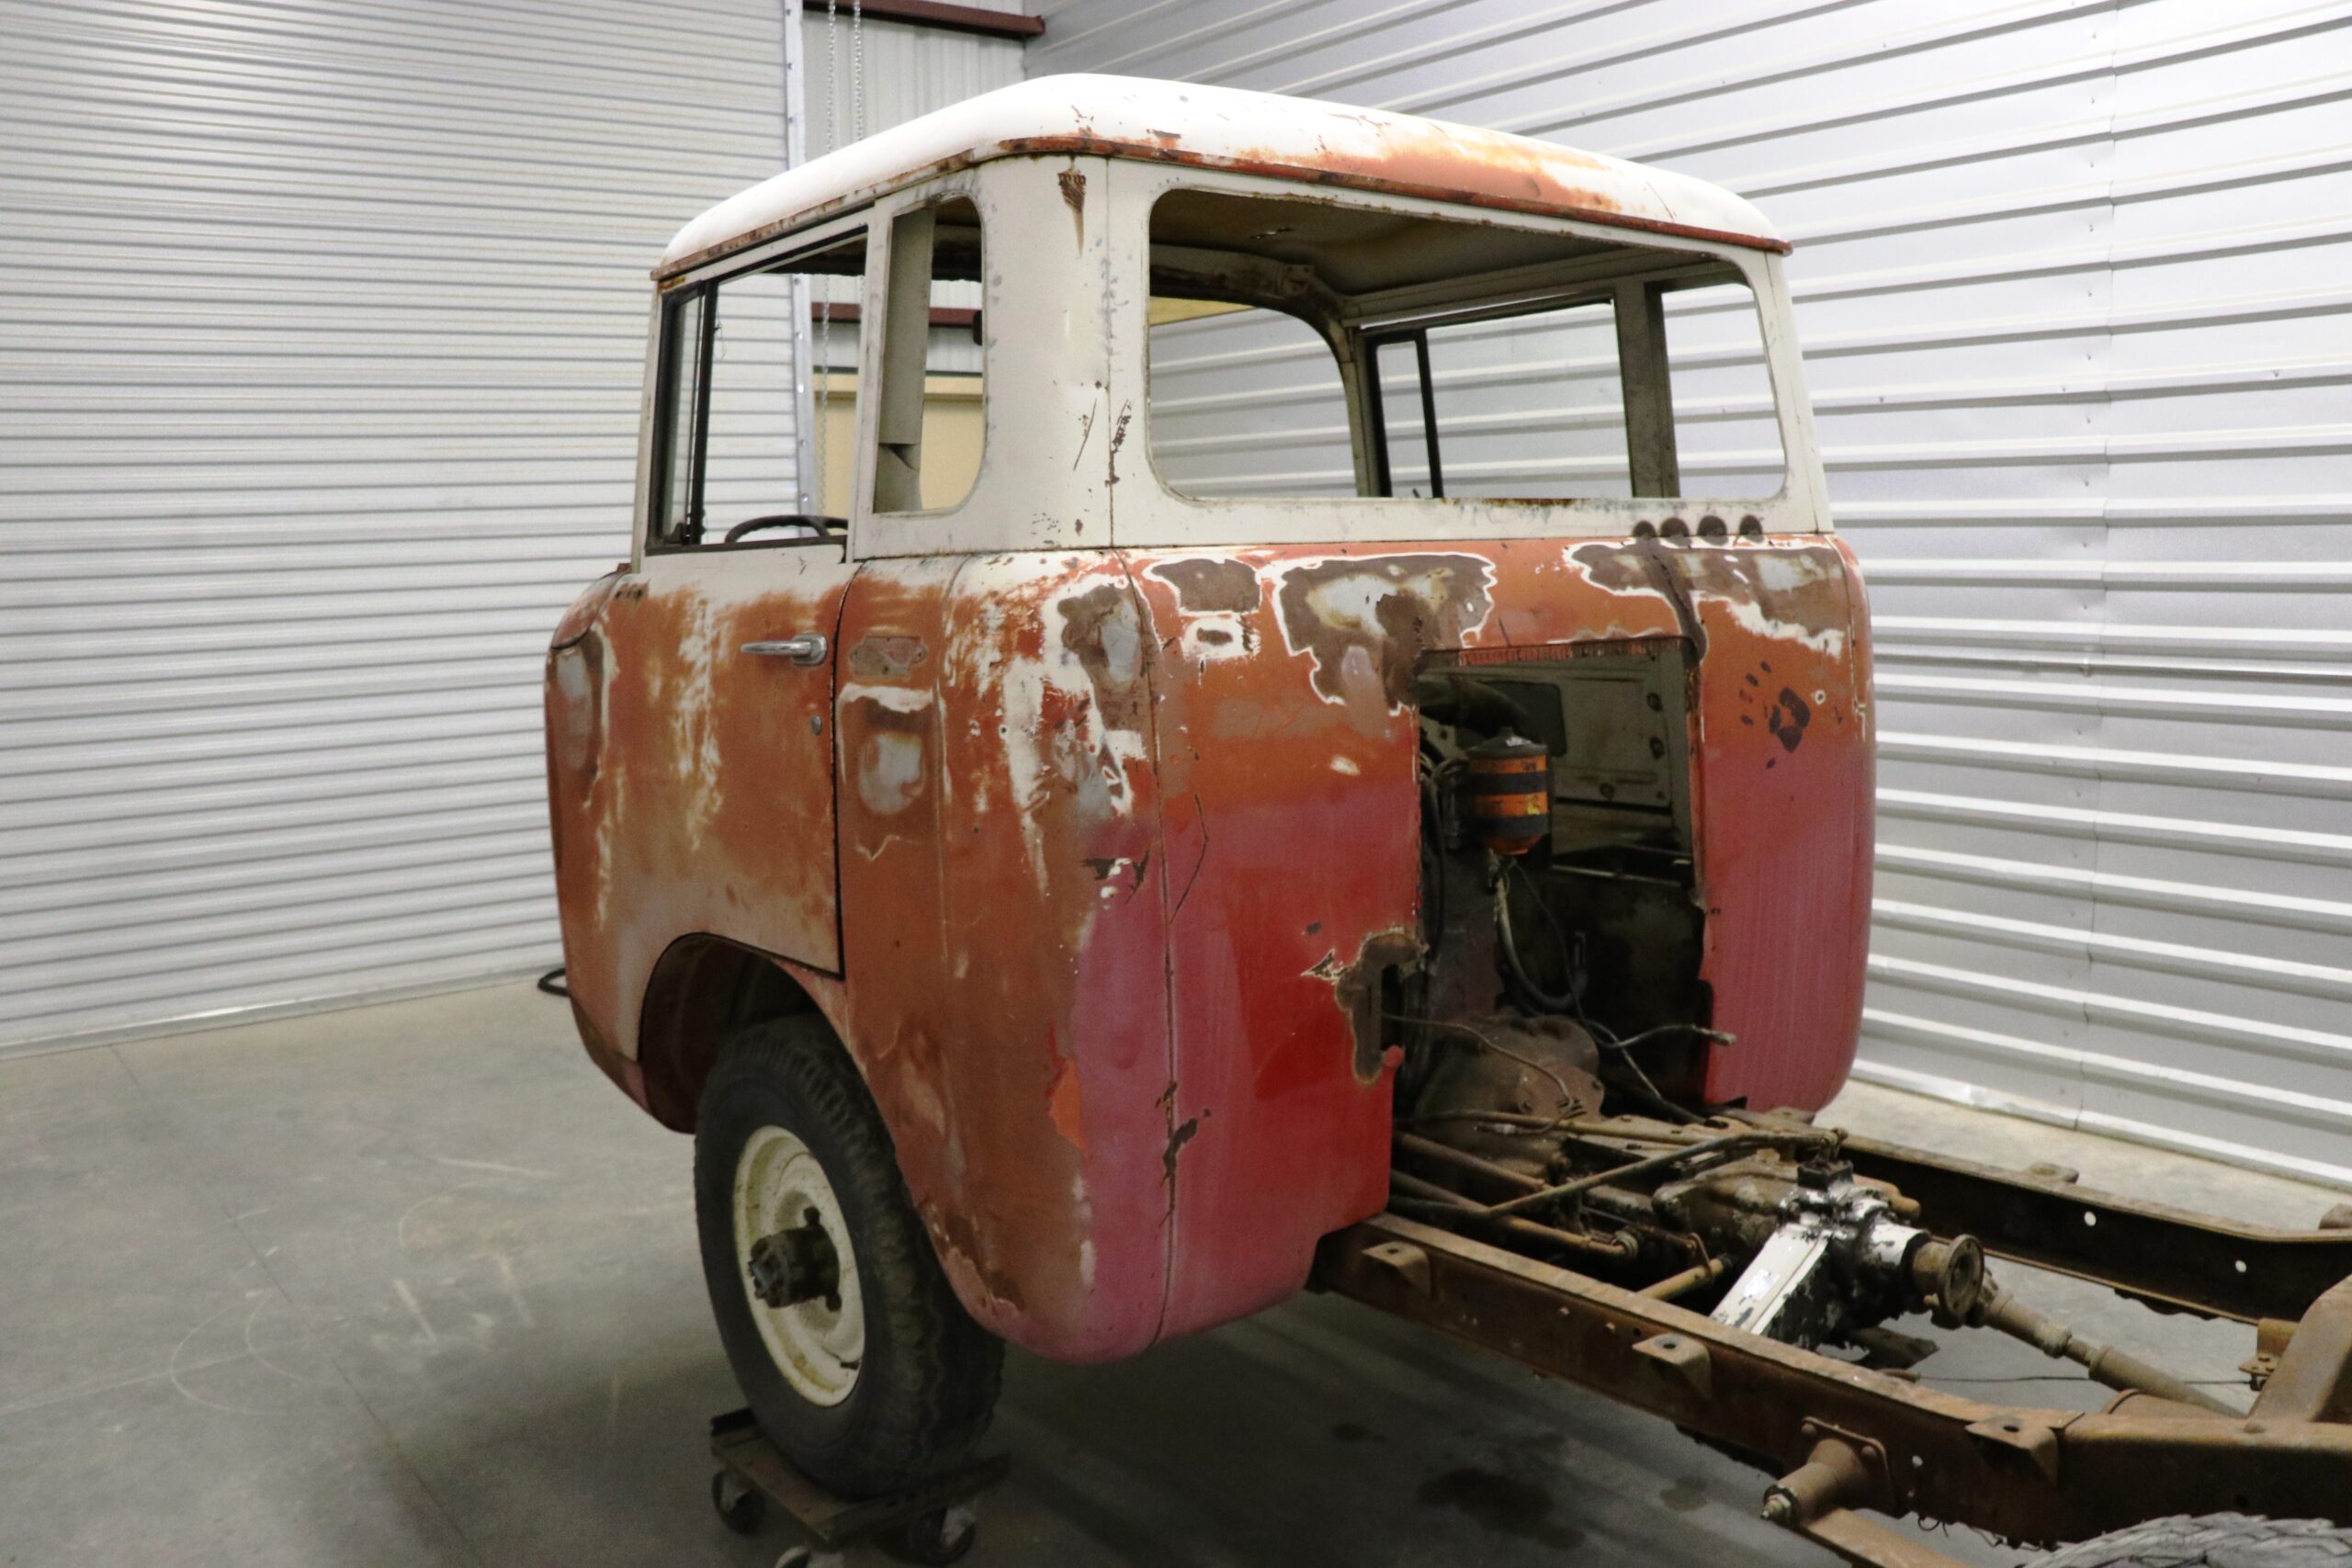
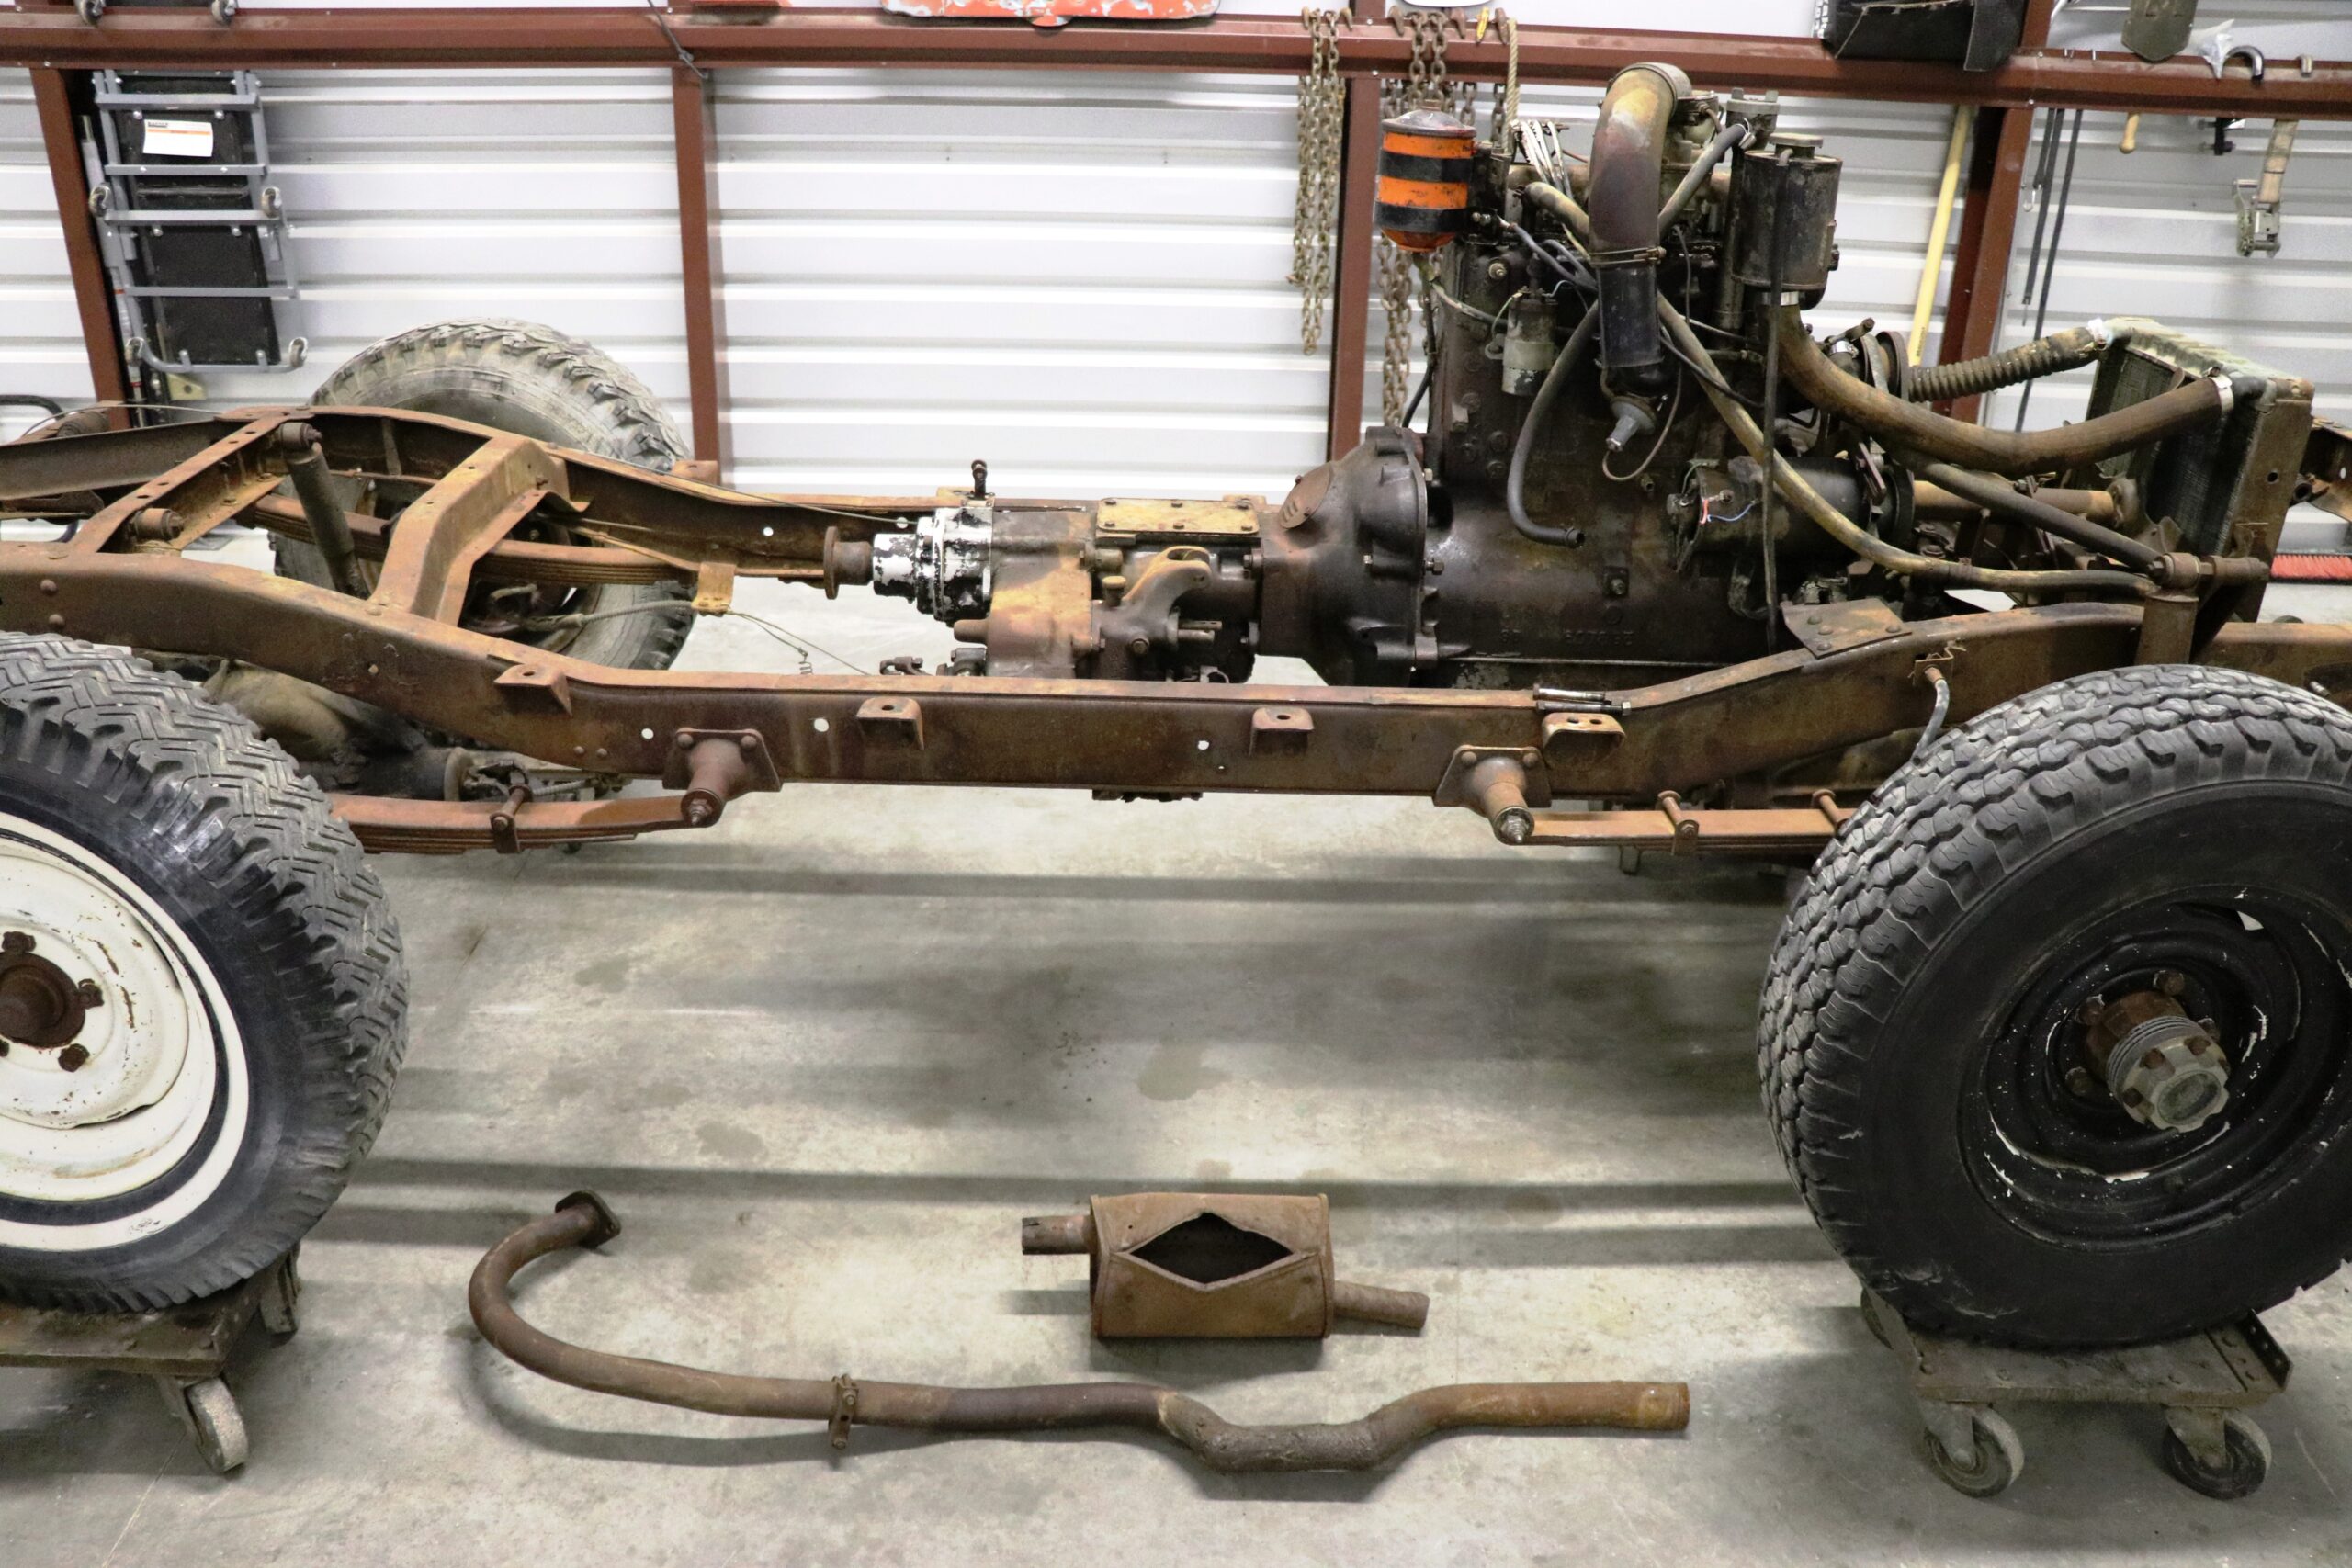
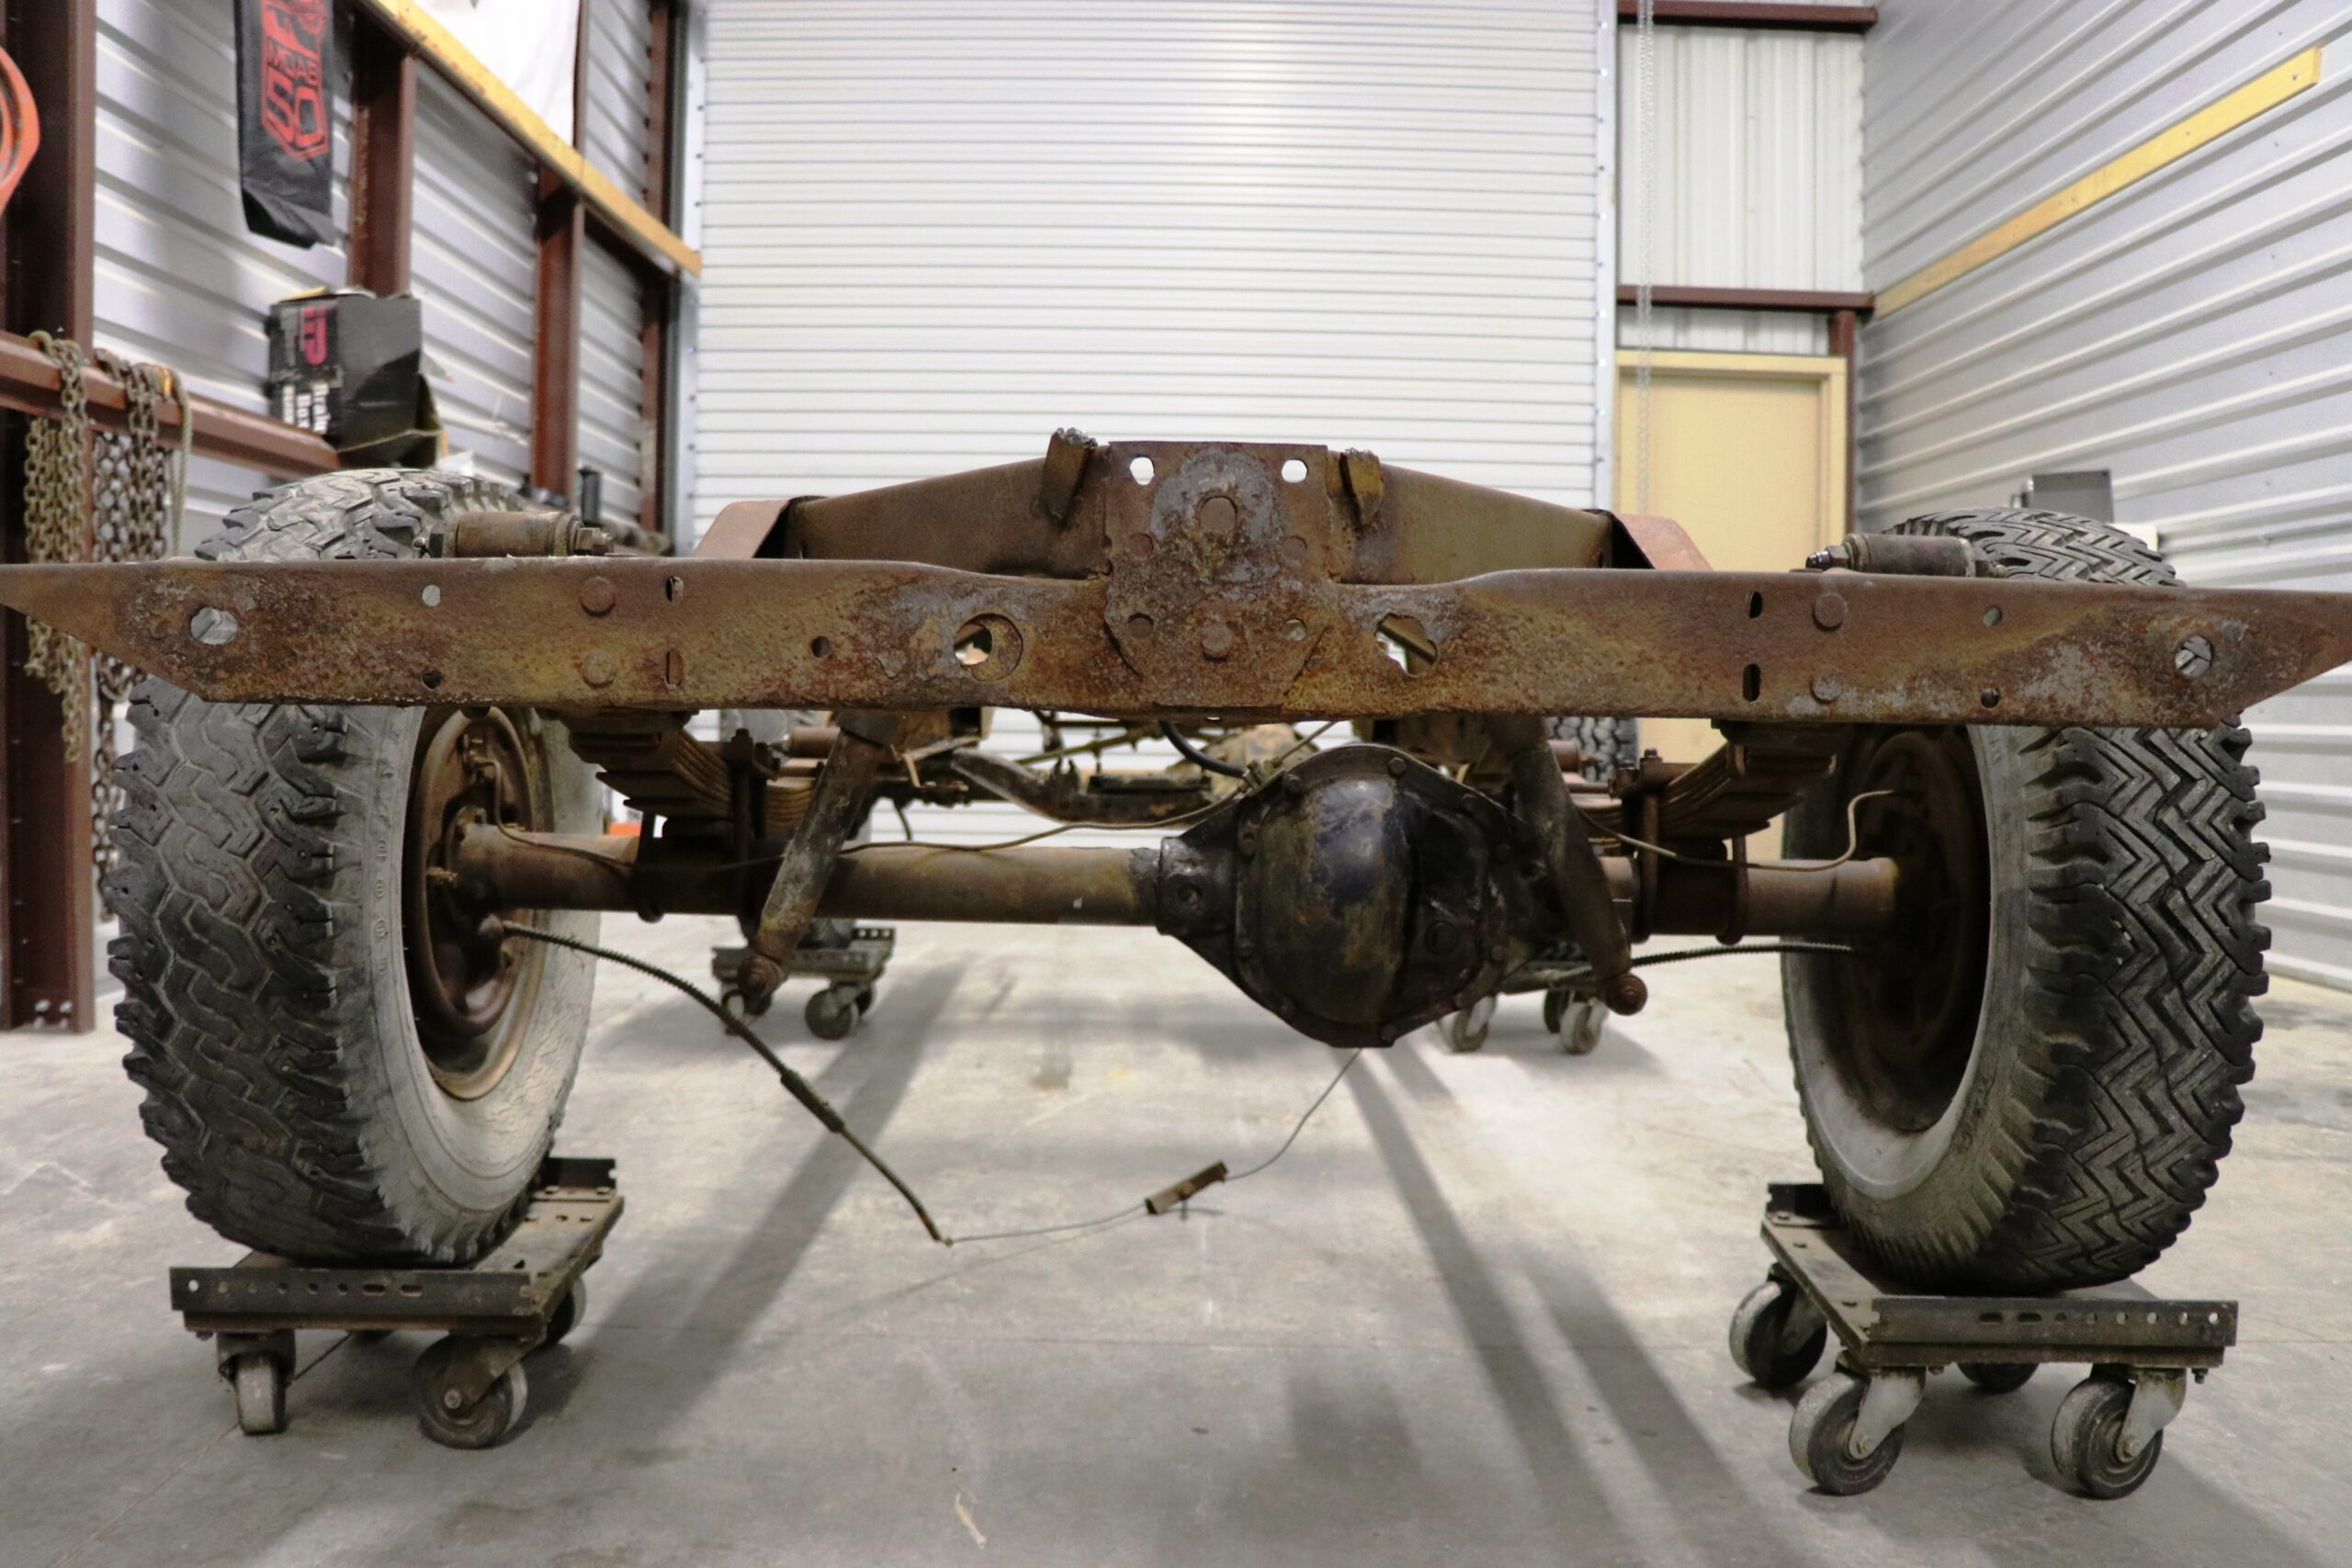
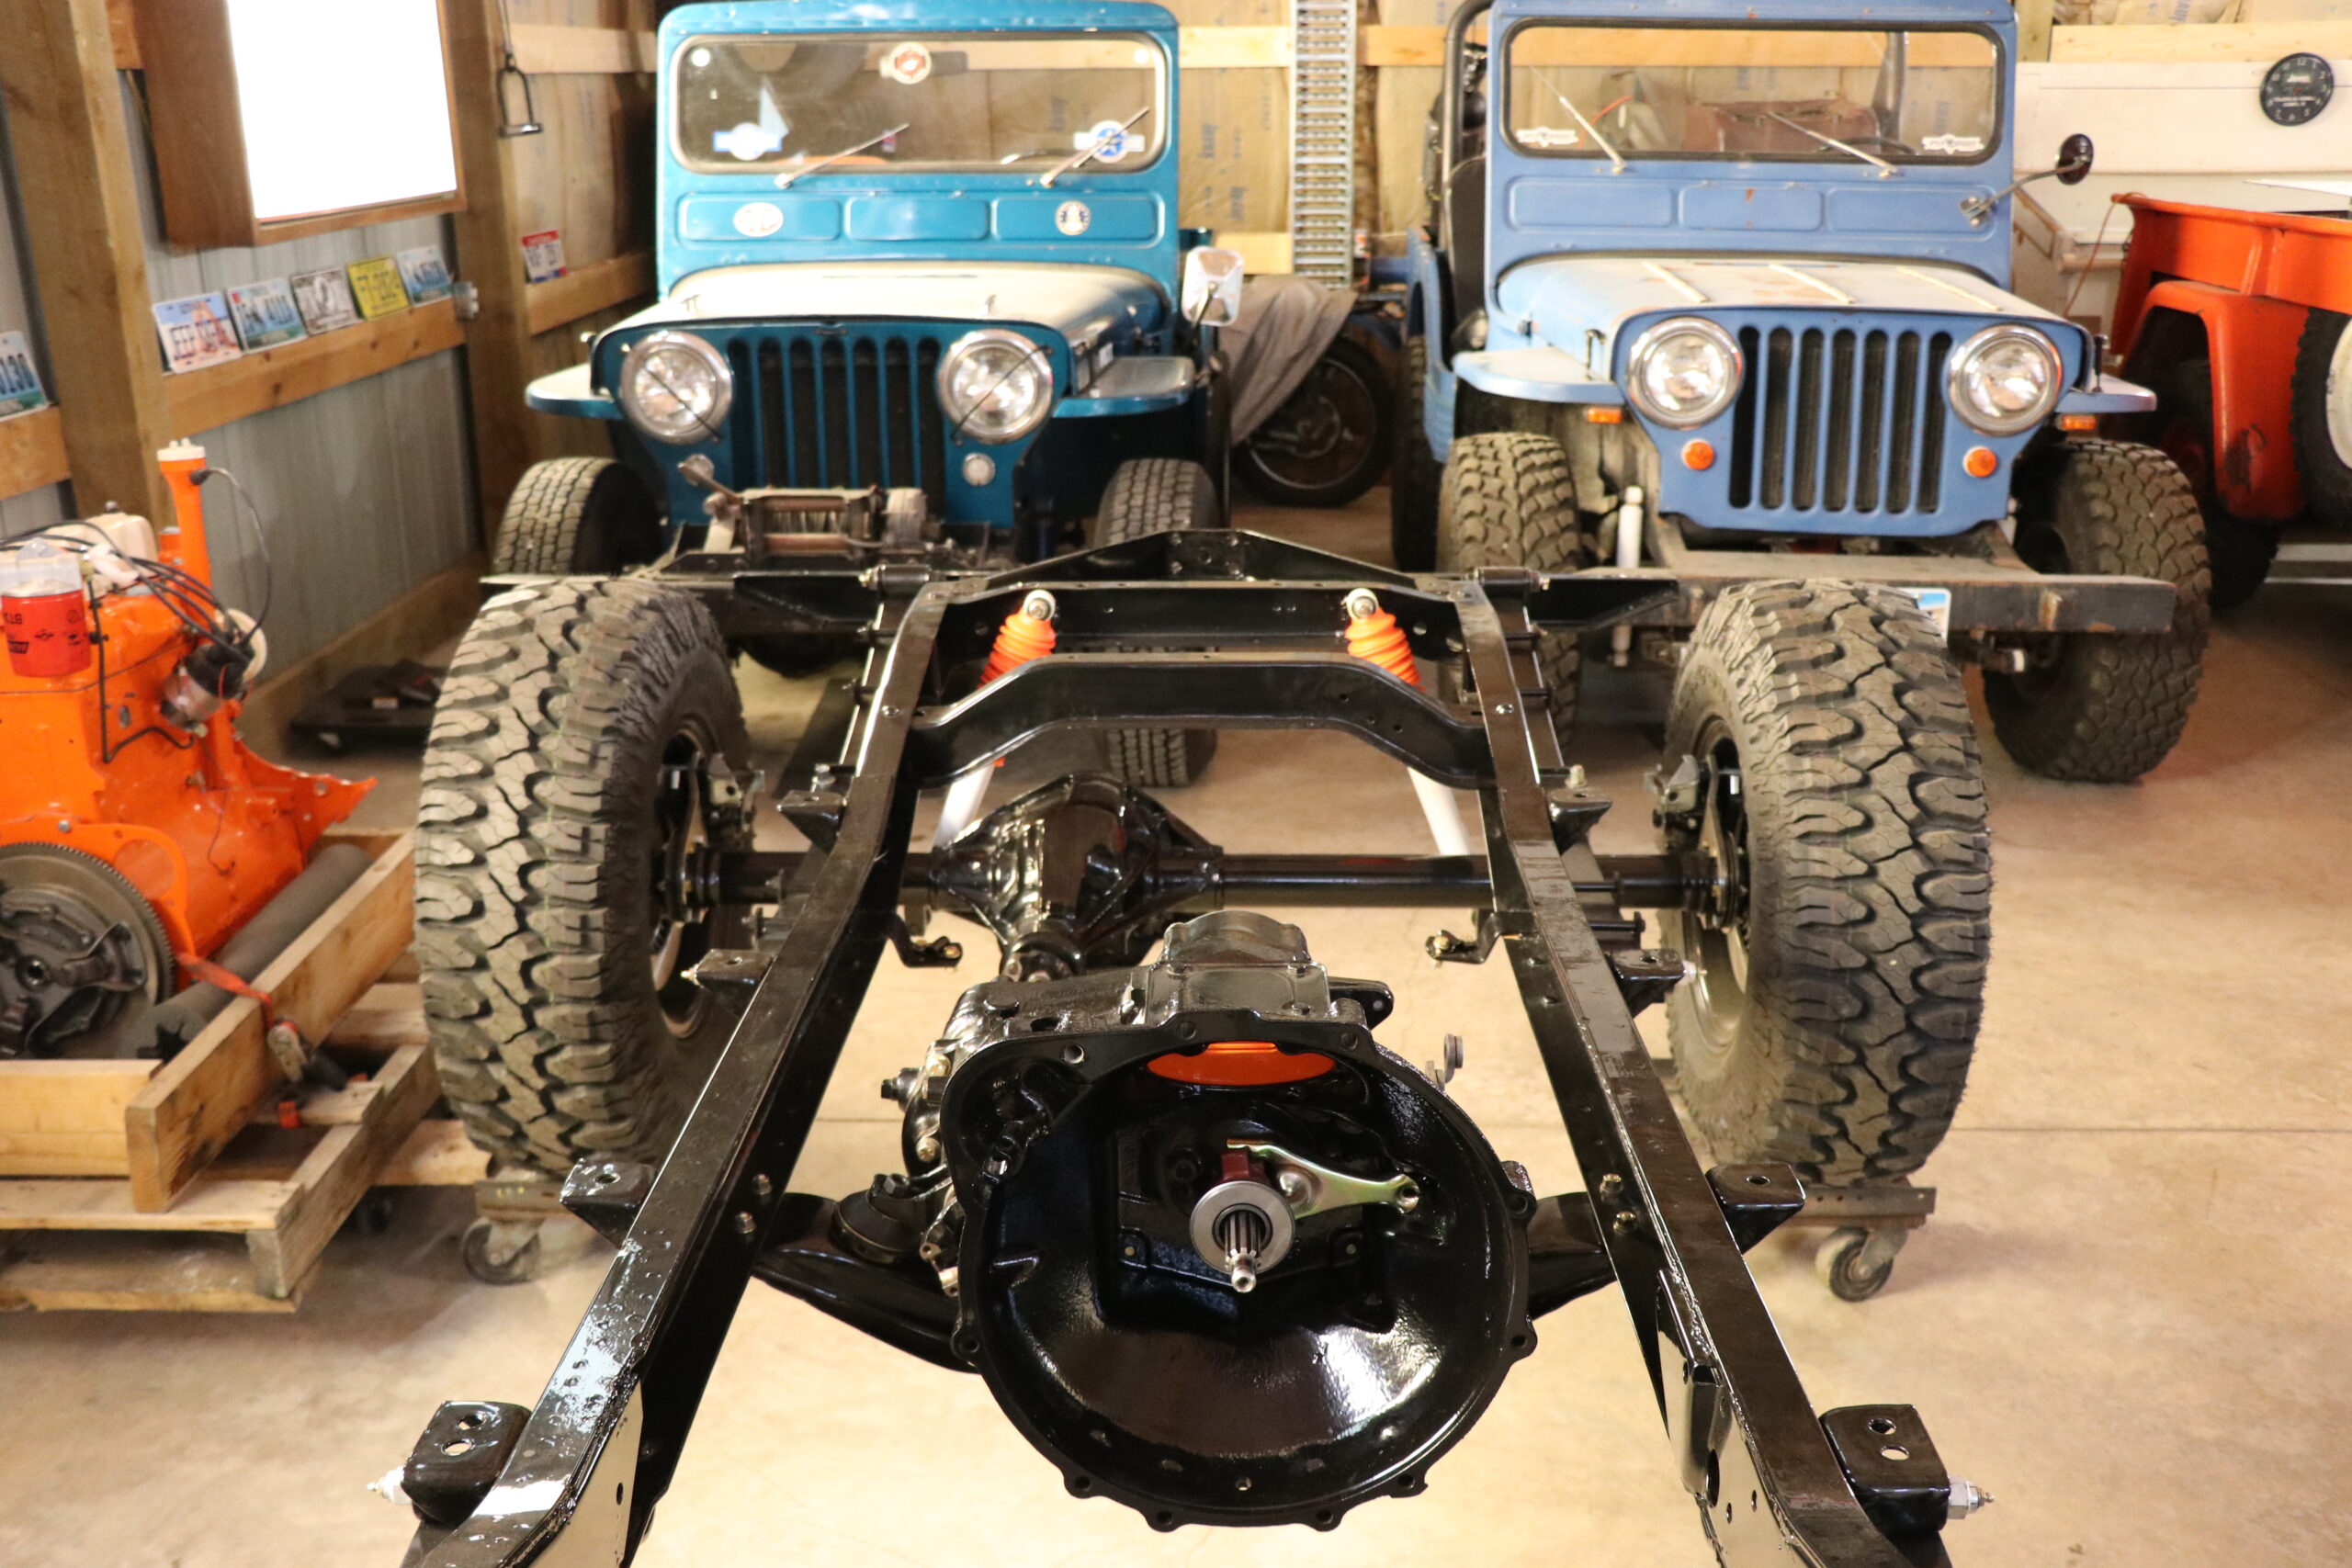
Before completely tearing things apart we wanted to get a closer look underneath so we put it on a hoist, did a walk around to see how things looked from below and assessed what obstacles may lay ahead. As you can imagine, a Jeep this old that has gone from a pasture to a back yard with no real work being performed in between; created quite the collection of leaves, weeds, grease and grime. This mess needed to be cleaned up so we could find the nuts and bolts but for the most part, the integrity of the frame and most of the body was still in great shape. We first noted the components and parts that weren’t reusable or that we saw were missing so we could start the process of sourcing them from the great sponsors supporting this restoration.
Knowing that the bodywork would take the longest it made perfect sense to get the box pulled off and delivered to the guys at Rad Rides Garage in Buffalo, Wyoming. Sage and Andrew have a great reputation in the small community and from what I could see; they have some experience when it comes to the classics. It’s not an uncommon sight to walk into the shop and see these guys doing complete restorations on old Willys trucks, Corvette’s and Chevelle’s. They fill their shop with everything from insurance jobs to complete, frame off restorations and from what I had heard about these guys, it seemed they would have an appreciation for the task at hand for the final version of our build.
Once the box was removed we had a better opportunity to look things over and methodically plan our approach. Since various components would be headed in different directions, it only made sense to start ordering items we knew would needed for our build. After a few phone calls and emails we had boxes arriving from sponsors boosting the anticipation of bringing this FC-150 back to life!
Since the box didn’t have a tailgate and there is only one place to find a new, factory replicated replacement, we immediately got on the phone and called the folks at Walck’s 4WD in Bowmanstown, PA. Walck’s makes the only replacement tailgate for the FC-150 that we know of or could find and Carl was kind enough to help us out. In addition to the tailgate, Walck’s also makes a replacement wiring harnesses so we ordered one of those as well. Since Carl has been building and working on these old Jeep vehicles for decades he is a great source for factory replacement parts for the classics. If you happen to live on the east coast and need parts or service we certainly recommend giving Walck’s 4WD a call or you can check out the link to their website at the bottom of this page.
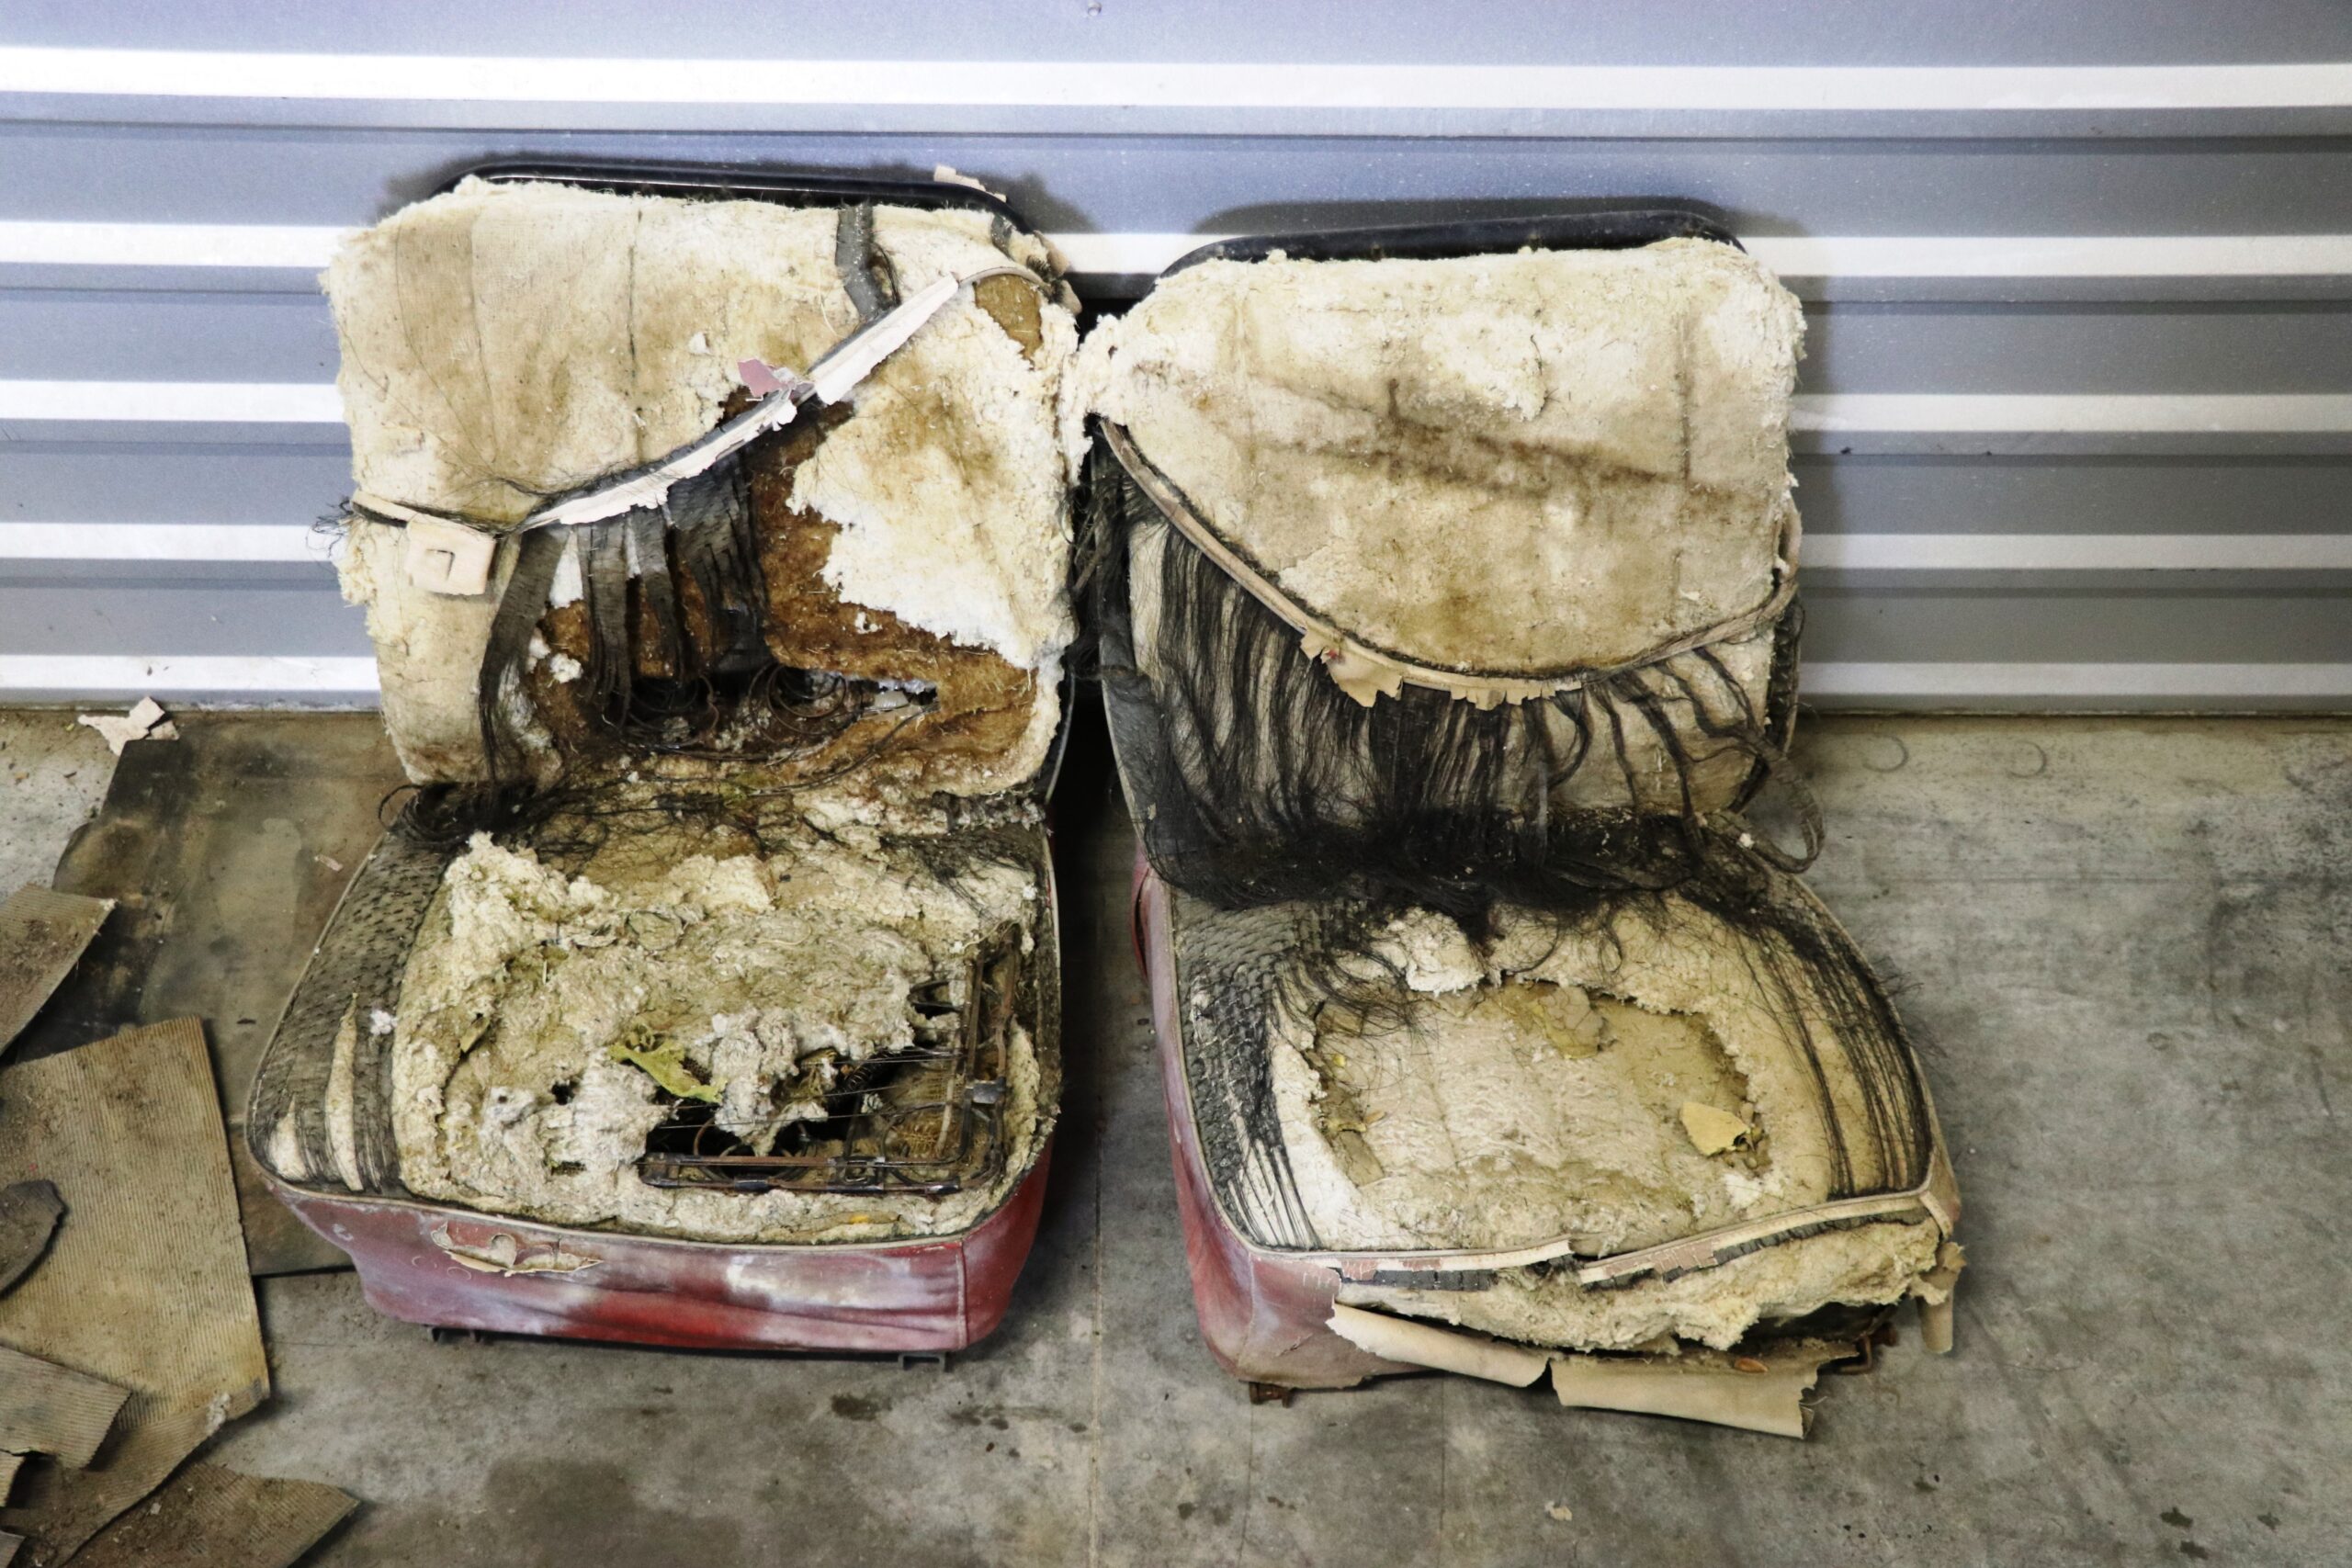
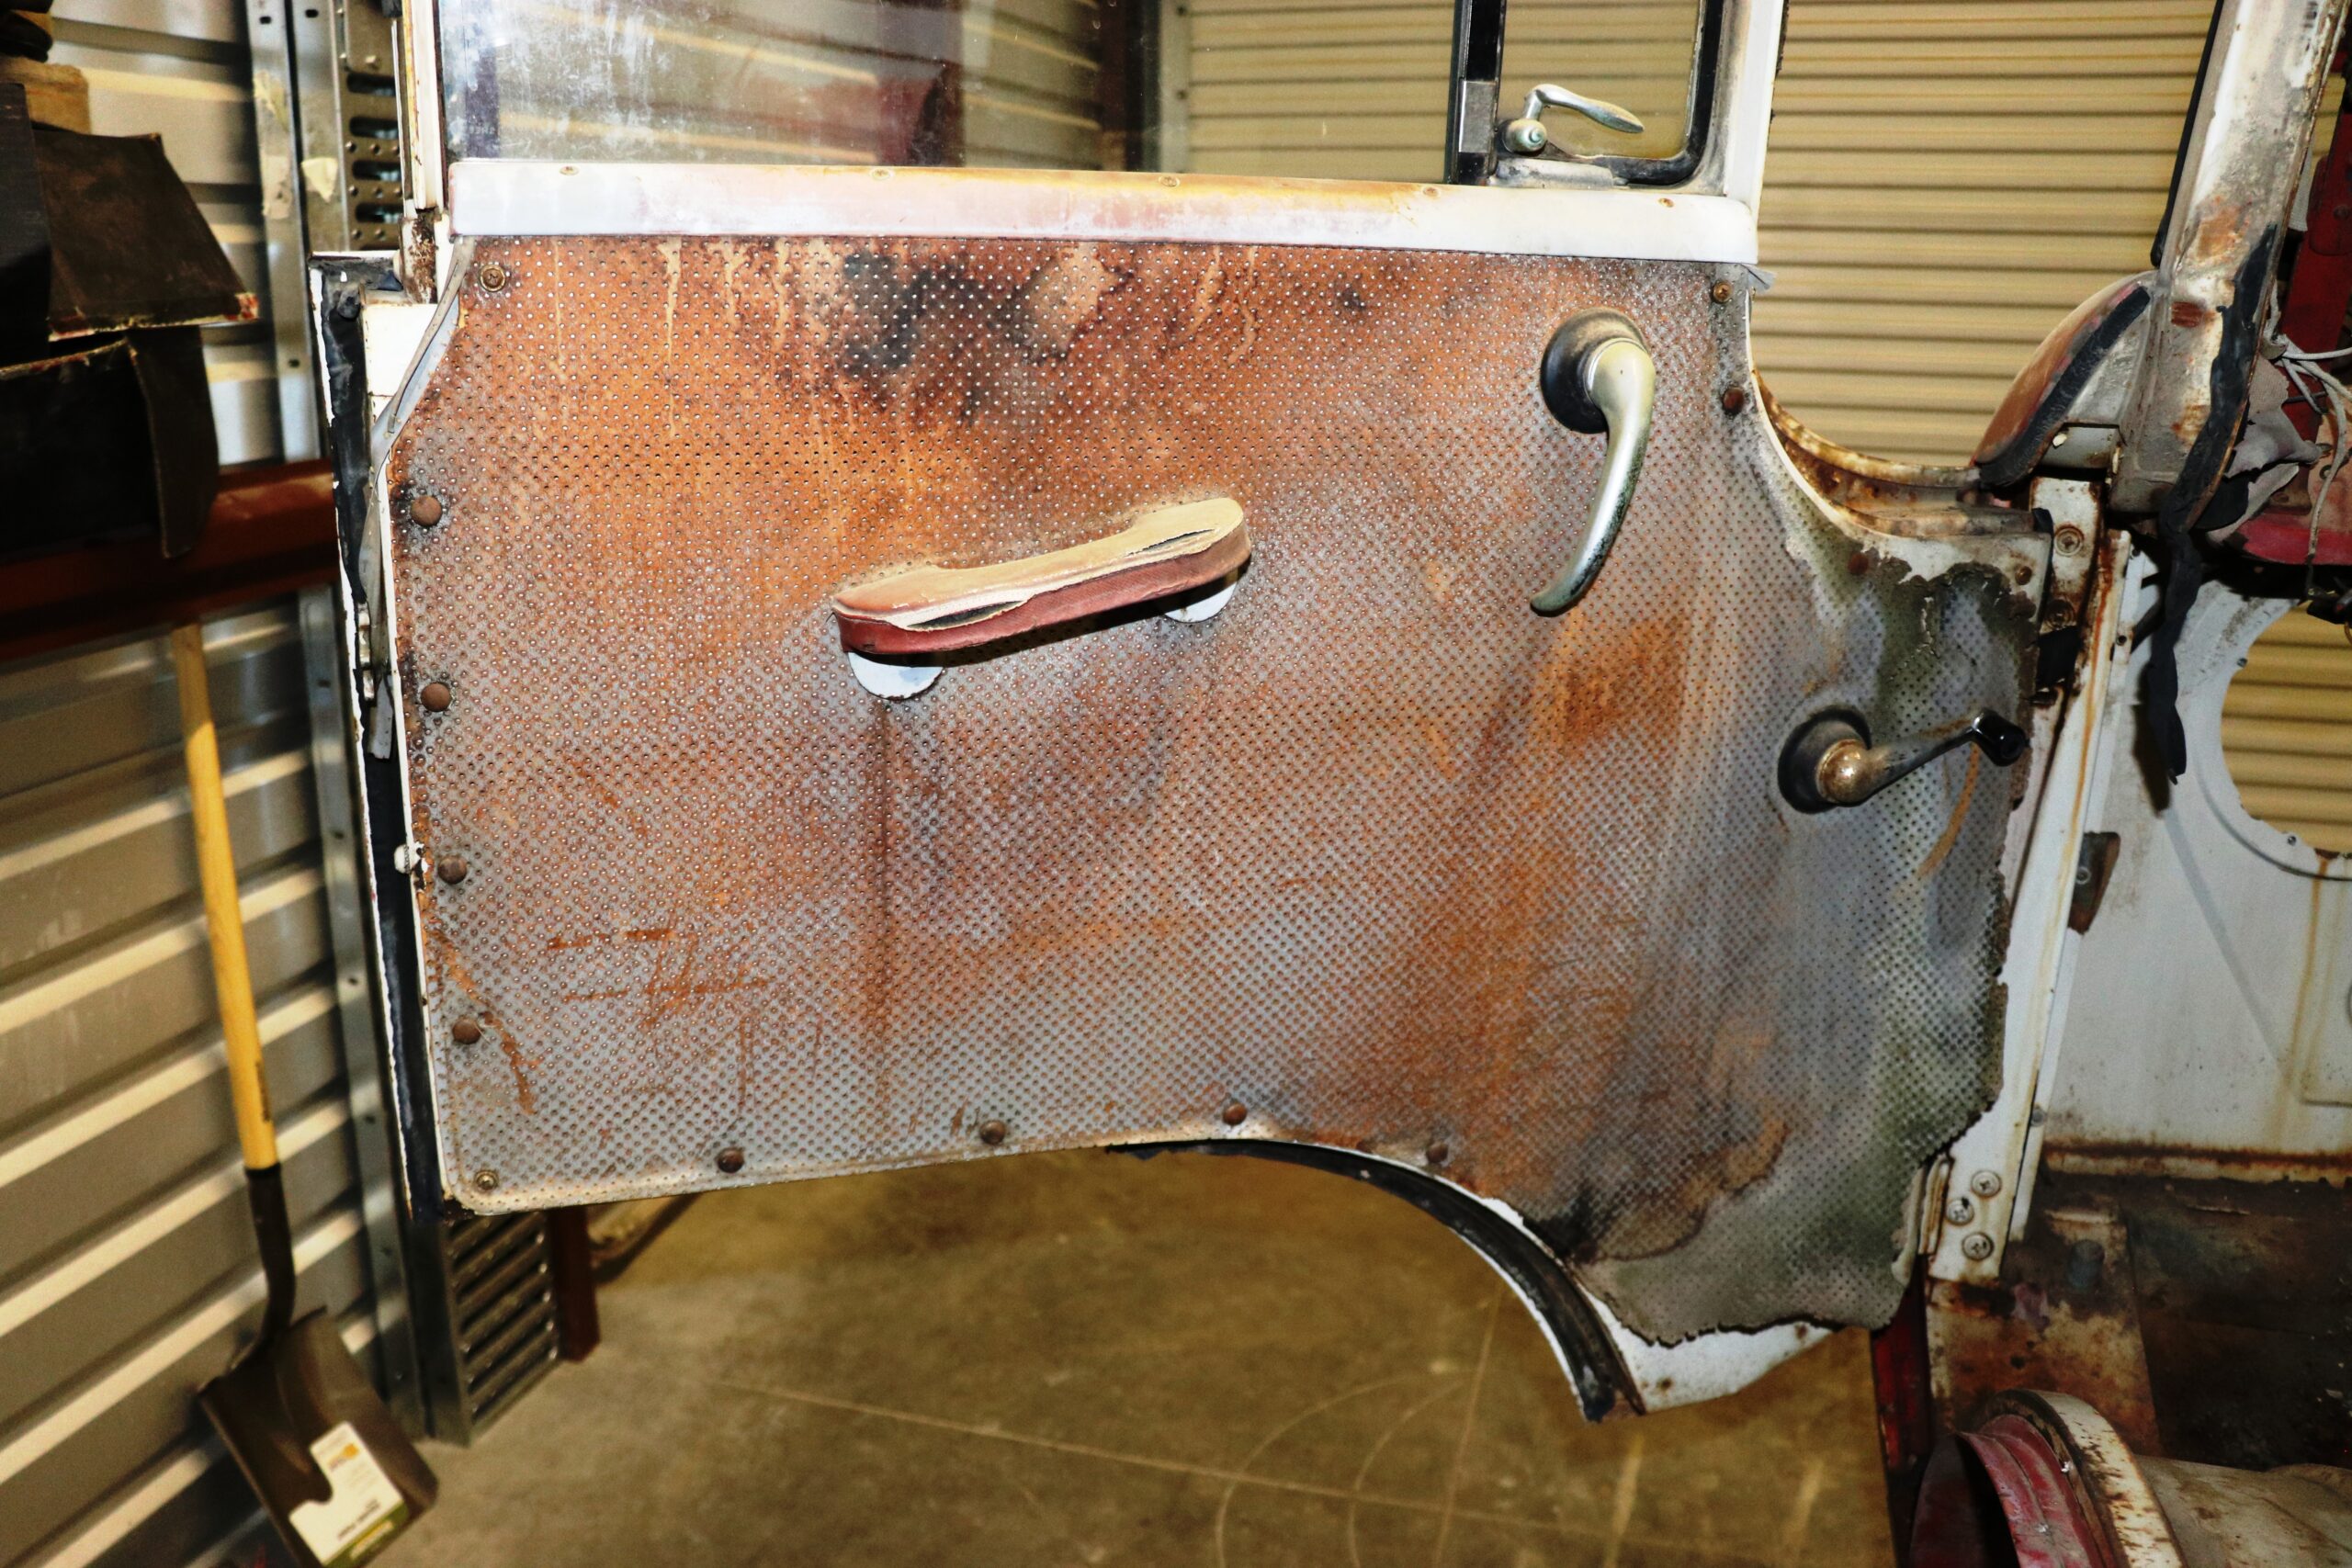
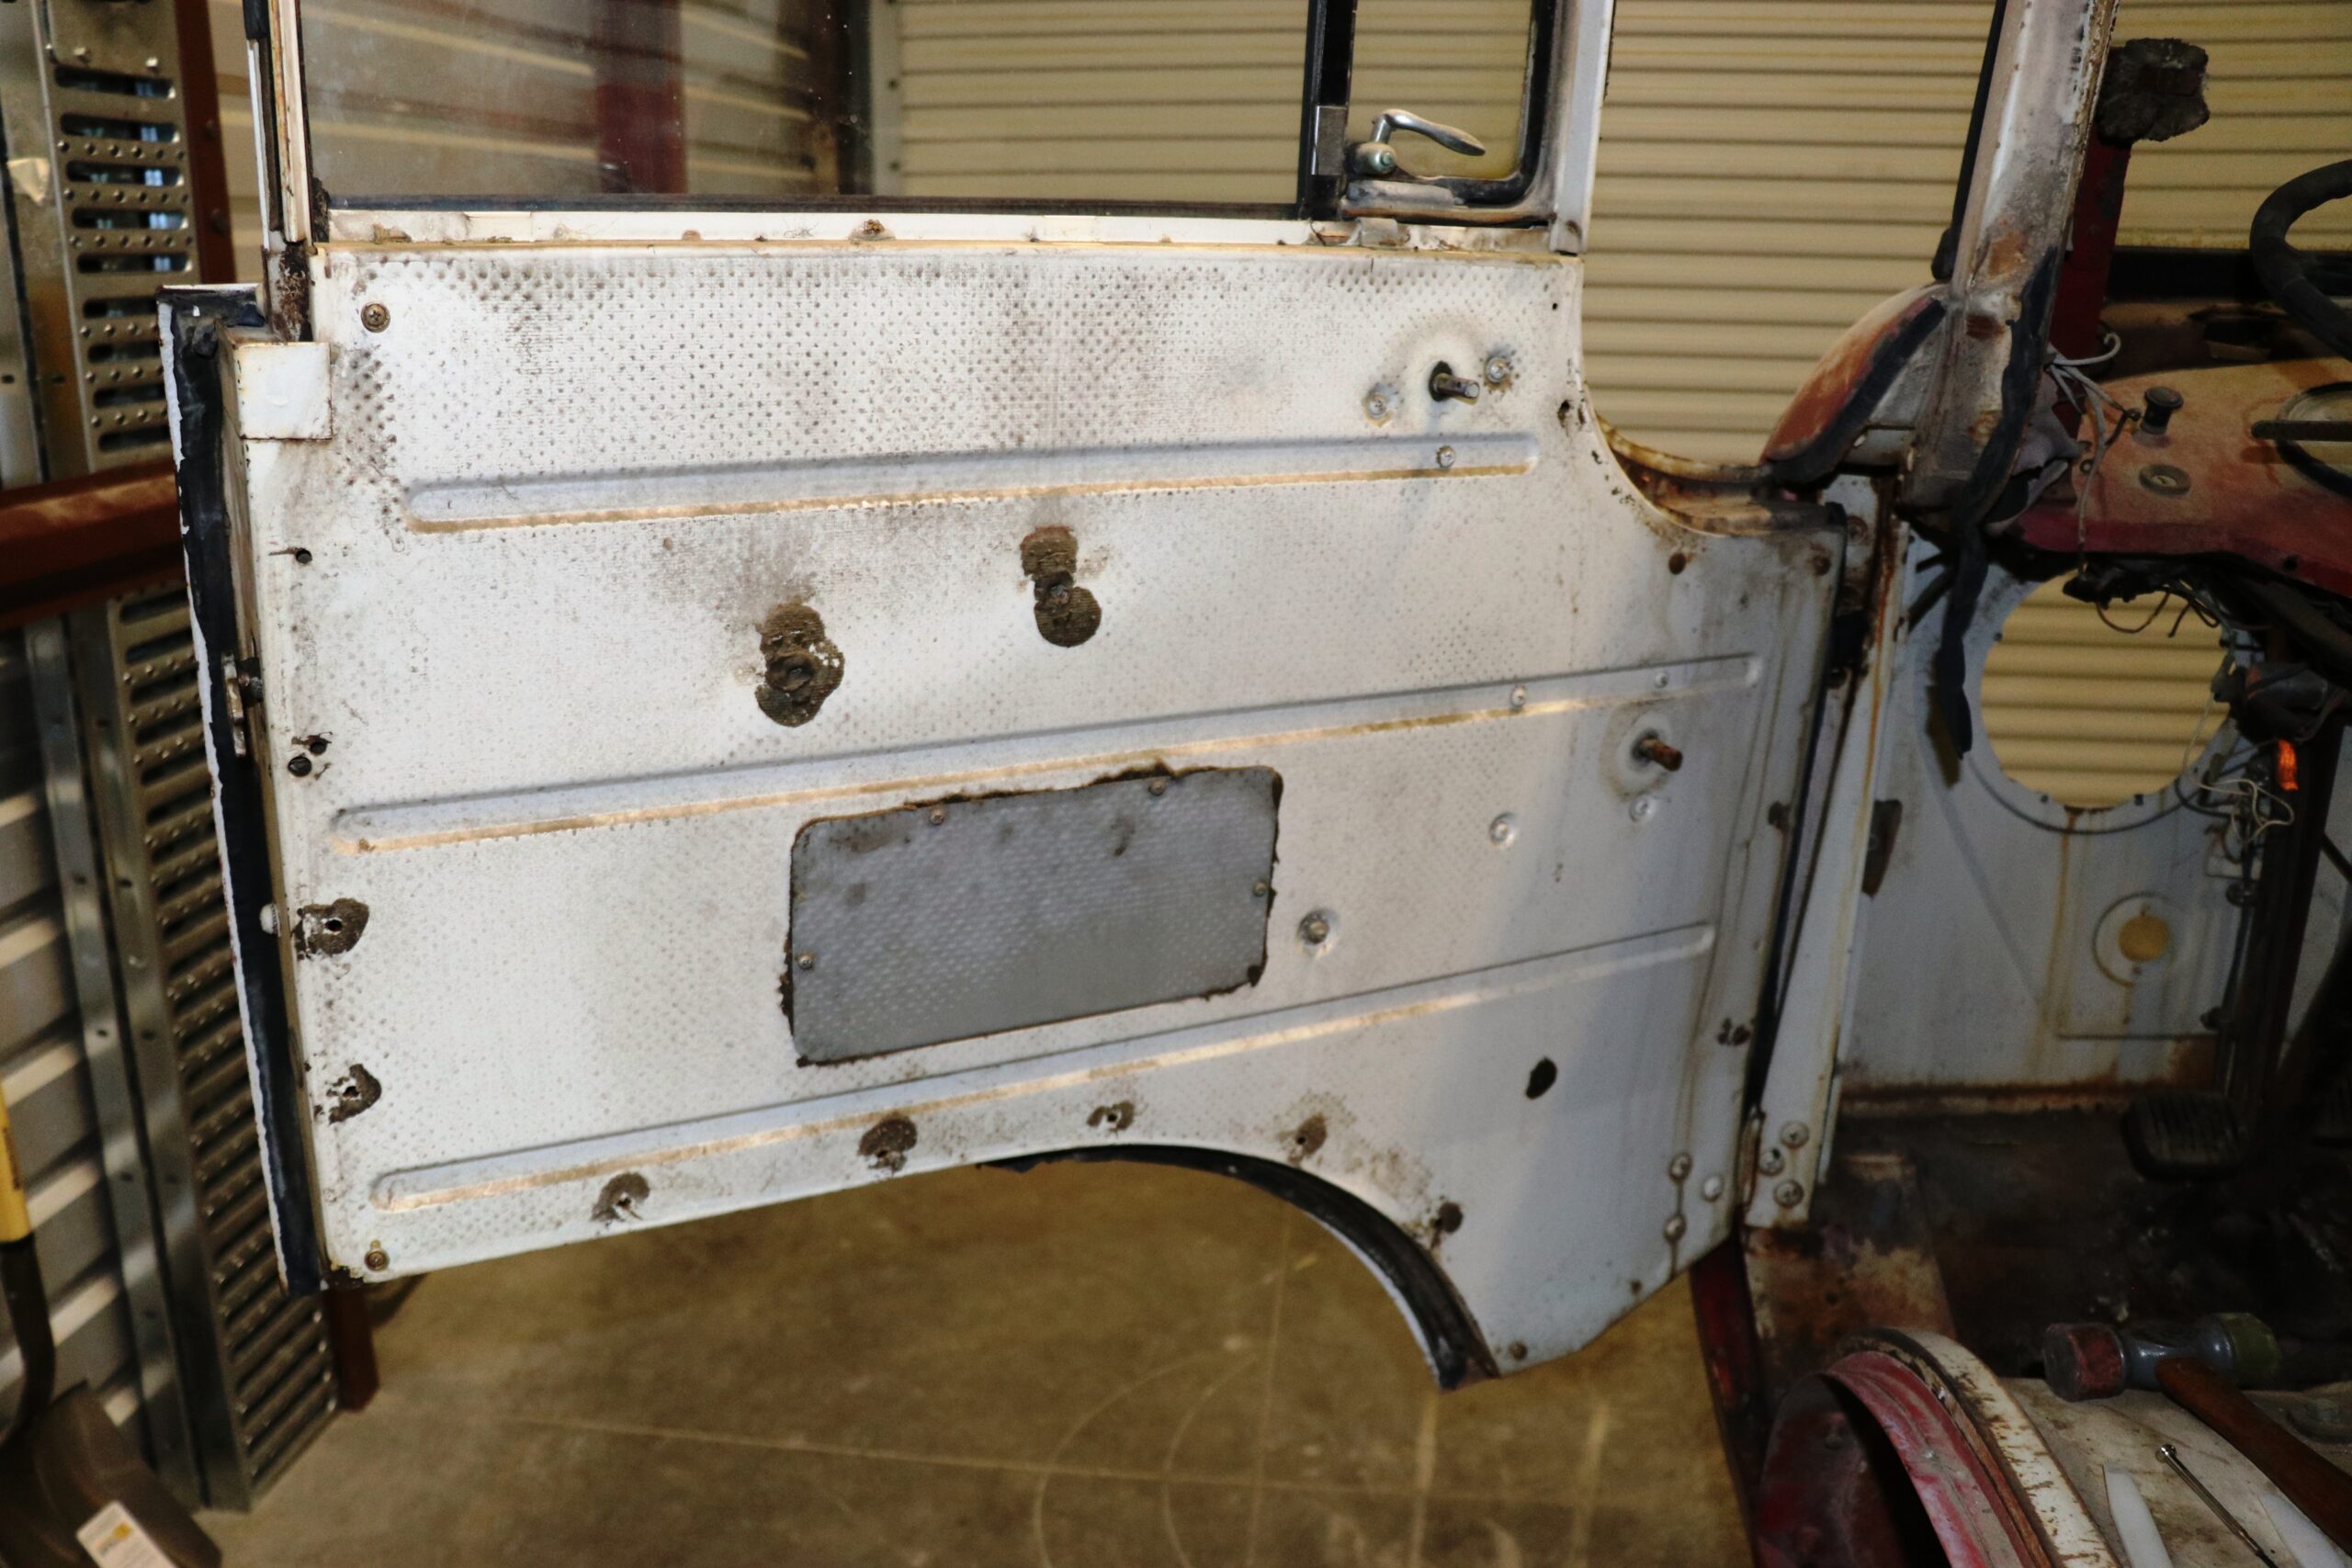
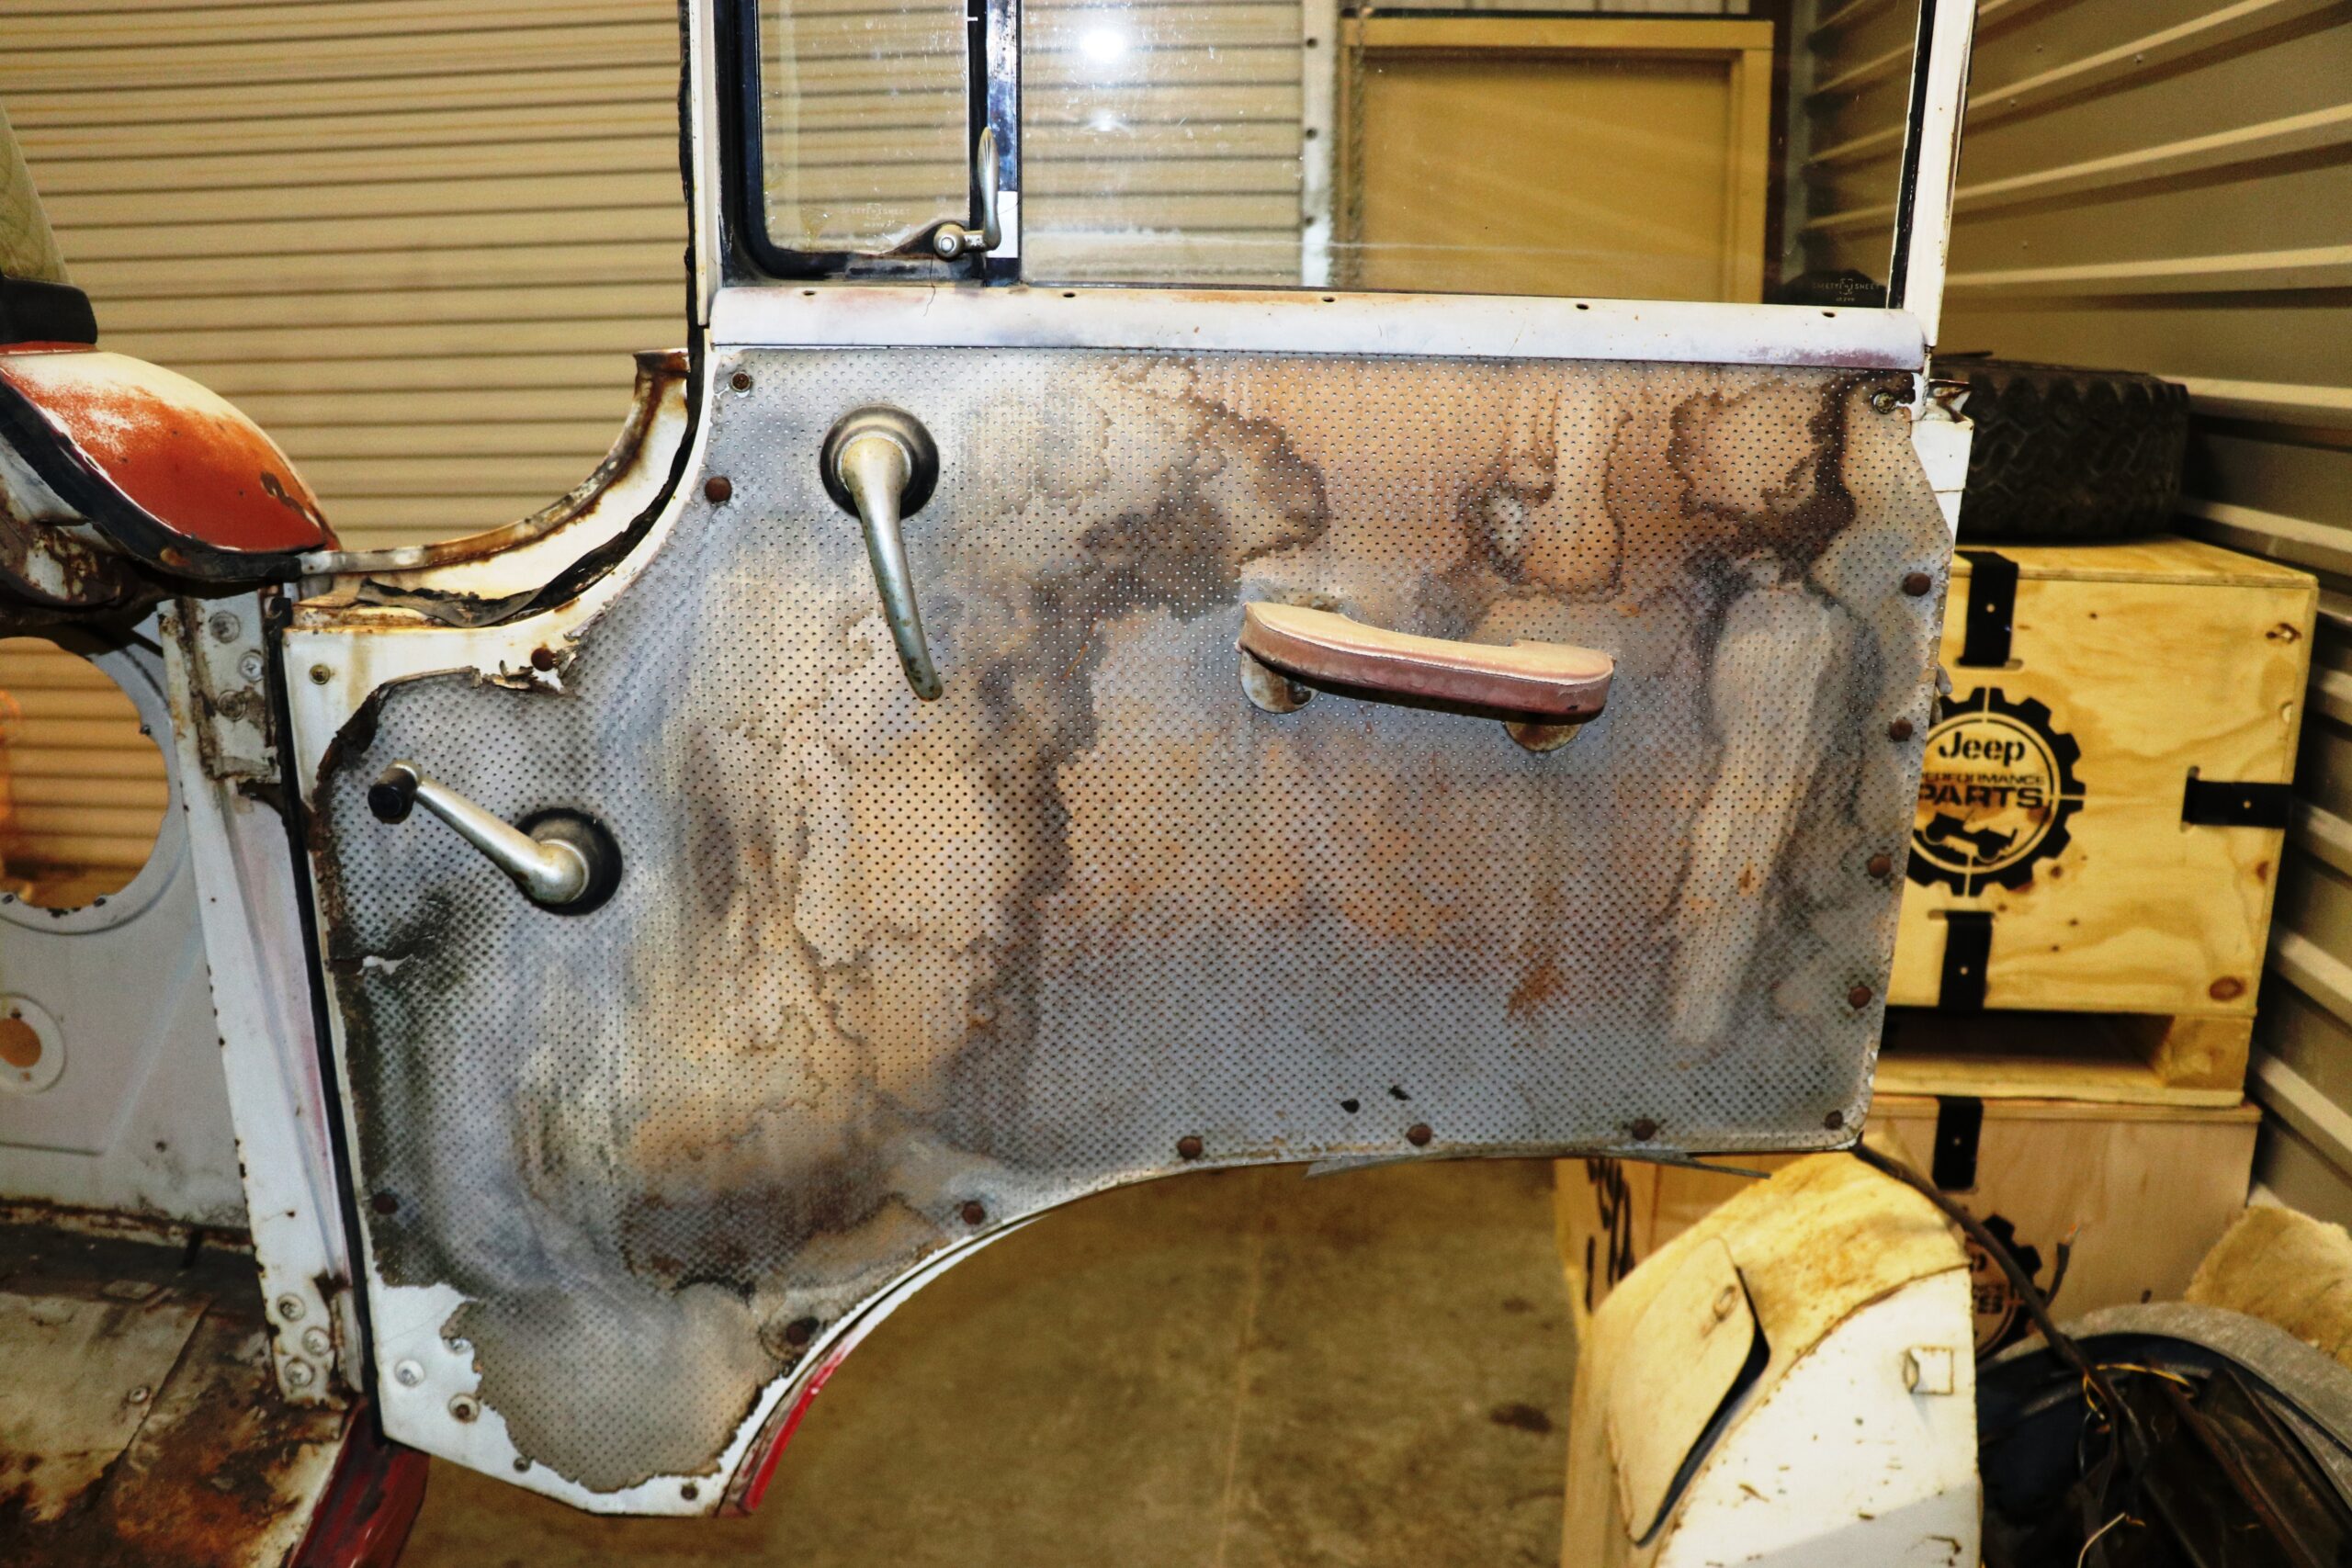
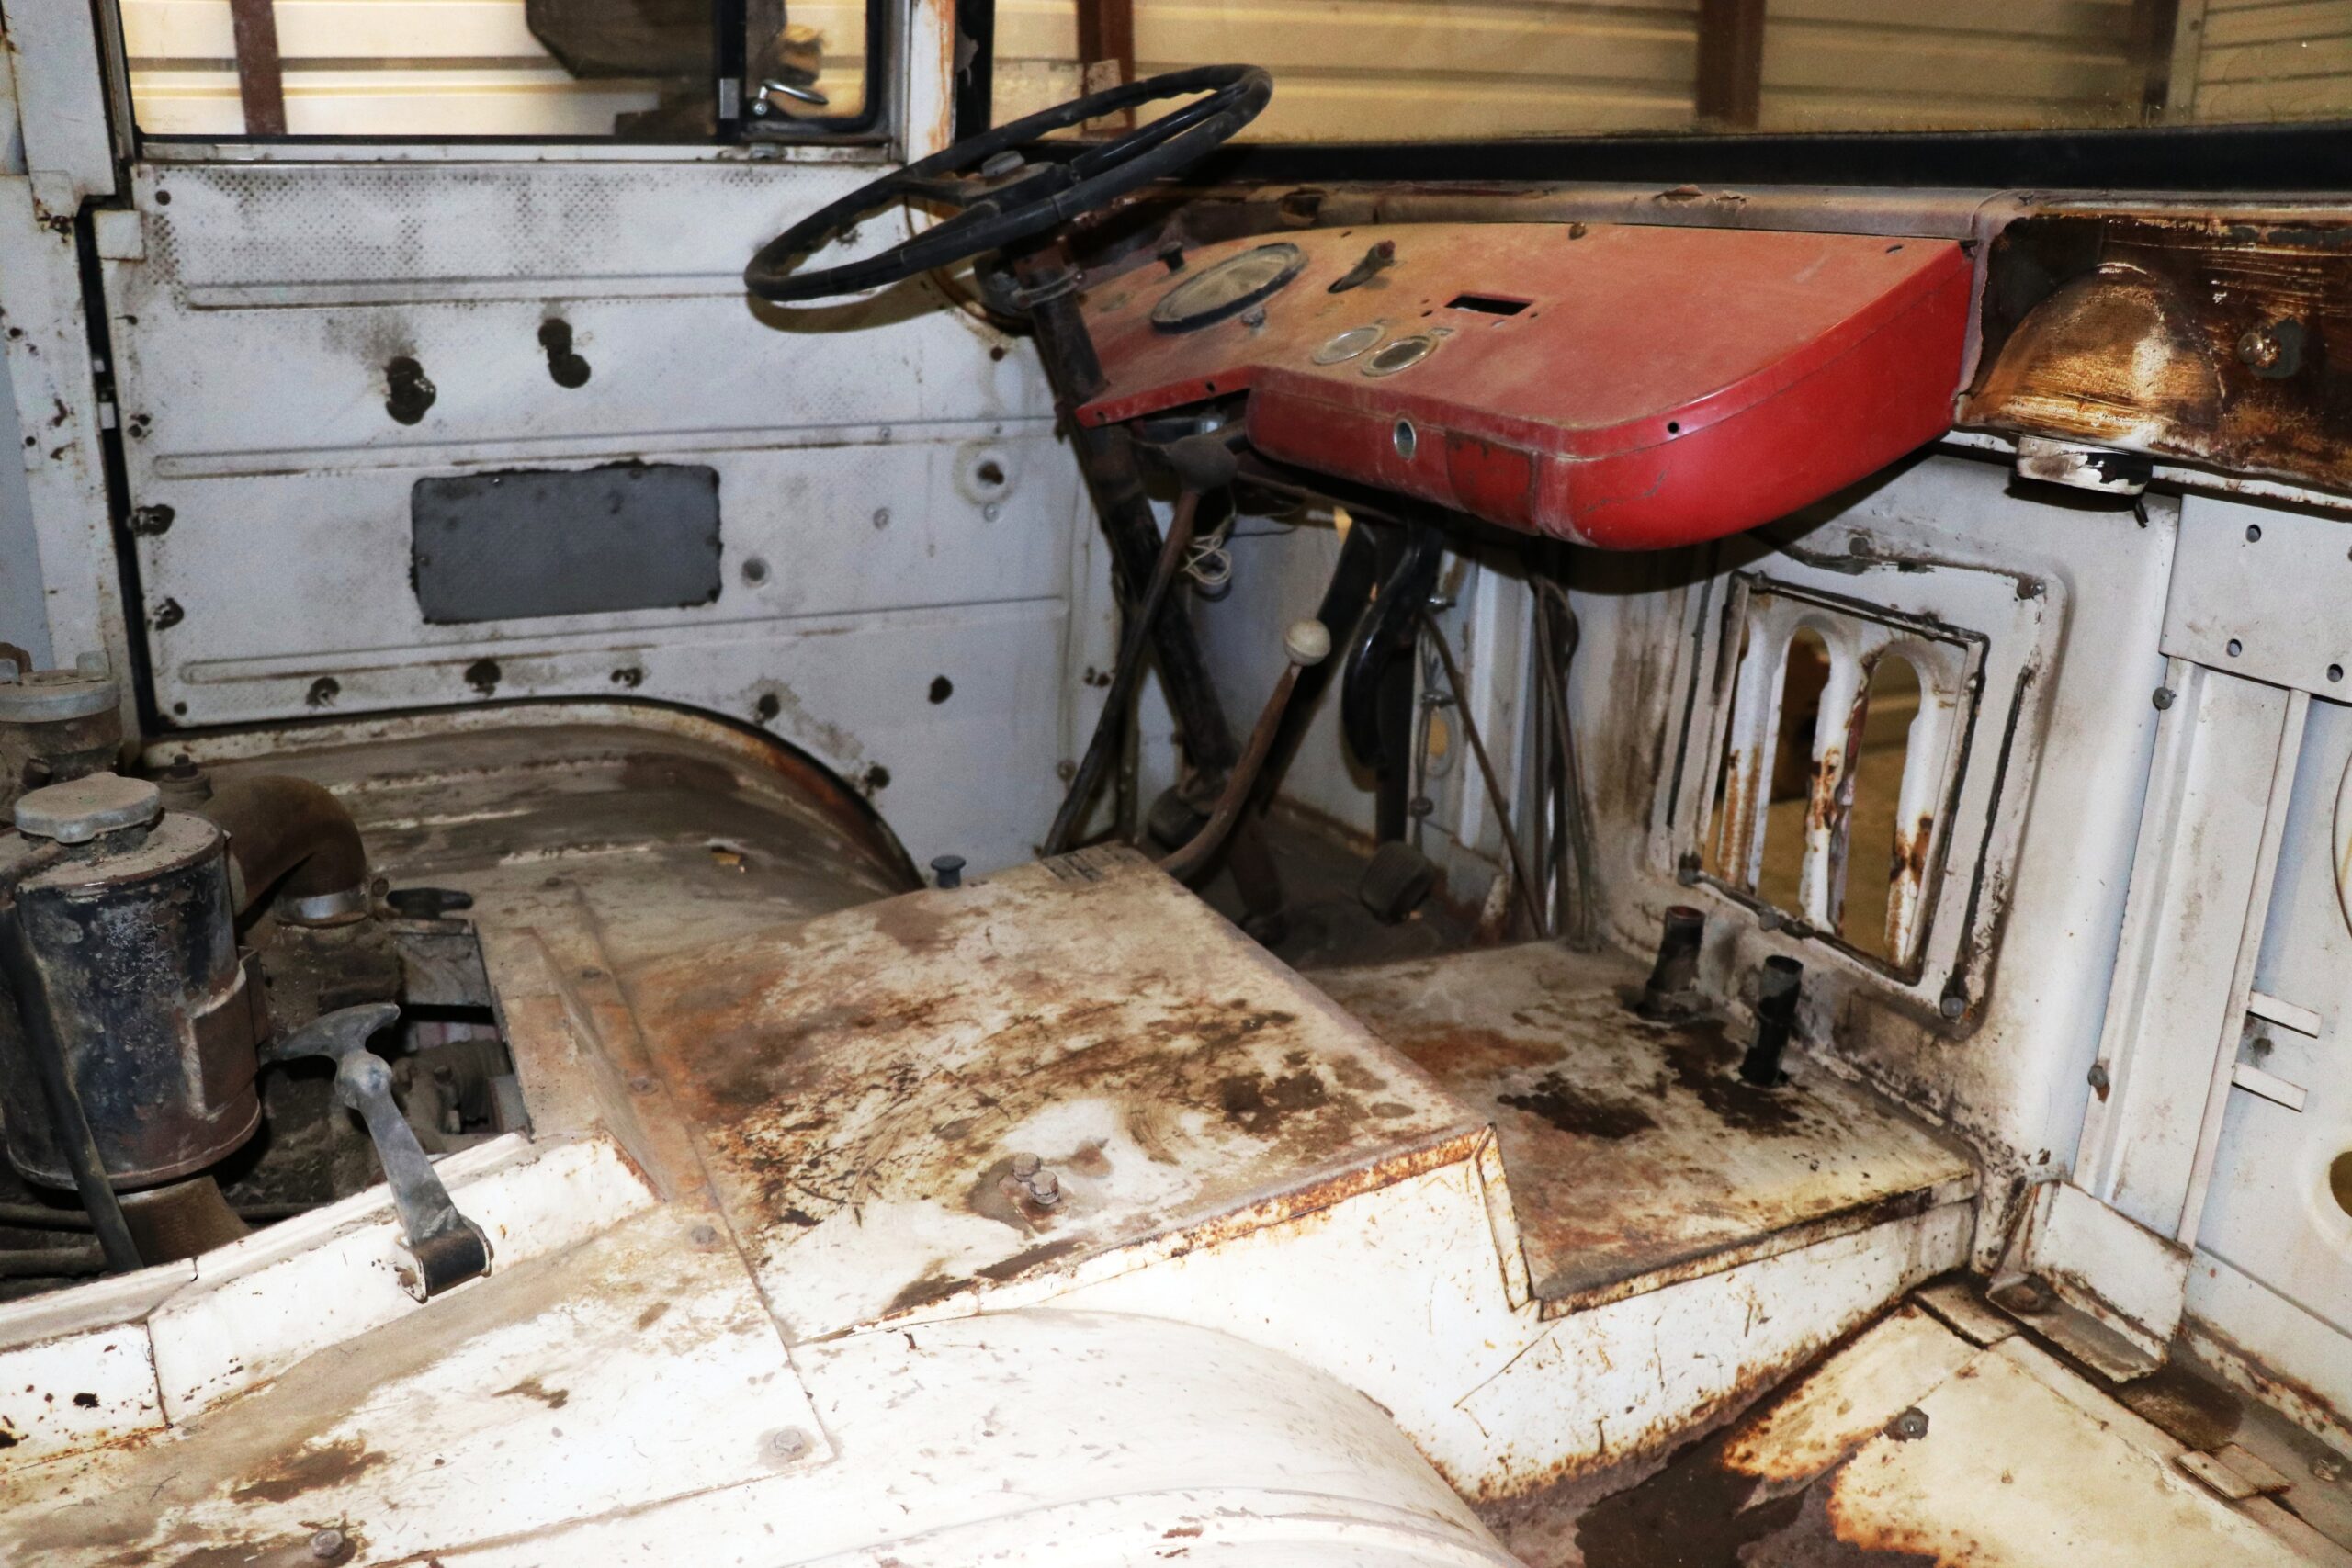
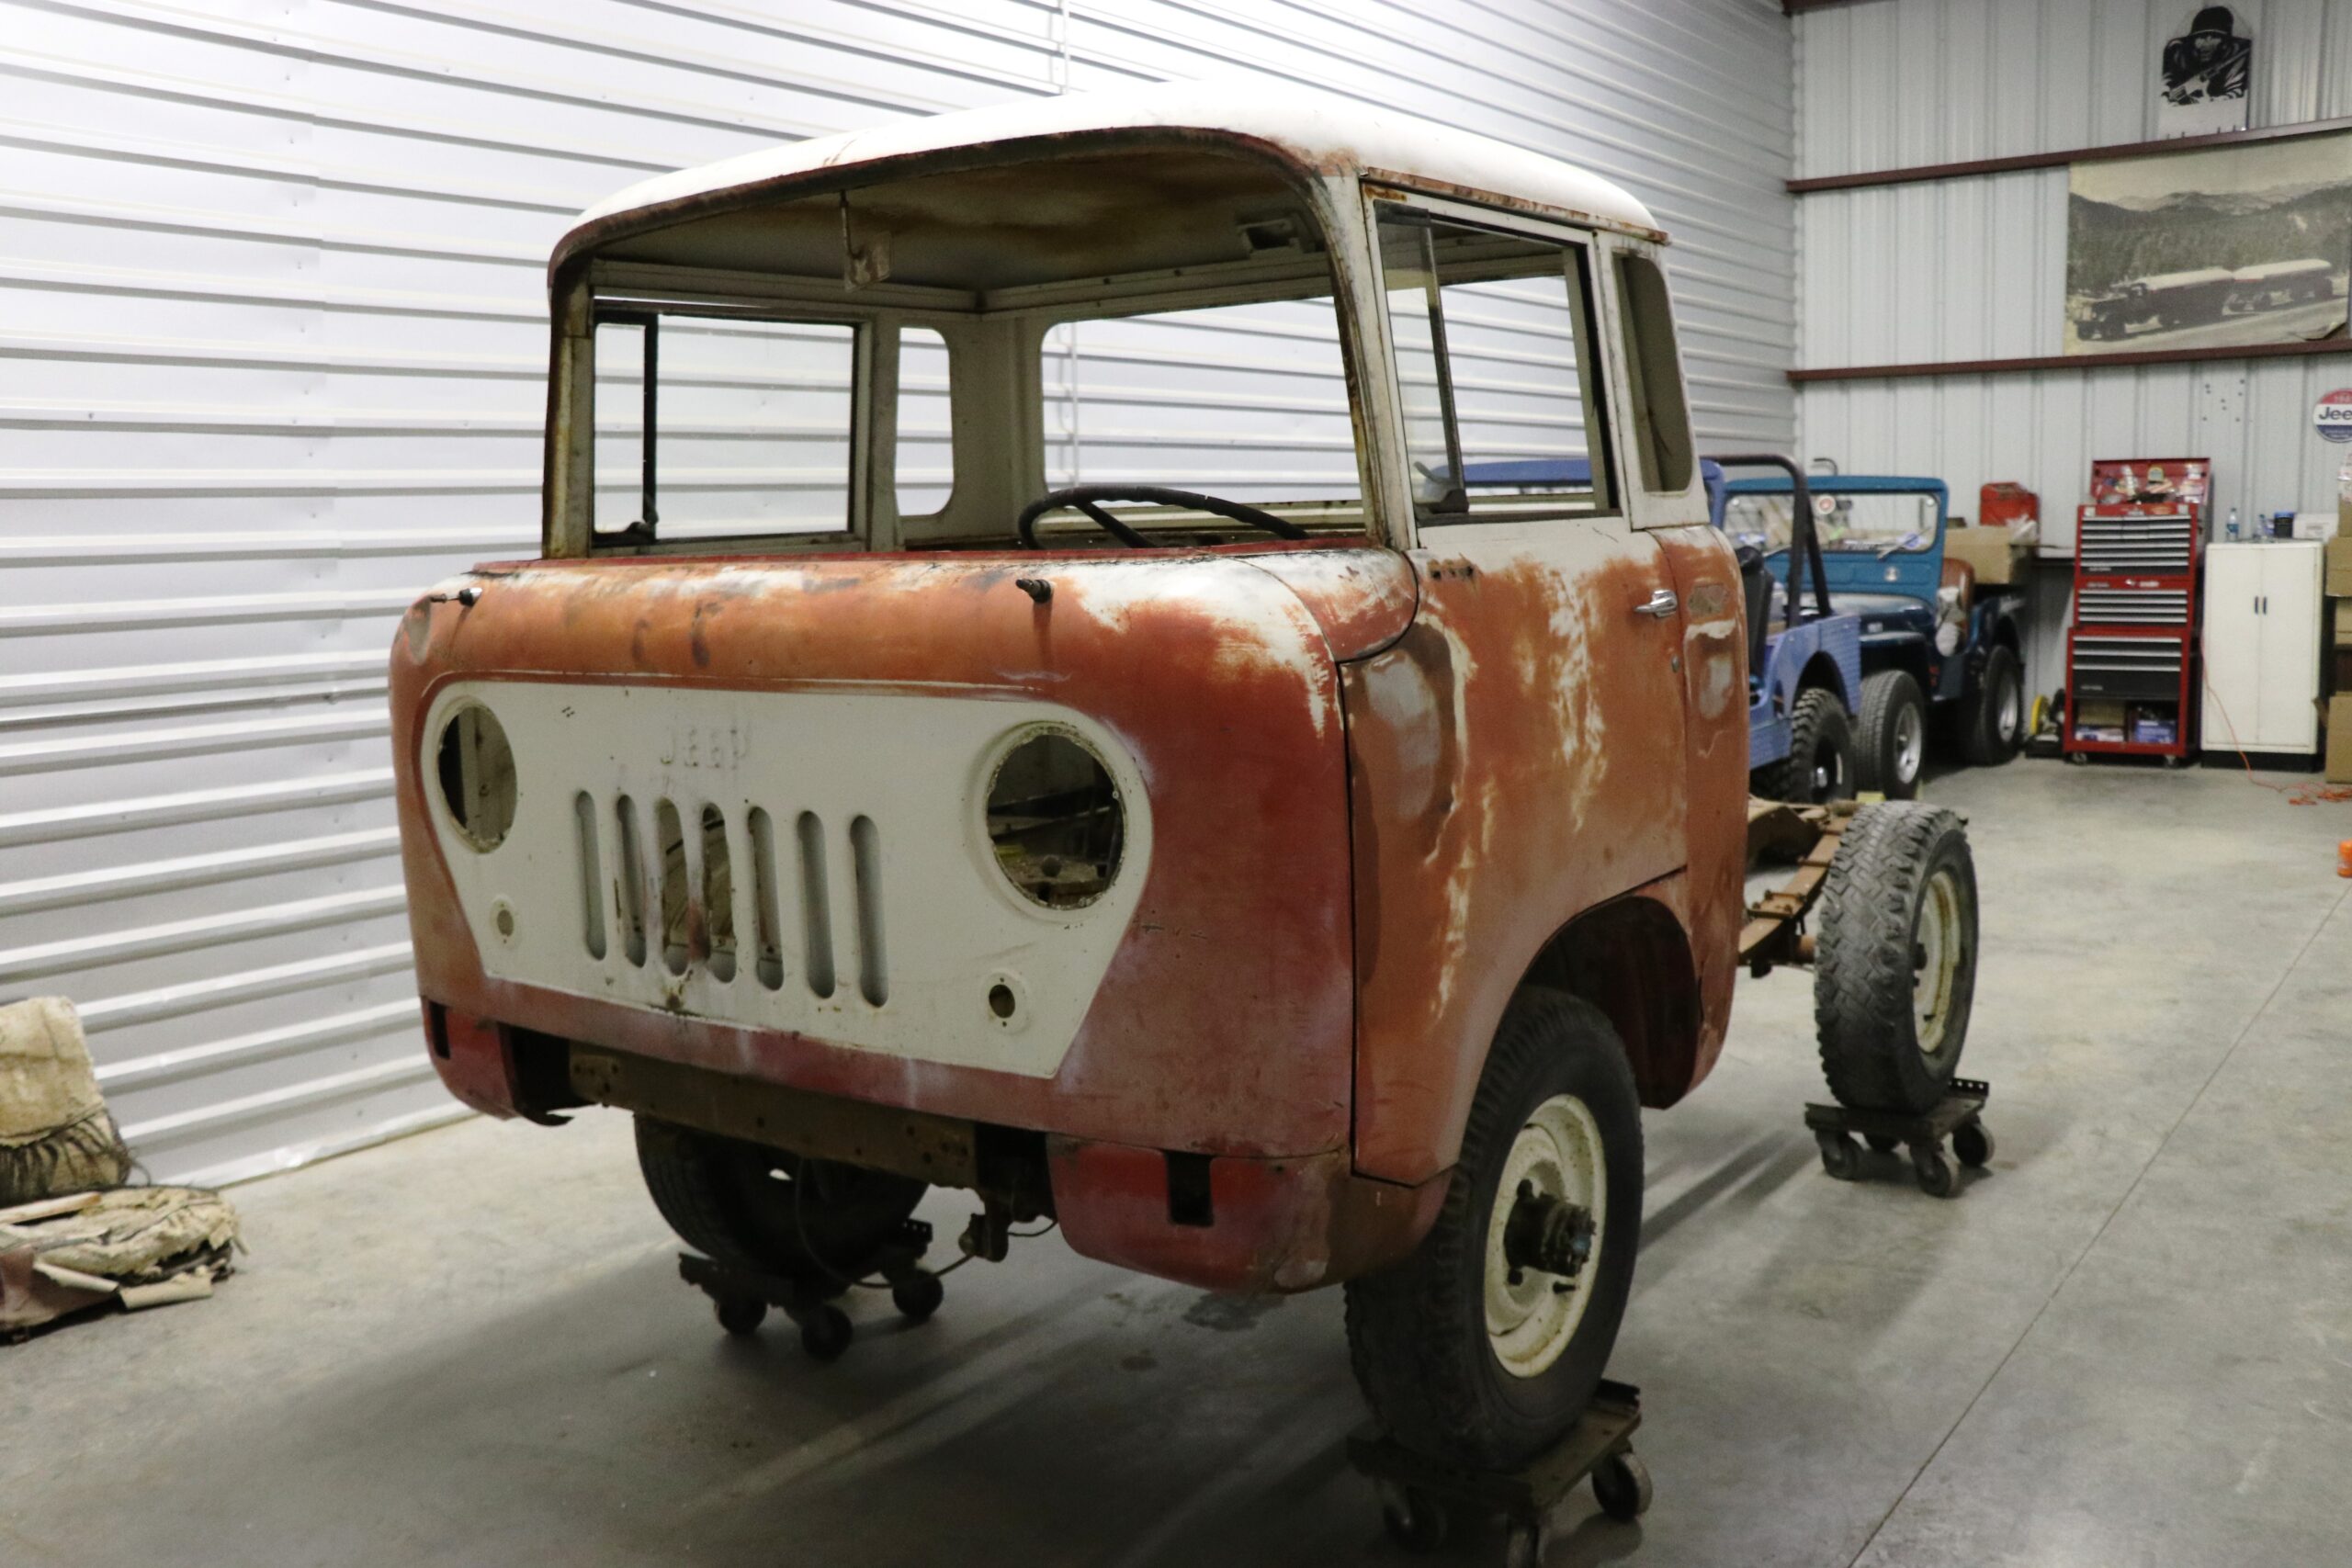
Next to be removed was the front bumper, the headlights and marker lights. Once those were out we moved inside the cab in order to get the interior emptied out. This area took a bit more time than anticipated, we fought nuts and bolts that were rusted, some were broke and others needed a solid dose of penetrating oil before they would break loose. We also wanted to preserve the wiring in order to have a reference when we put the replacement harness in.
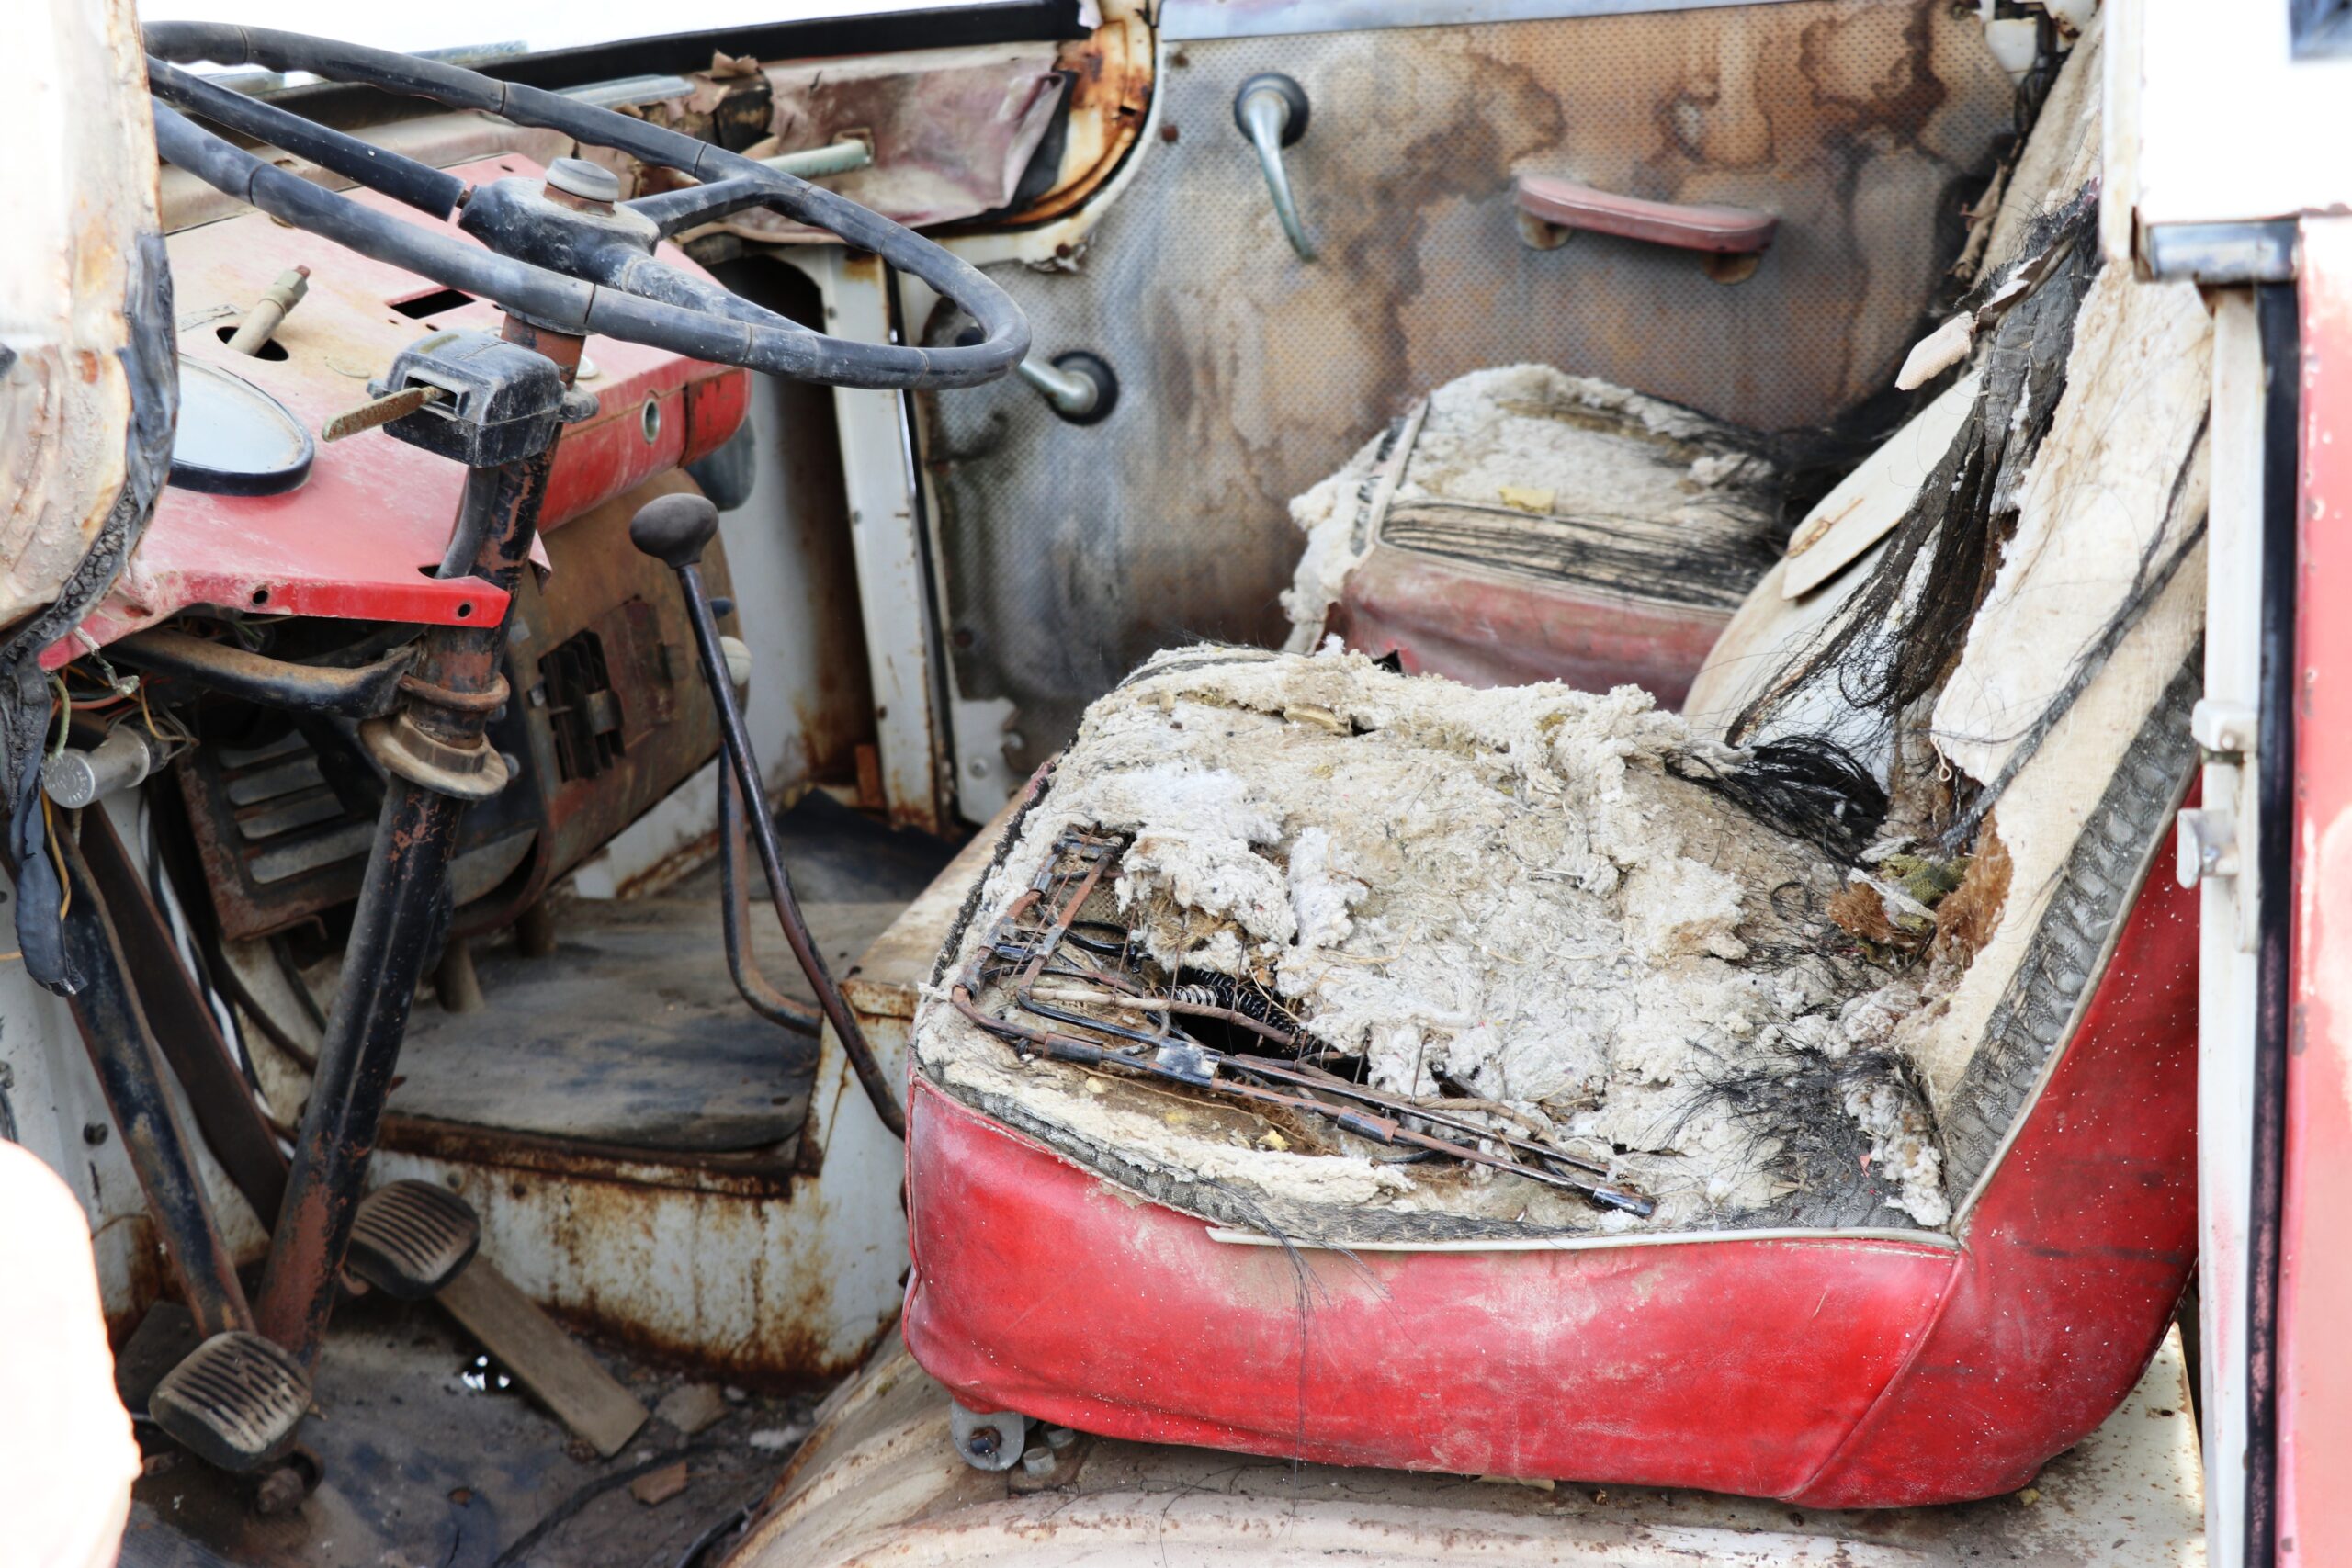
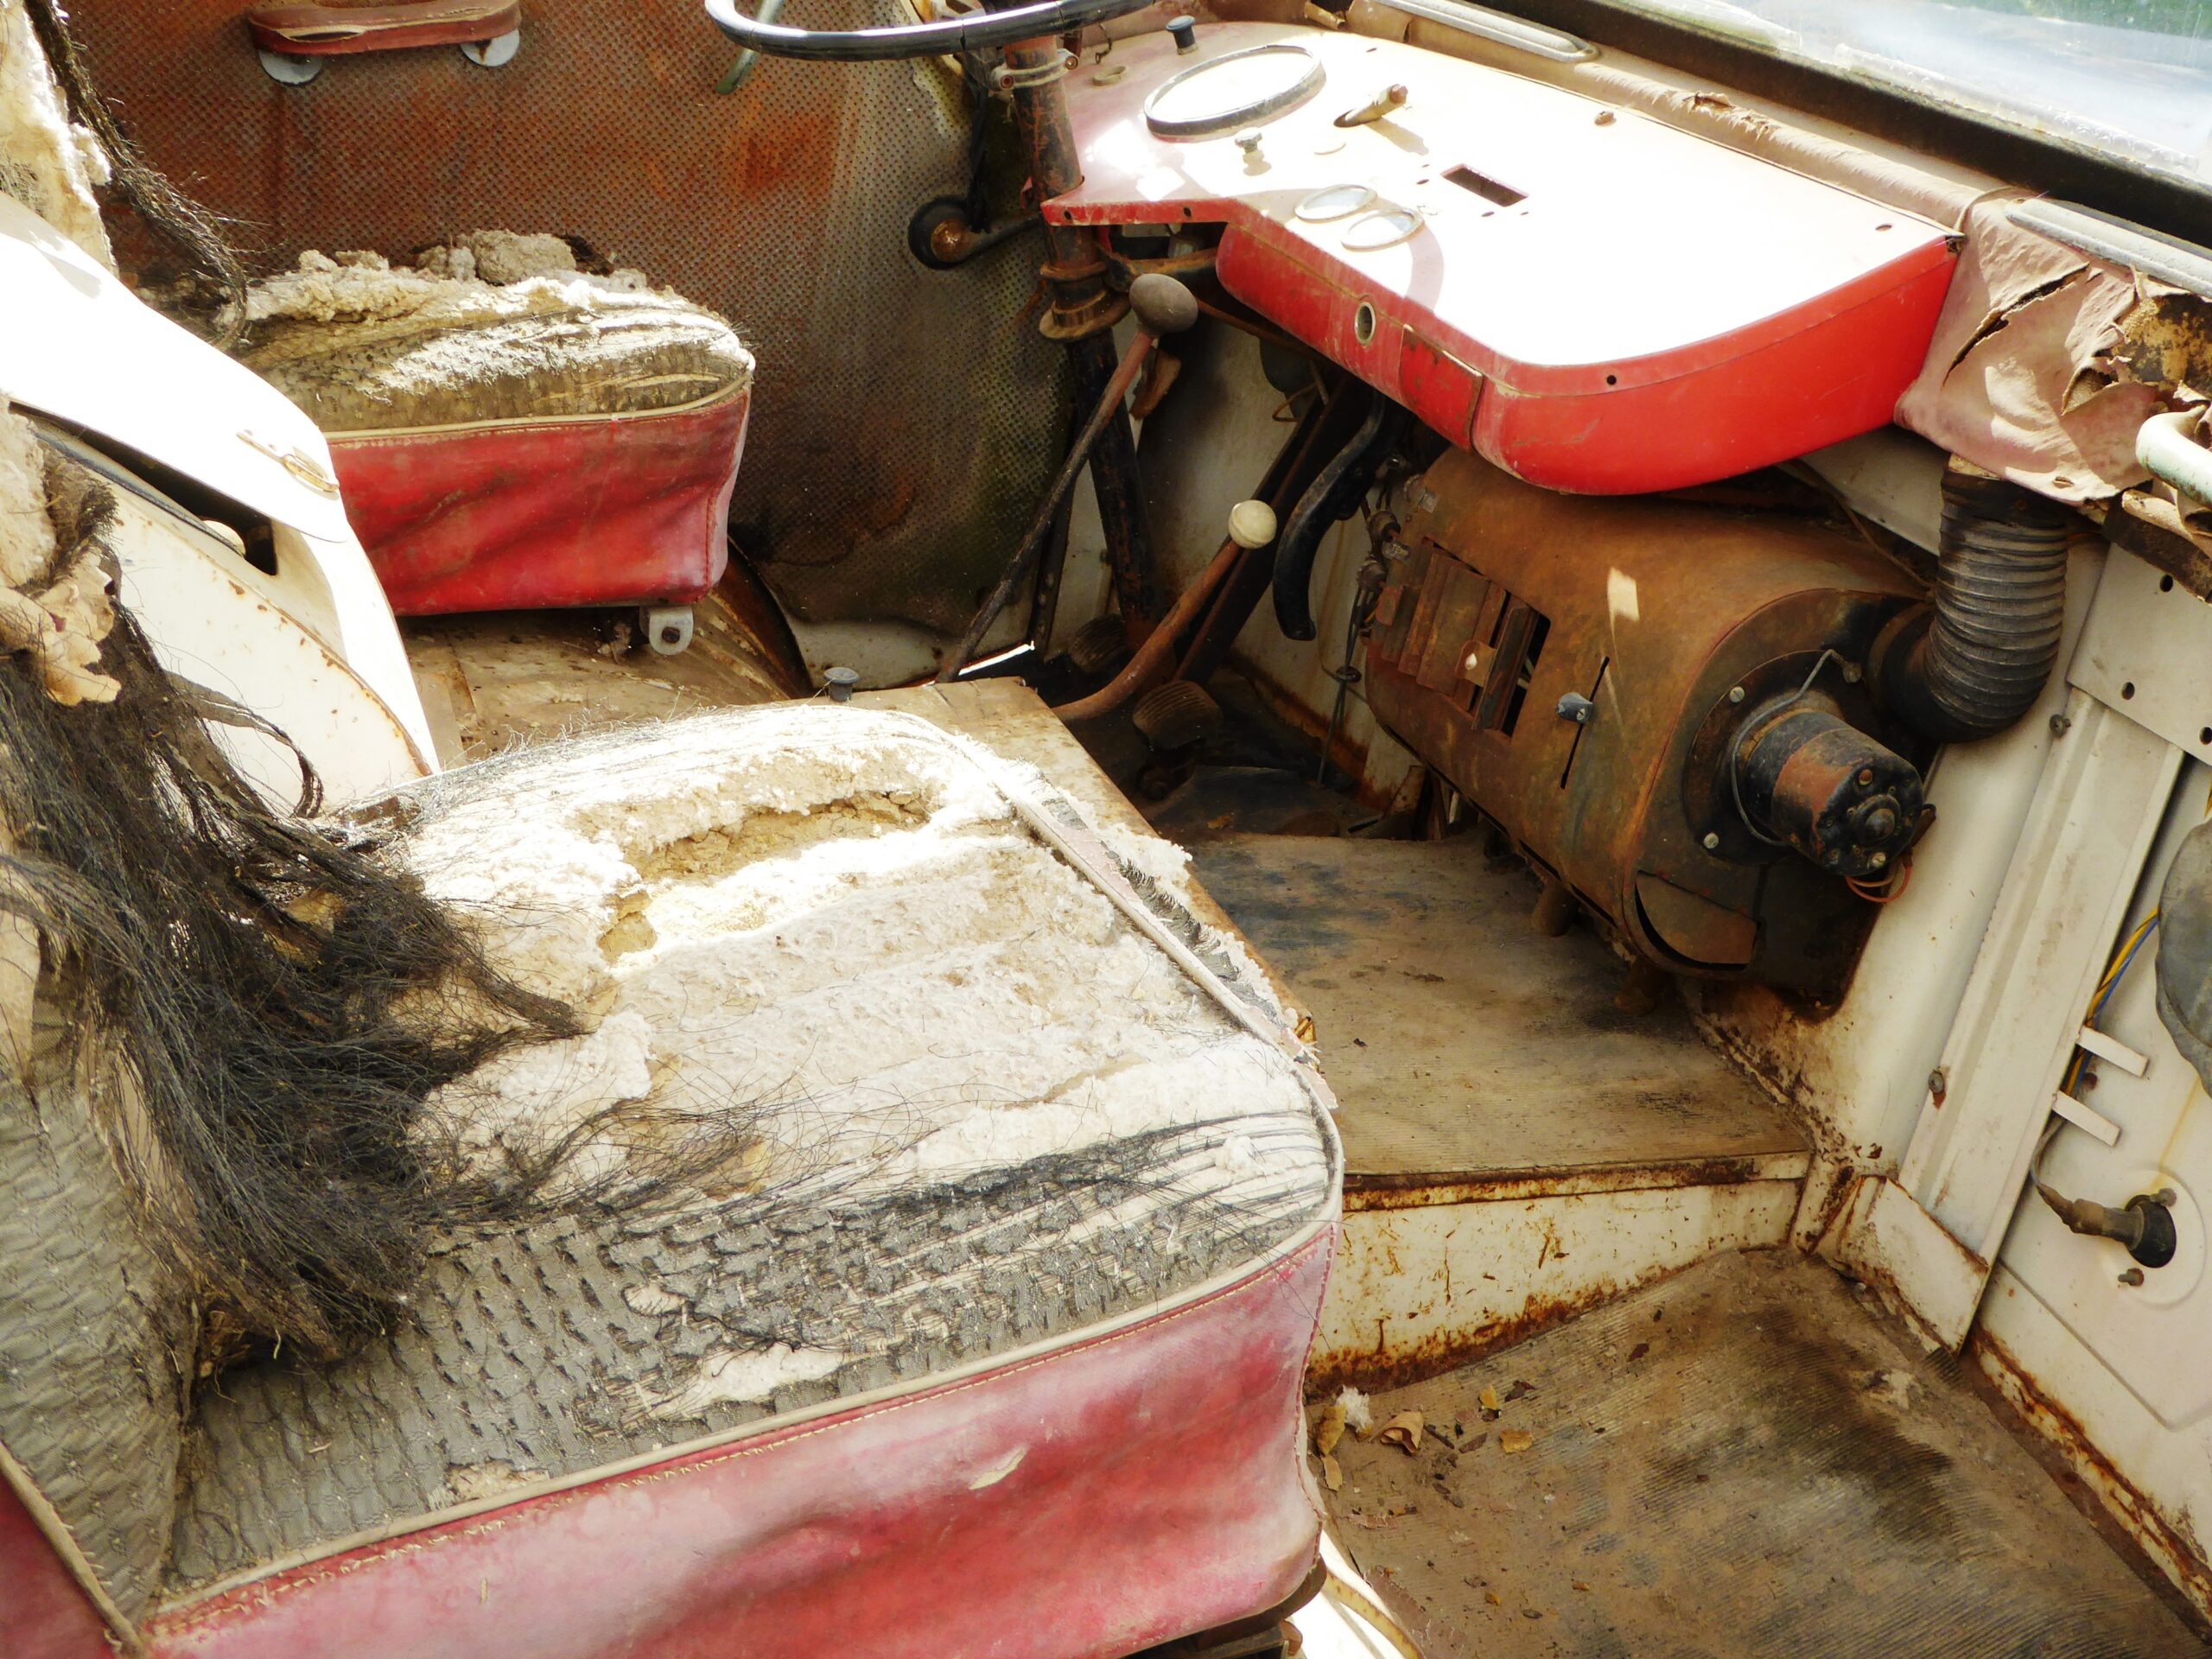
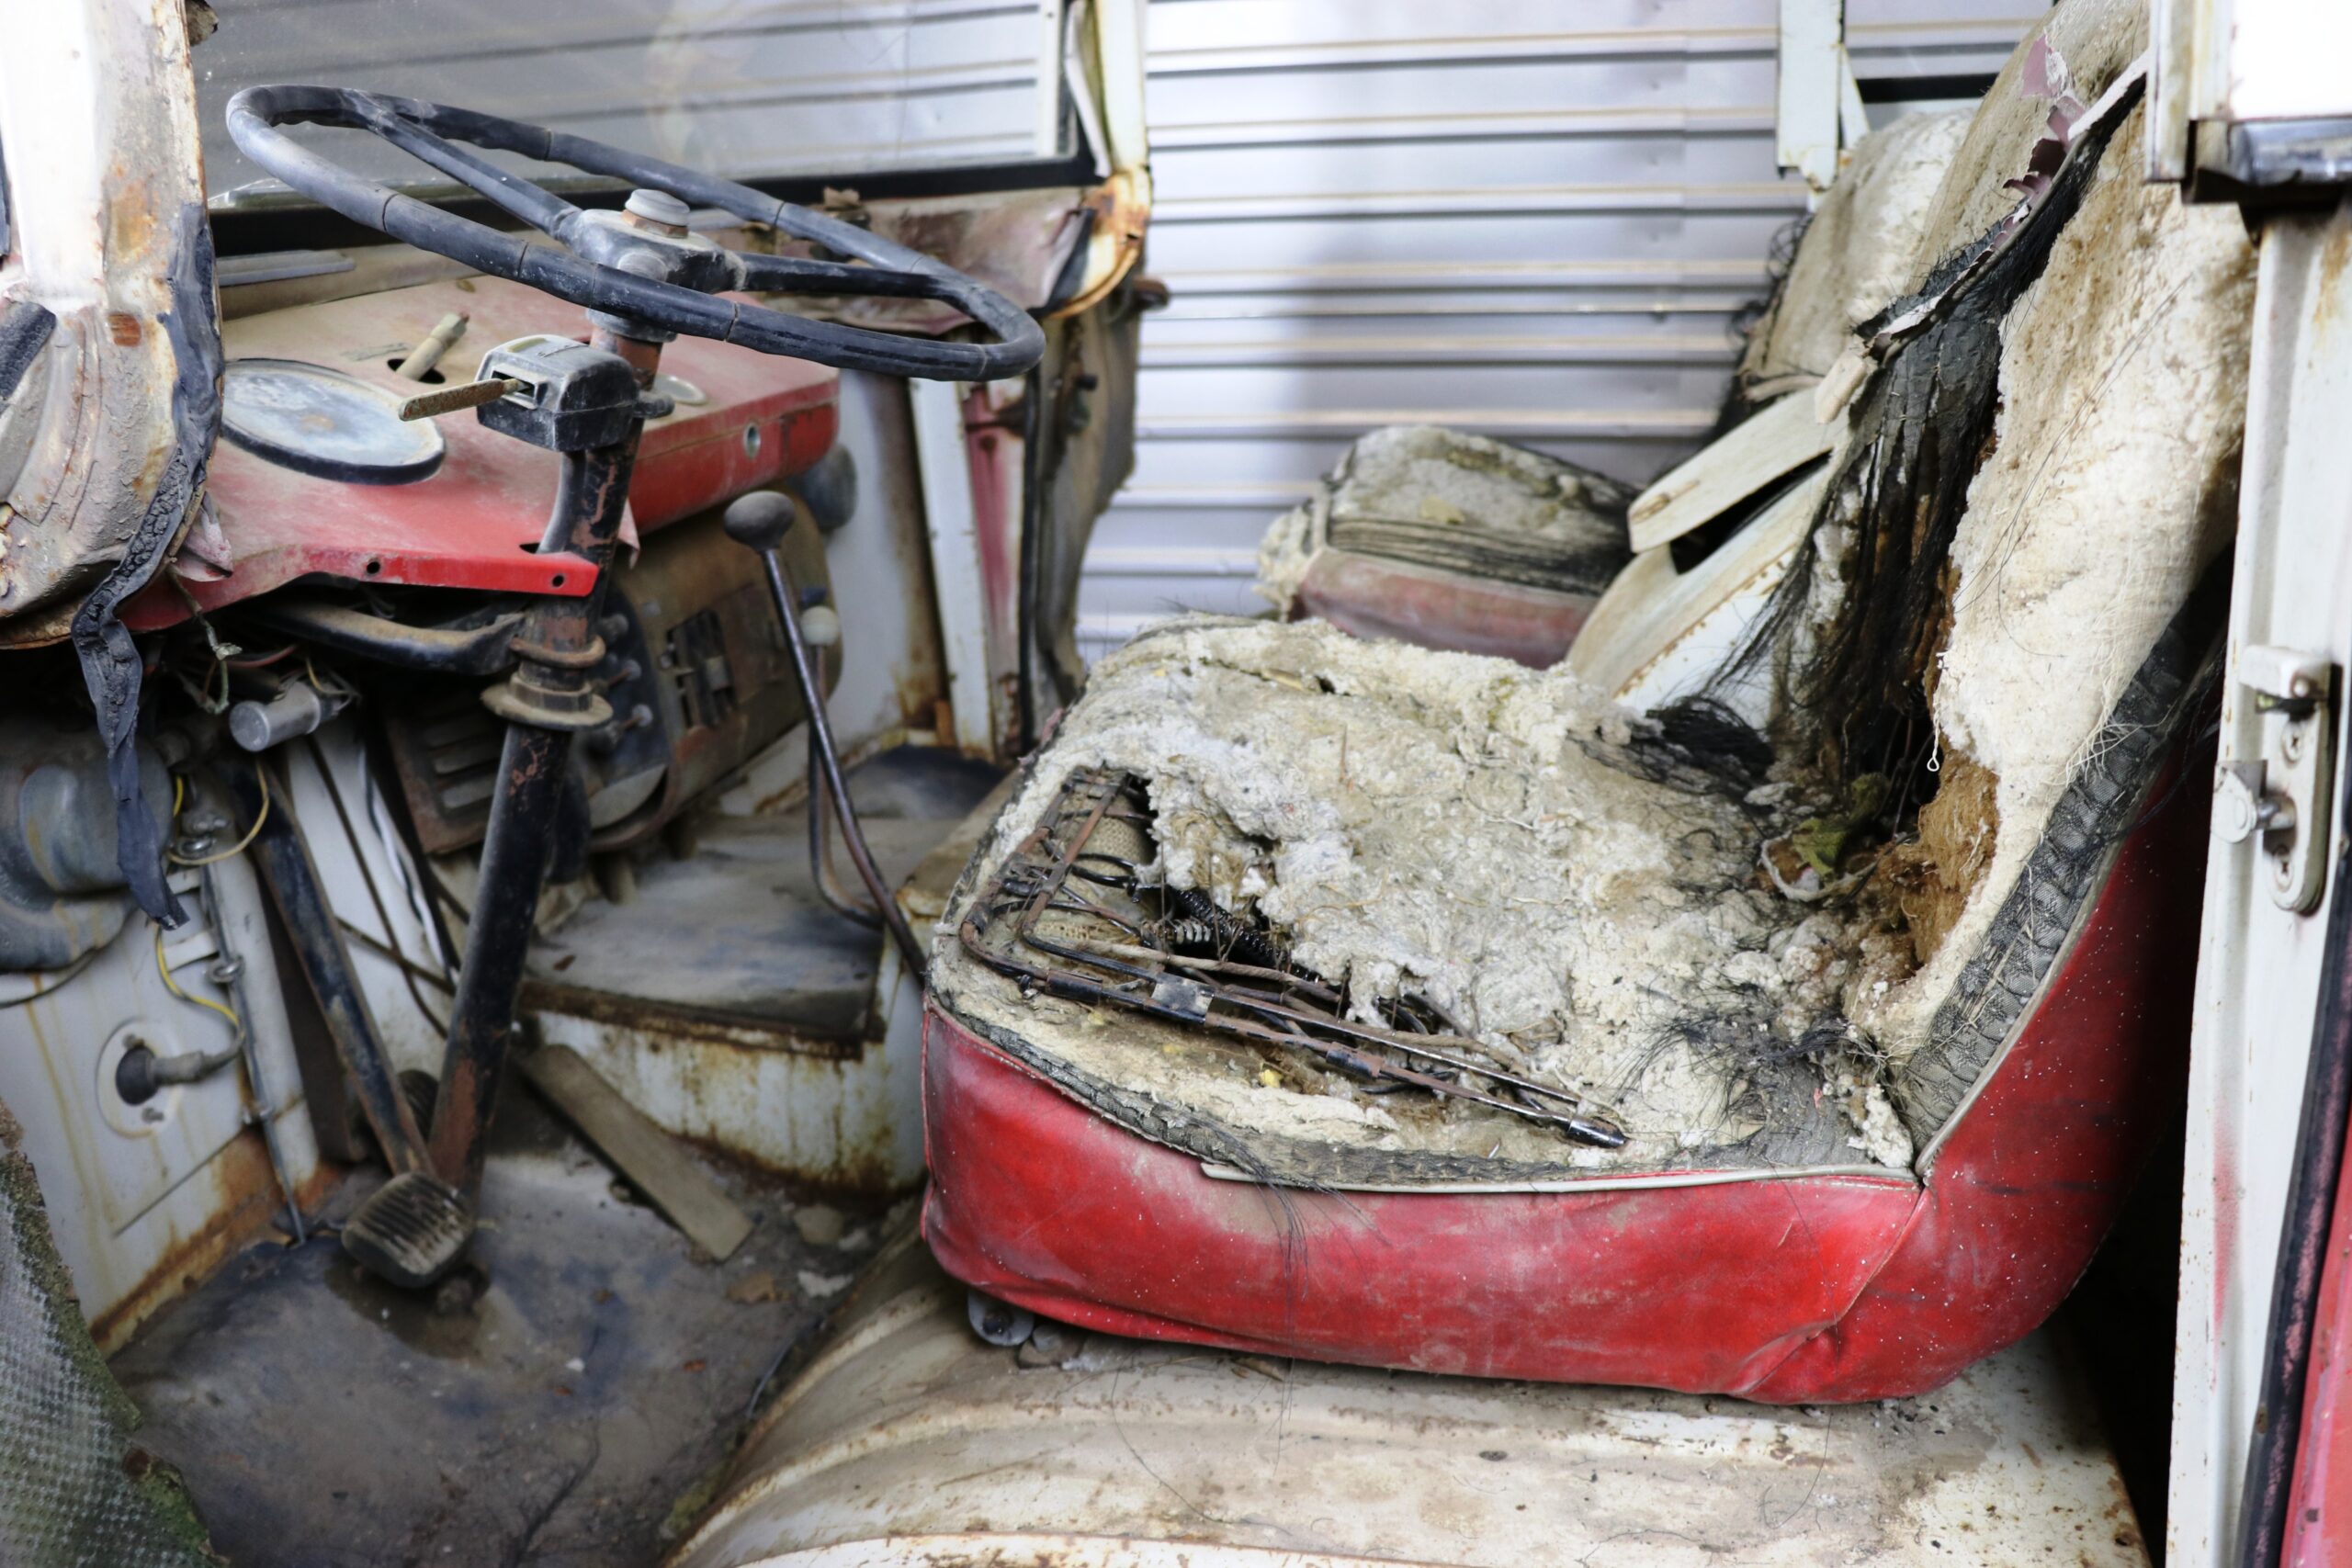
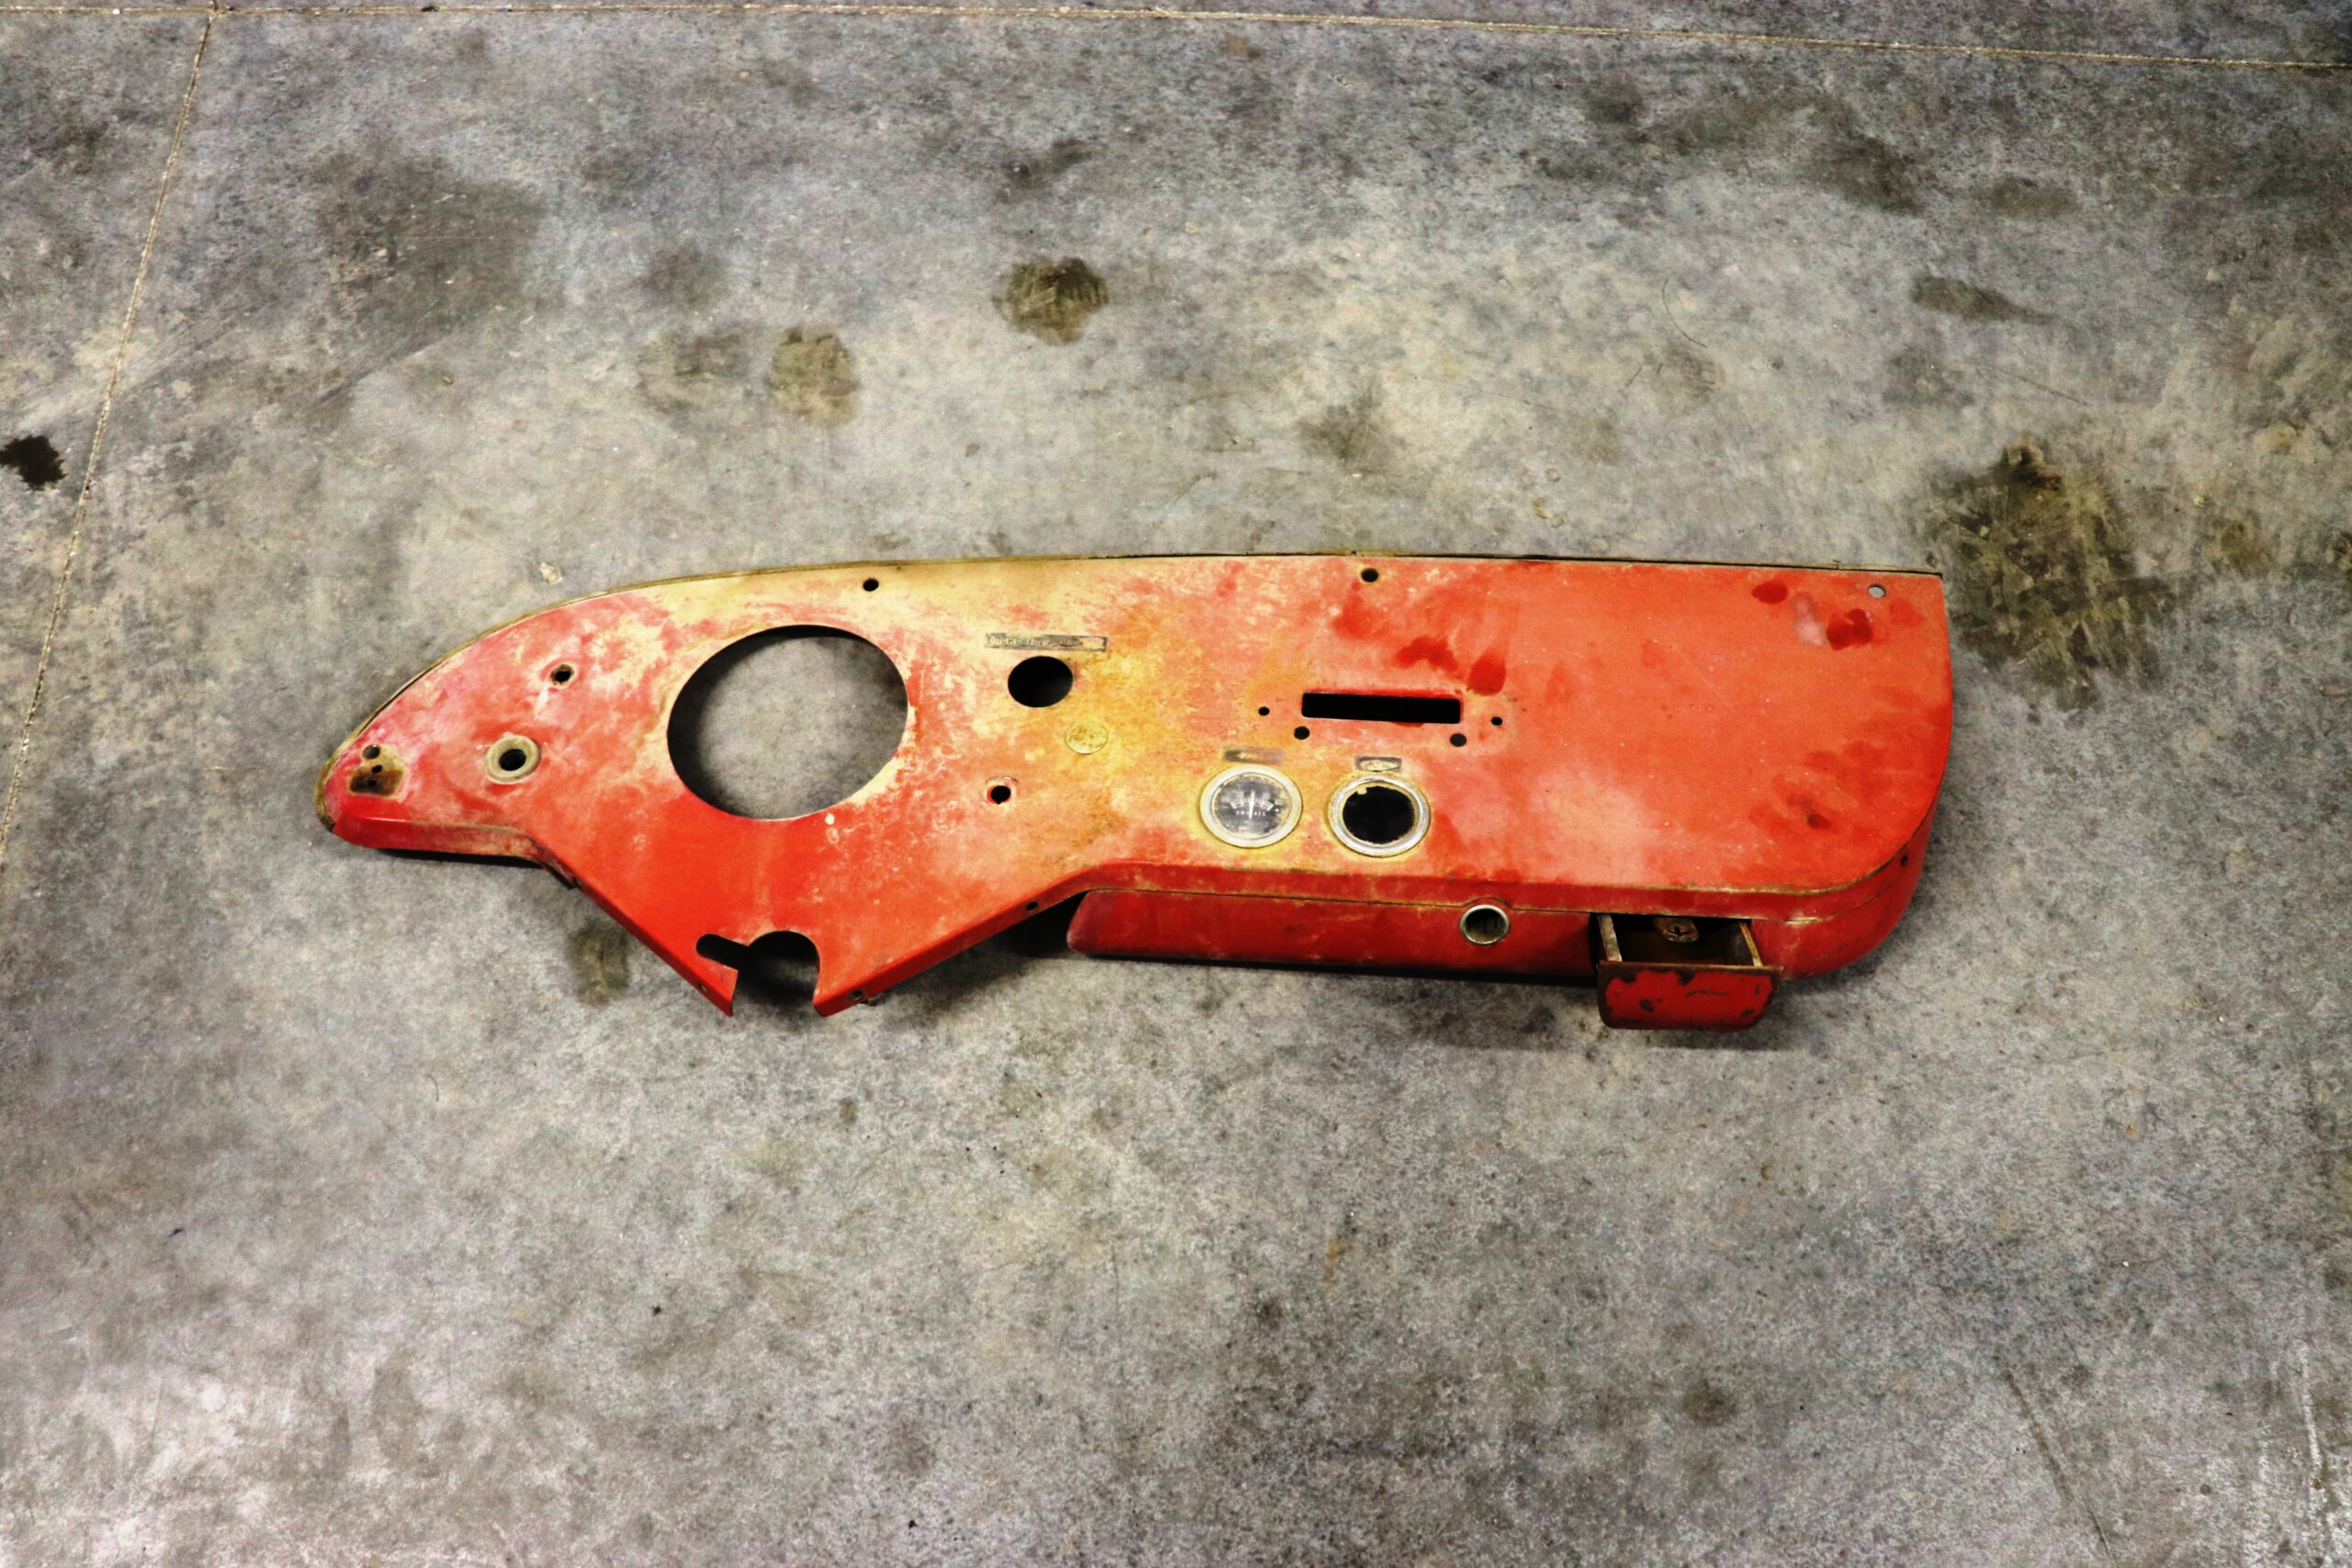
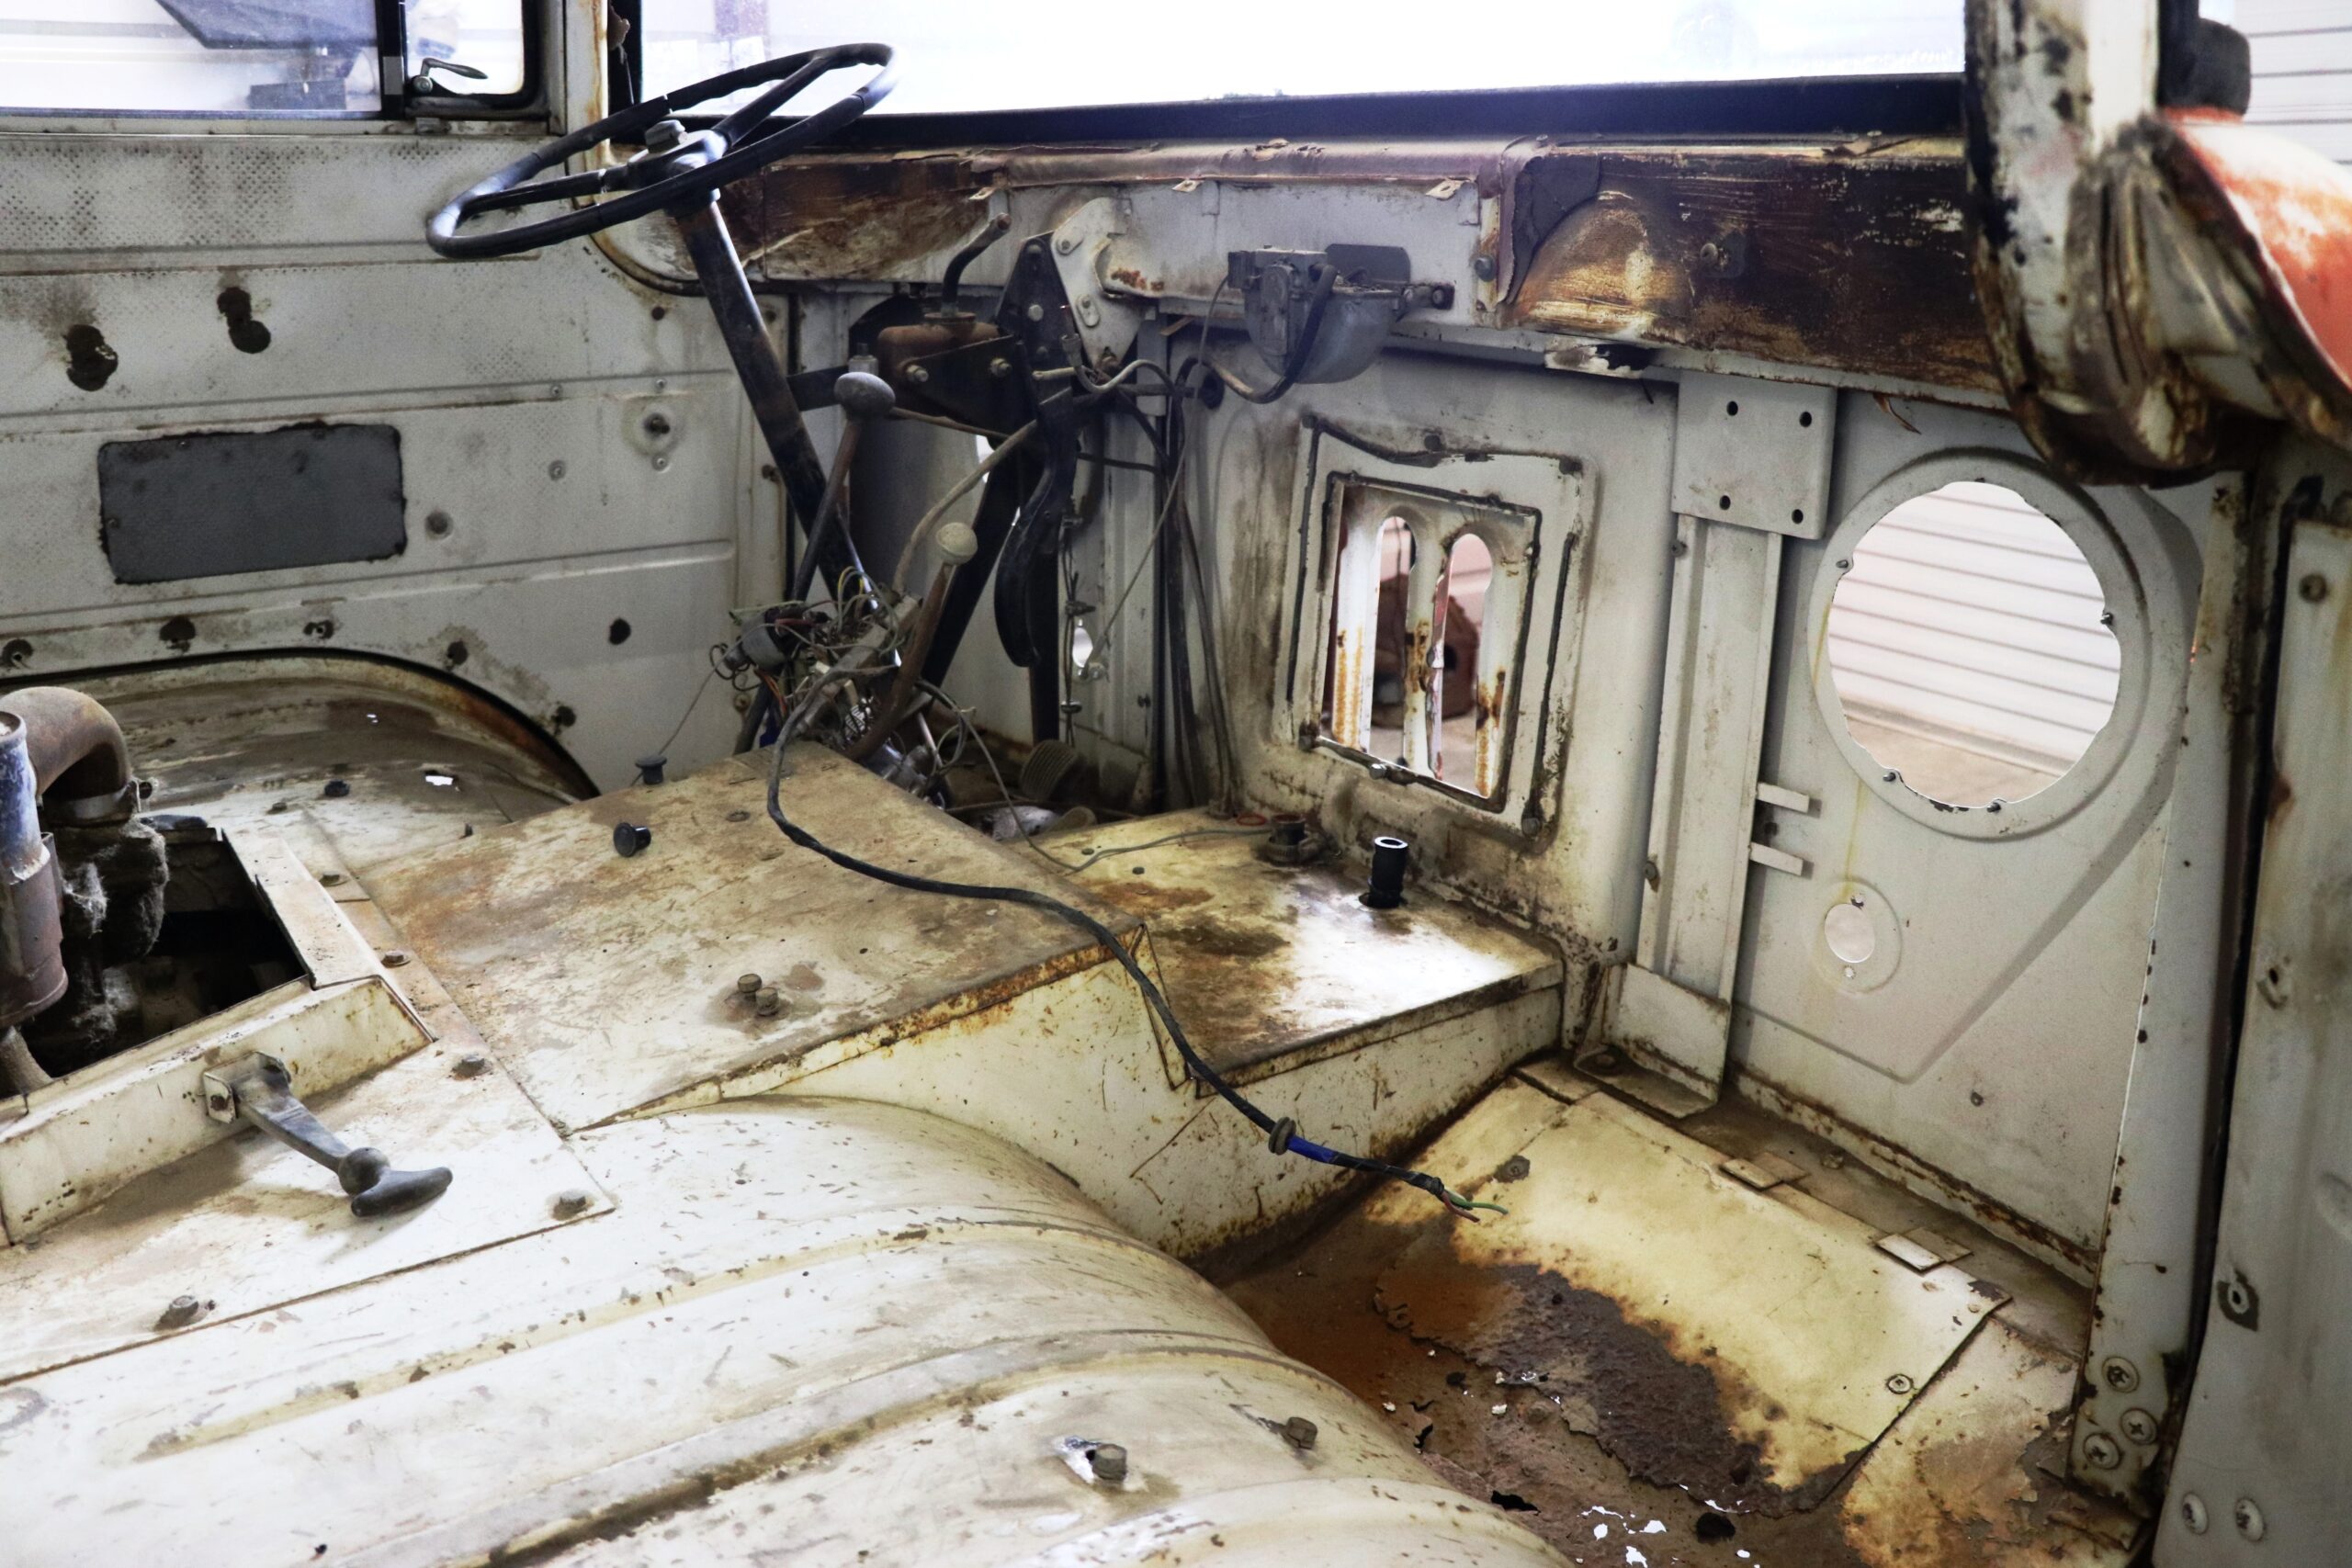
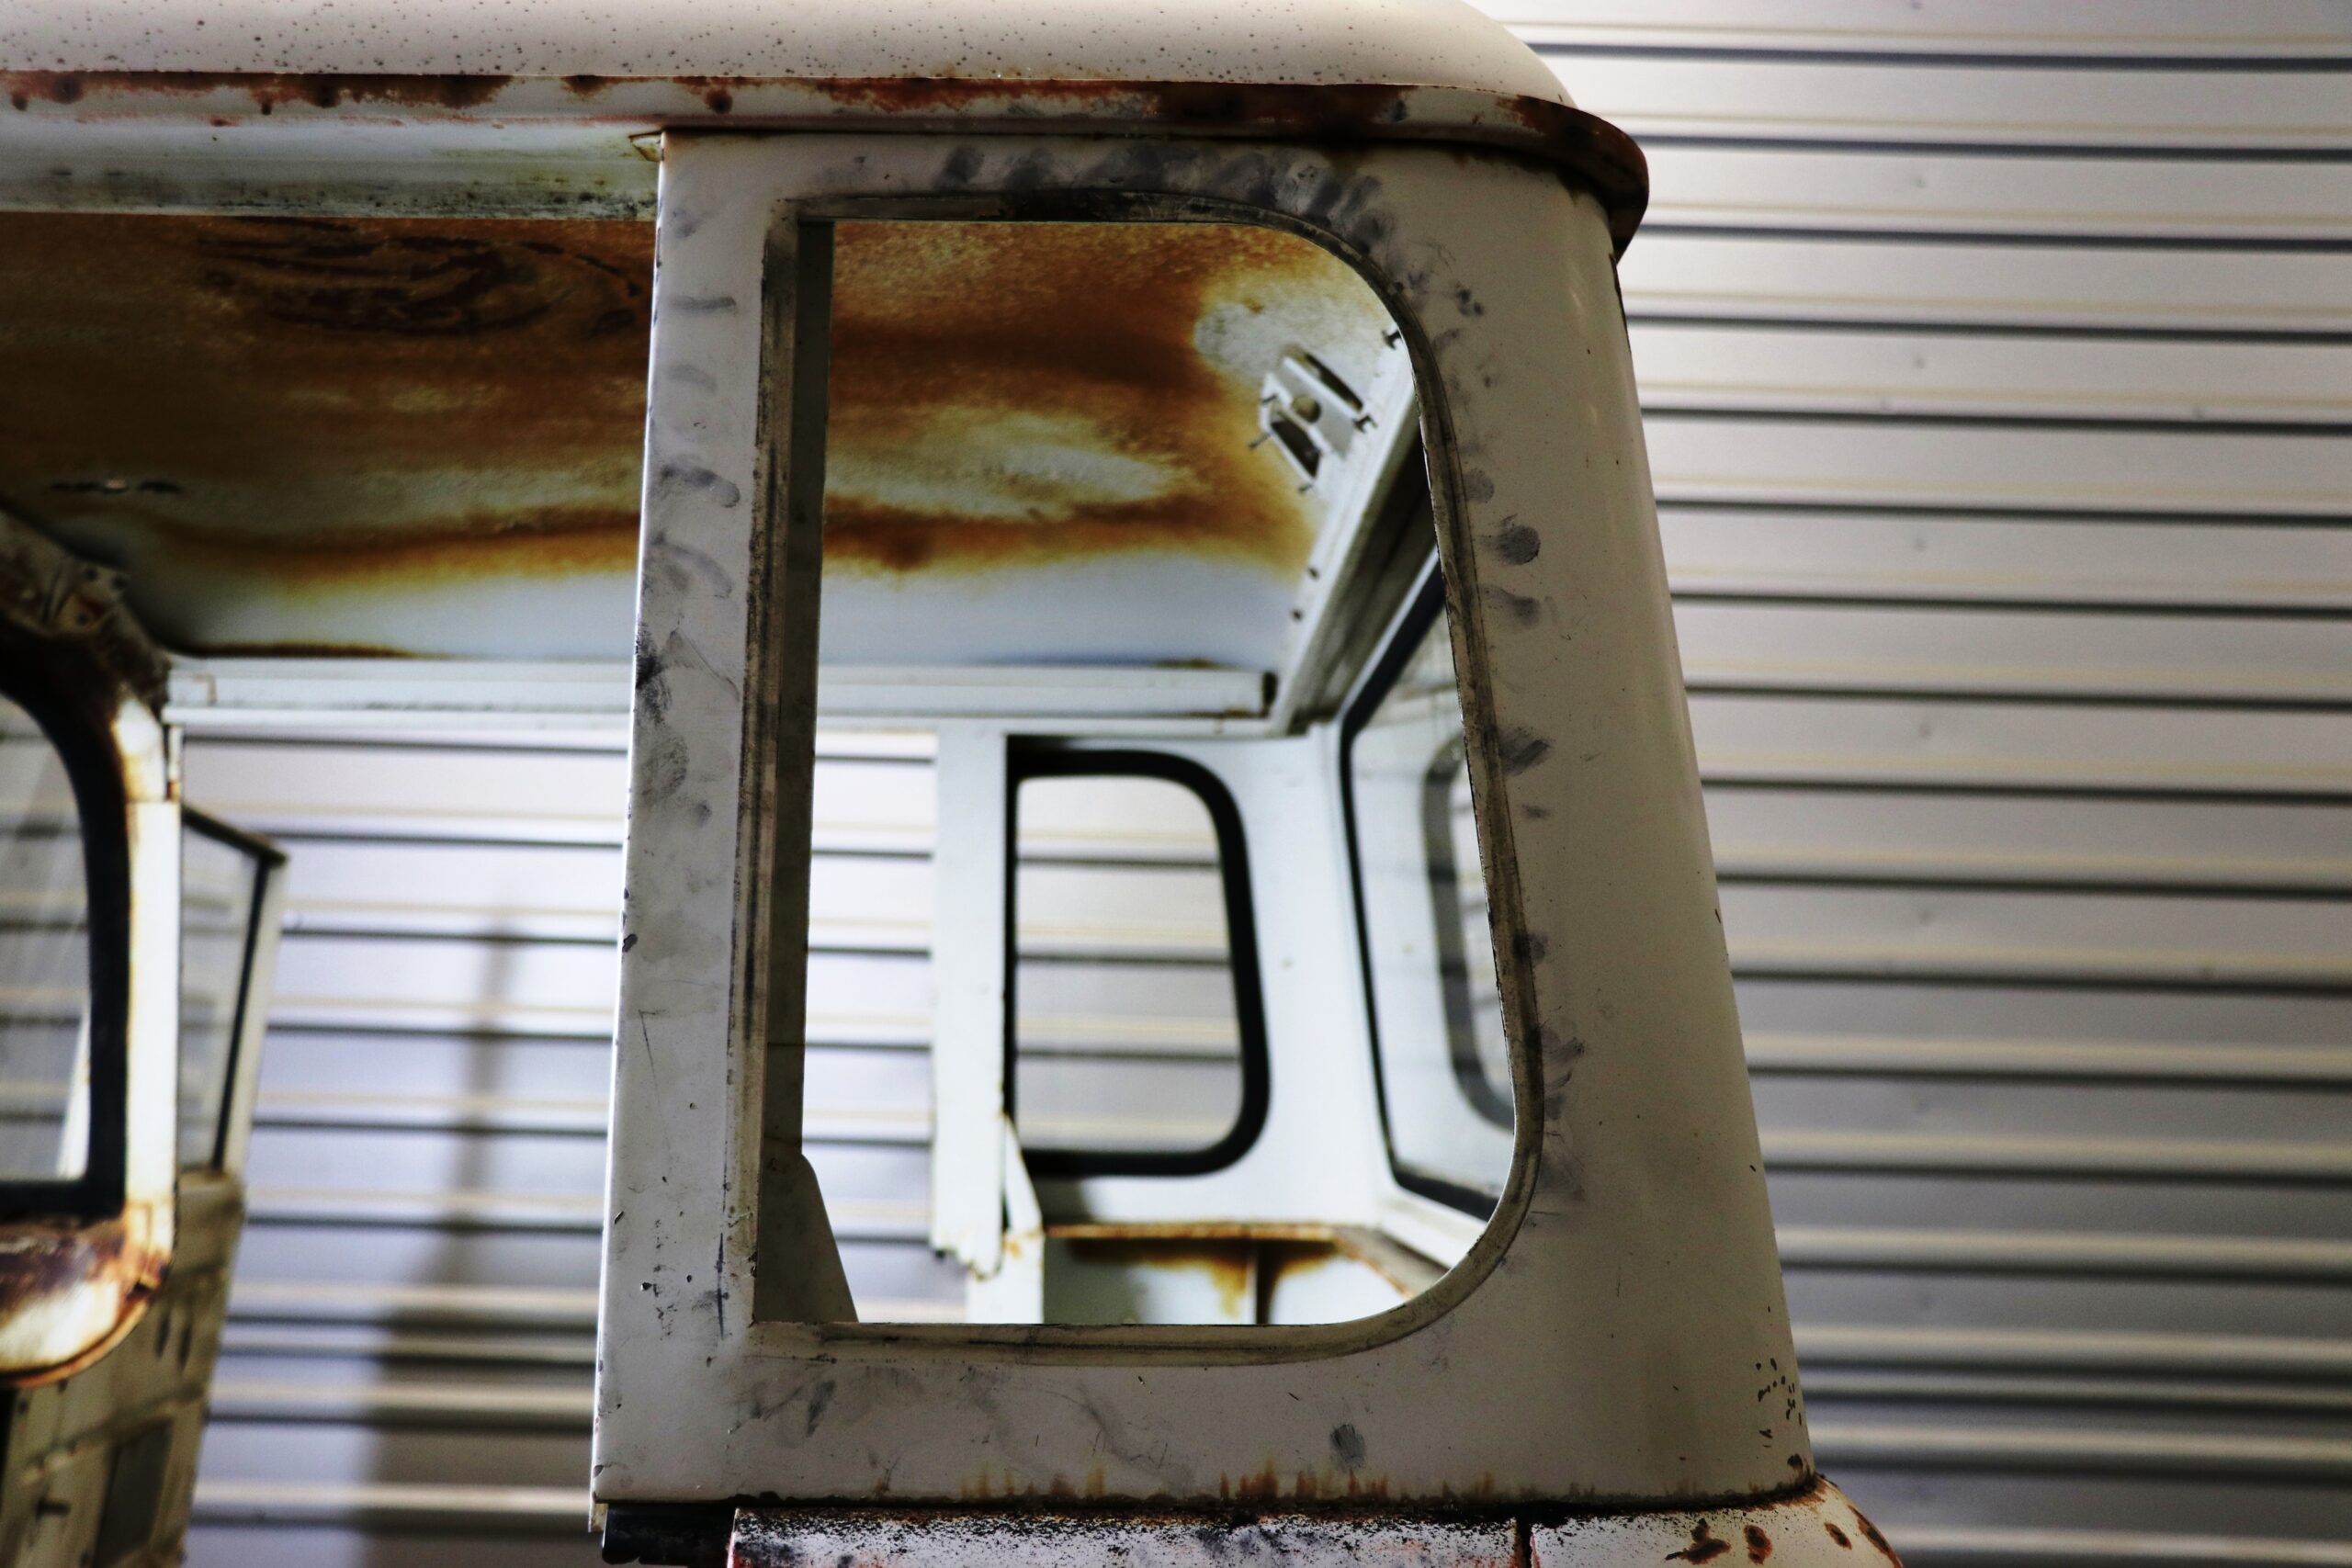
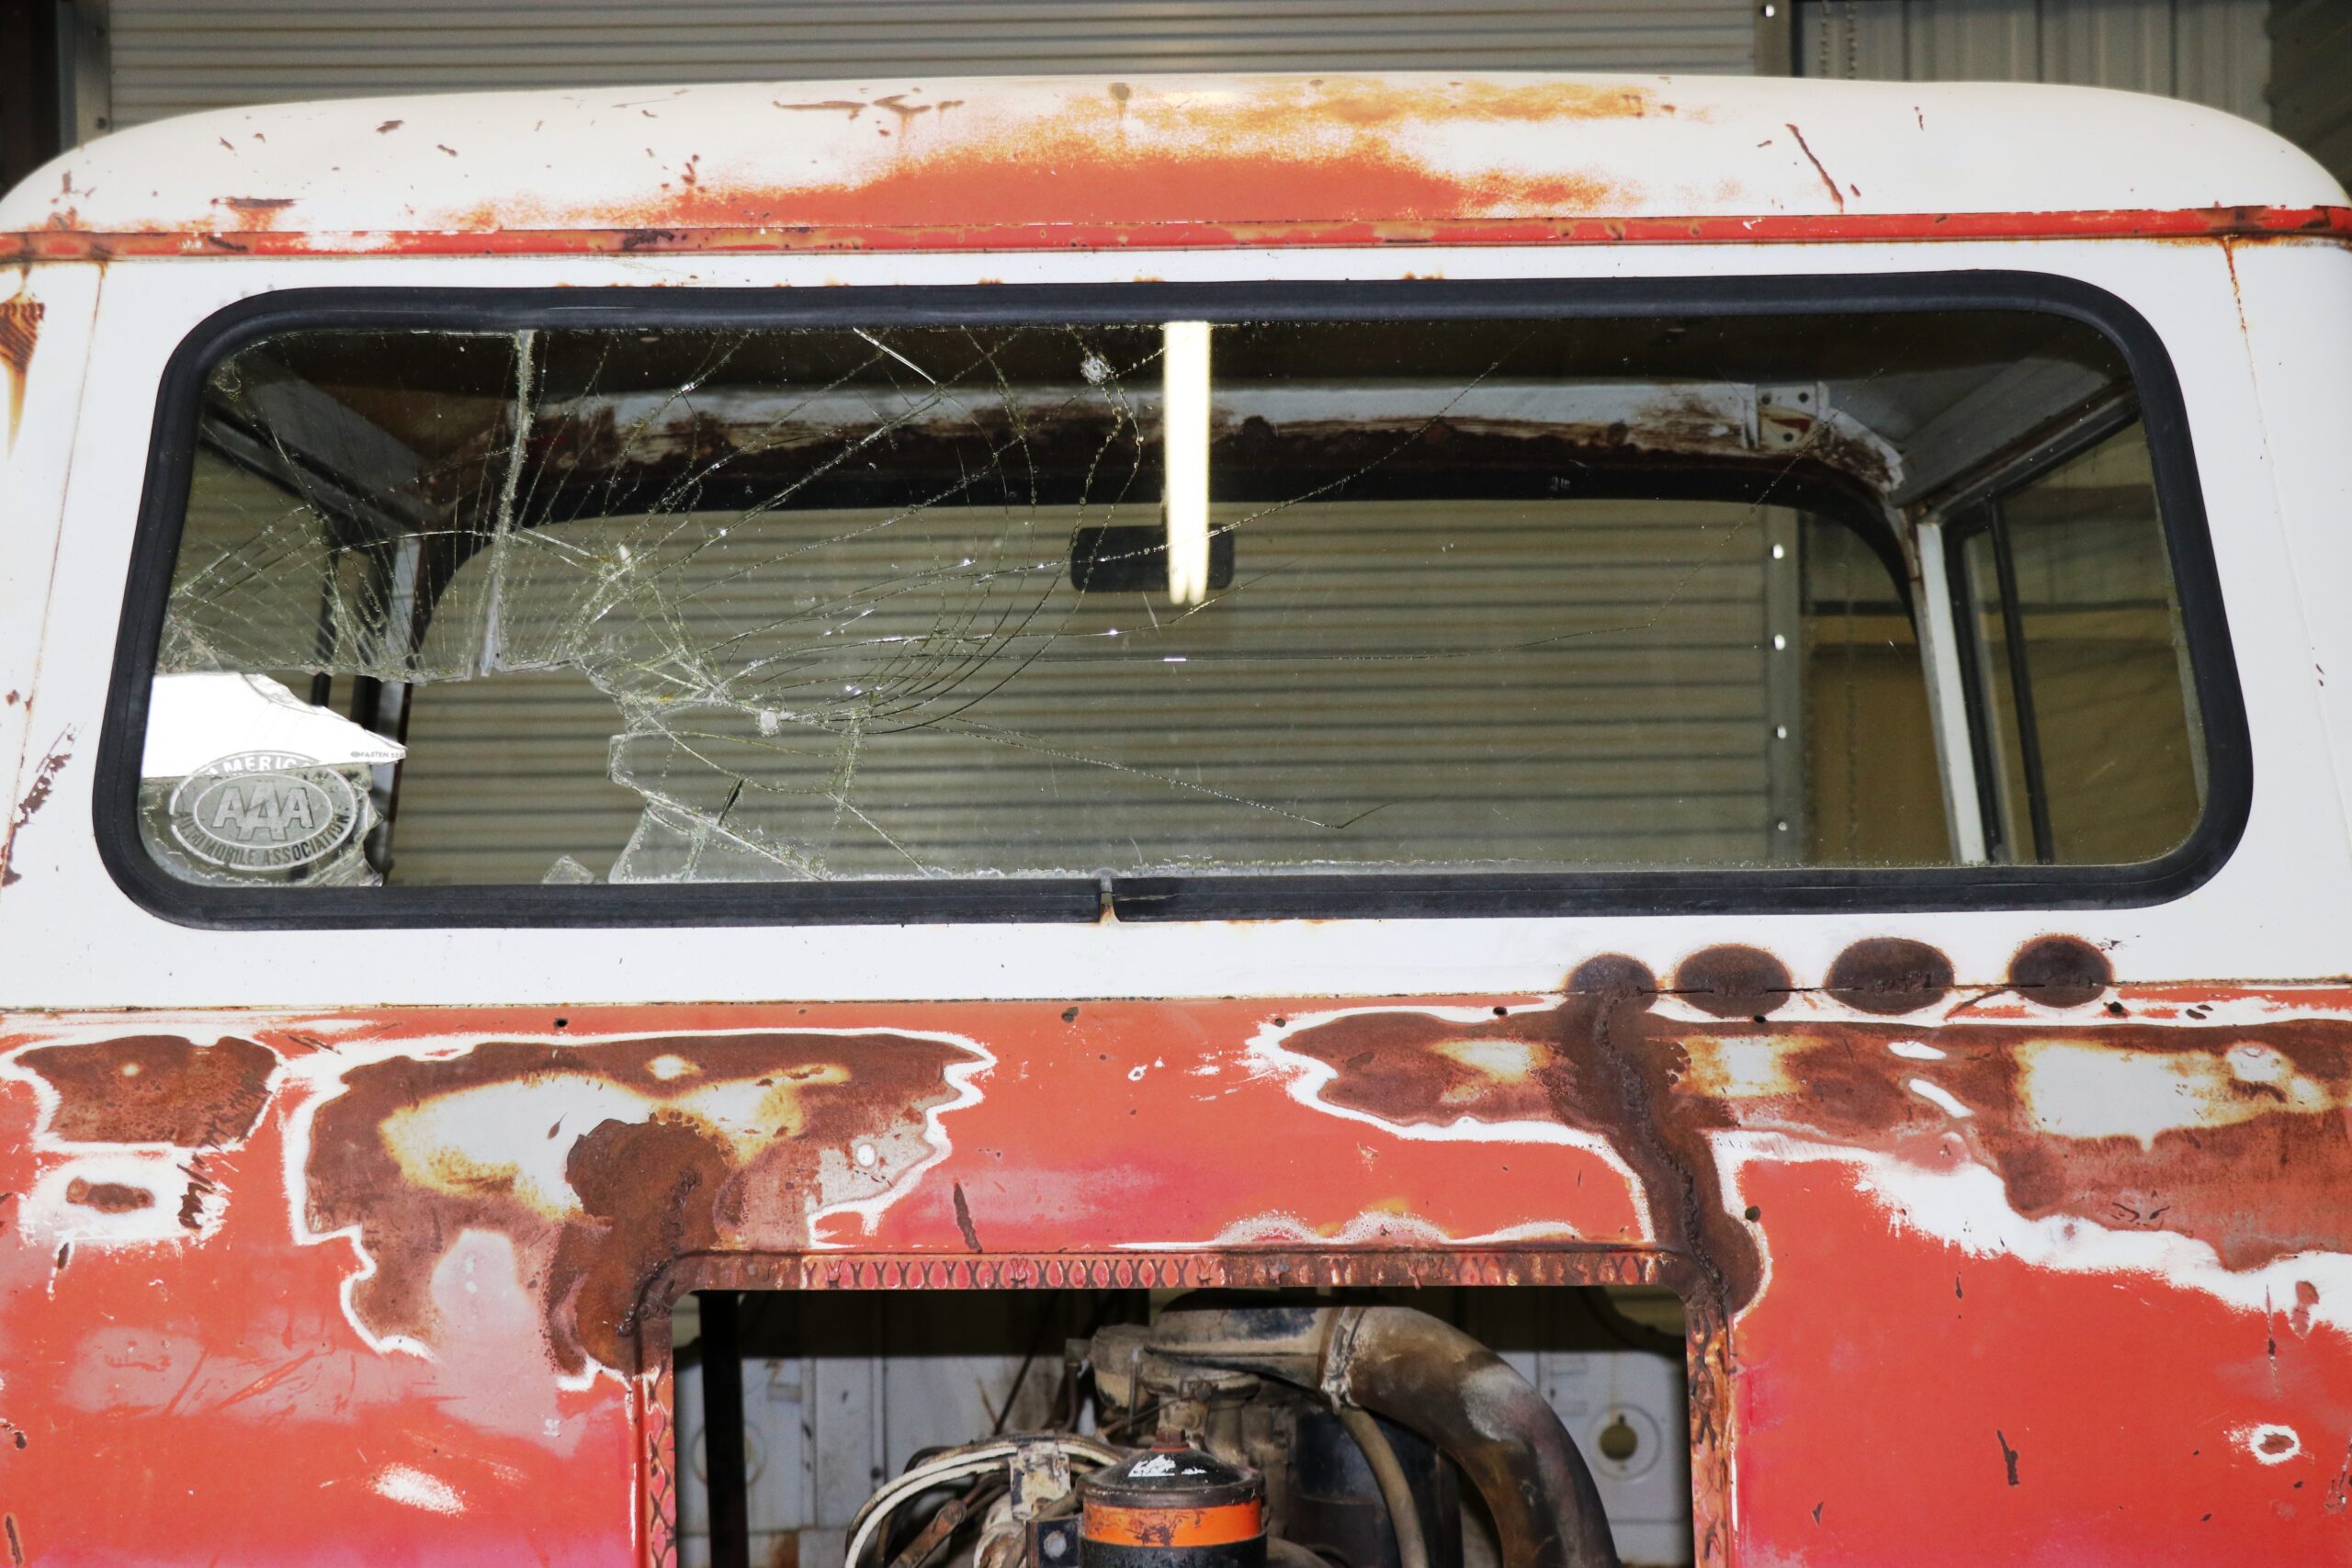
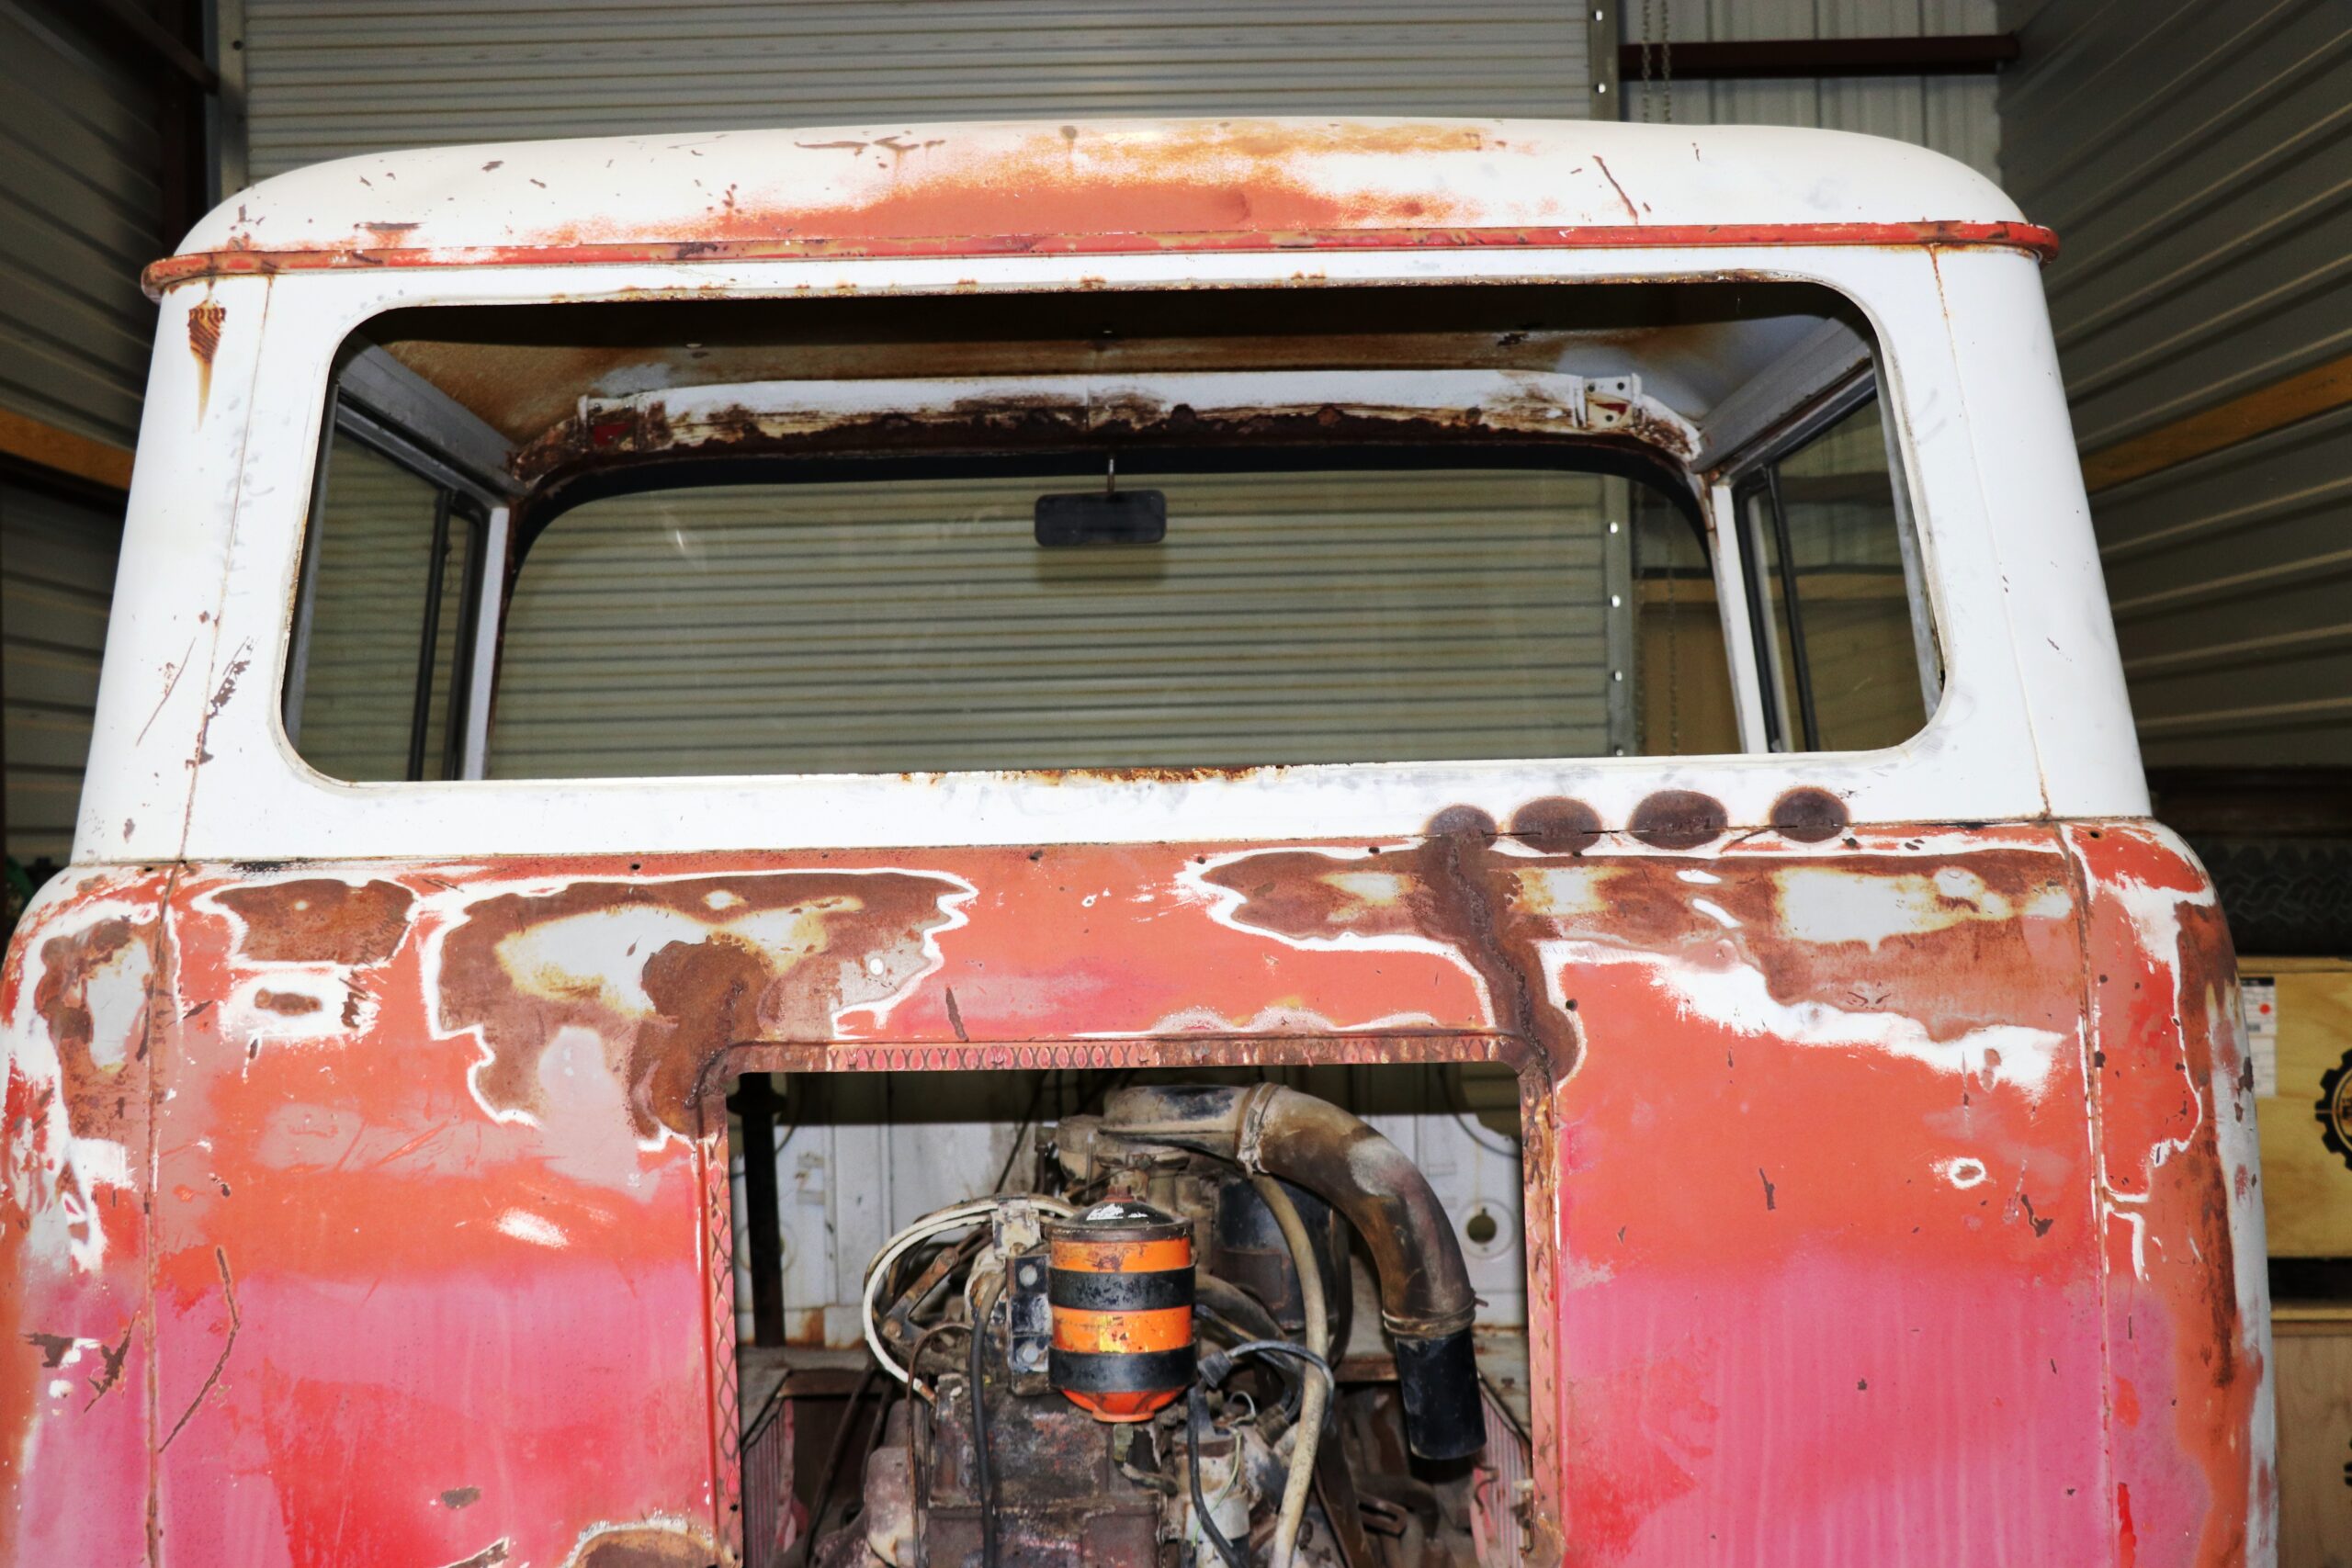
The engine cover panels and heater were the first components to come out and then the gauges, wiring and dash were pulled so we could better access the pedal assembly and steering column. With the cab pretty well cleaned out the rear quarter glass was removed, the rear glass and then the front windshield. The old gaskets for the glass had lost all of their flexibility so the fight was on trying to get the glass out but with enough determination, fits of anger and a few loosely thrown words, we managed to remove all of the glass with the exception of the doors removed. The doors have a removable upper section that is held on by screws, like many other parts on this FC… were locked in place by decades of built up rust.
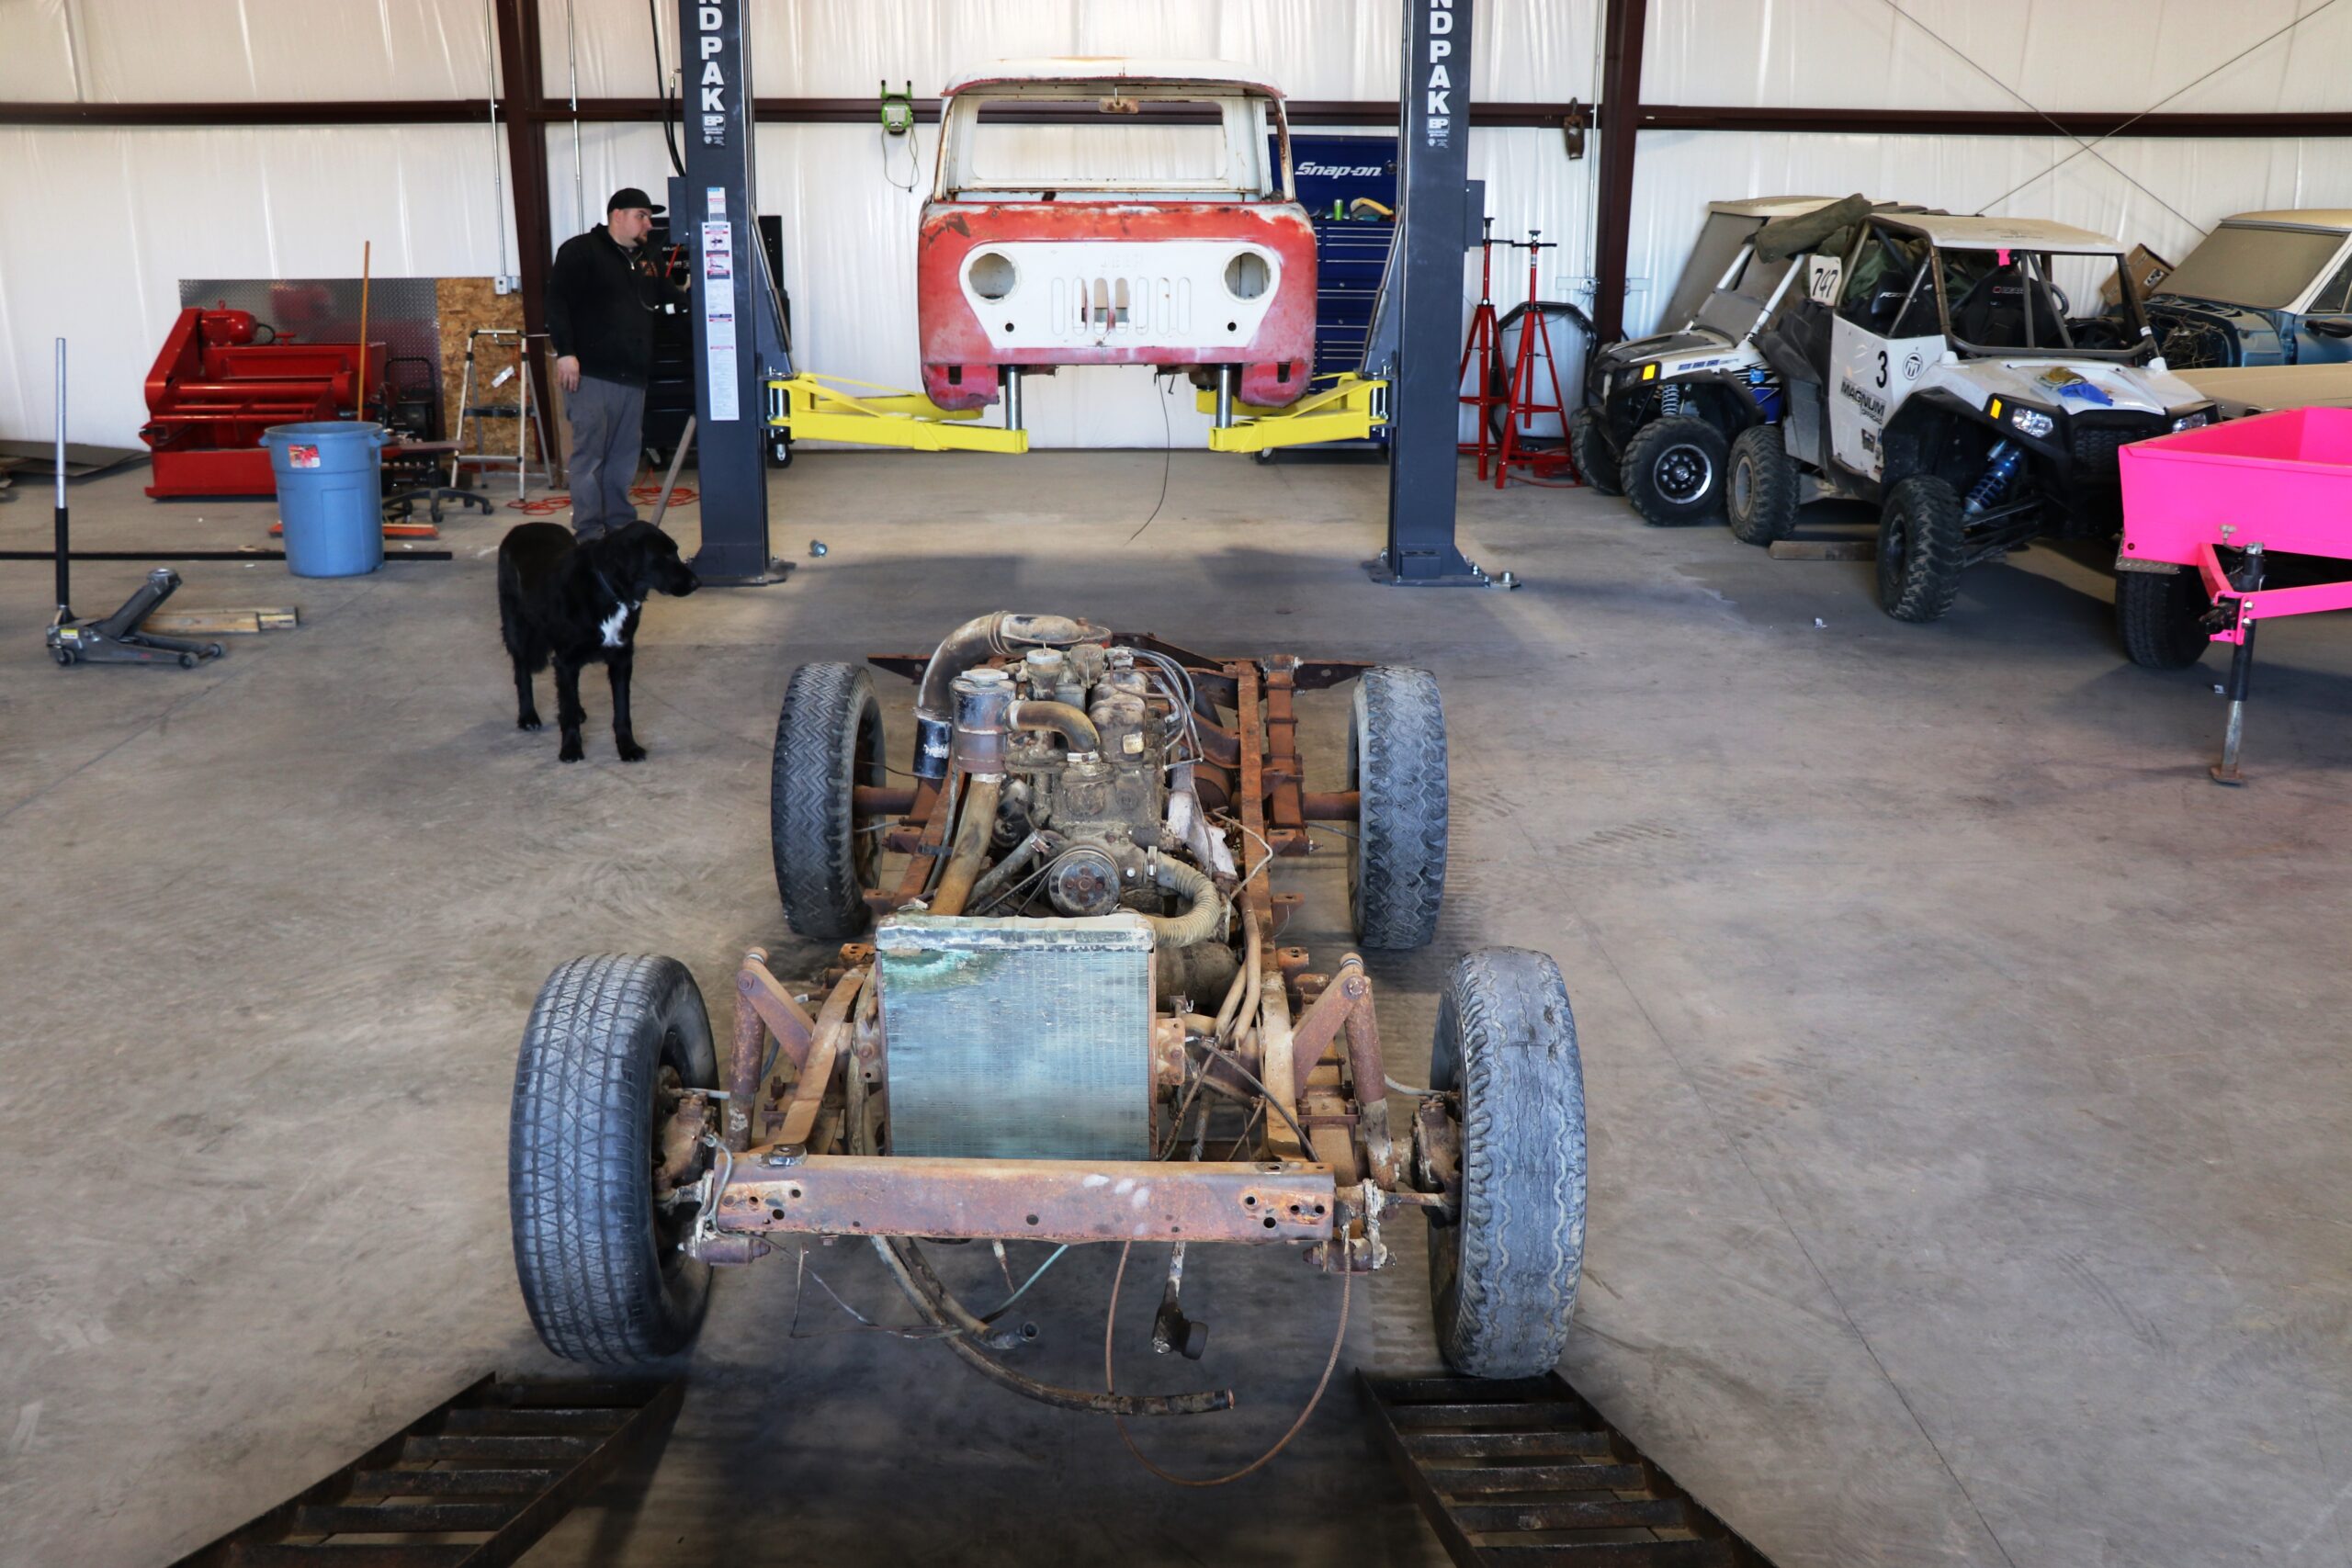
While we waited for multiple applications of penetrating oil to work its magic on the window frames, we removed the bolts holding the cab onto the frame to we could remove it and get it over to the guys at Rugged Werx in Kinnear, Wyoming. Aaron and Matt have years of experience when it comes to fabrication and restorations. The guys will get the paint blasted off of the cab so we can see what kind of attention and bodywork will be needed. Since this FC will have a few extra’s thrown in and after spending some time with these guys, it was apparent that their fabrication and media blasting skills will be a much needed value to this build.
Once the metalwork and fabrication is complete Matt and Aaron will put the finishing touches on the frame and many of the other components with their powder coating finishes. If you need some quality coatings large or small these guys are equipped to handle jobs of all sizes so check them out through their link at the bottom of the build page.


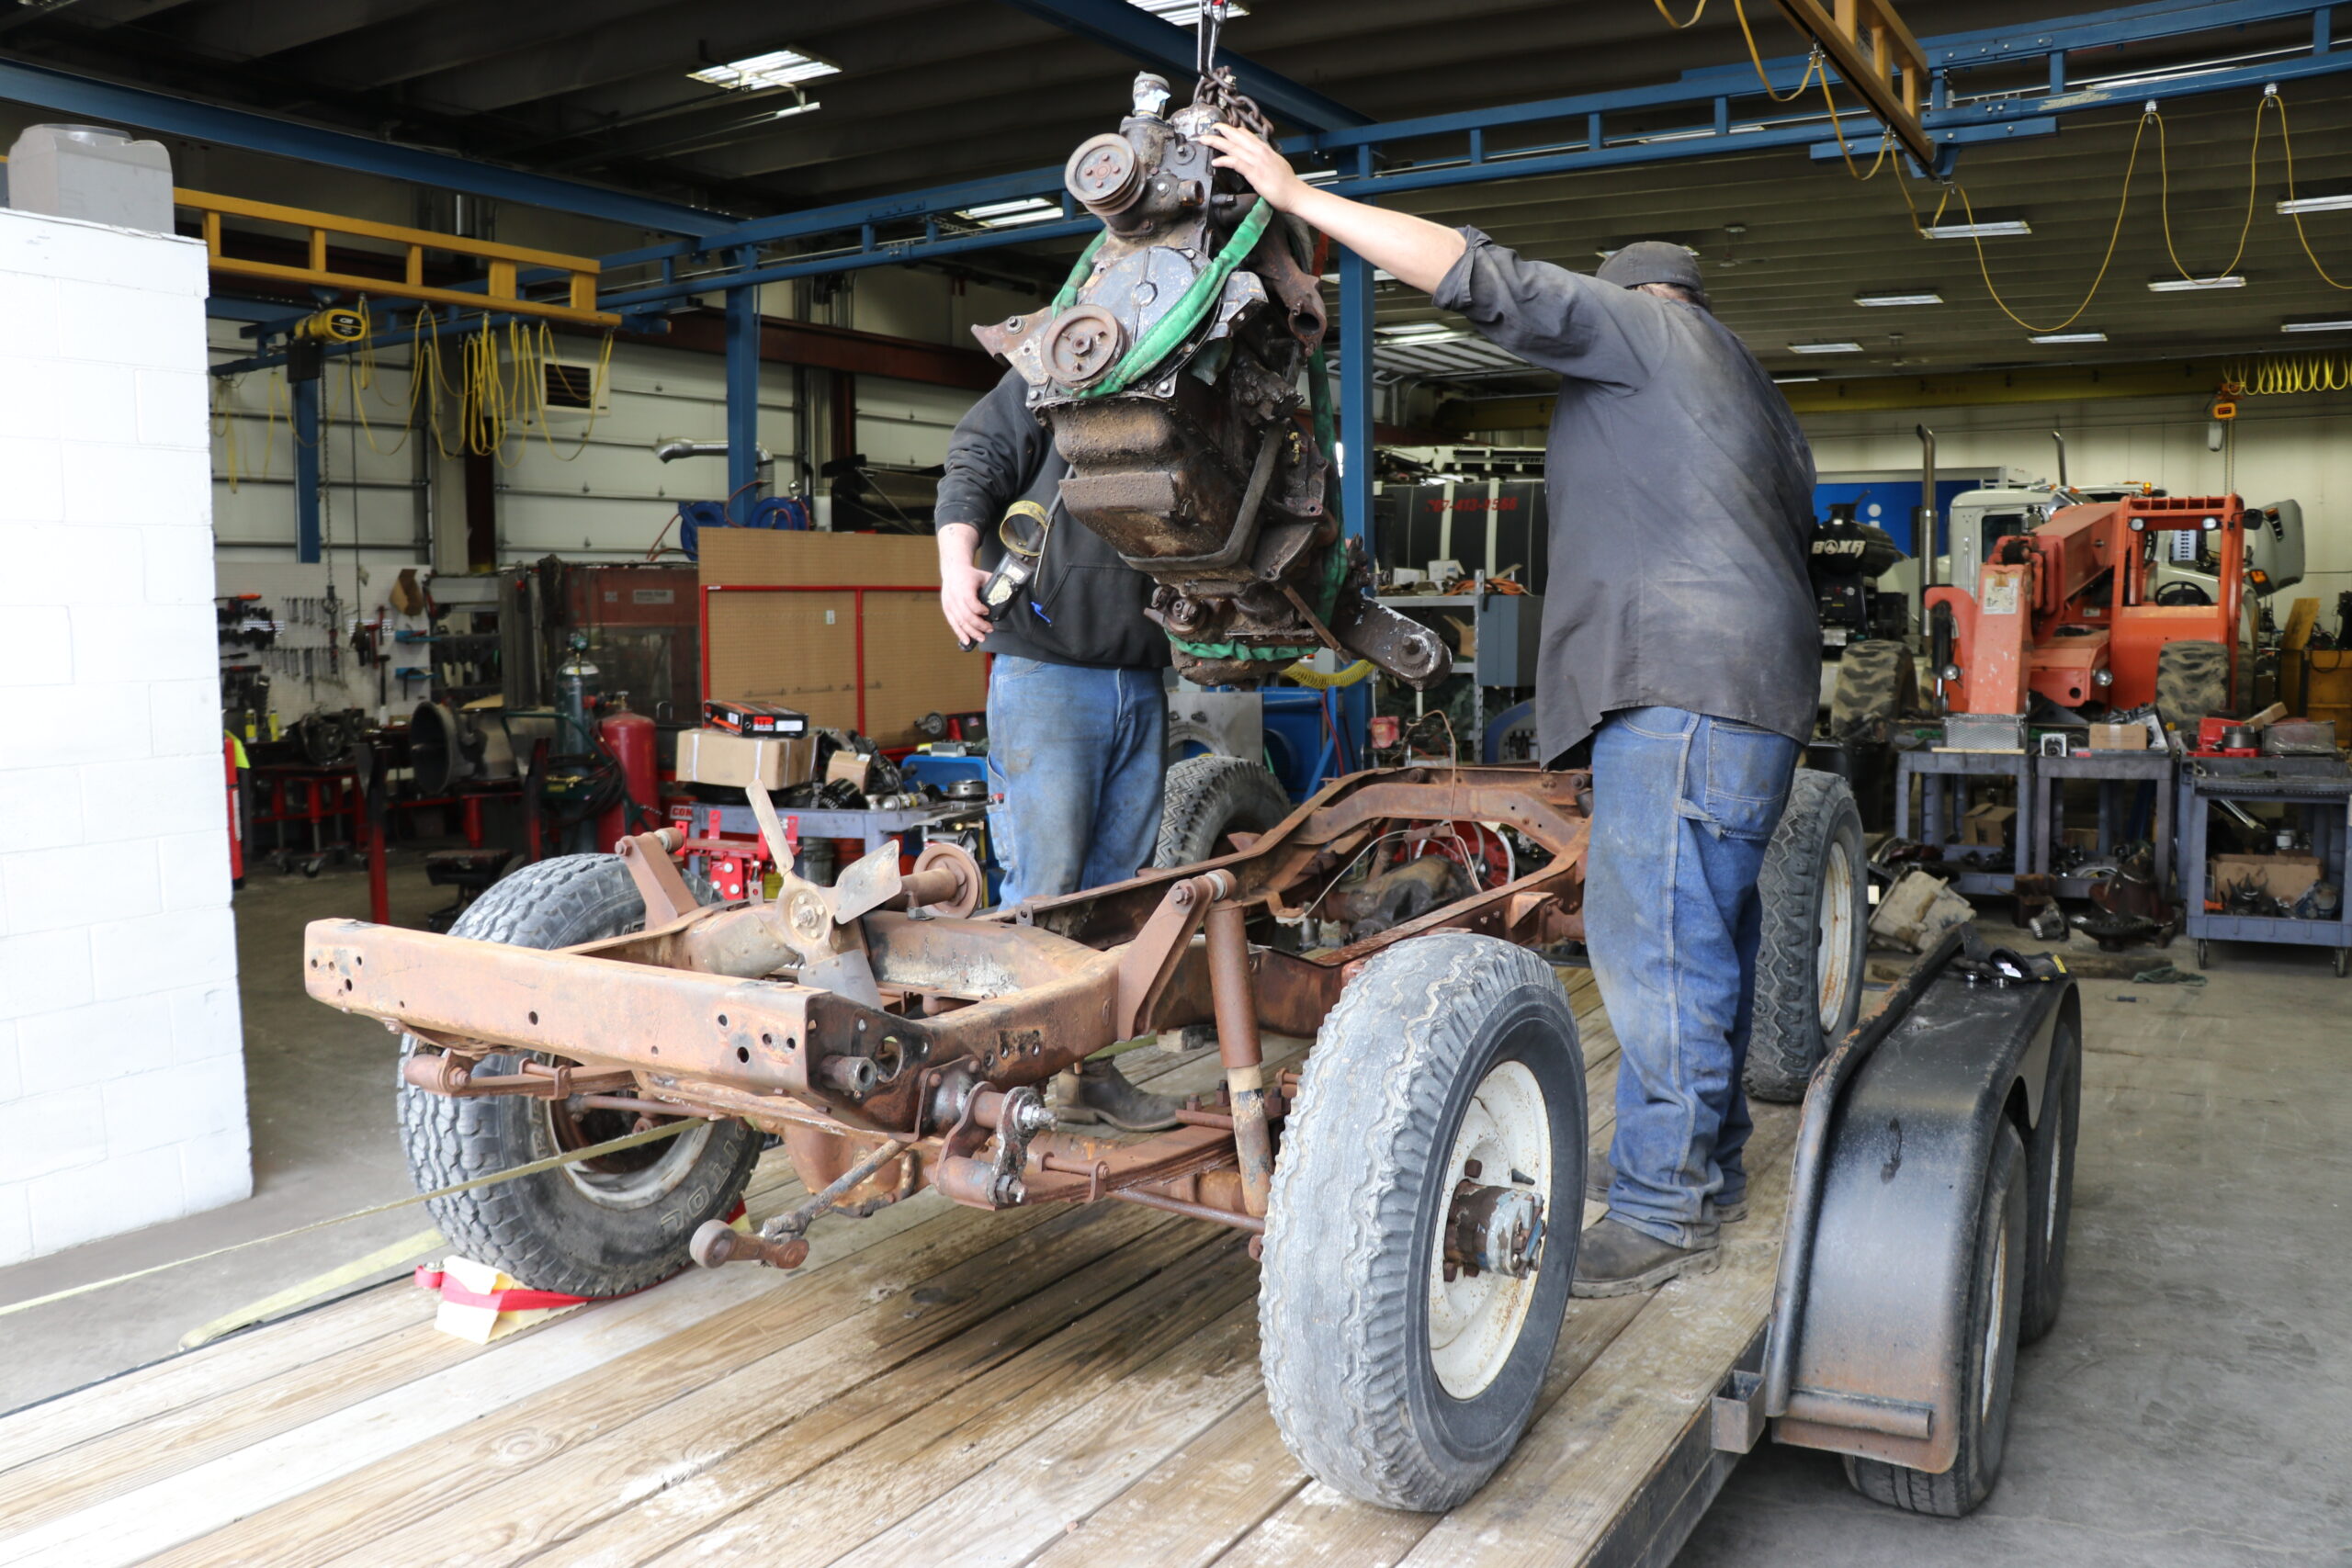
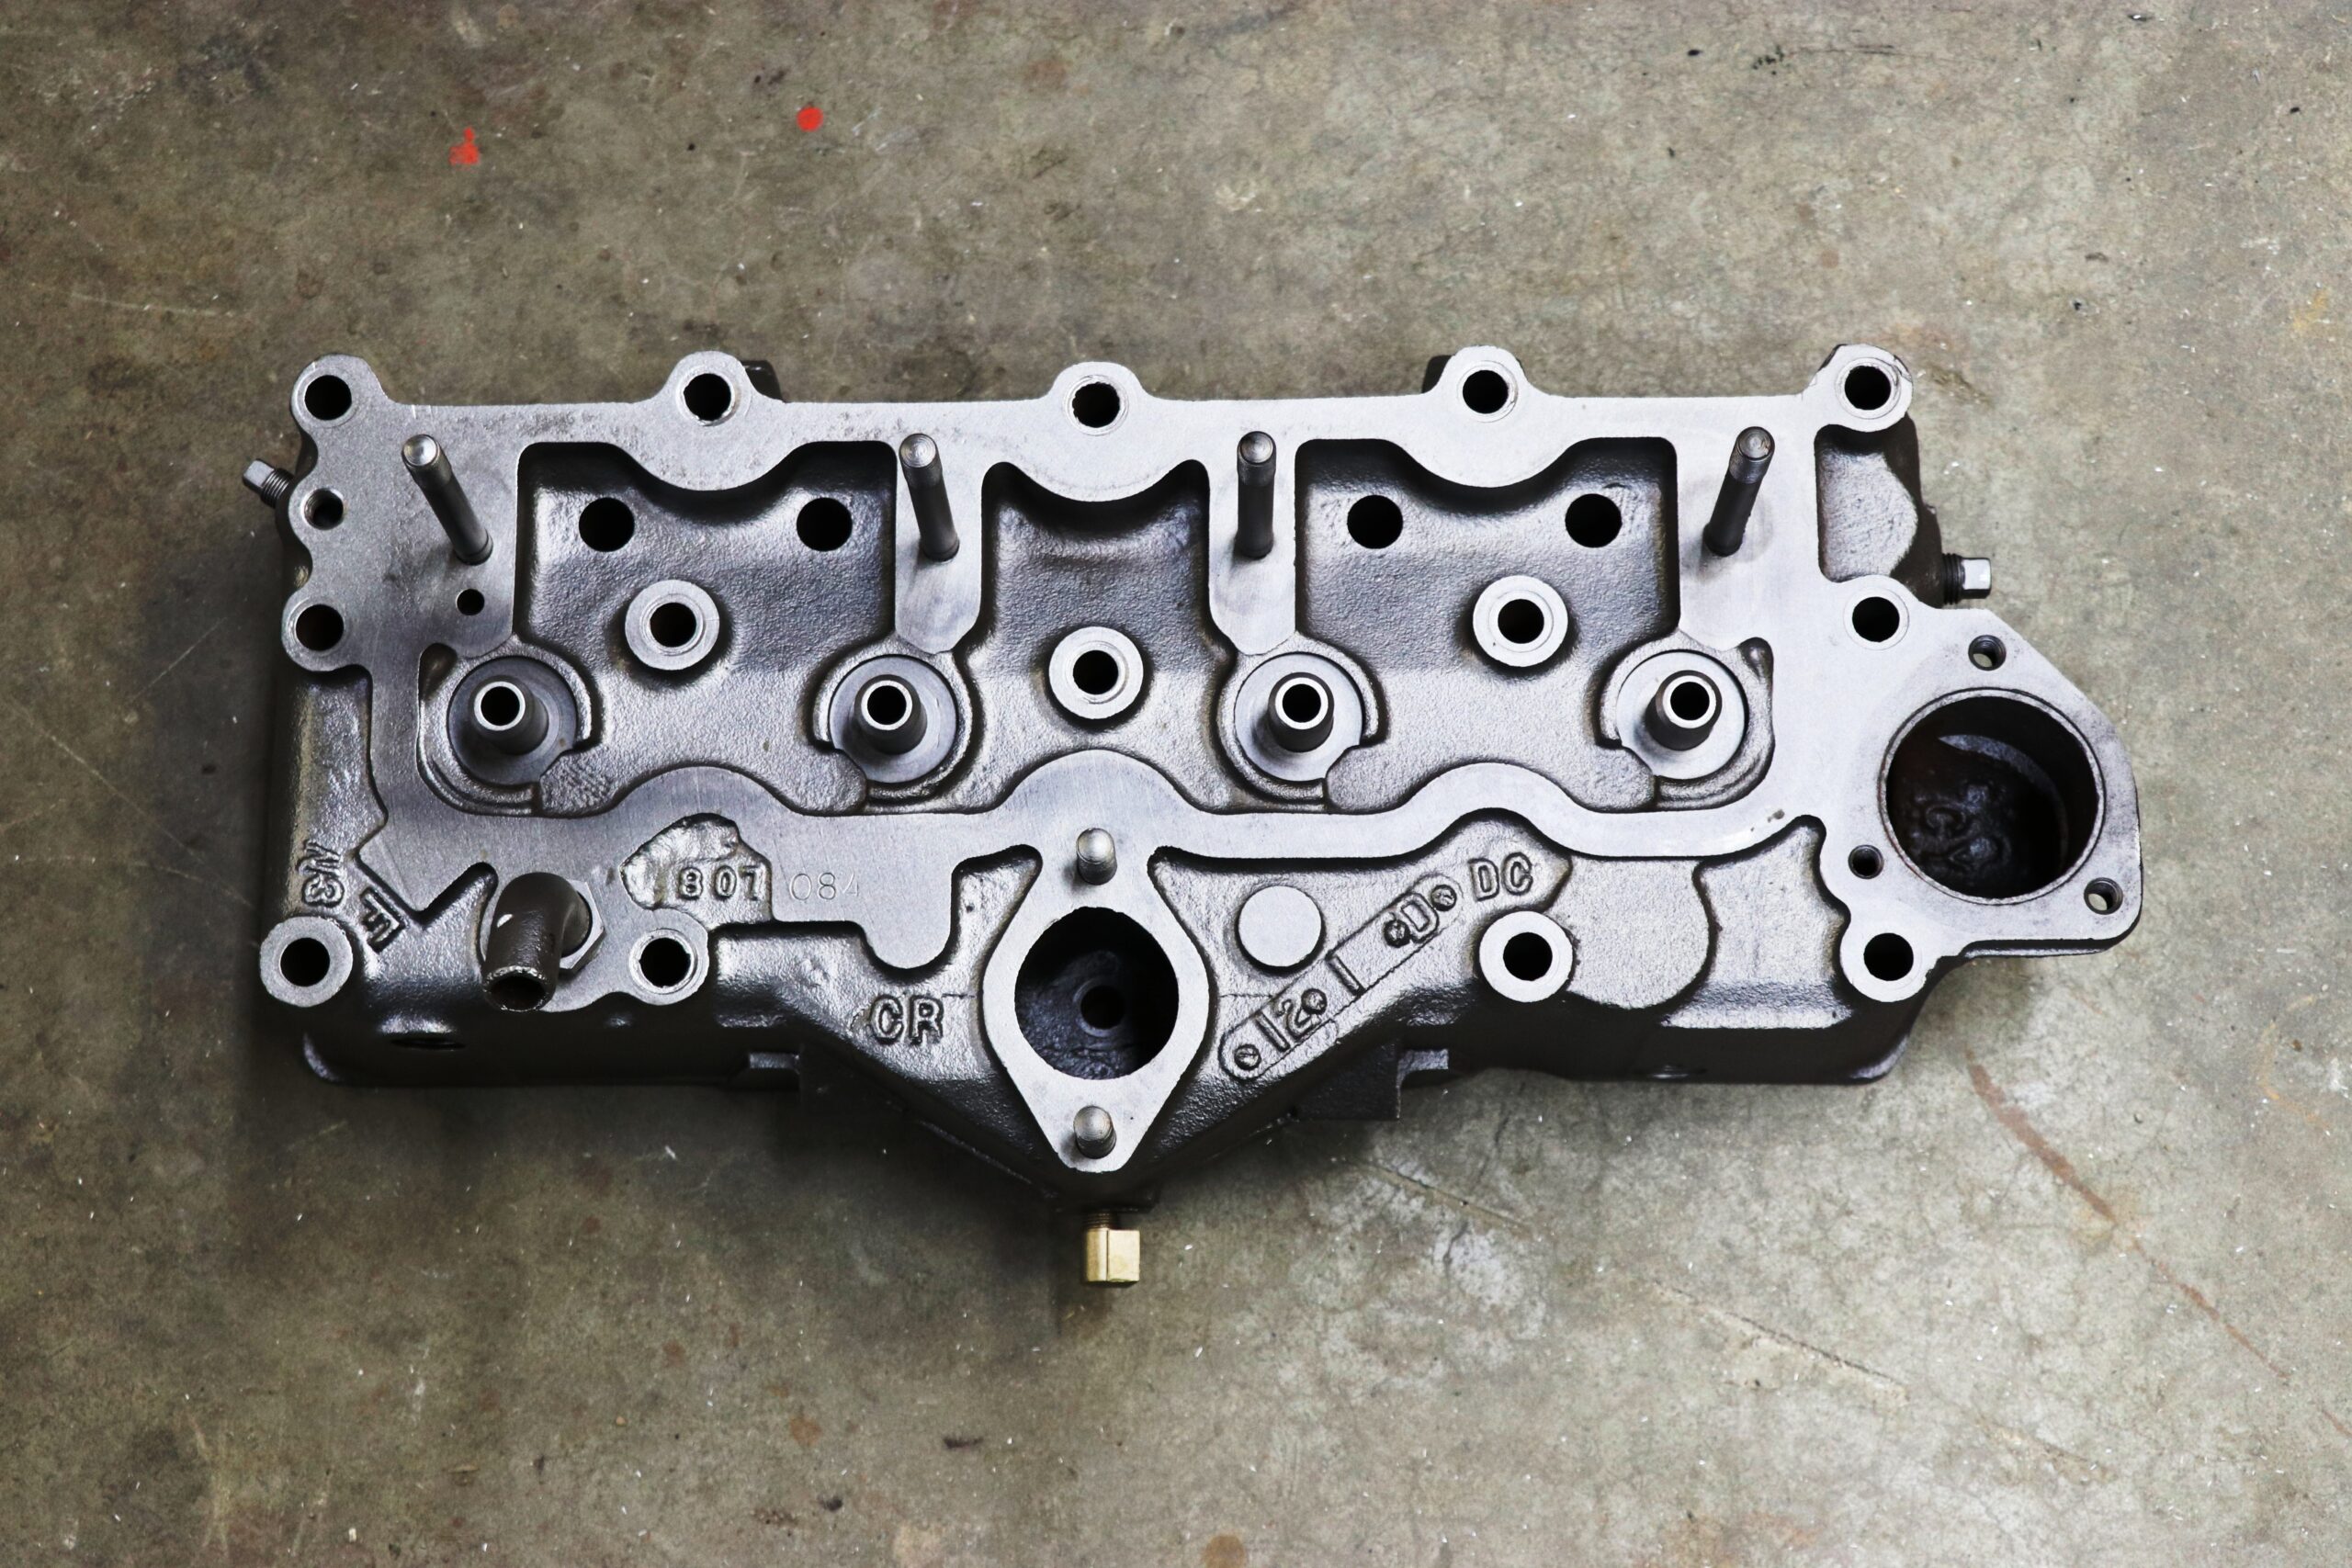
With the box and cab delivered we had open access to the frame and power train making things much more accessible so we could get the motor, transmission, transfer case and PTO removed. Each of these components will get cleaned up, rebuilt and eventually reinstalled once the frame and other components are powder coated and back from the guys at Rugged Werx.
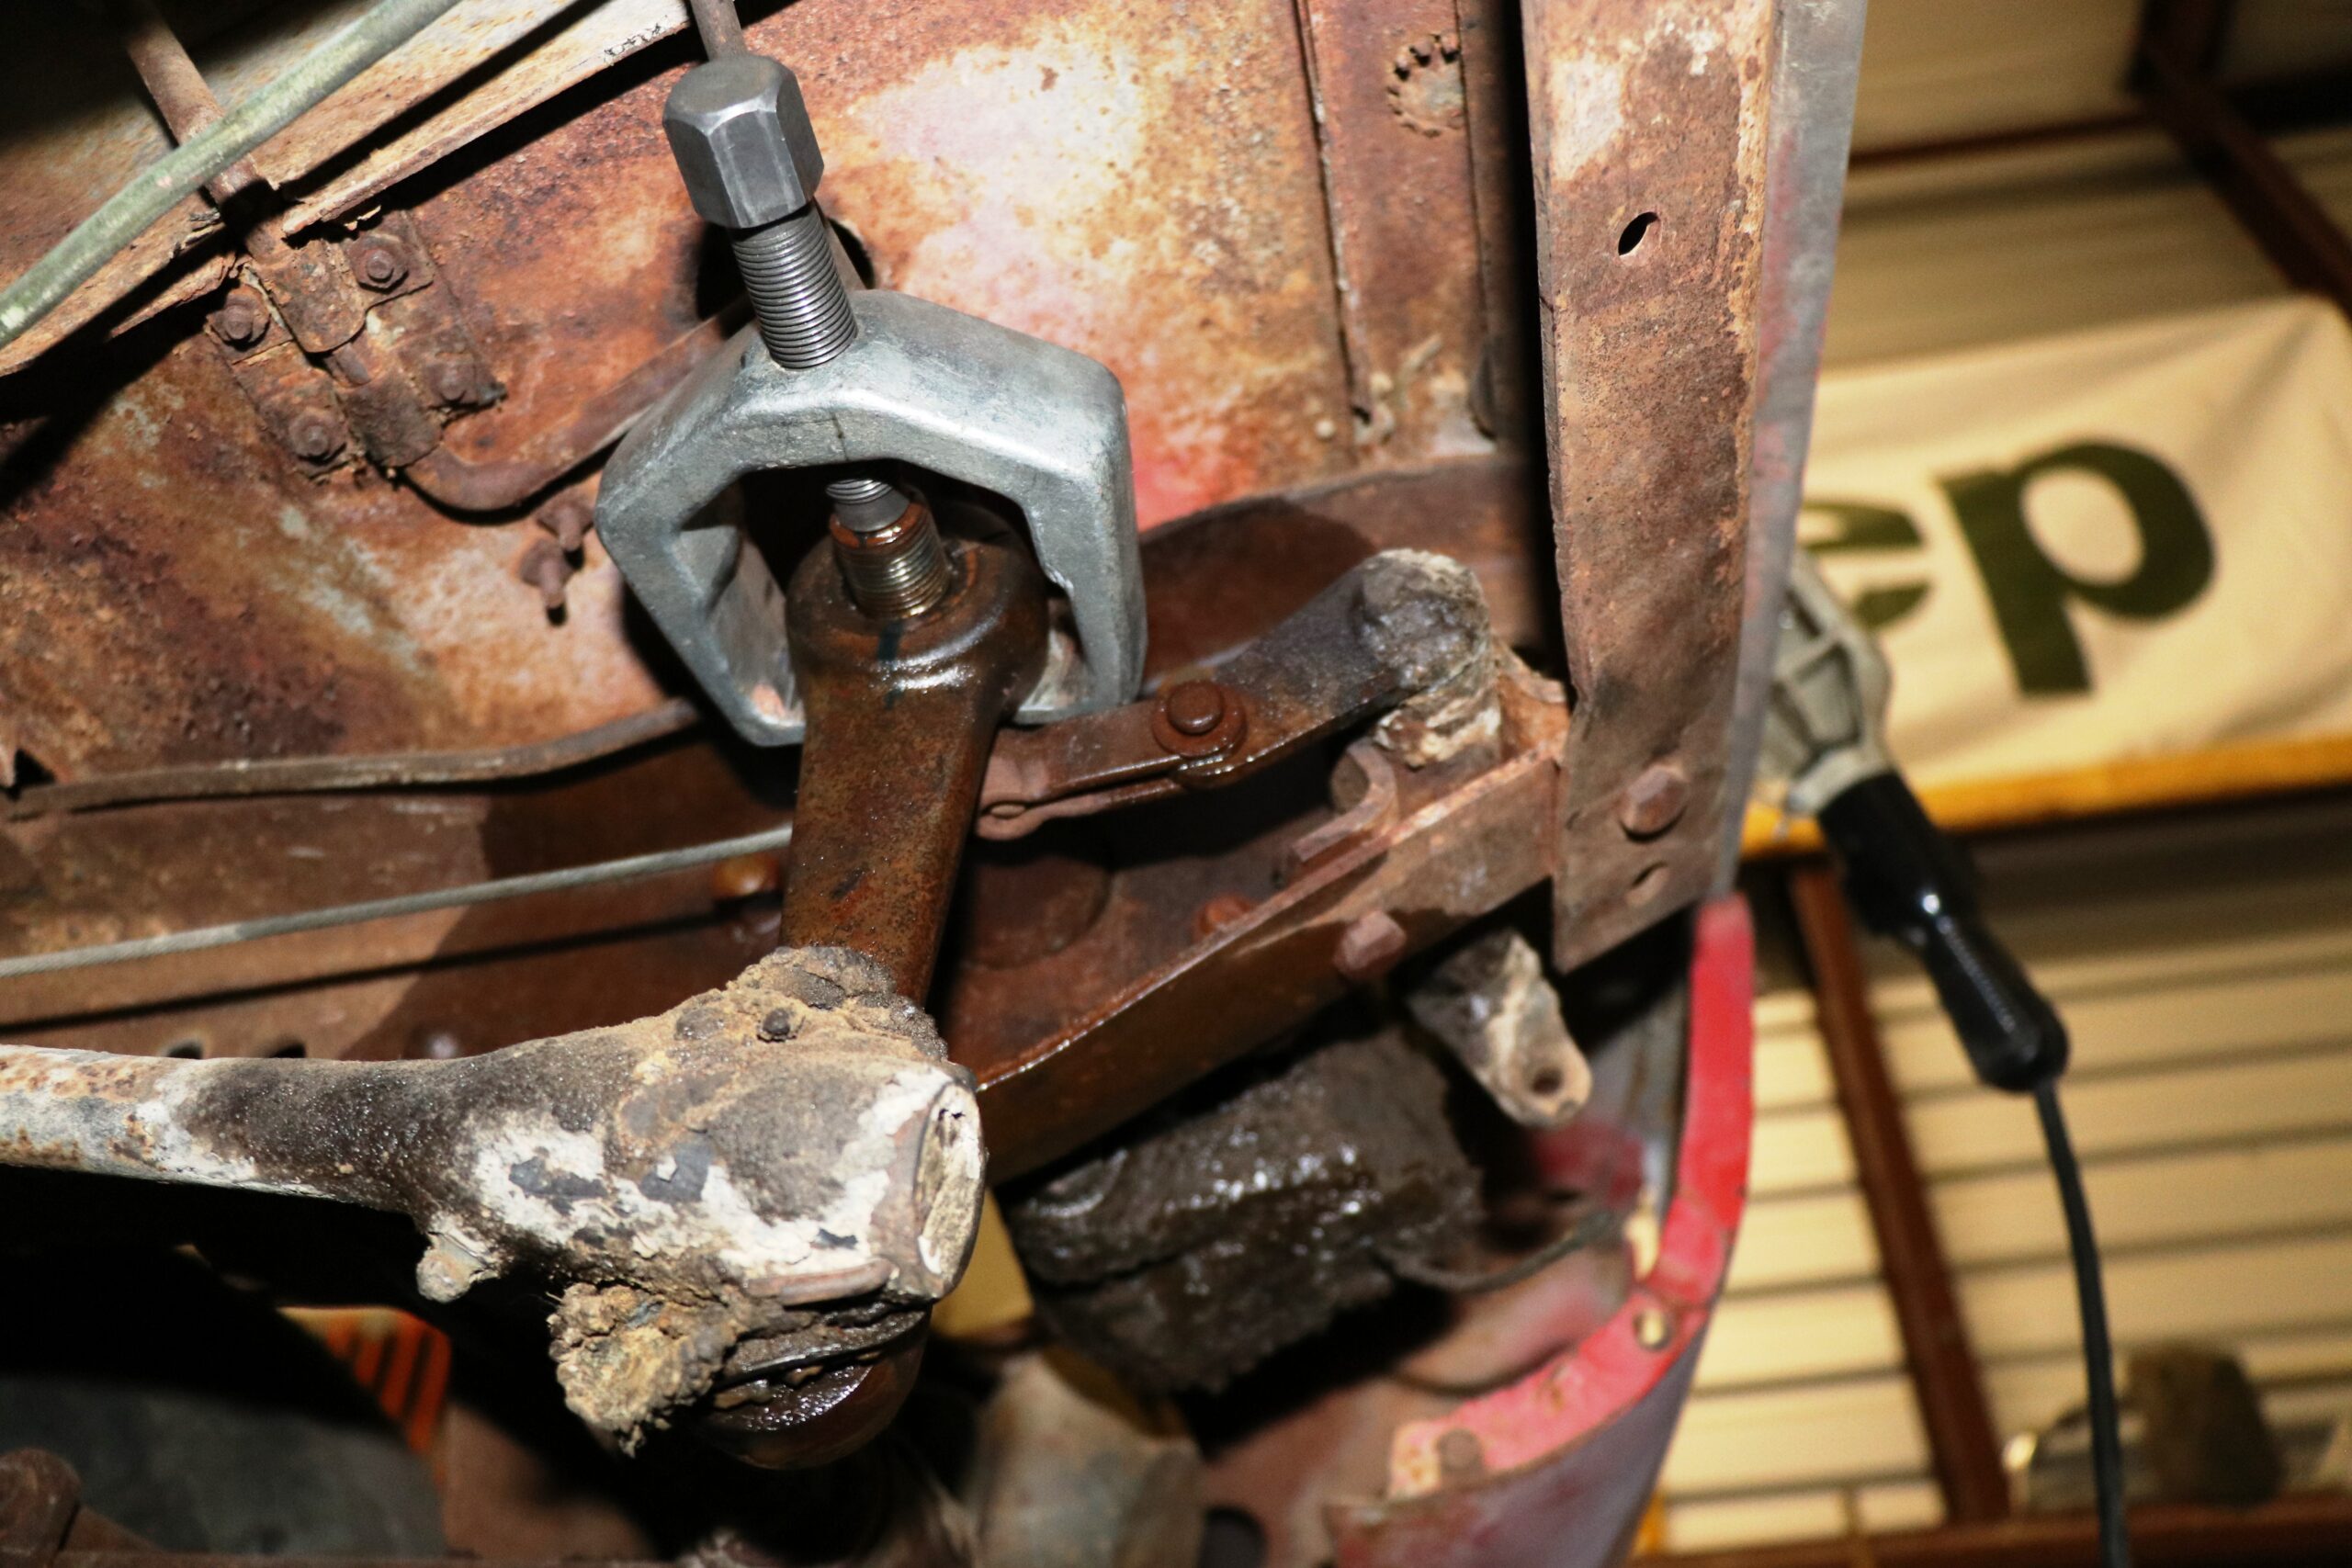
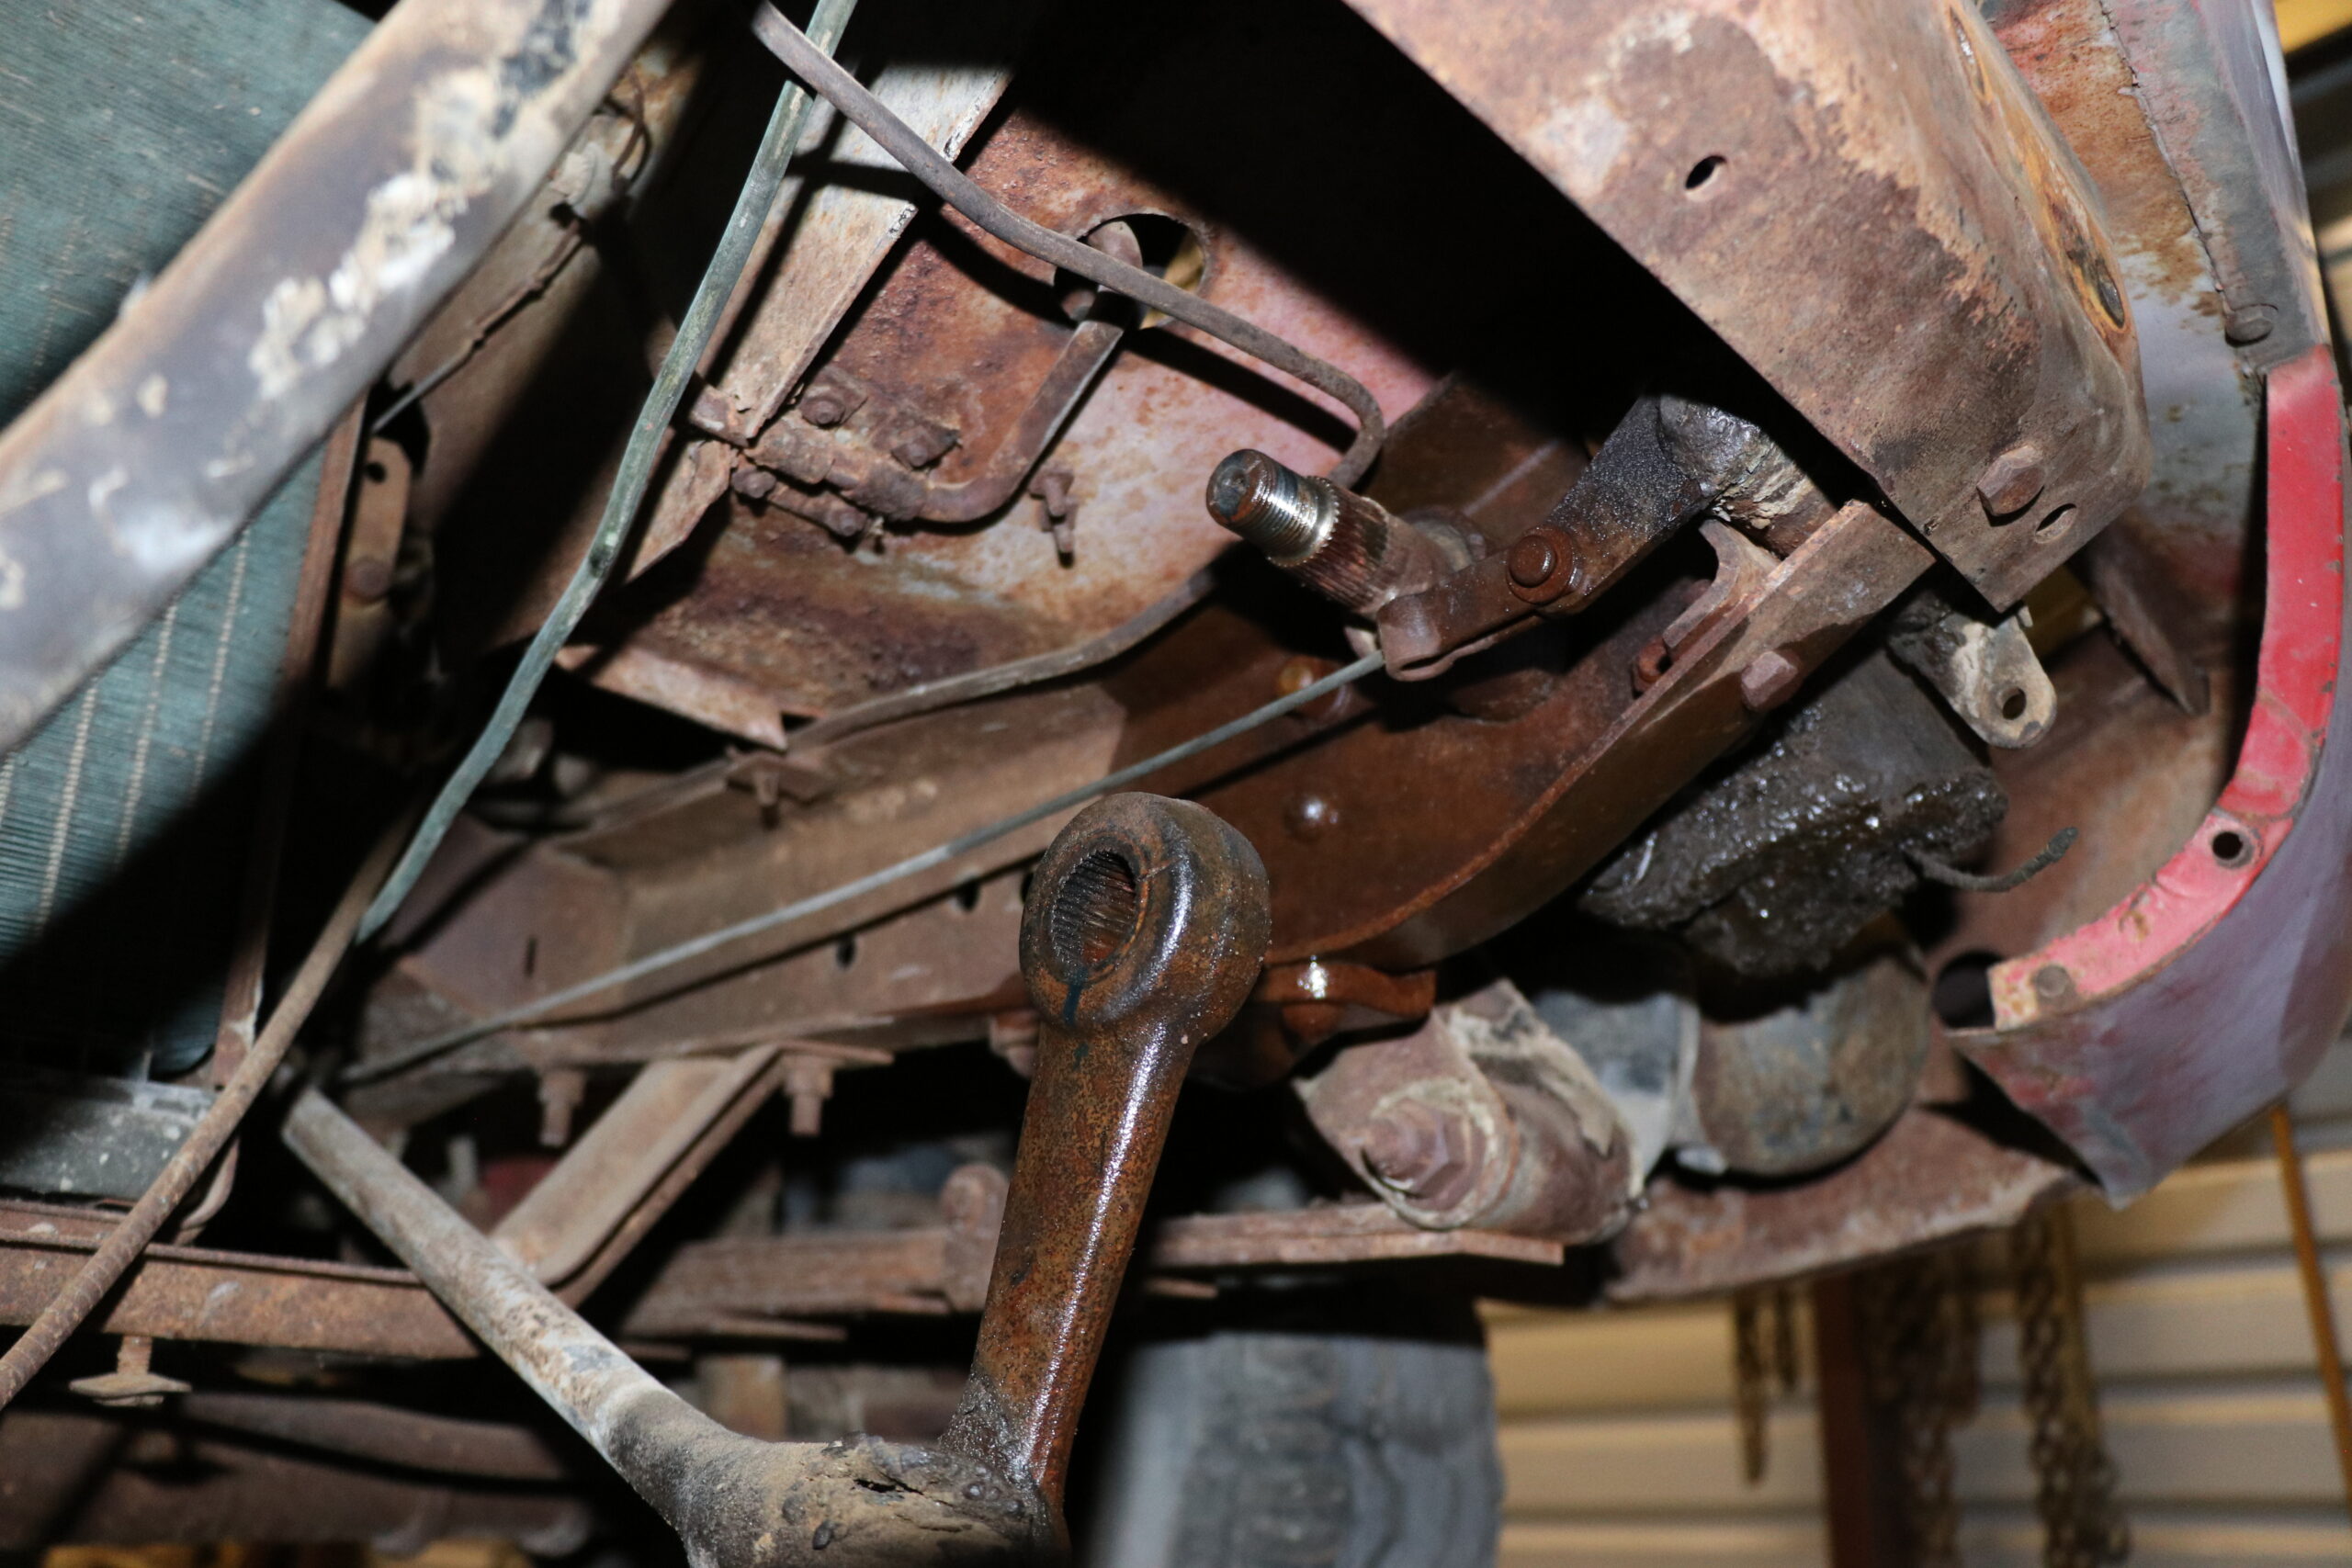
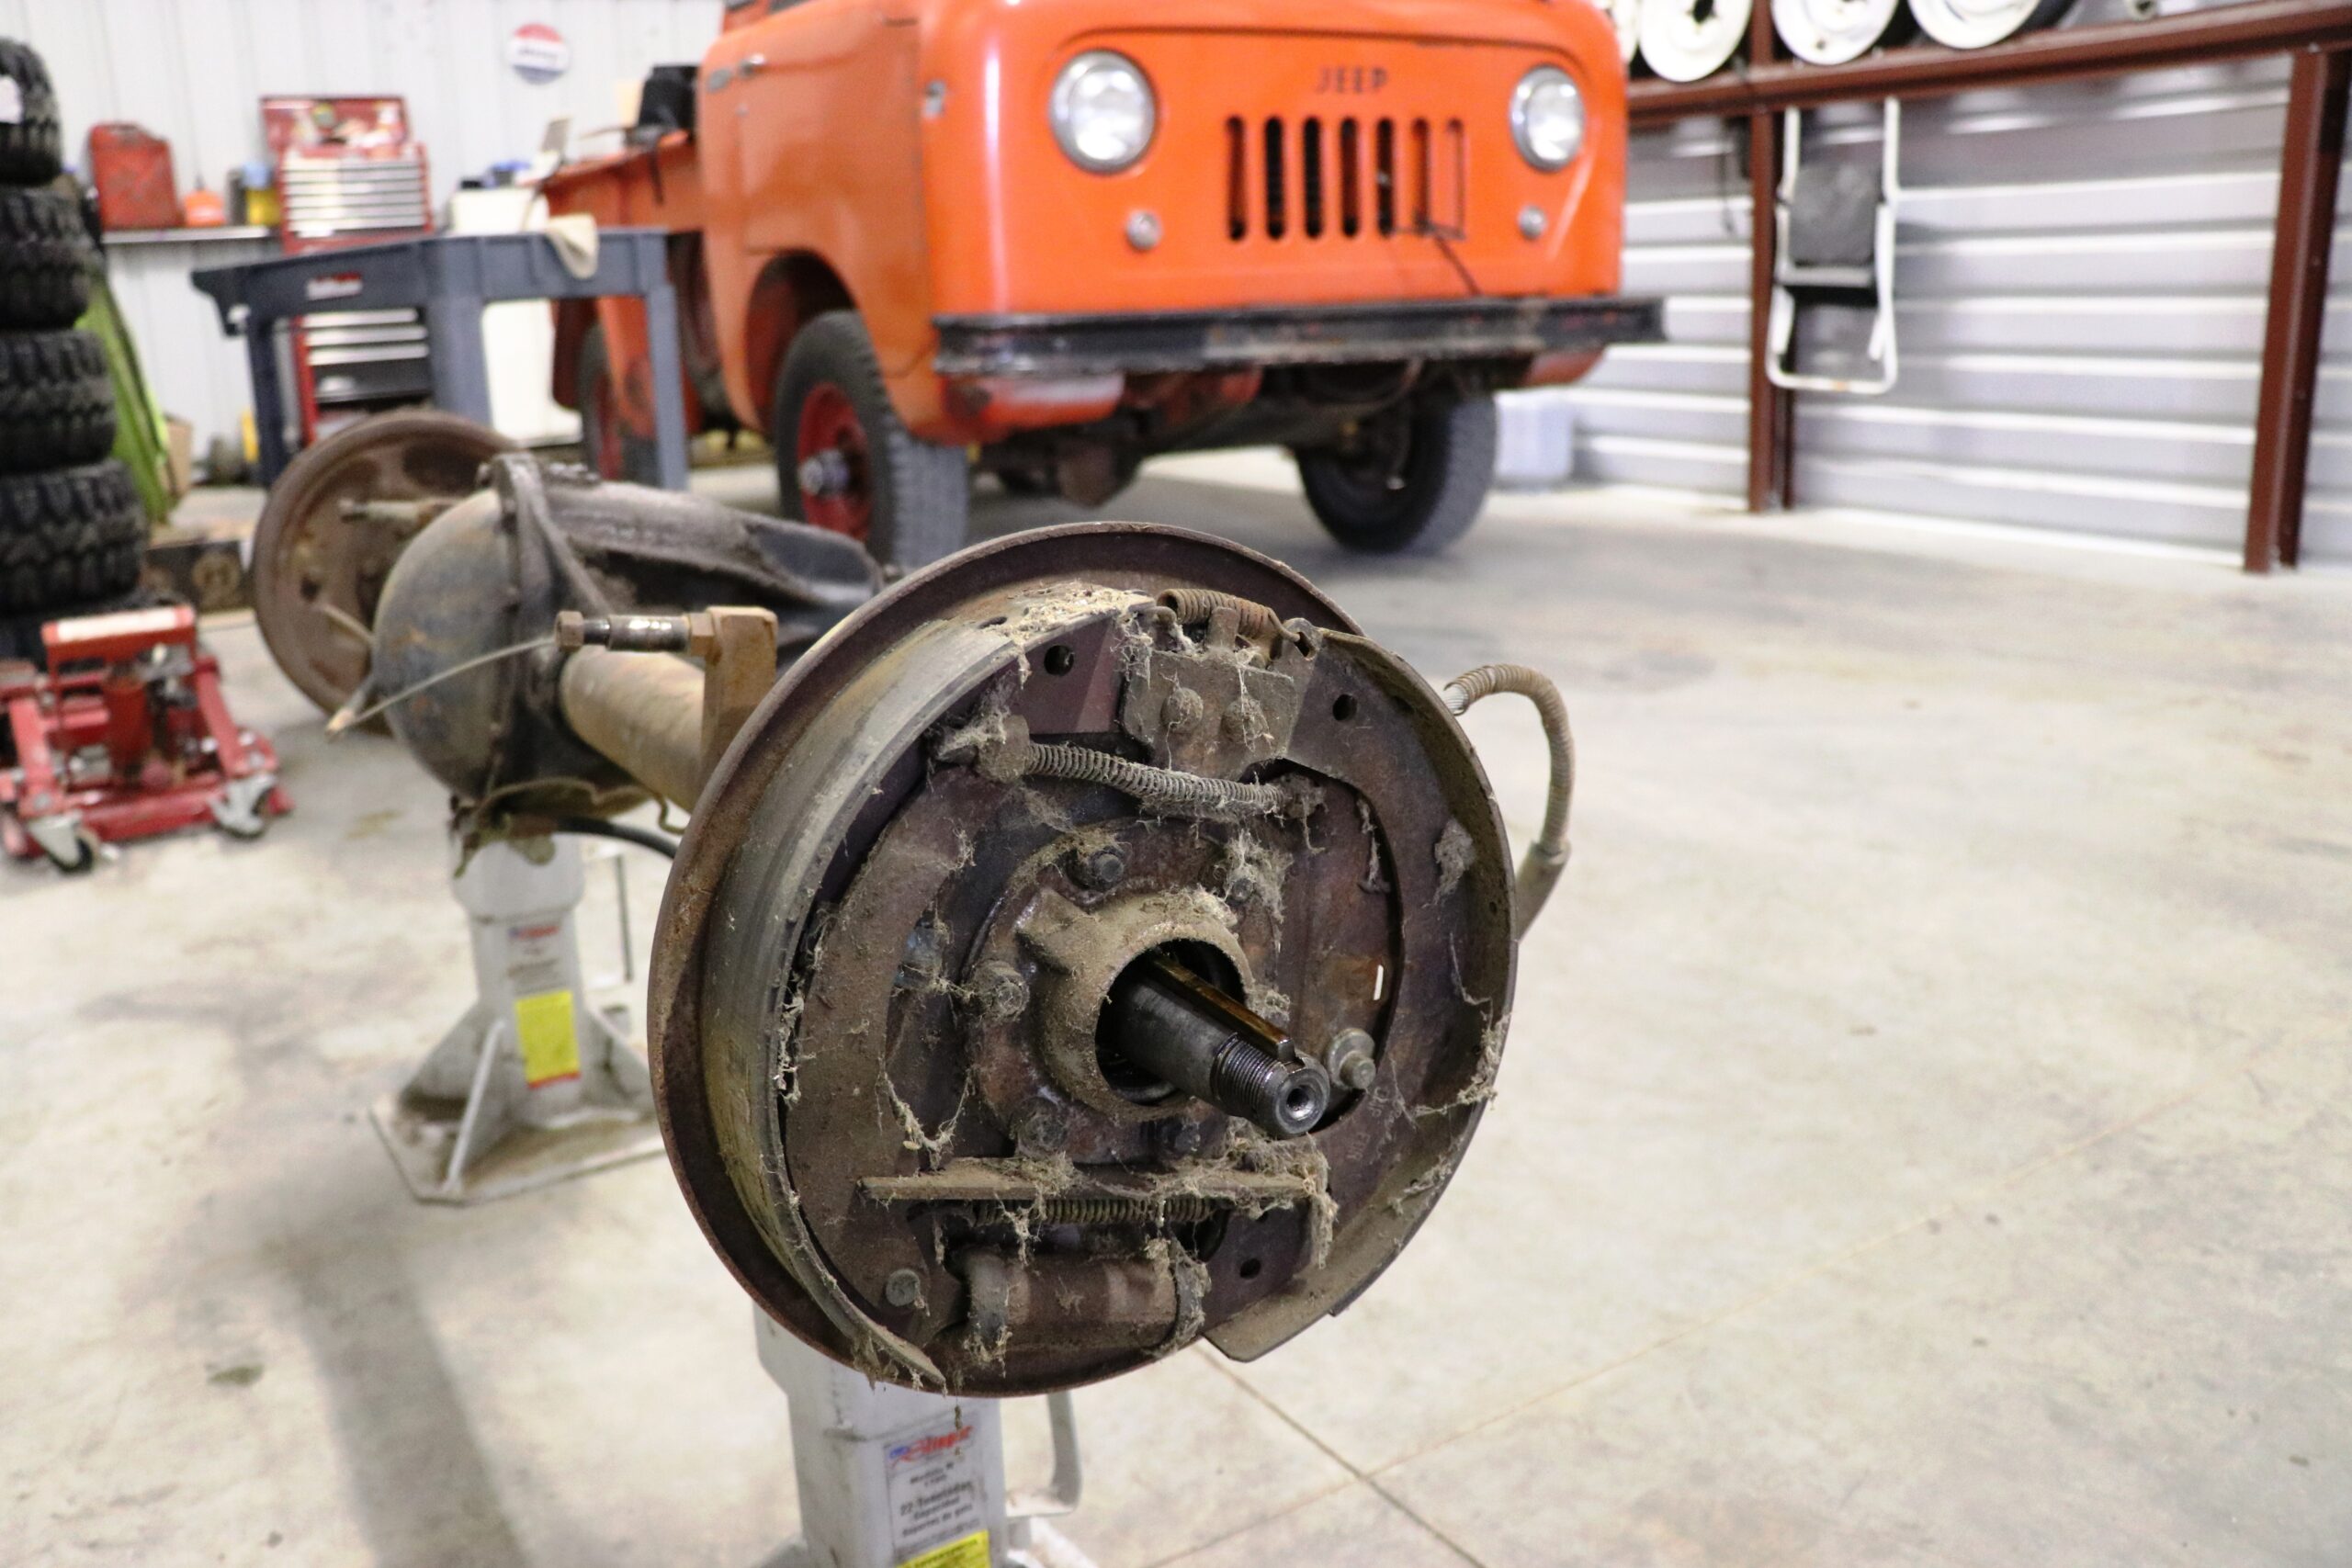
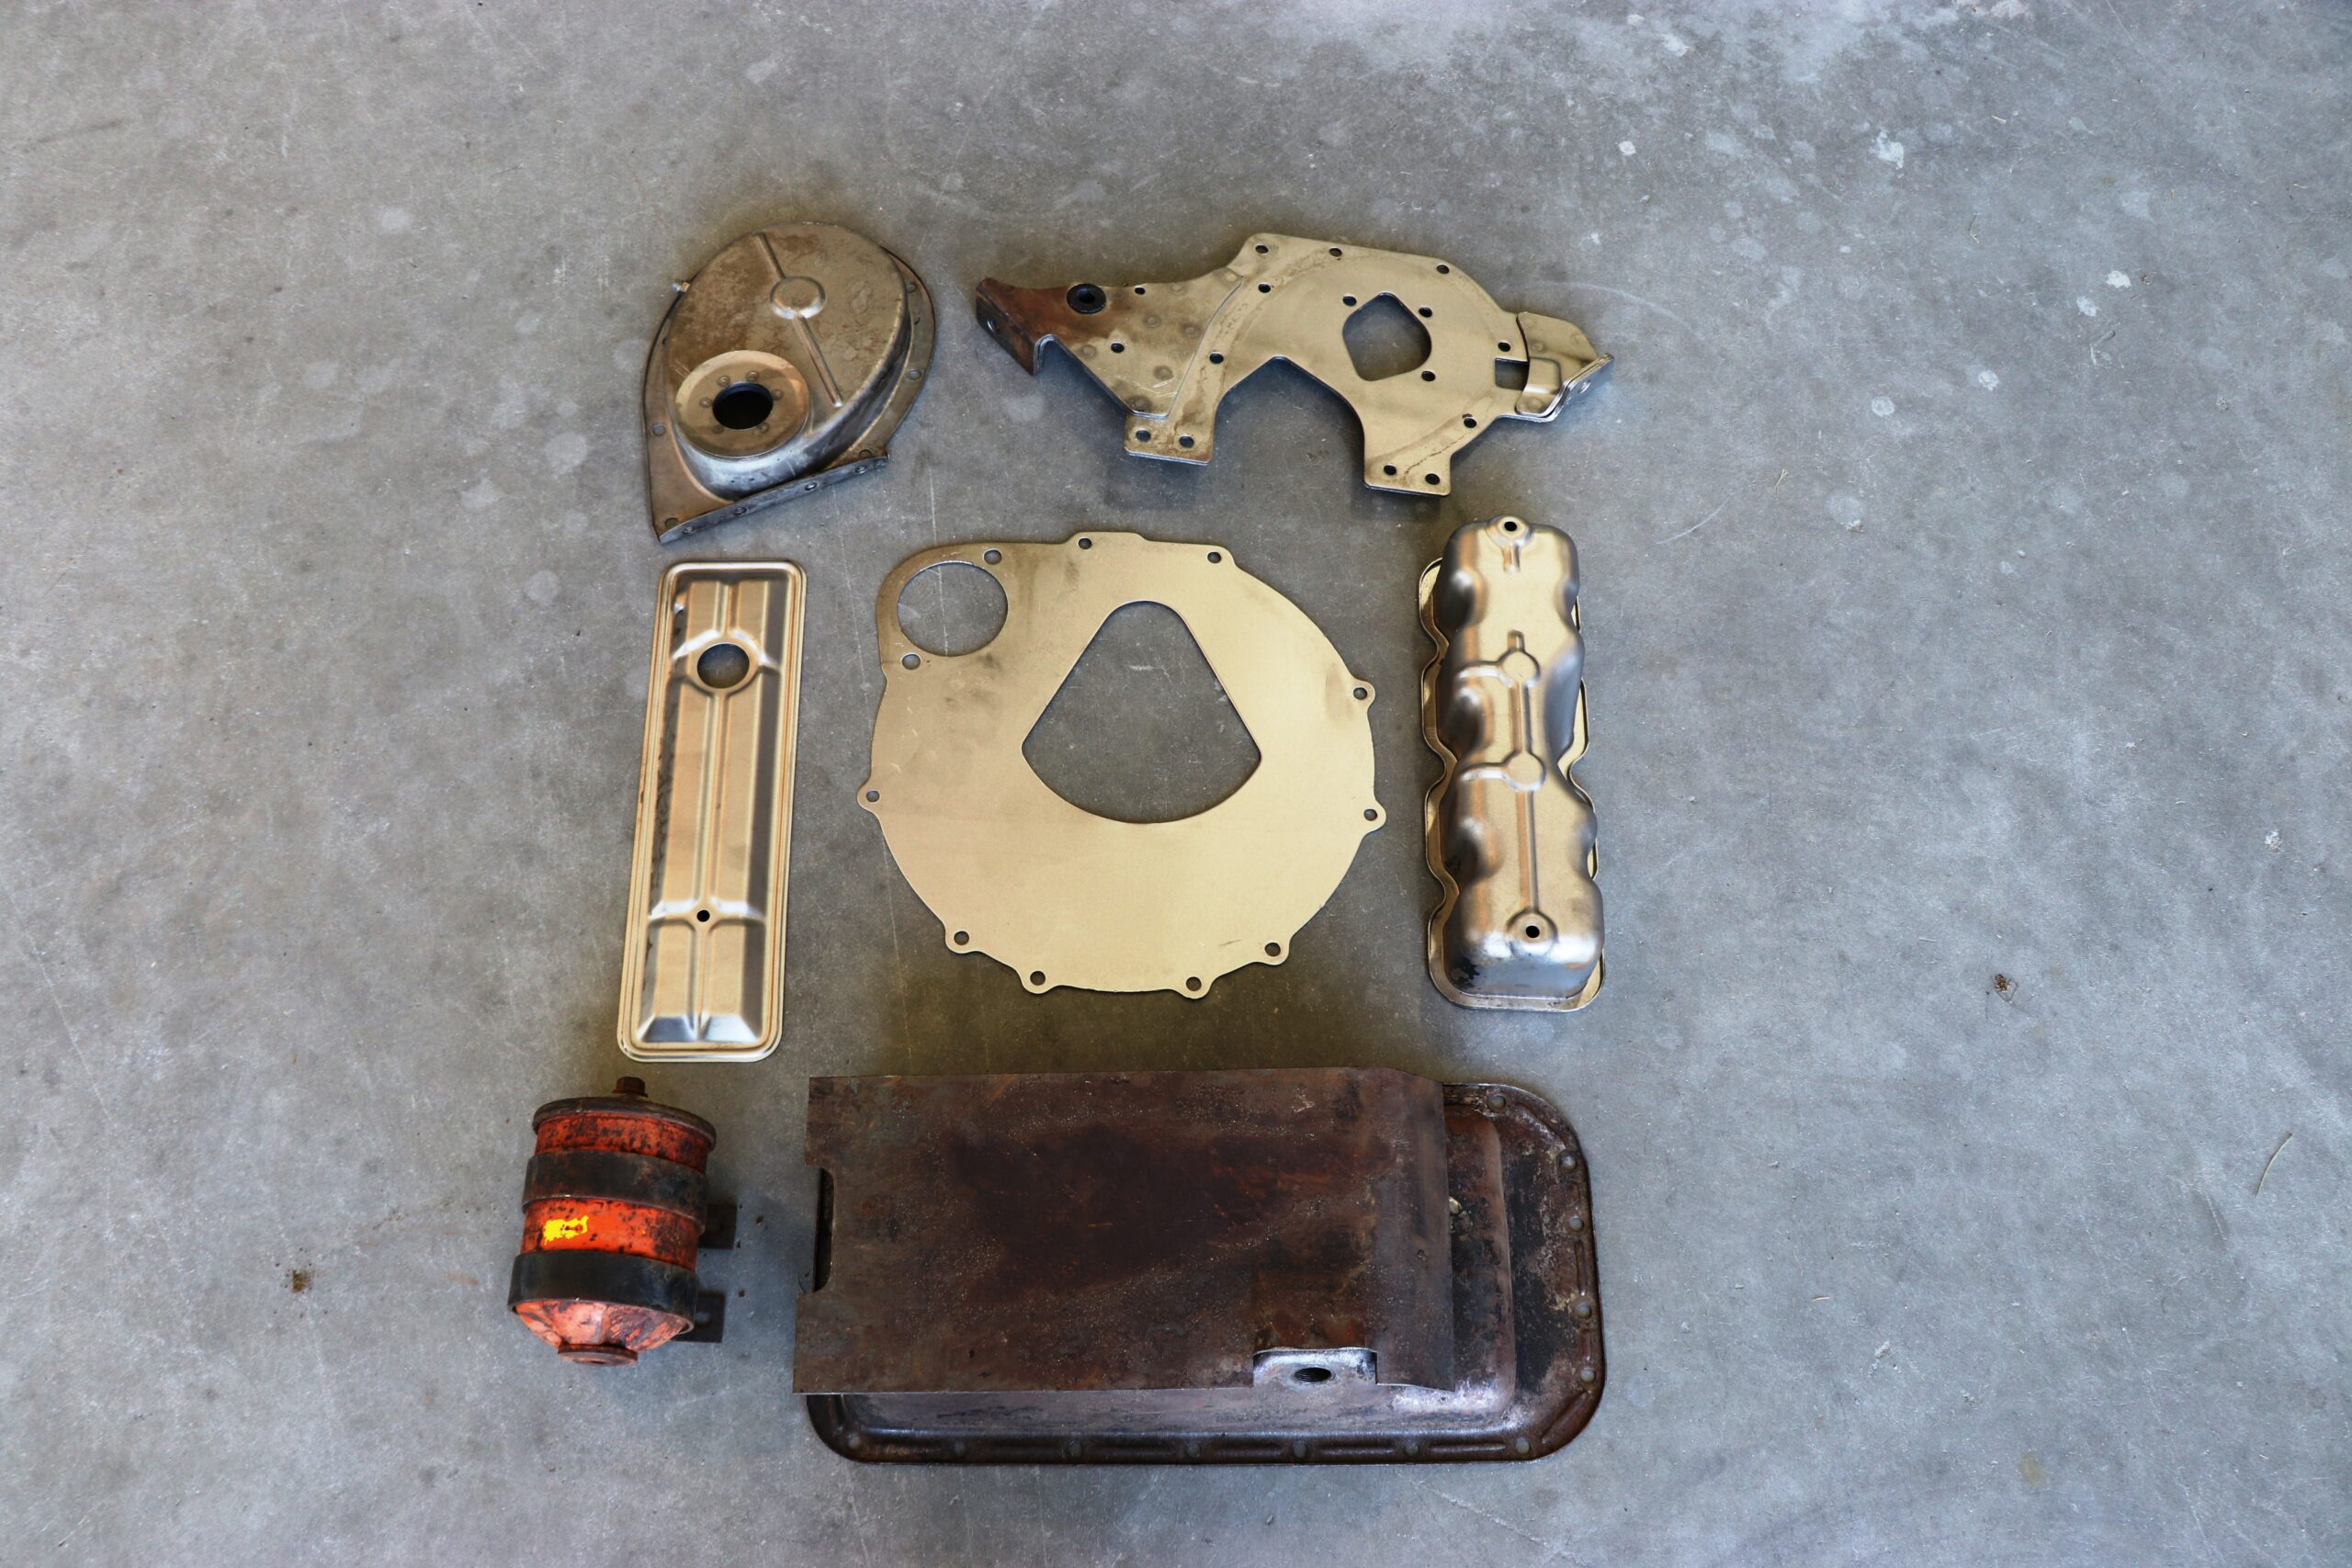
Years of sitting in fields and eventually a back yard allowed for the leaking oil and grease to solidify and pick up extra layers of dust and dirt. Anyone who has ever done a build or had to climb underneath any aged vehicle, knows how tough it can be to chip your way through the grime to get to the nuts and bolts. A close look at the pictures and you’ll quickly see that we had more than our fair share of fun trying to get these vital components pulled.
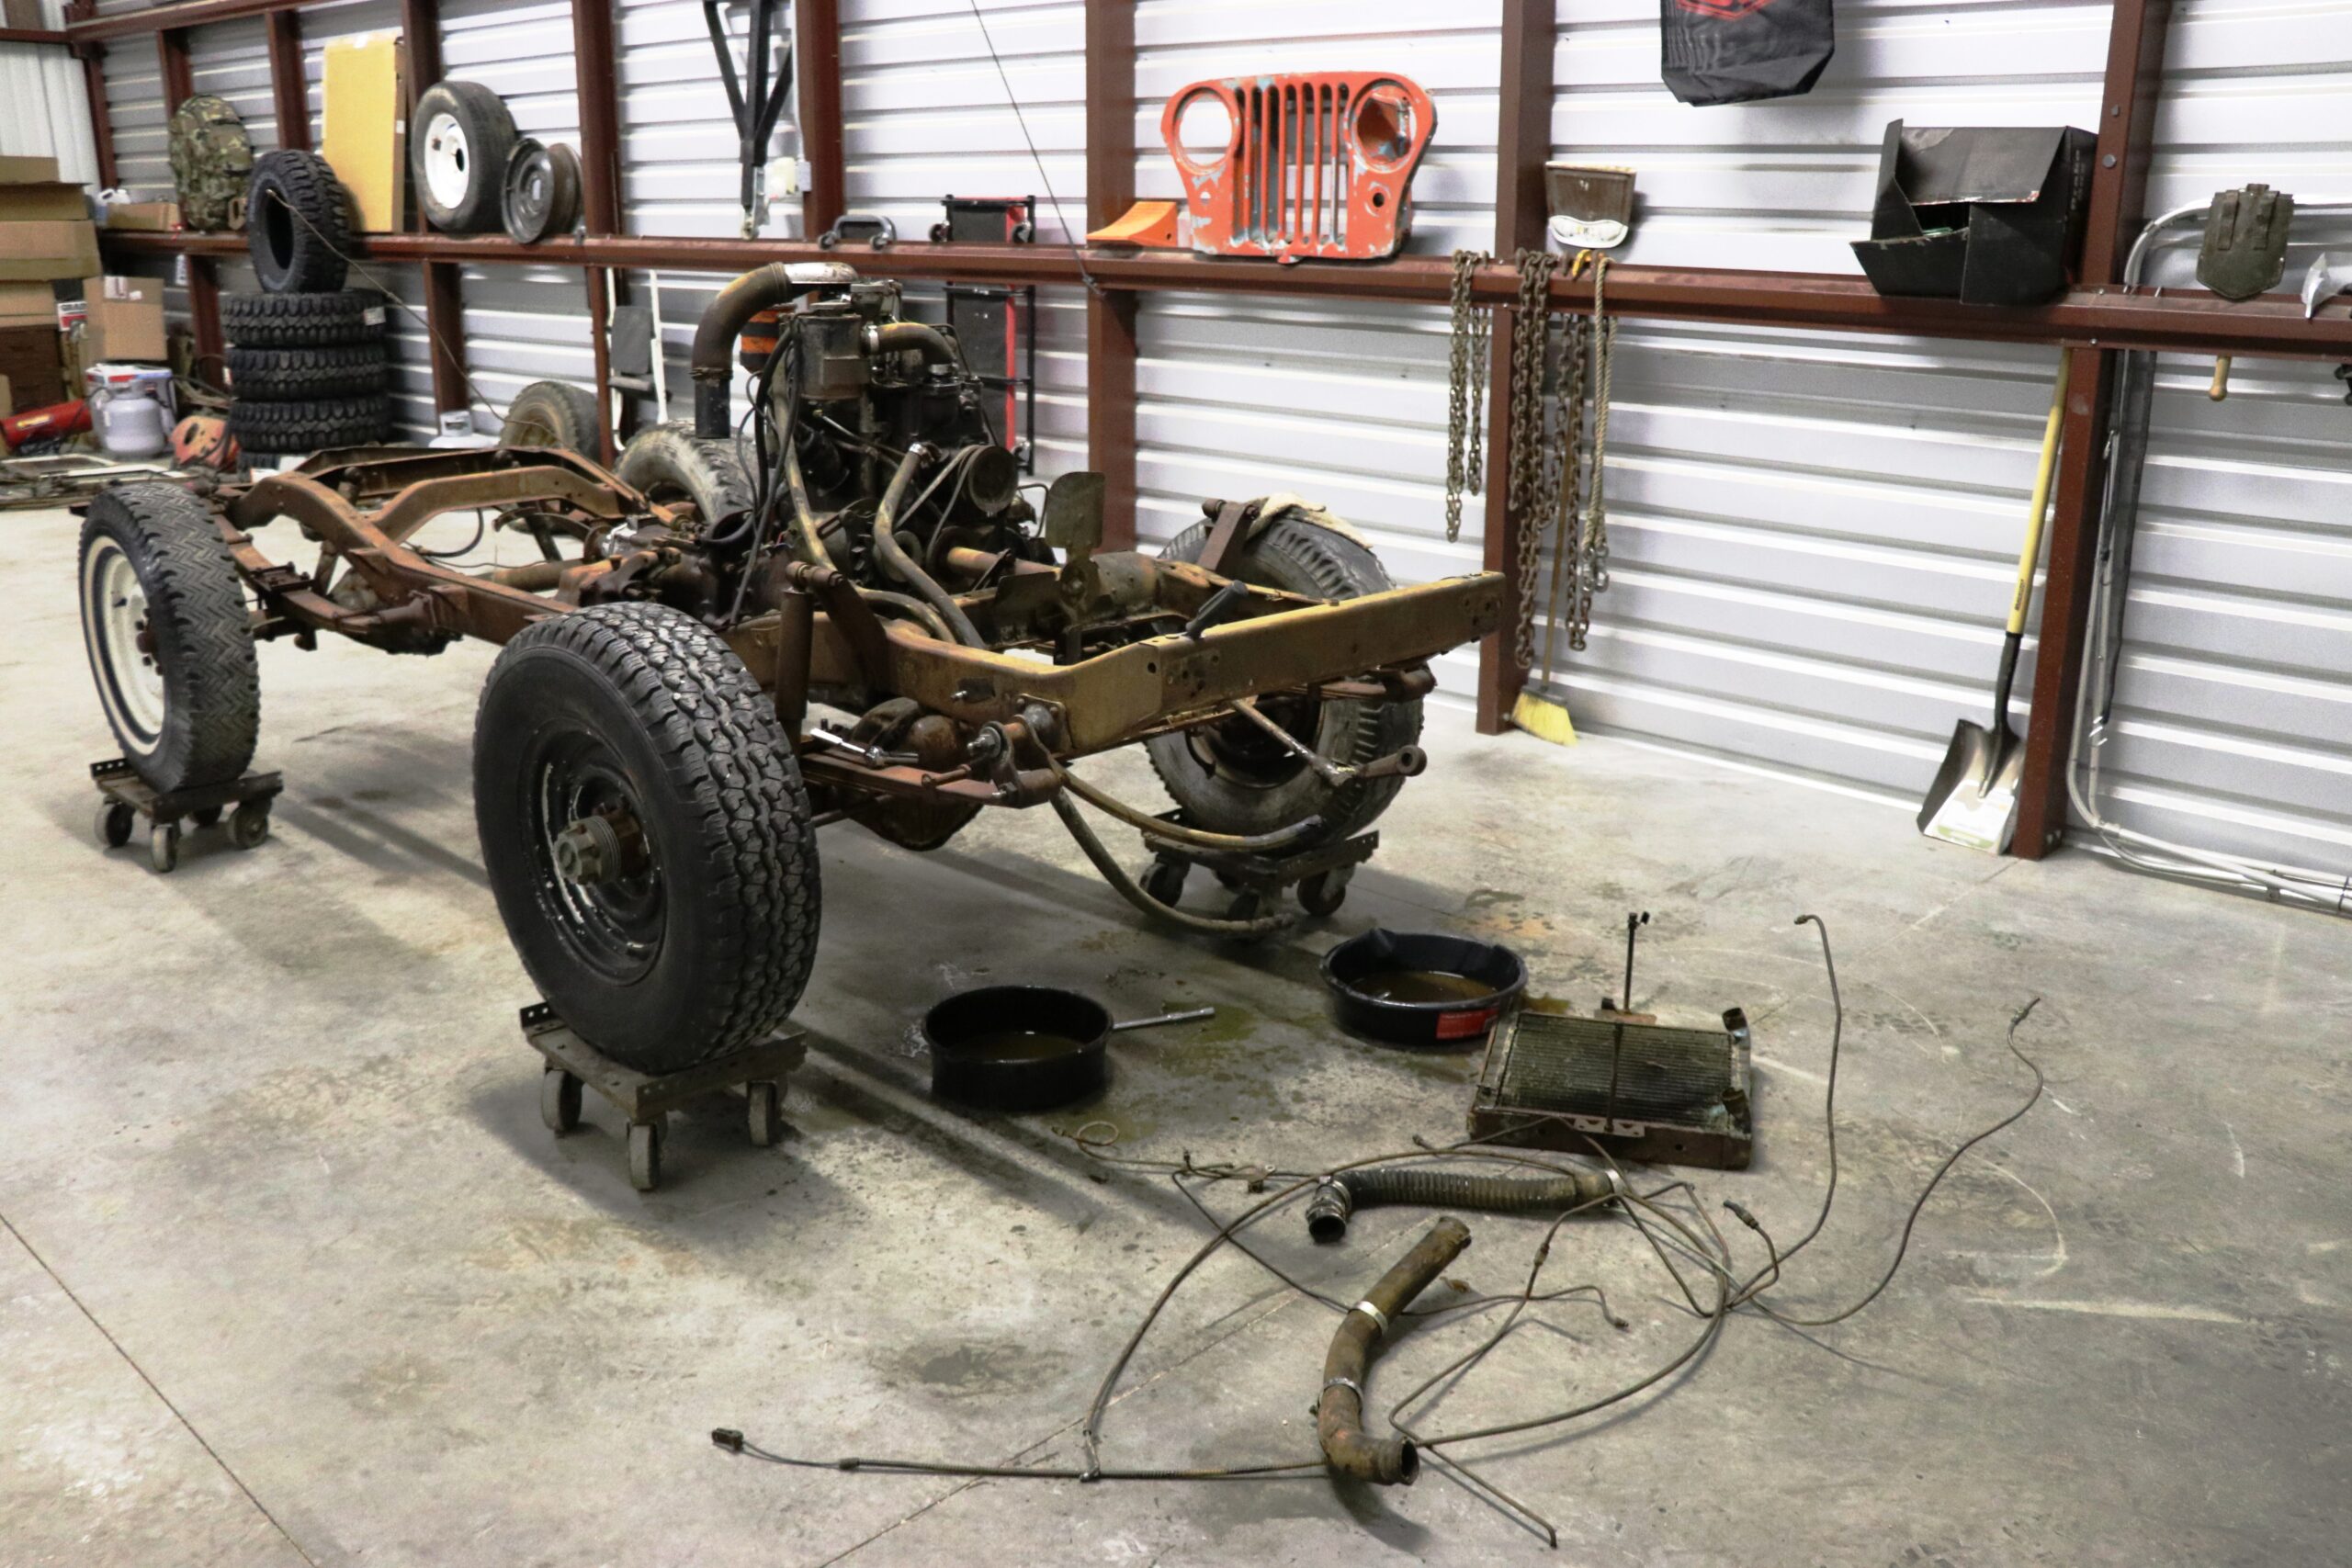
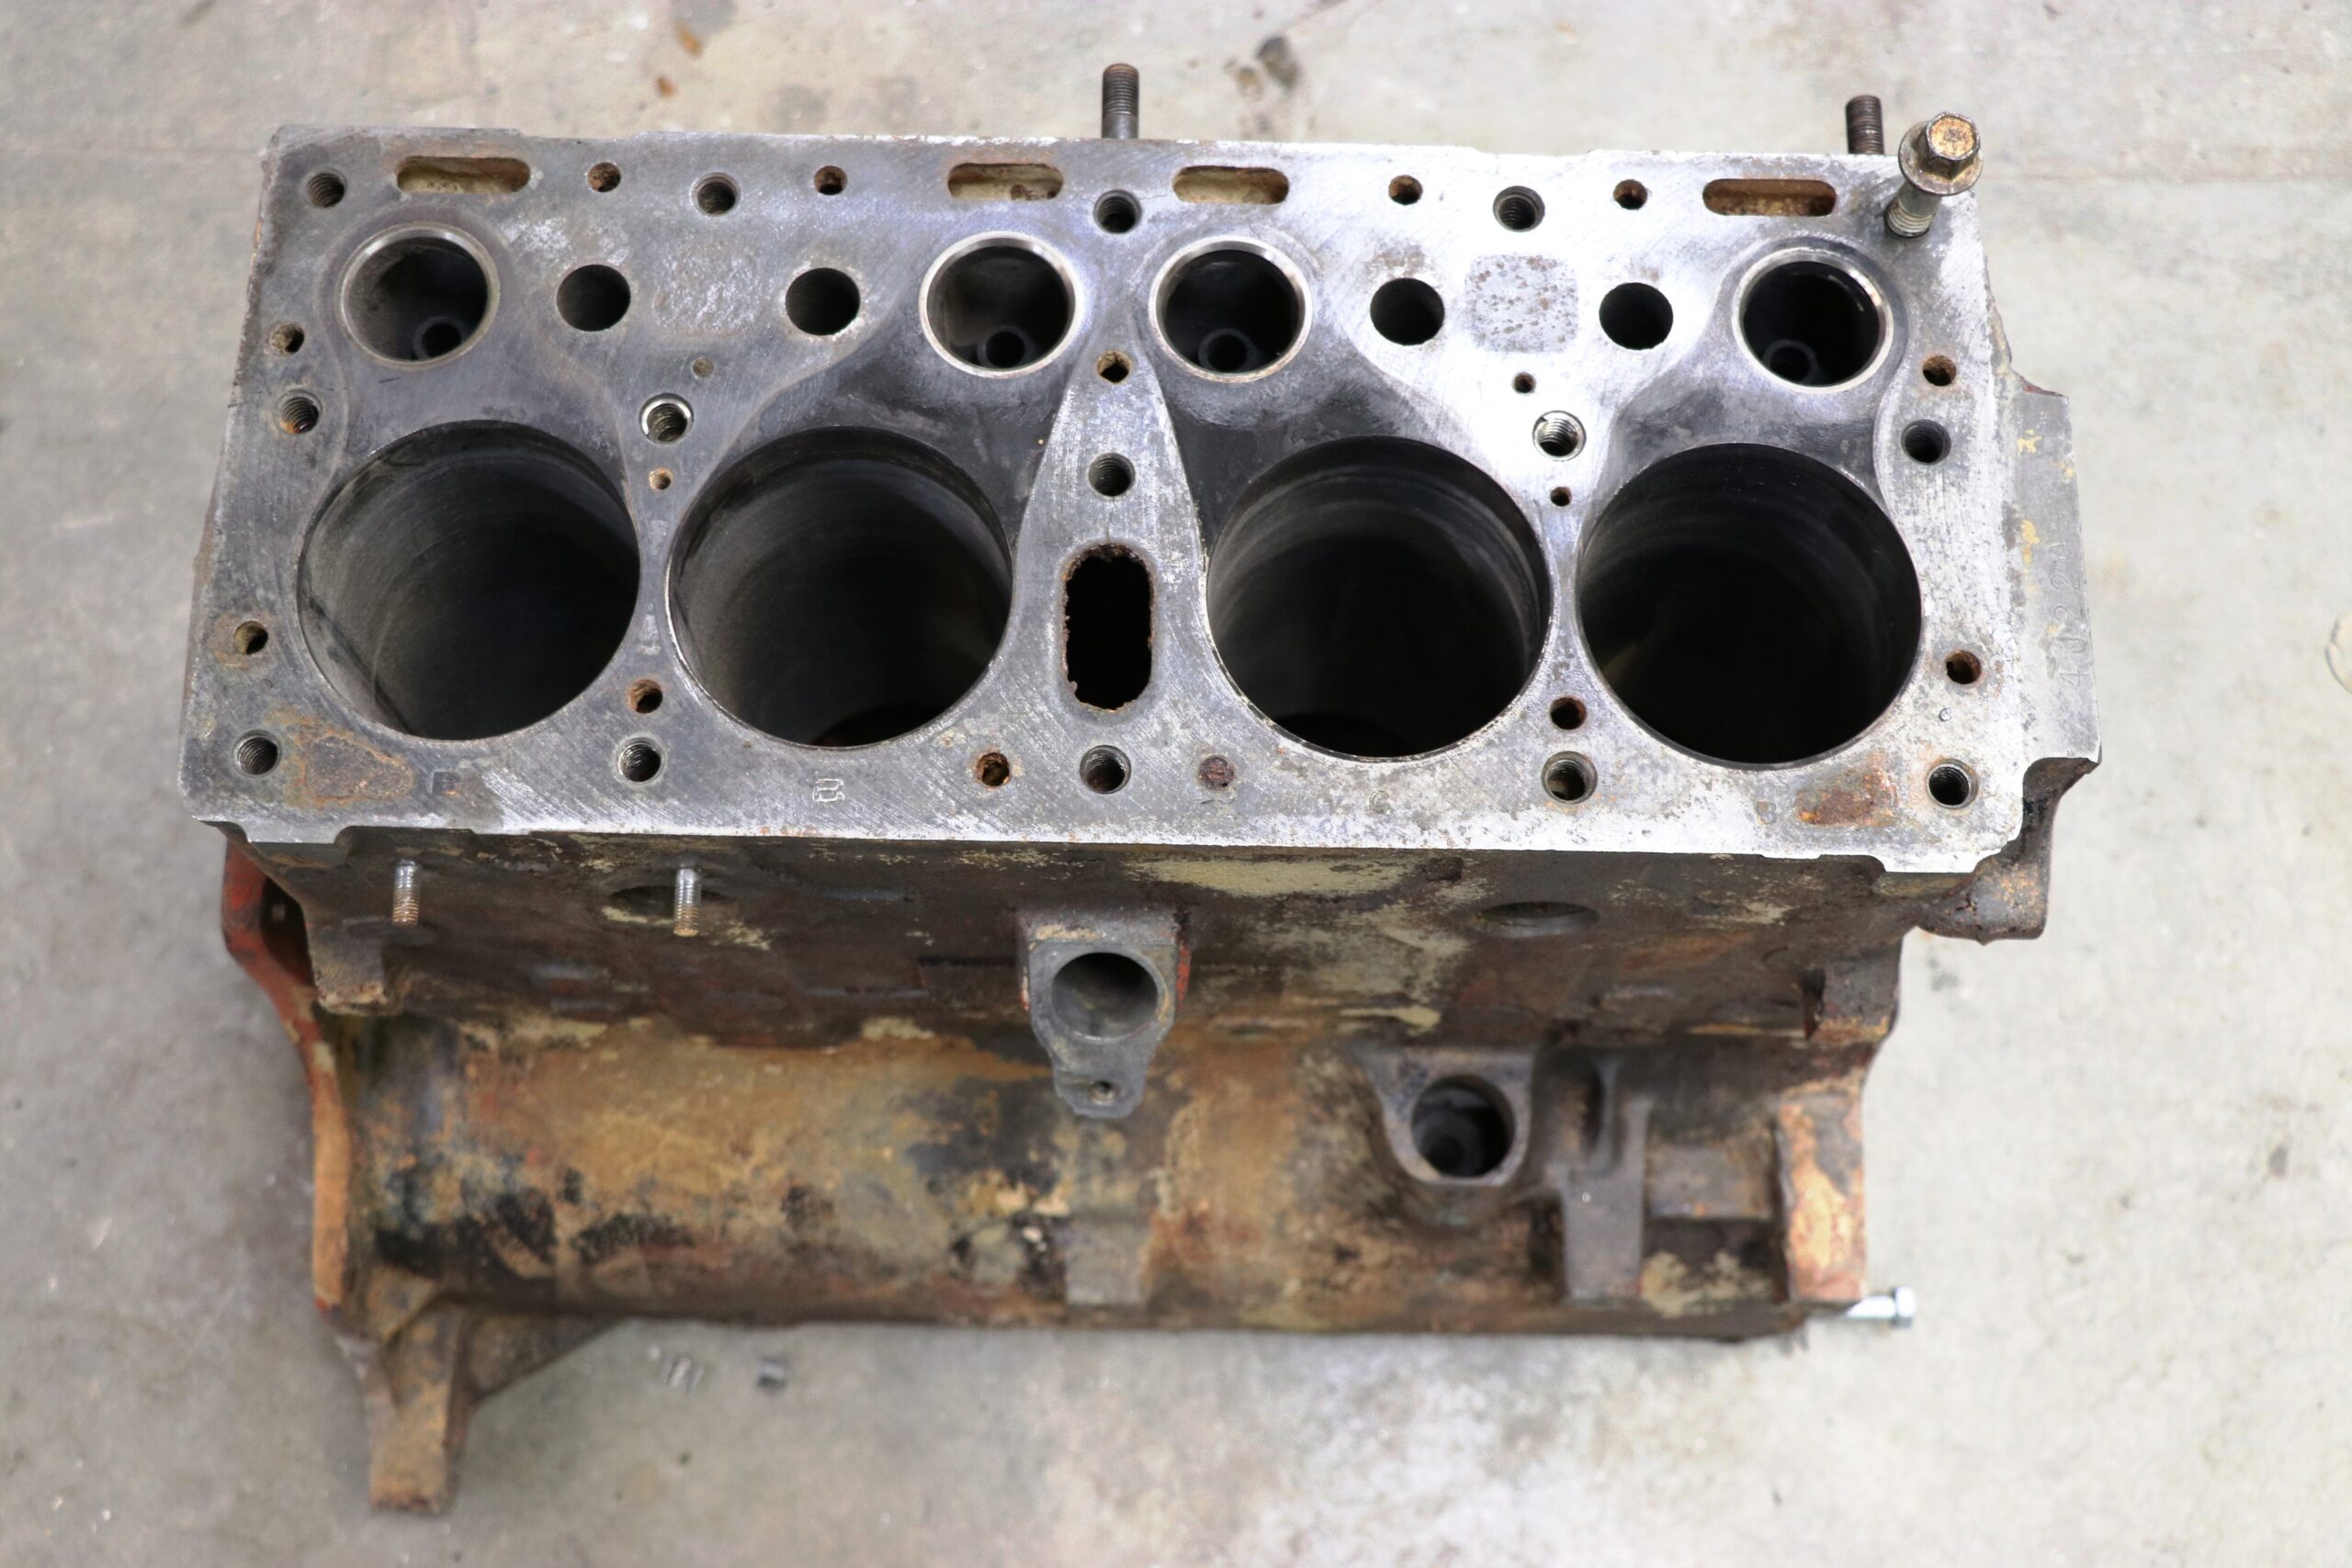
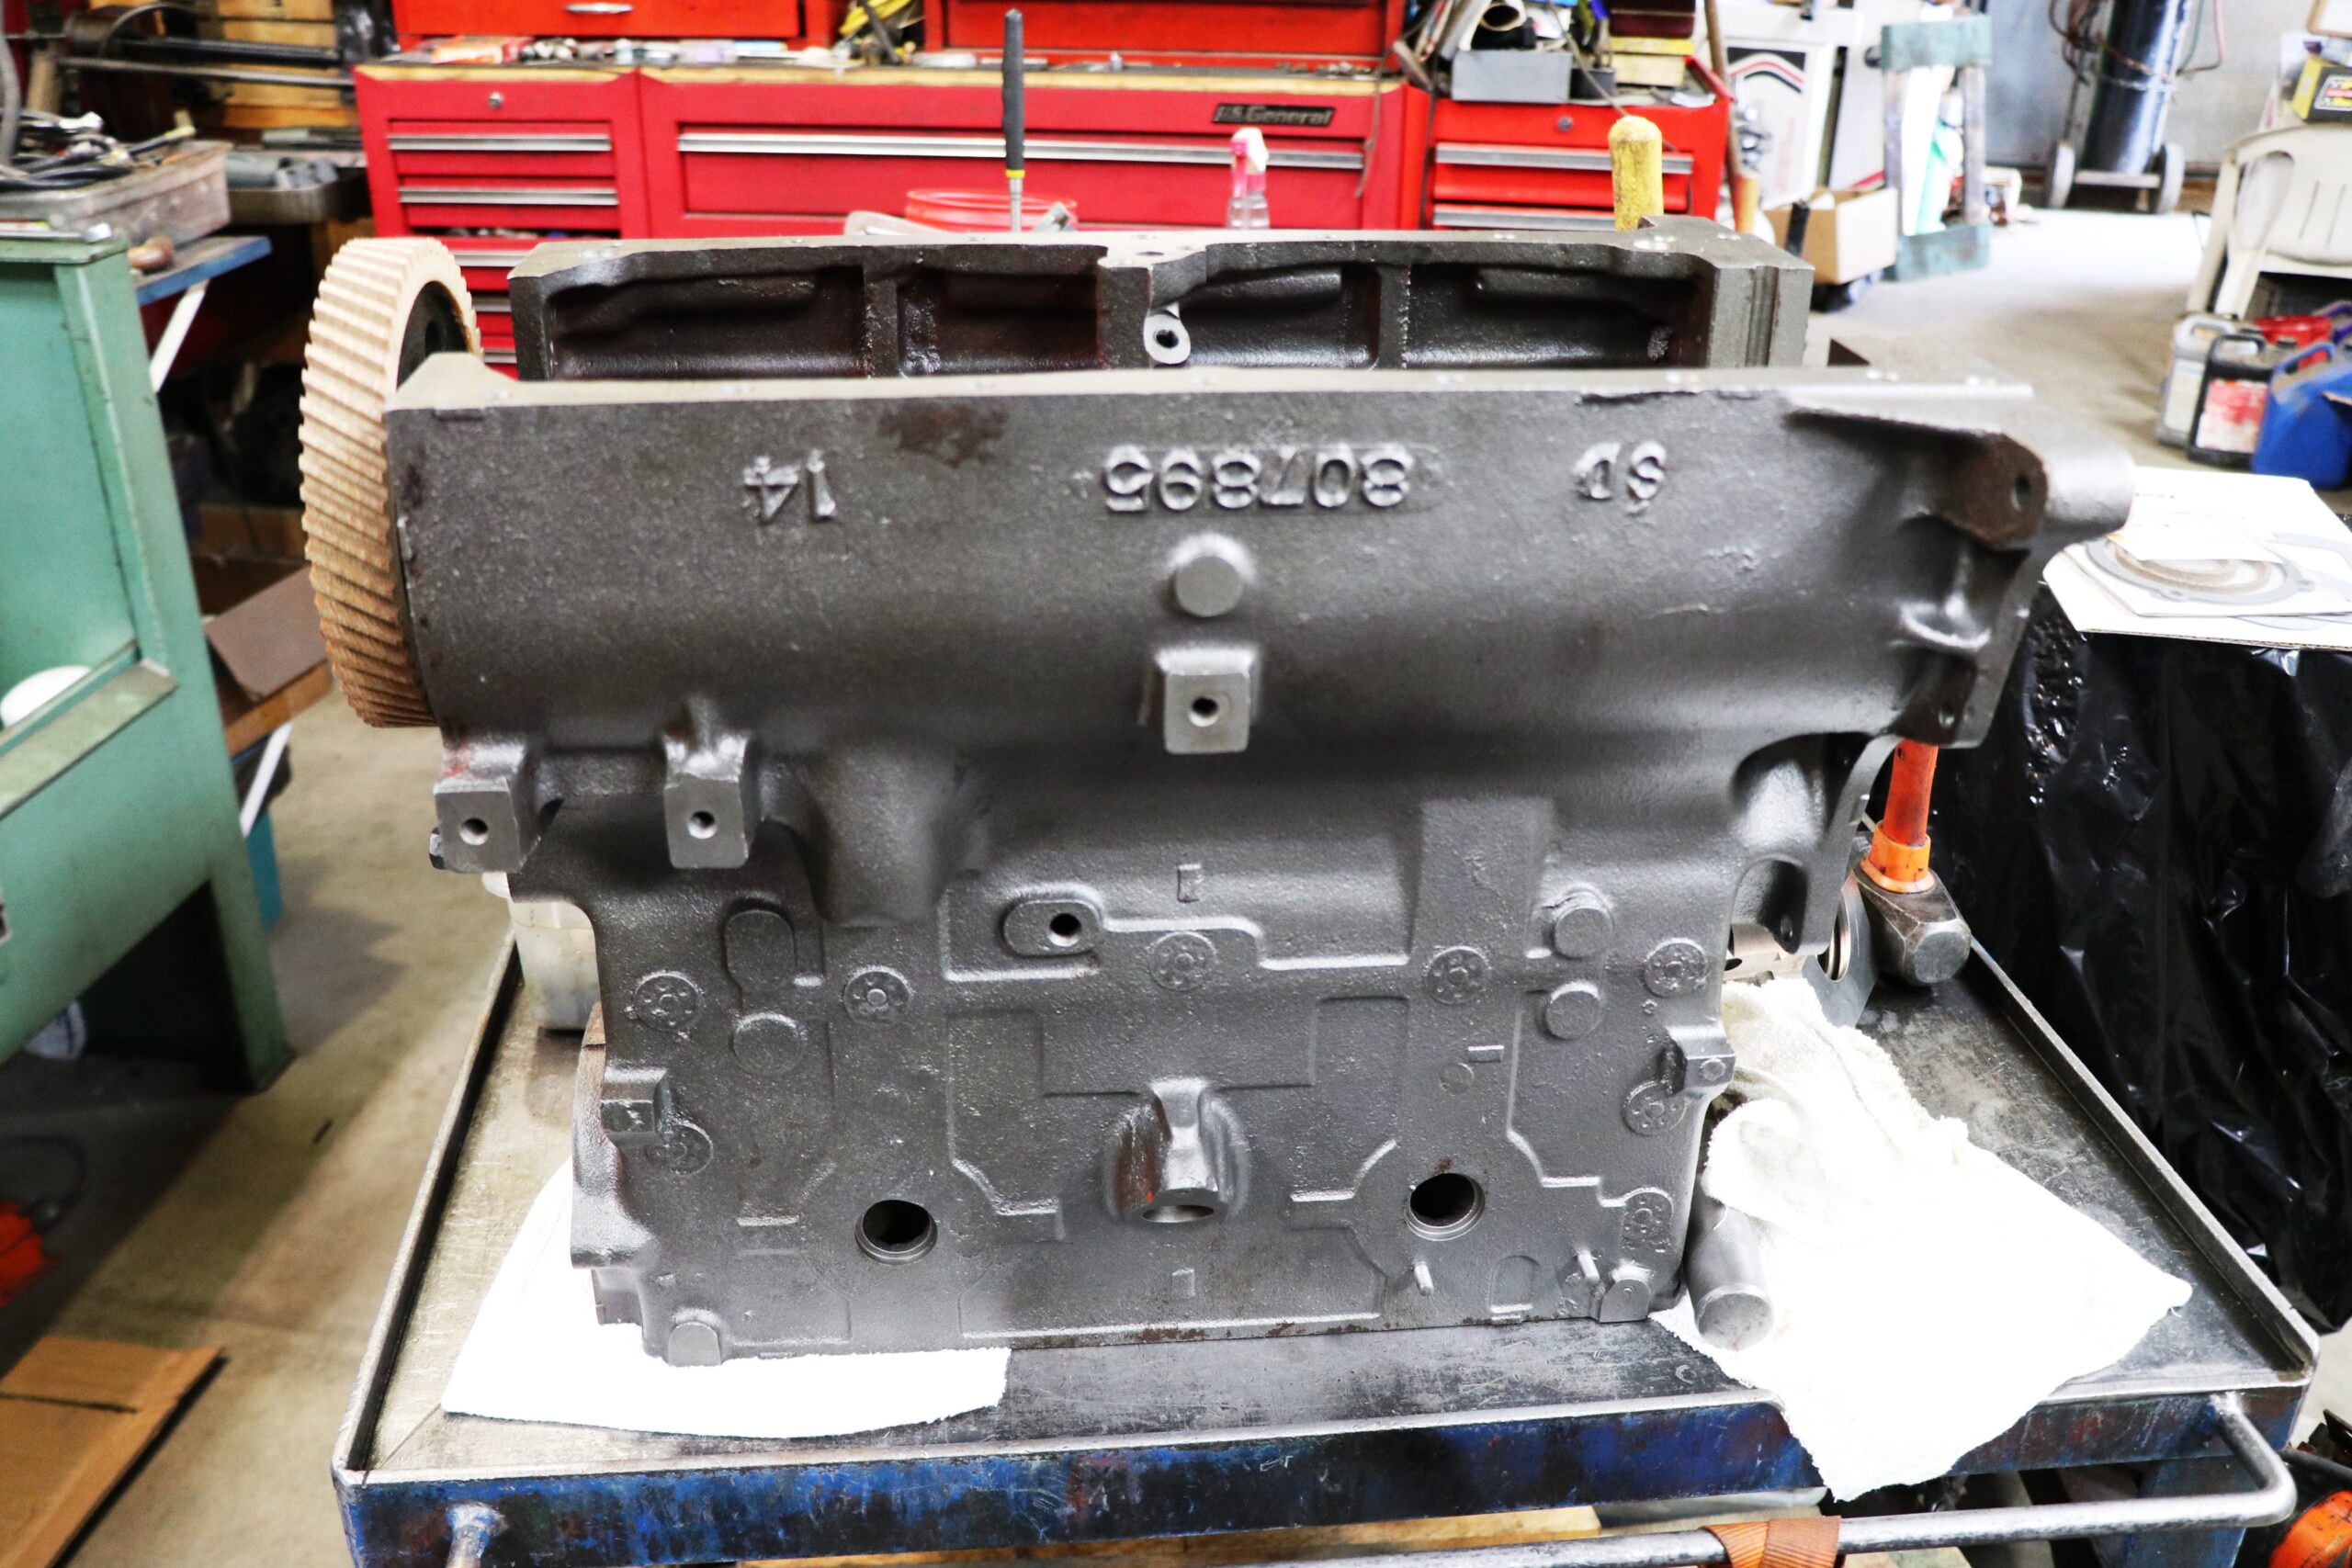
Starting with the easiest and most accessible stuff we pulled the front and rear drivelines and shift linkage, the exhaust pipes and blown out muffler were the next items to be removed. As most know; there is a certain order and some things have to be removed before other components can be taken out. In an effort to open things up and make our major components more accessible, we removed the brake lines, radiator and hoses. This afforded us the room and ability to pull the plug wires, fuel pump and miscellaneous smaller items from the engine. With things stripped down, we loaded what was left of the FC and wheeled on down to Inland Truck Parts to utilize the crane and a couple of extra pairs of hands to make it a quick, easy pull of the engine, transmission and transfer case. Once out, they were all separated and we put the engine in a crate to haul it off while the T-90 and Dana 18 stayed behind to be rebuilt.
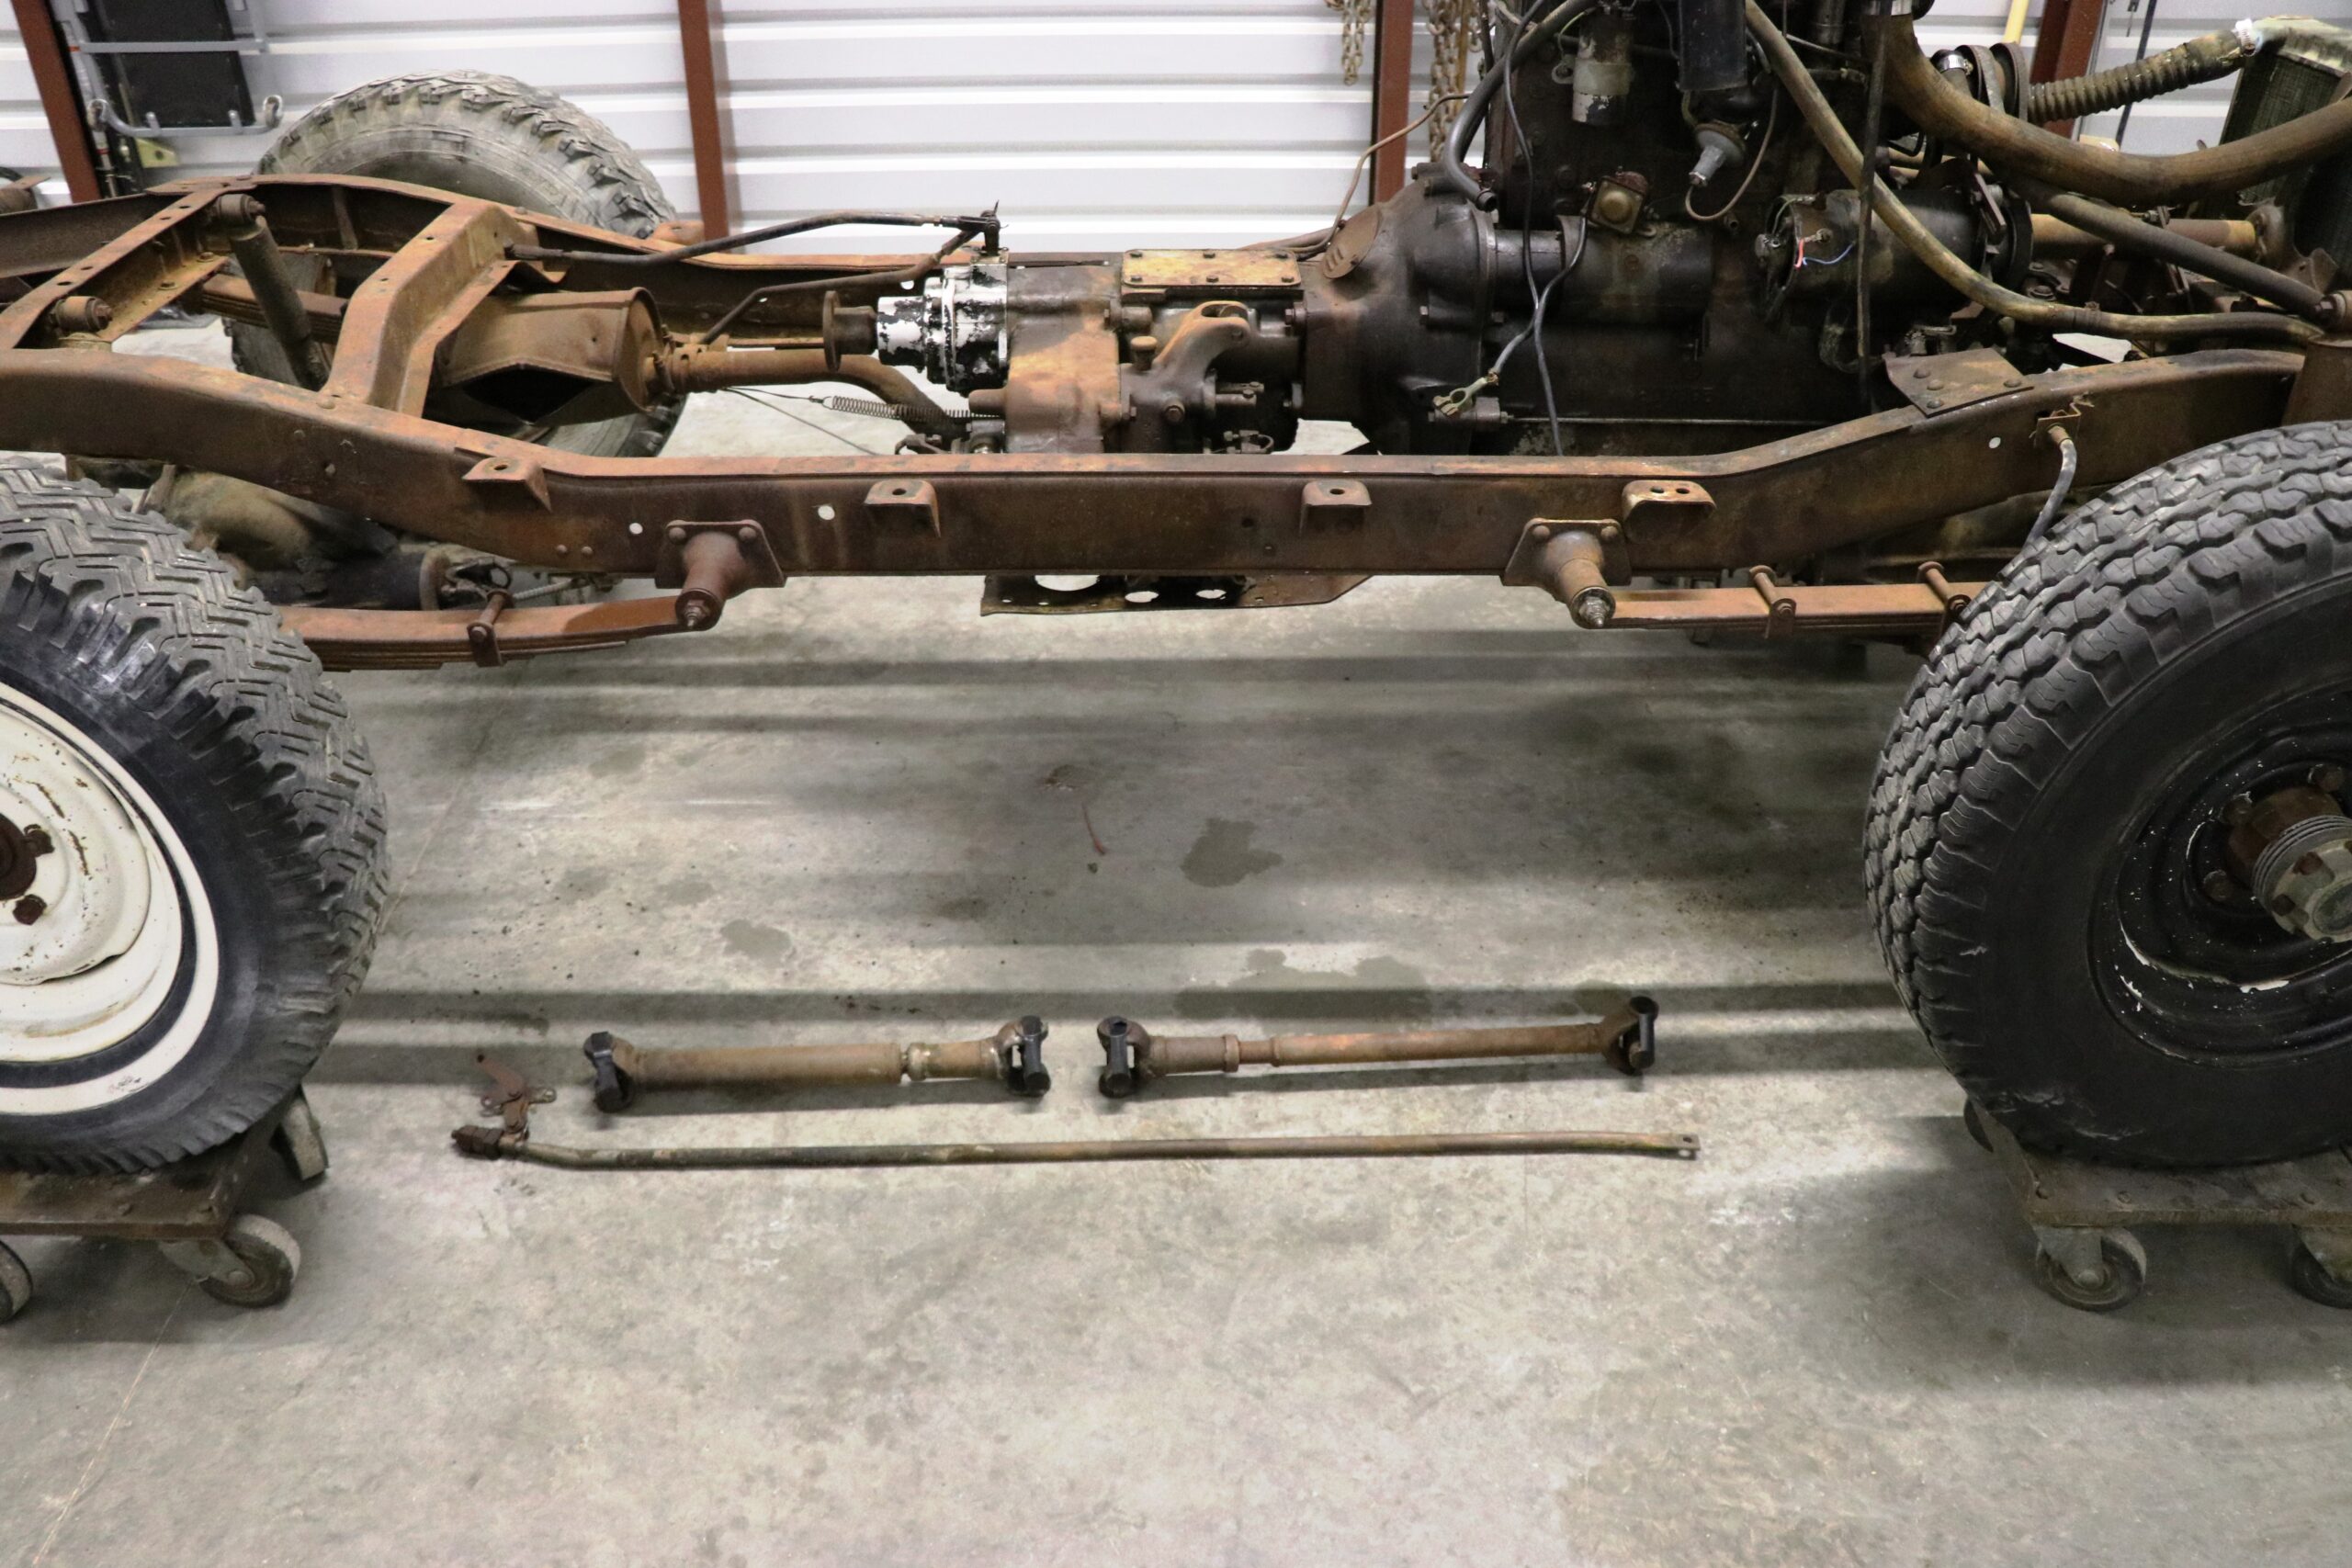
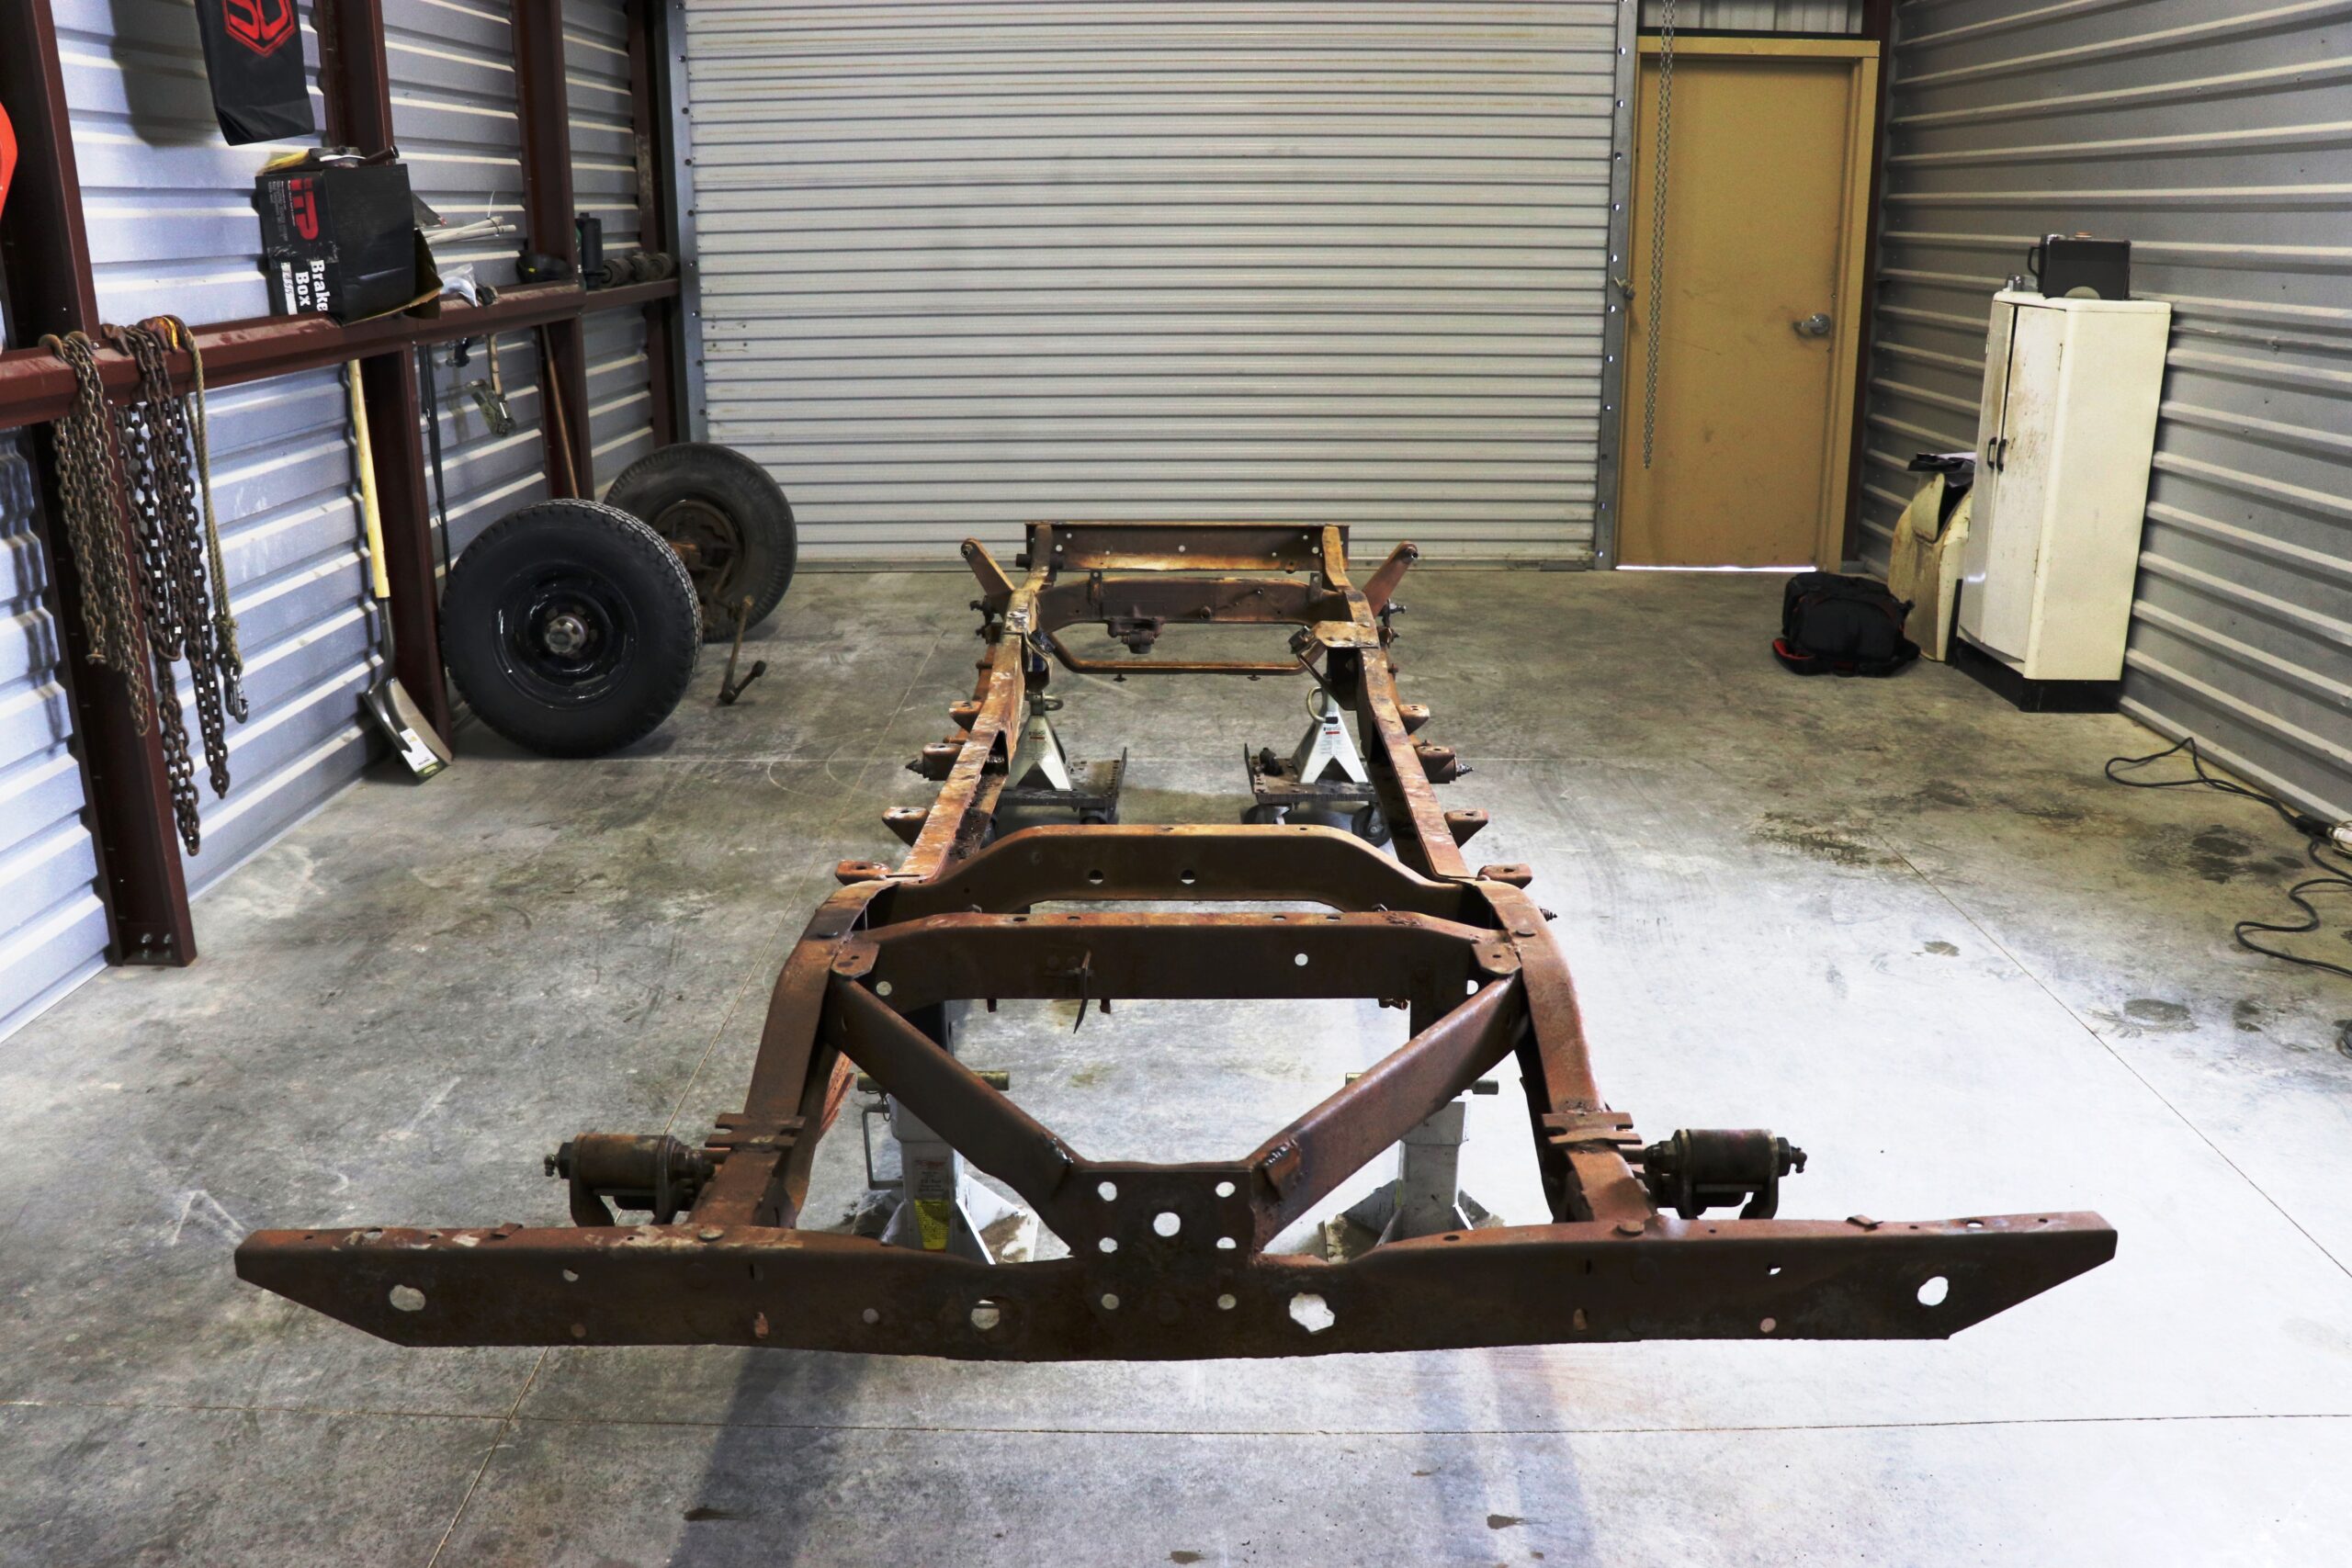
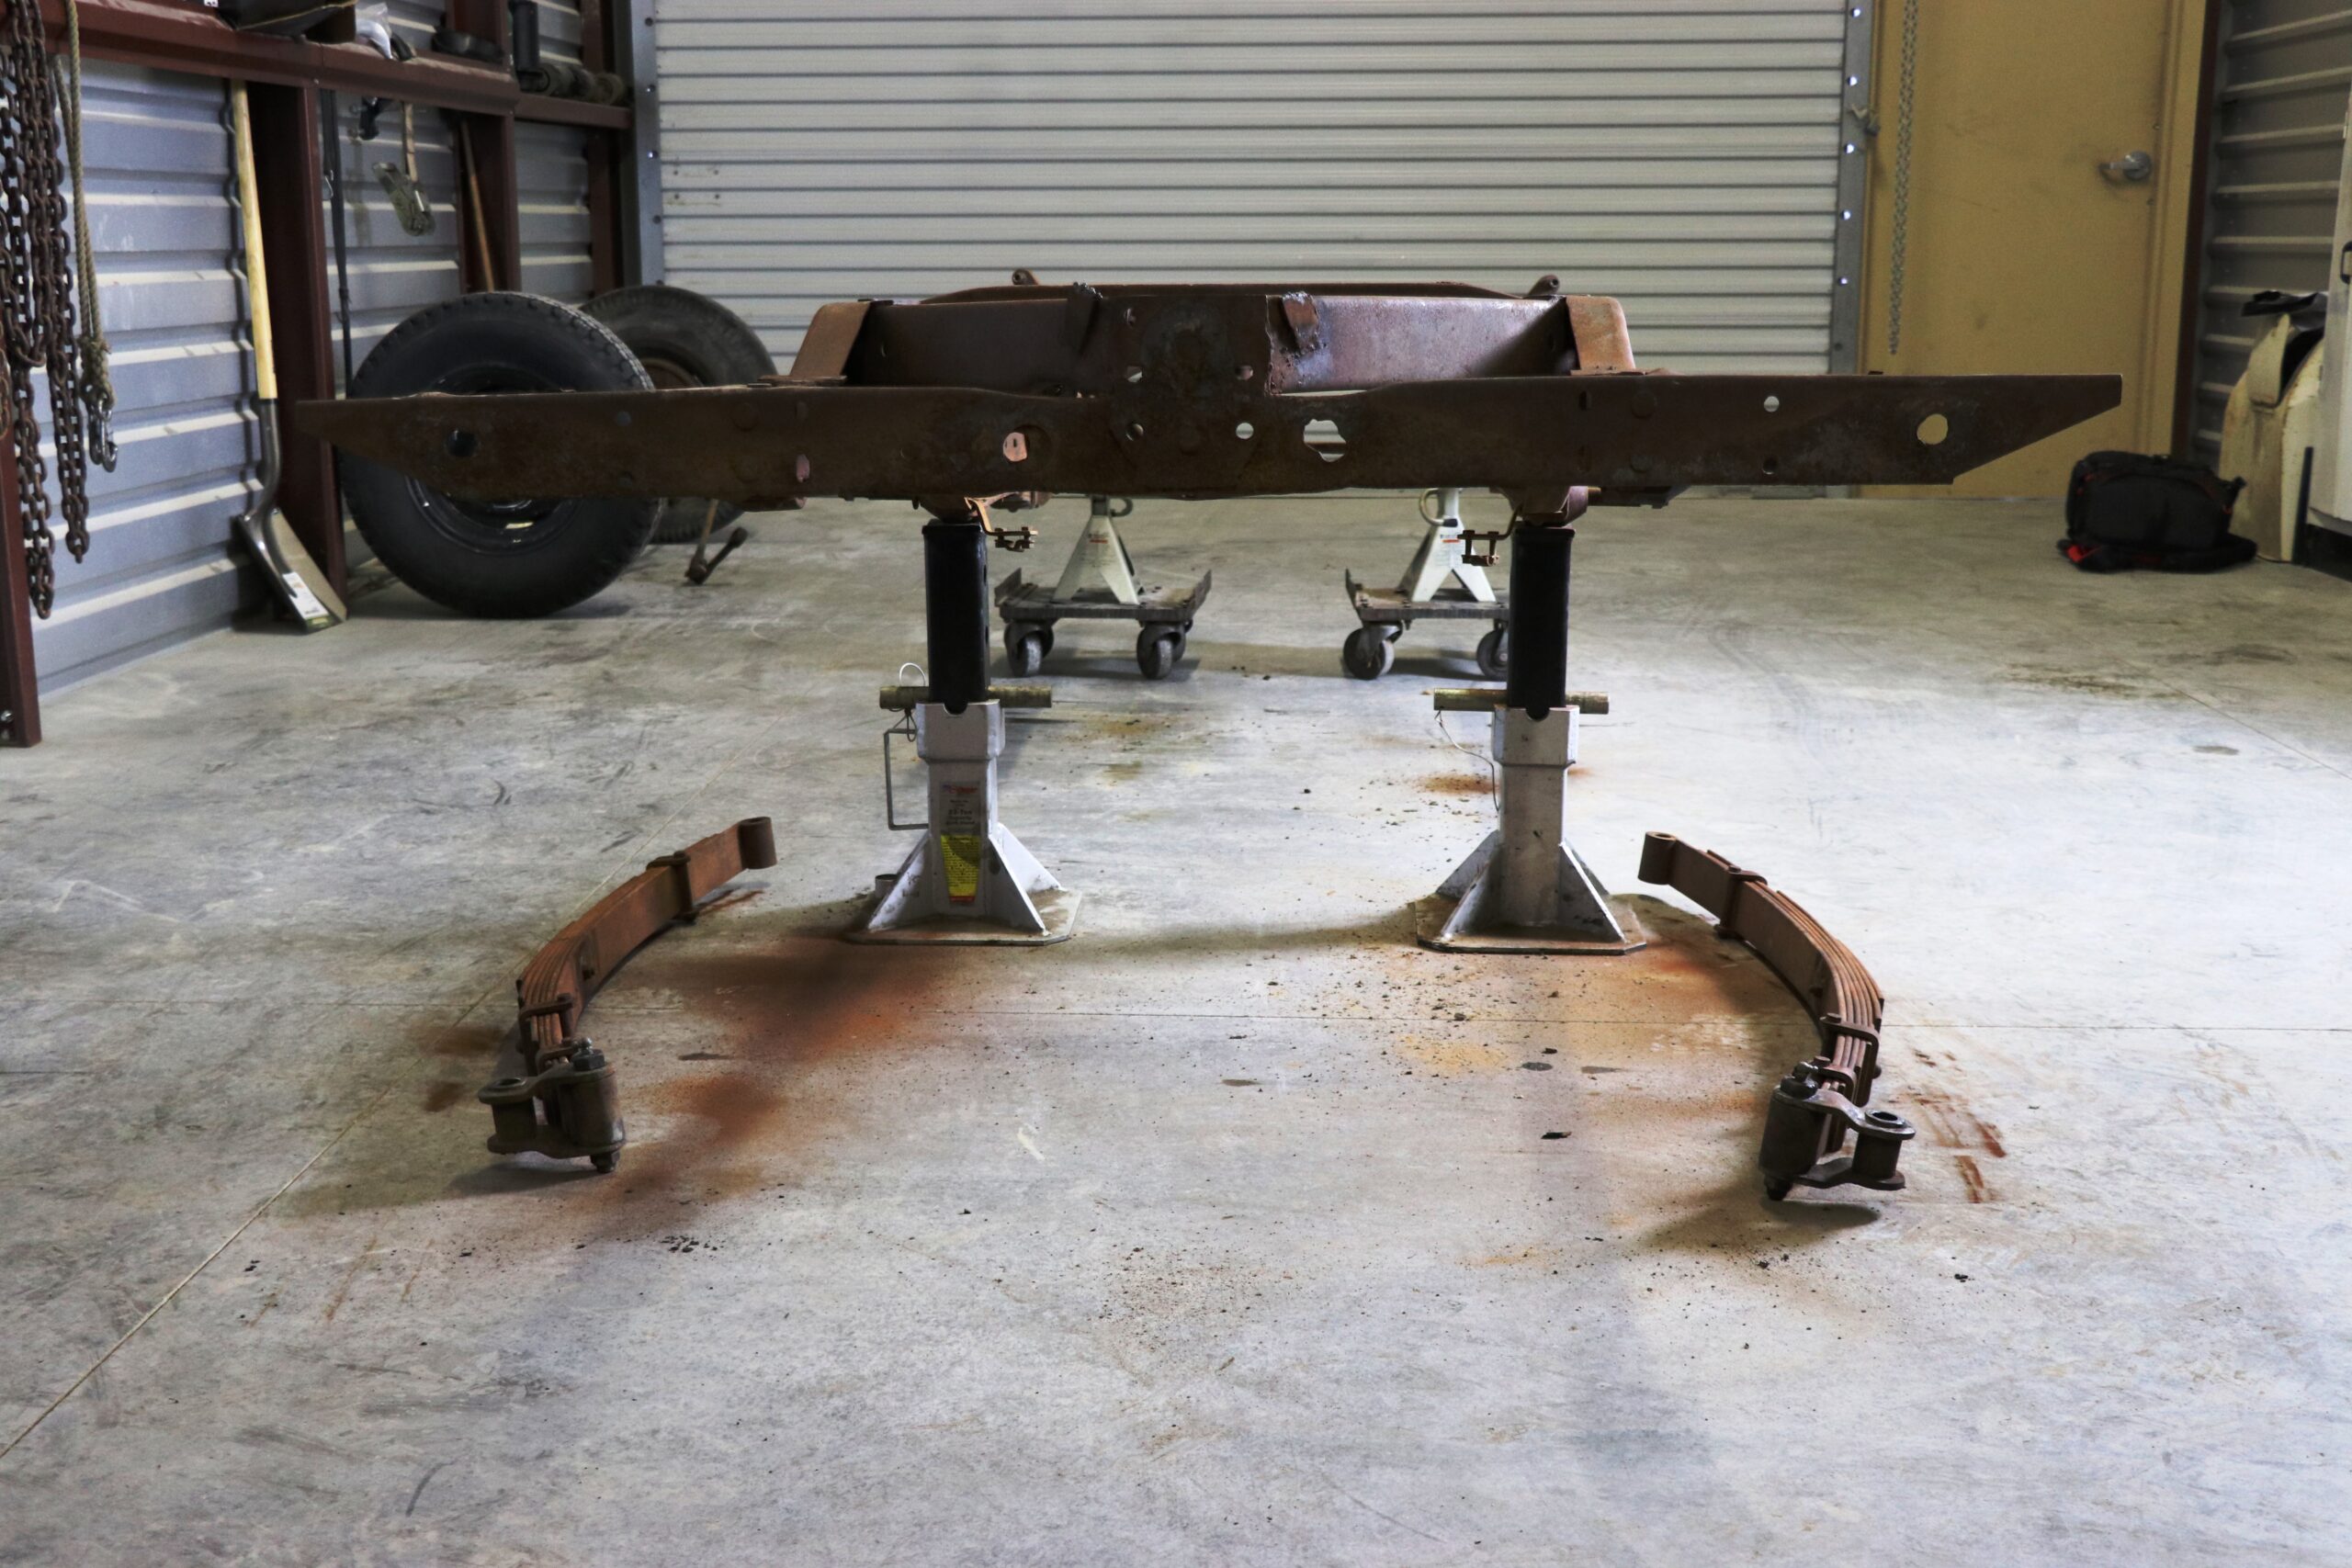
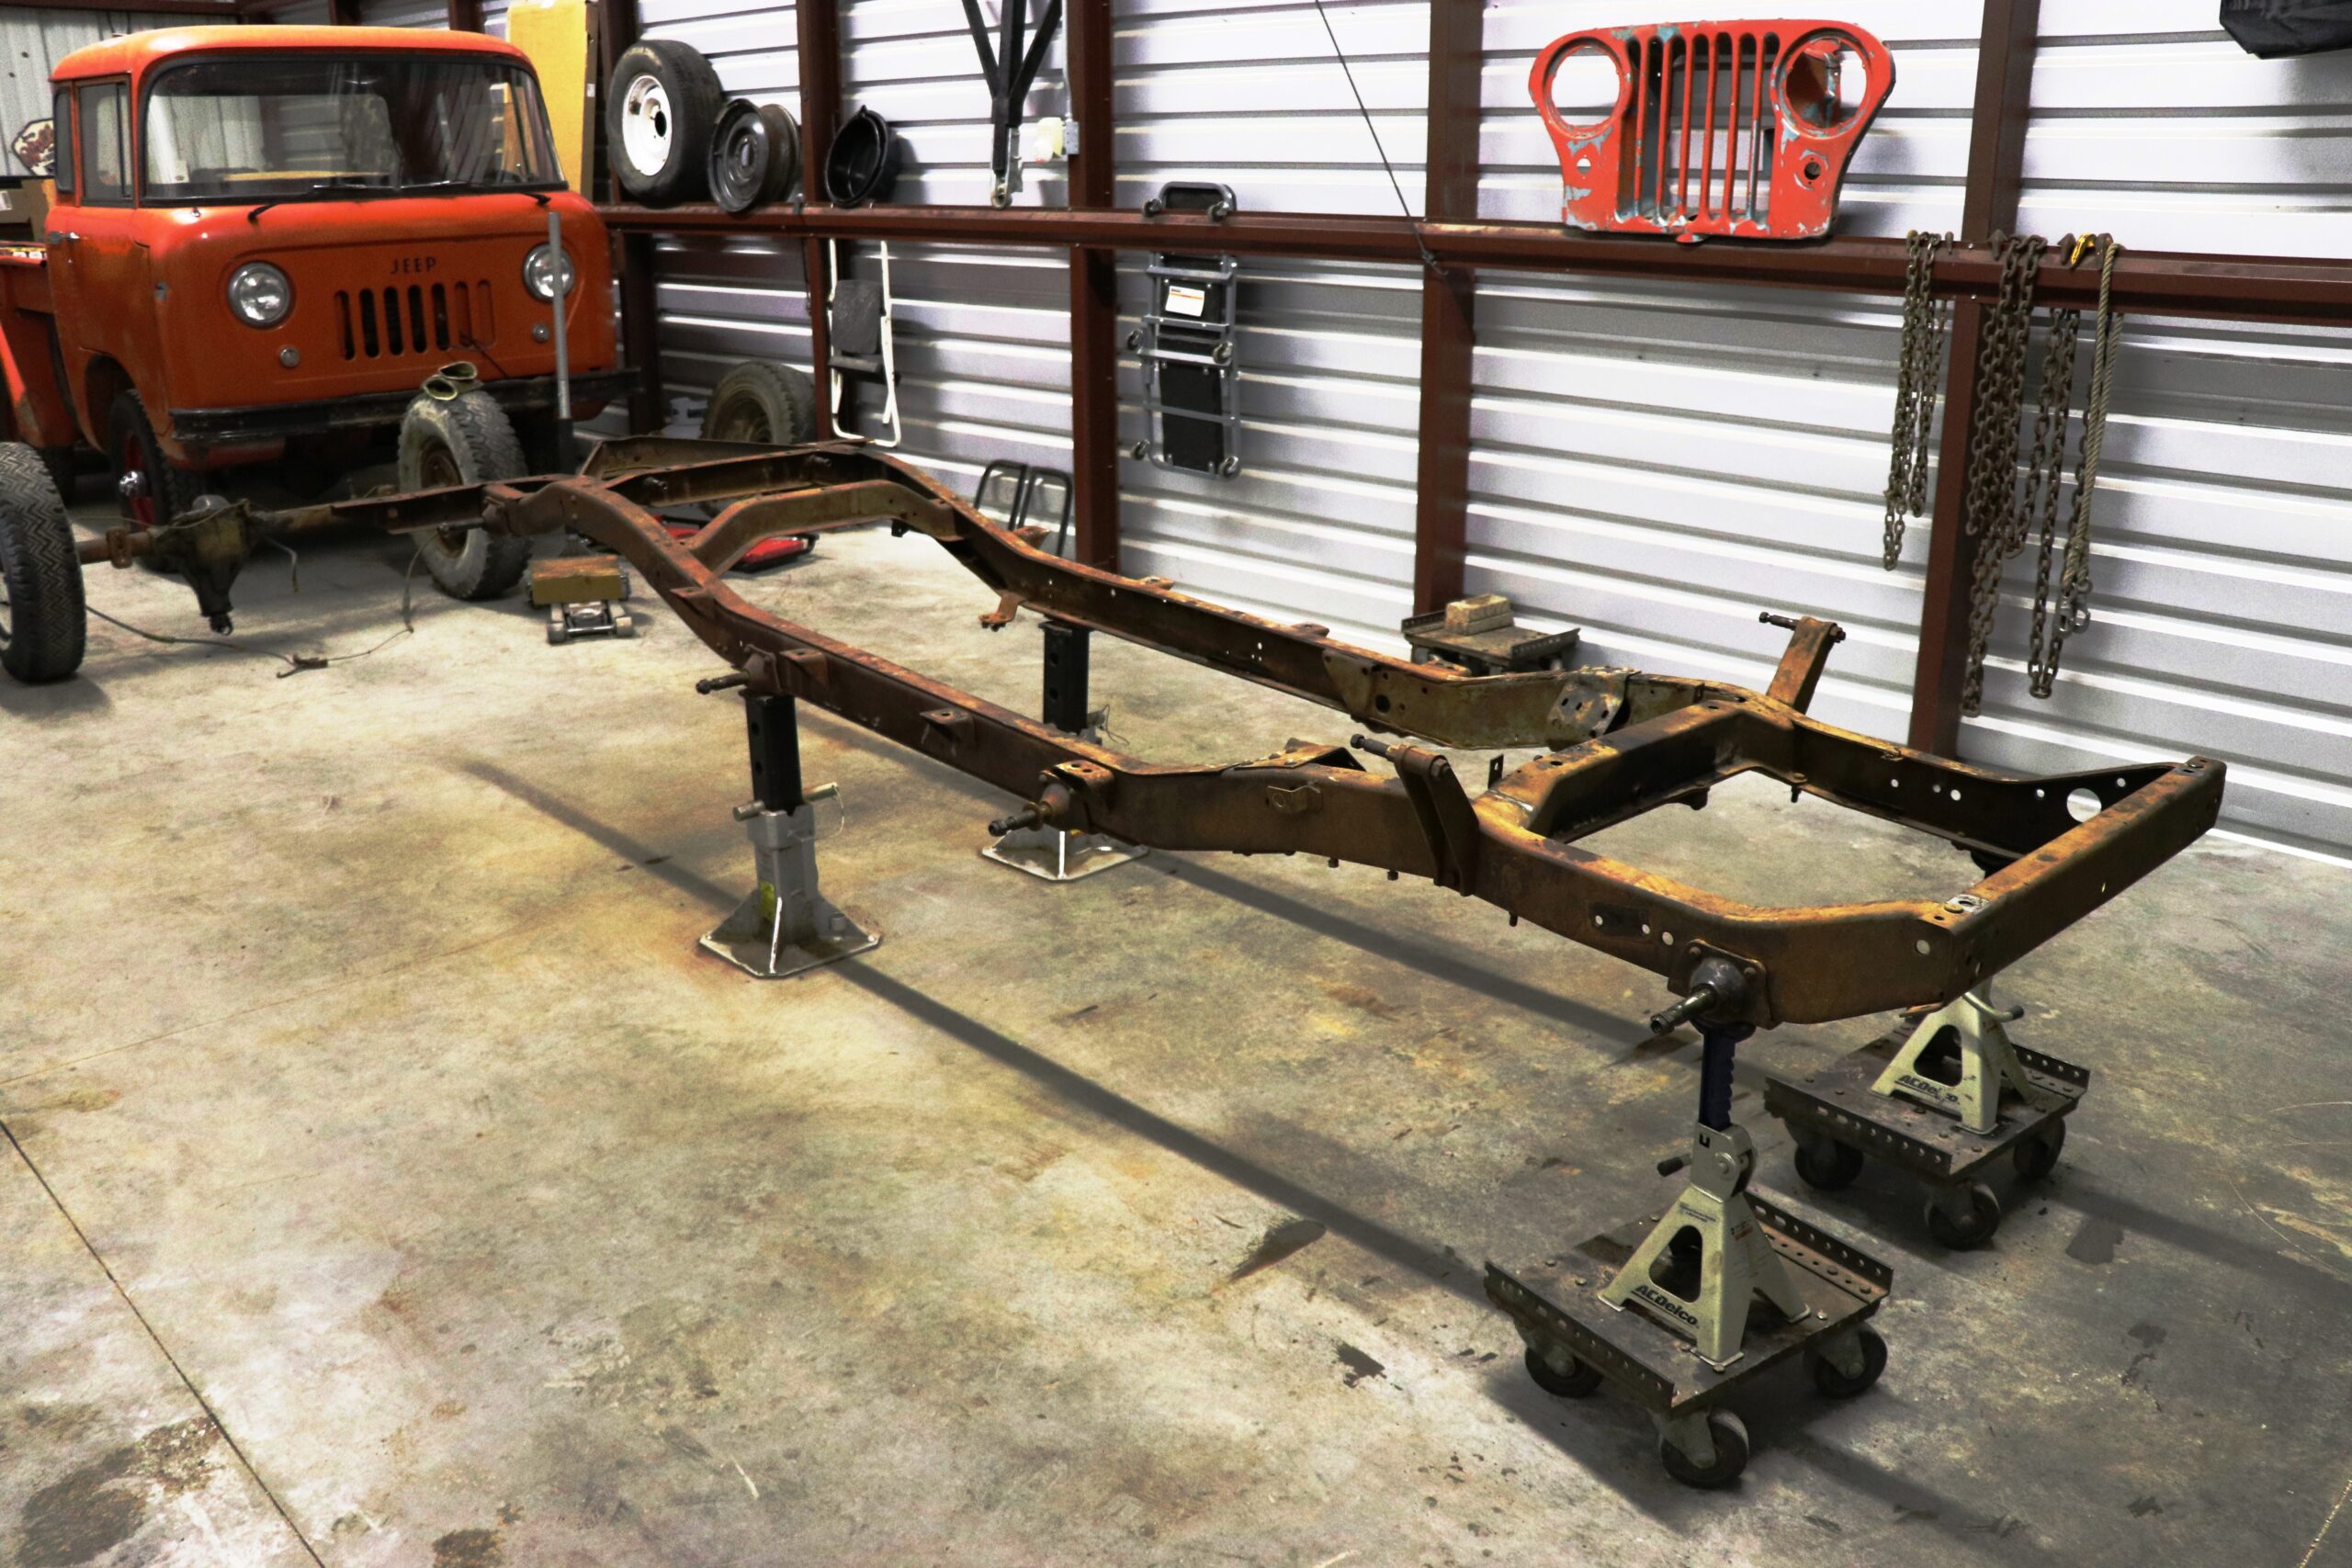
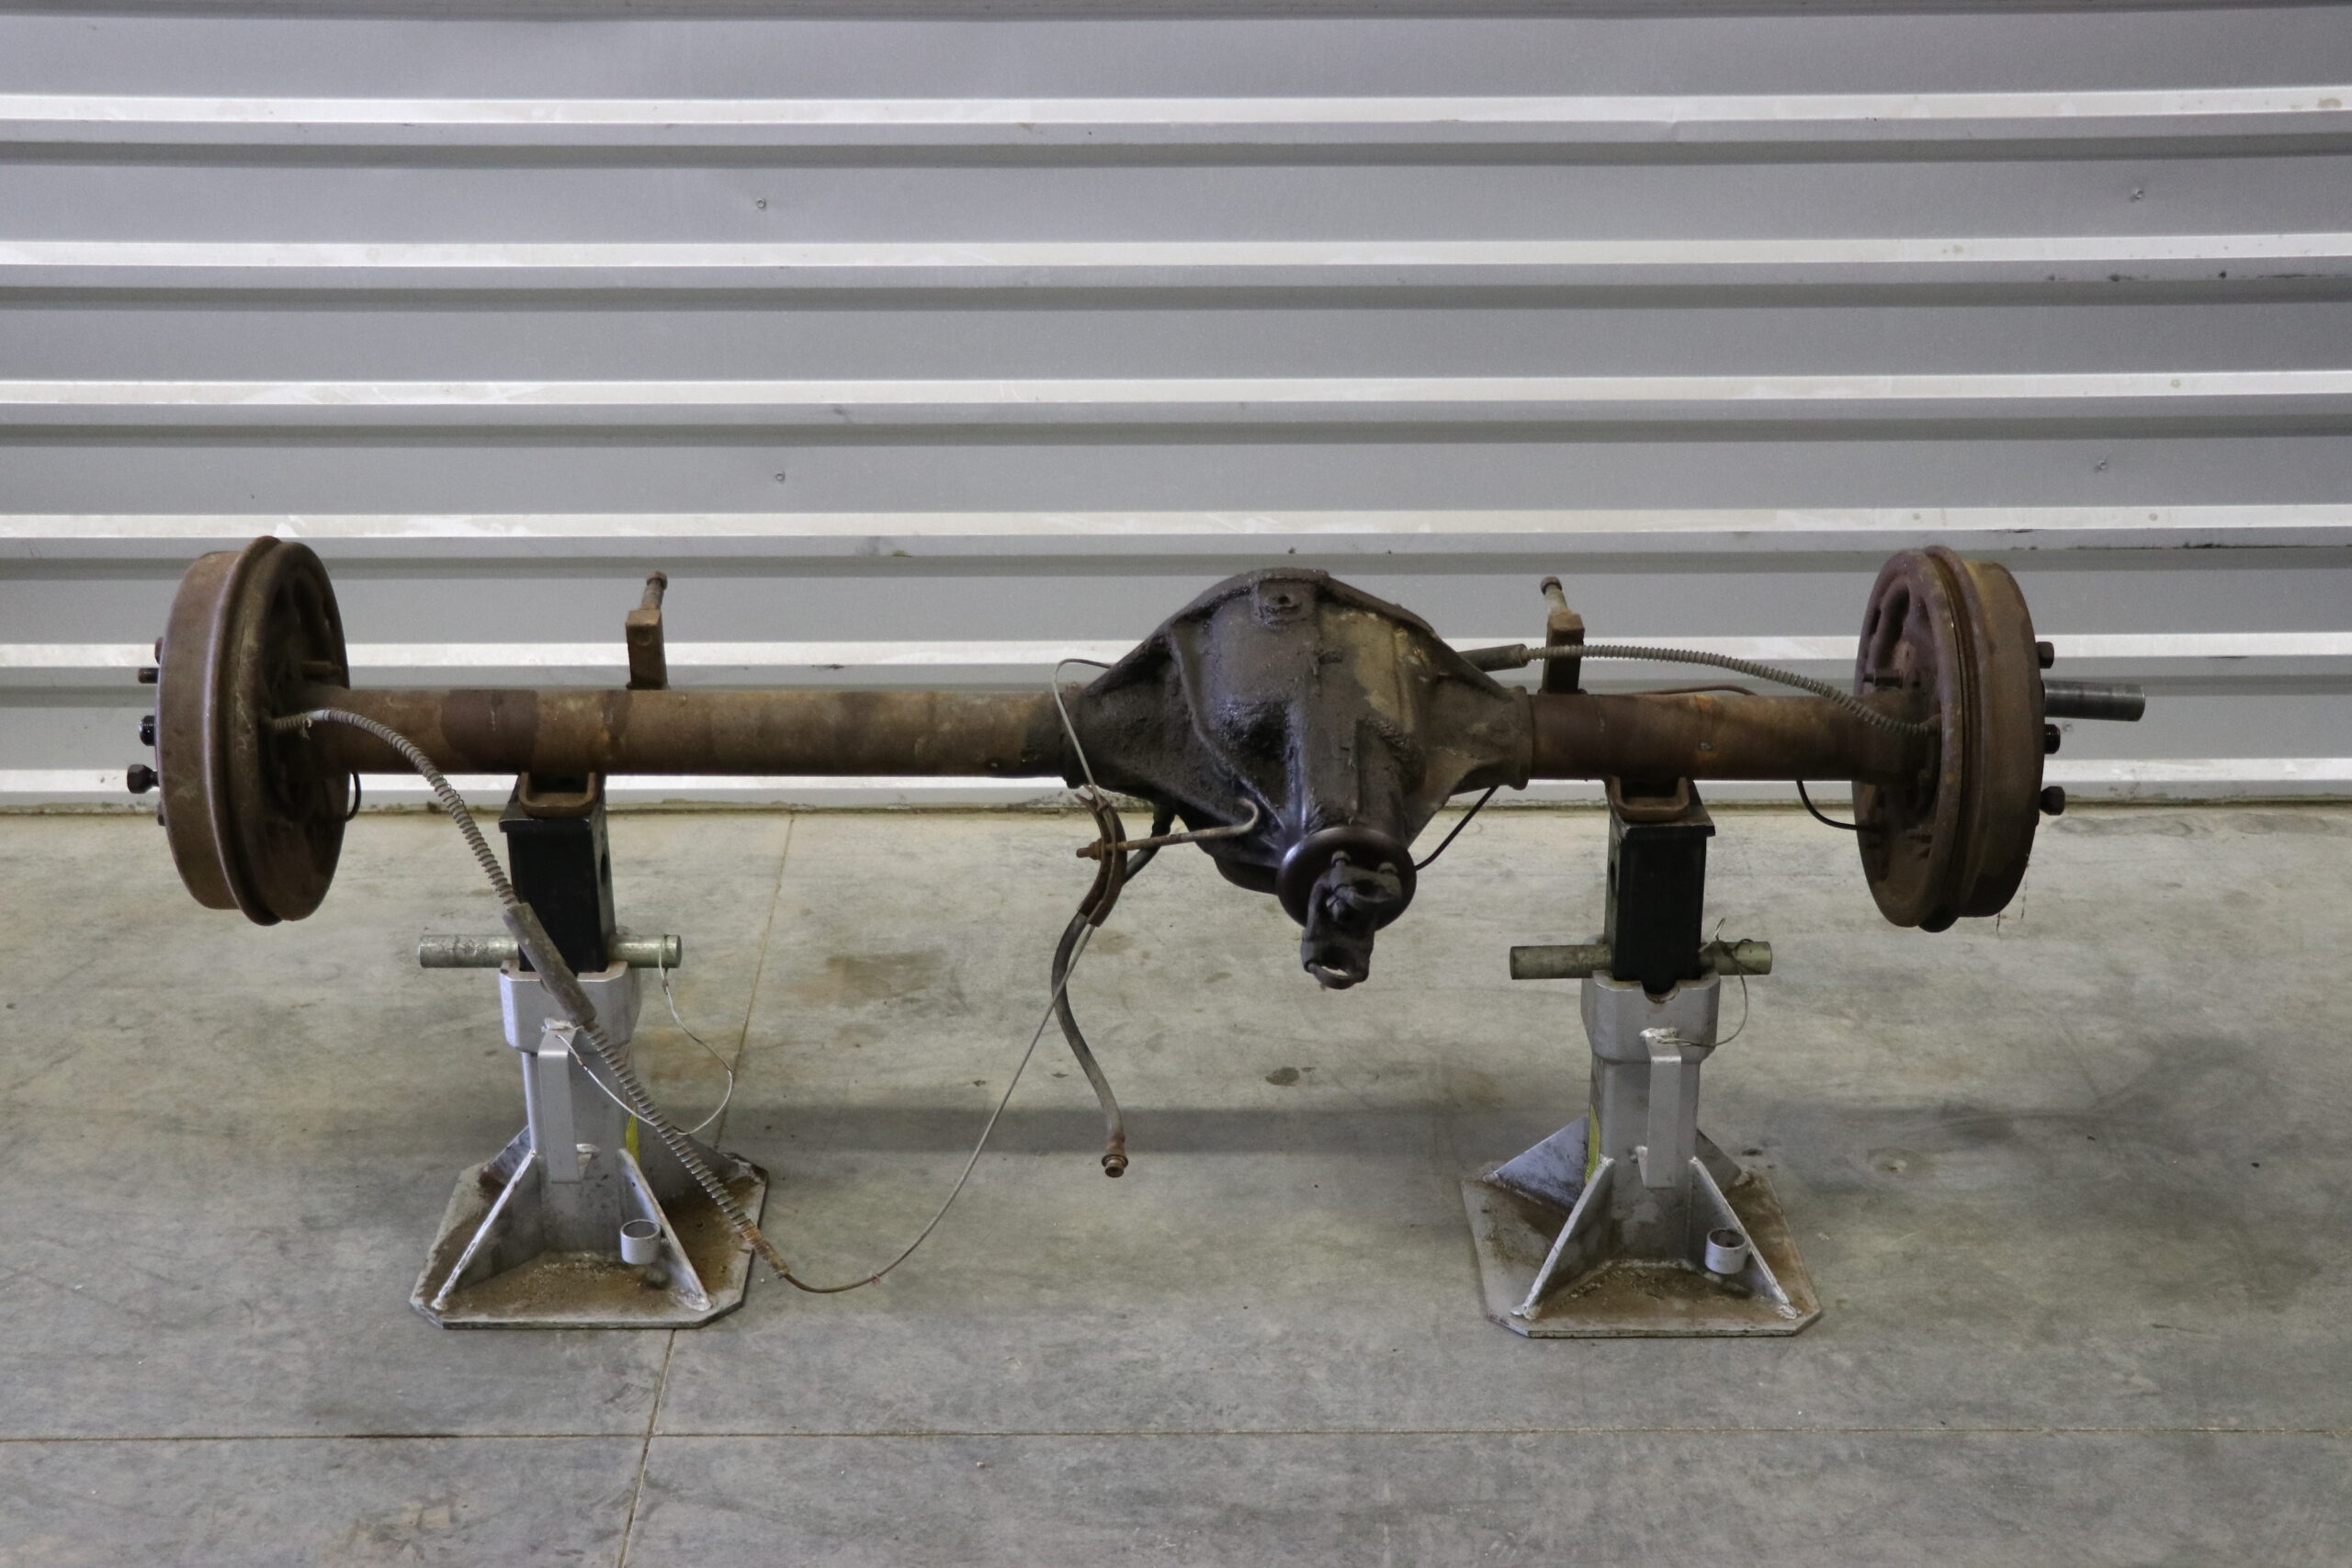
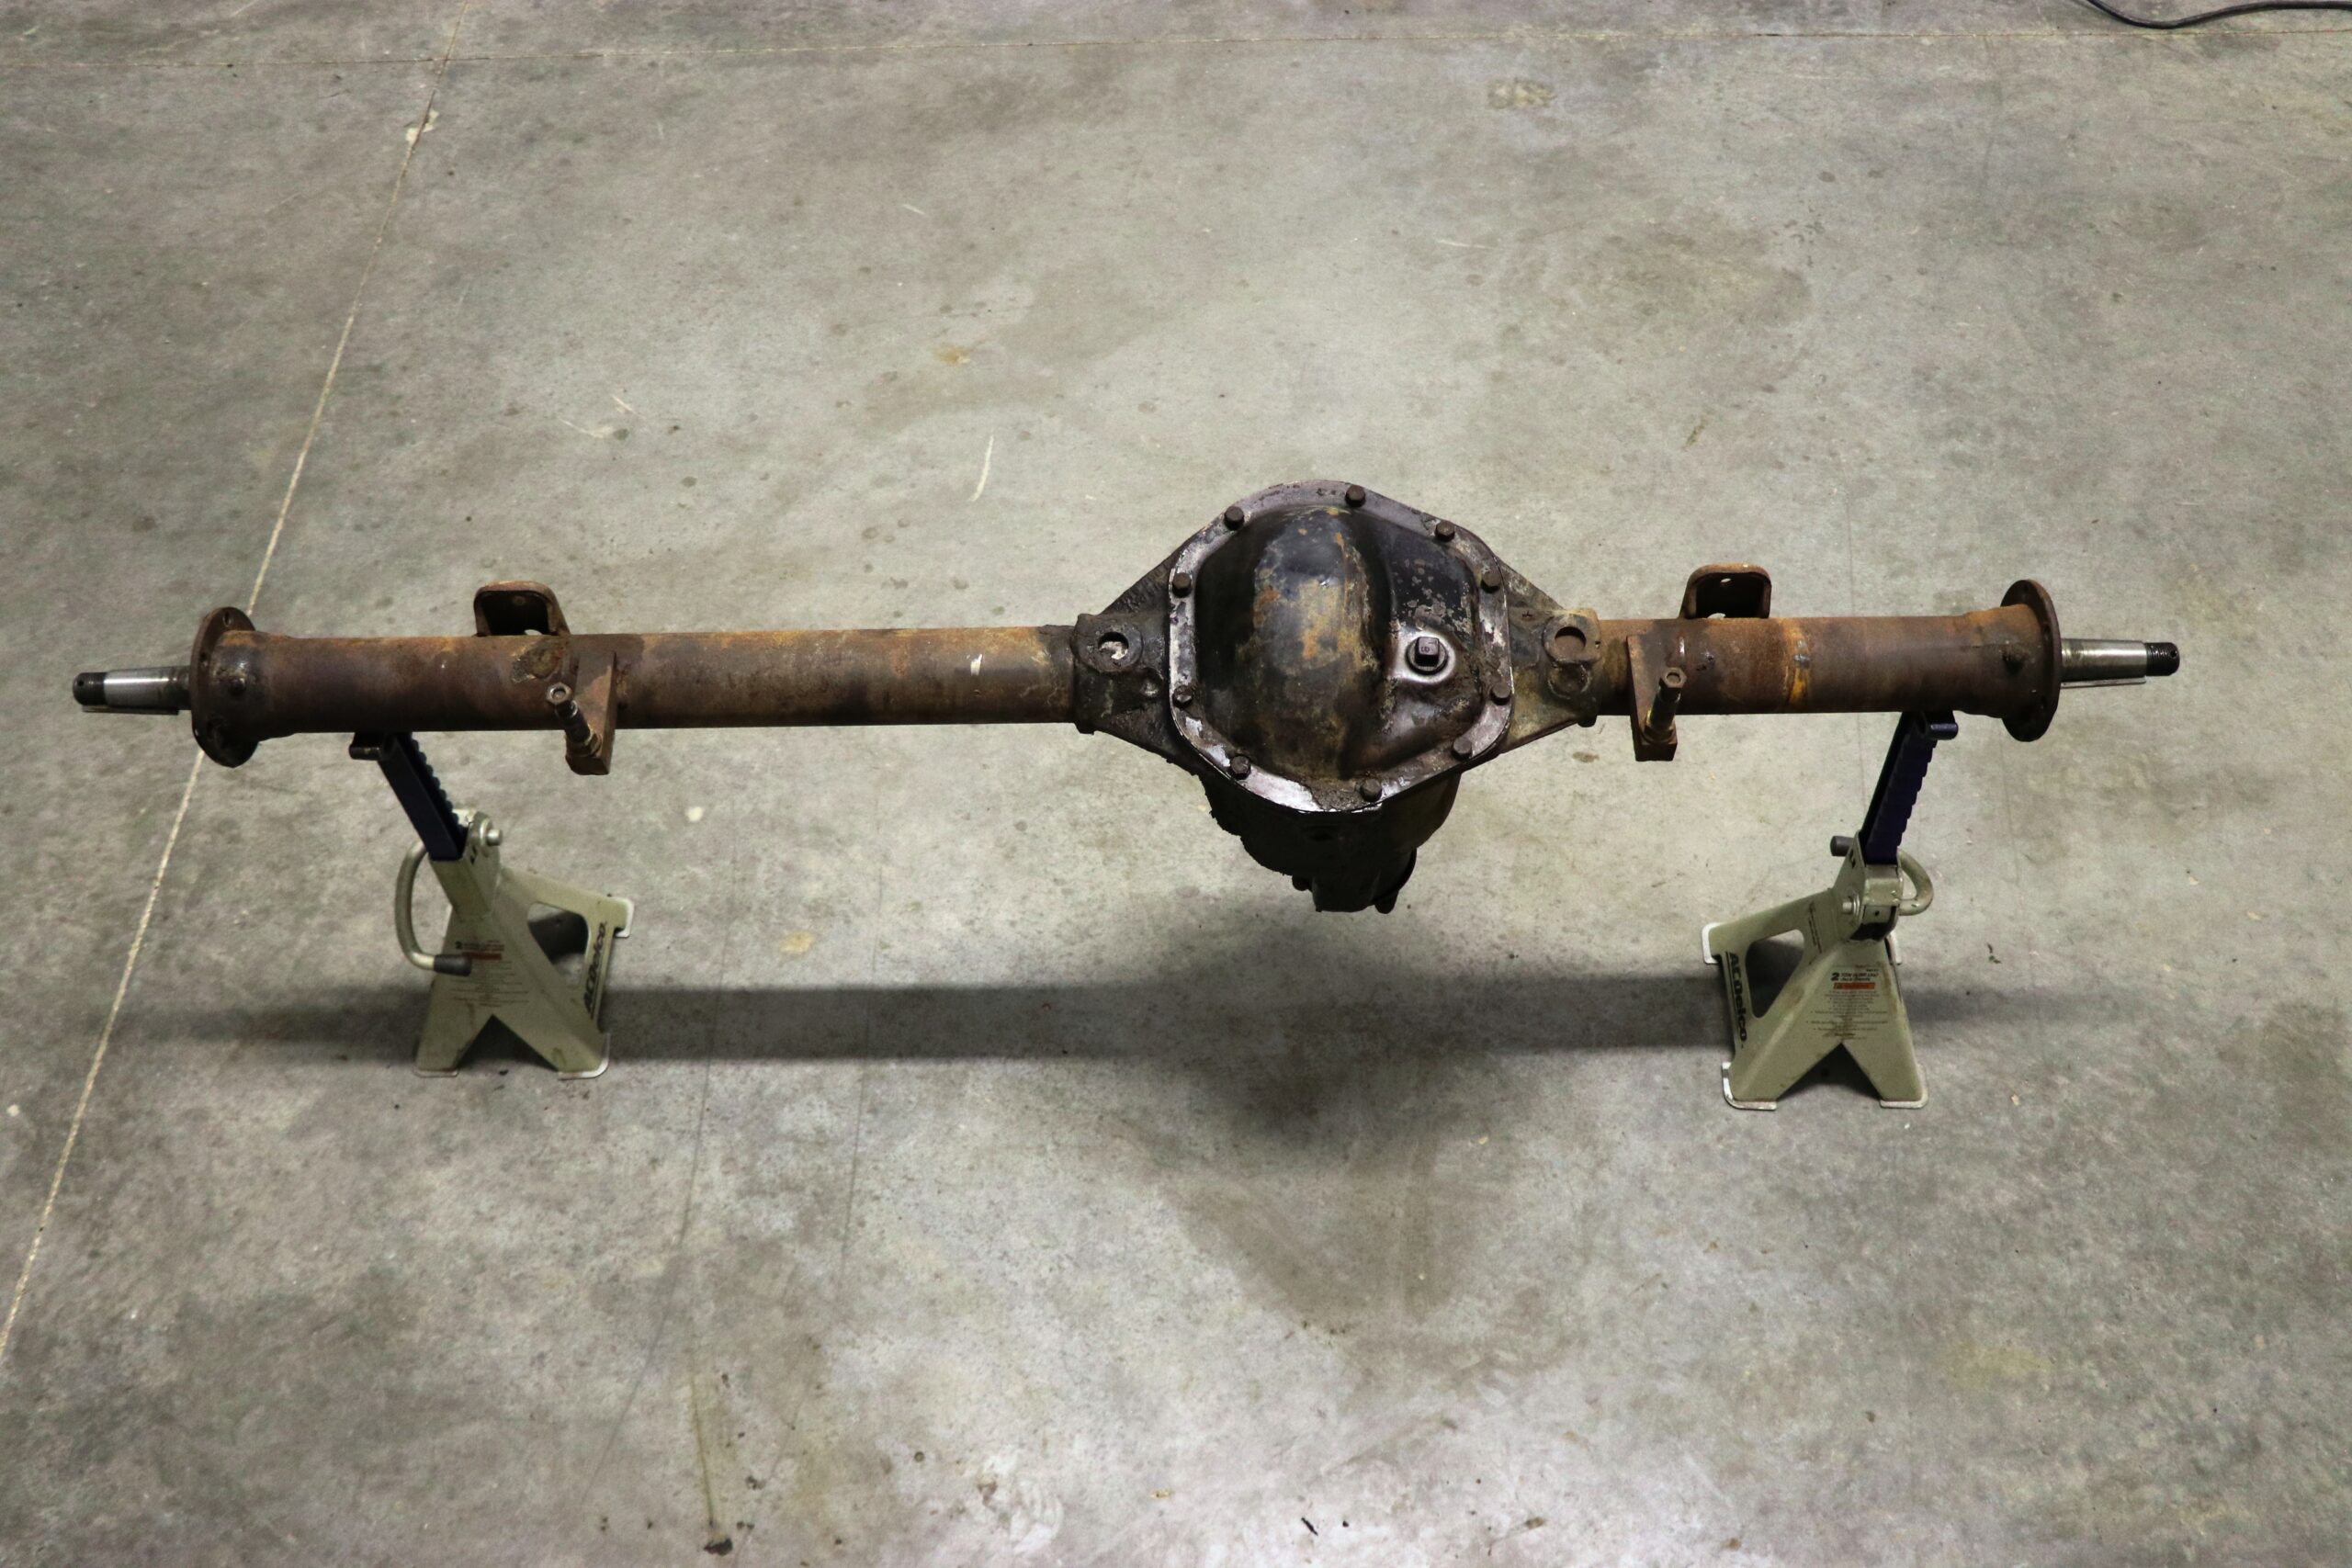
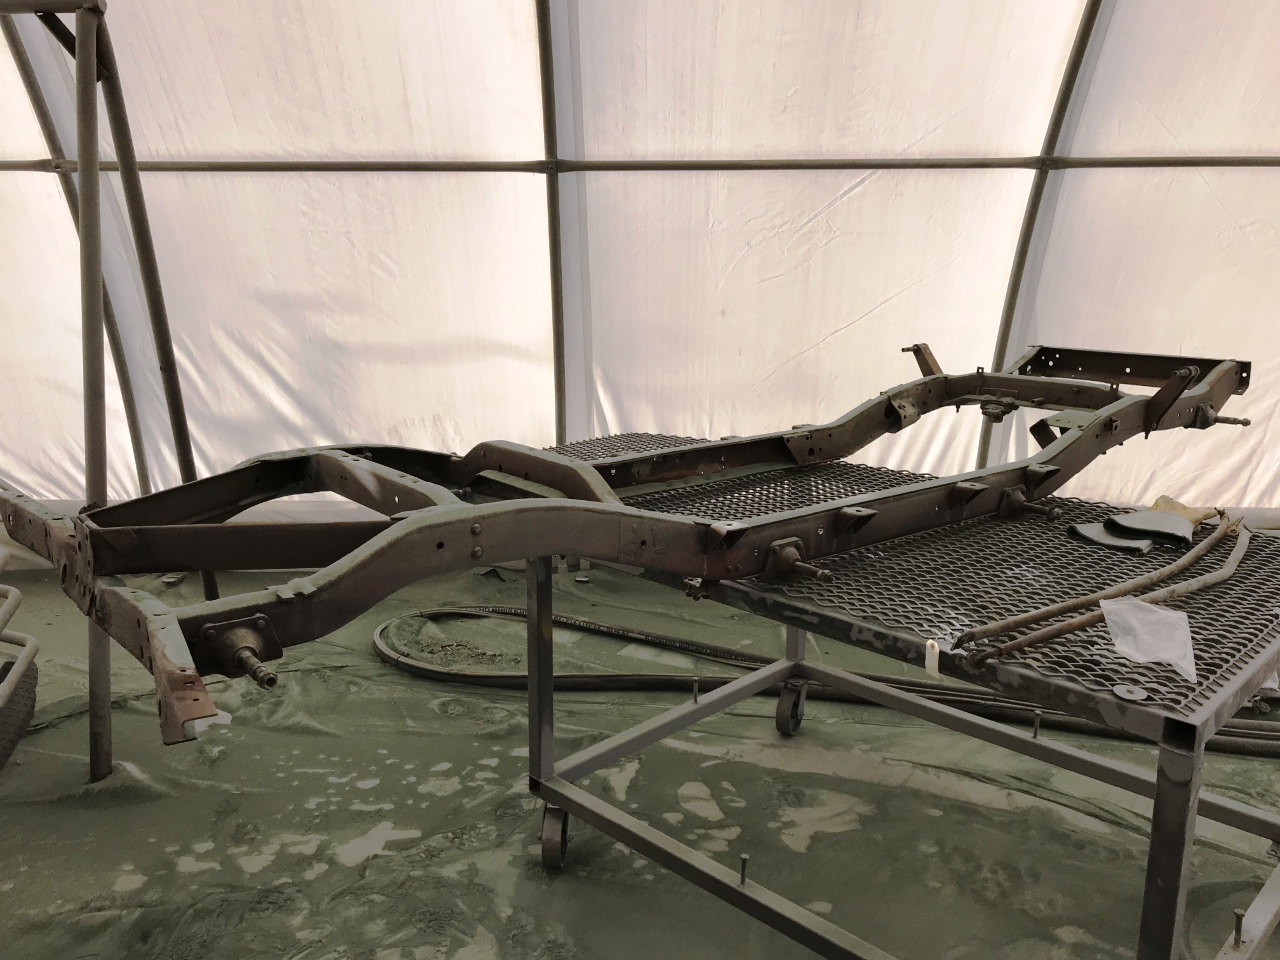
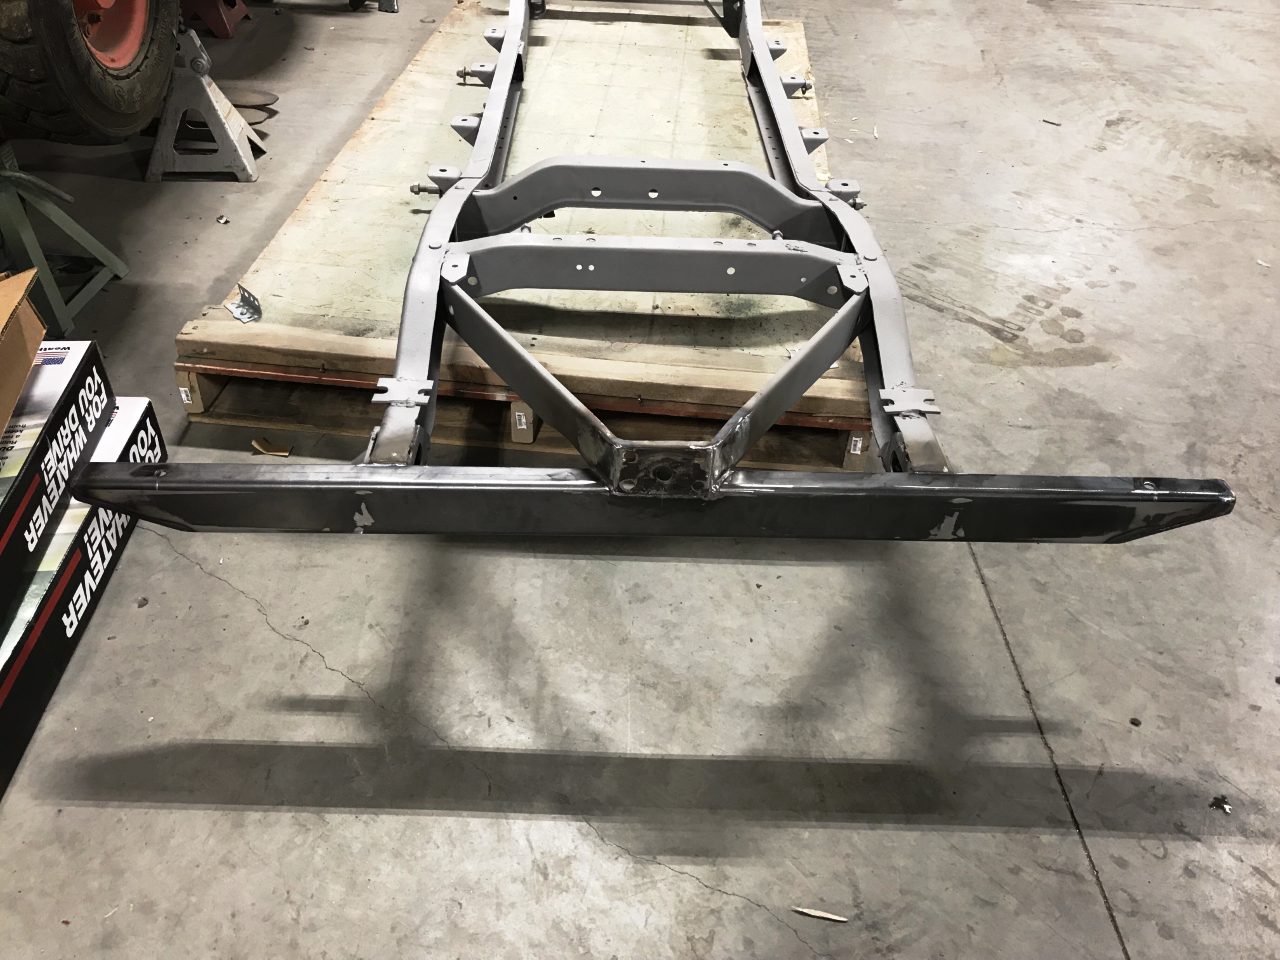
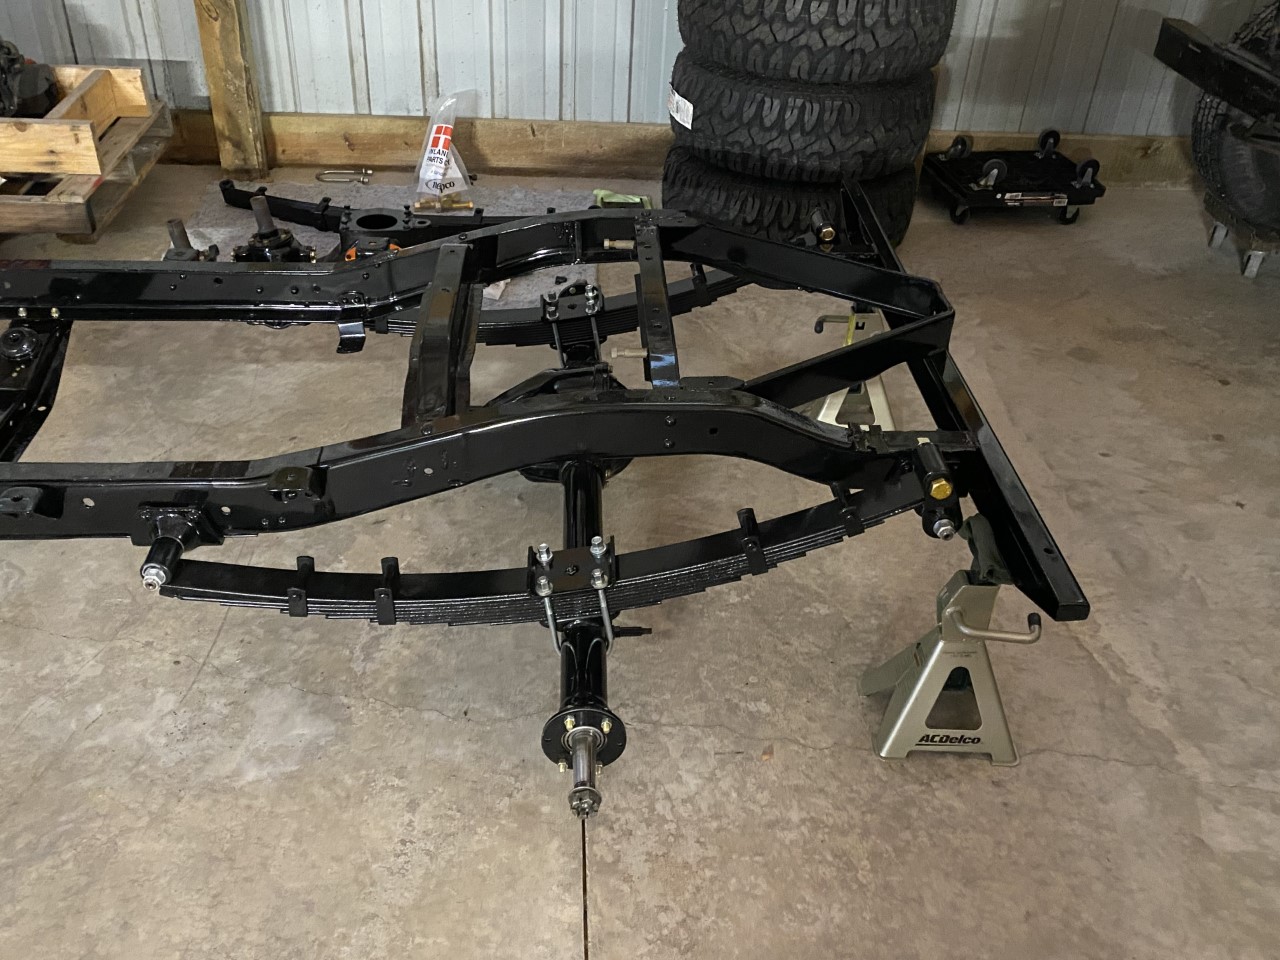
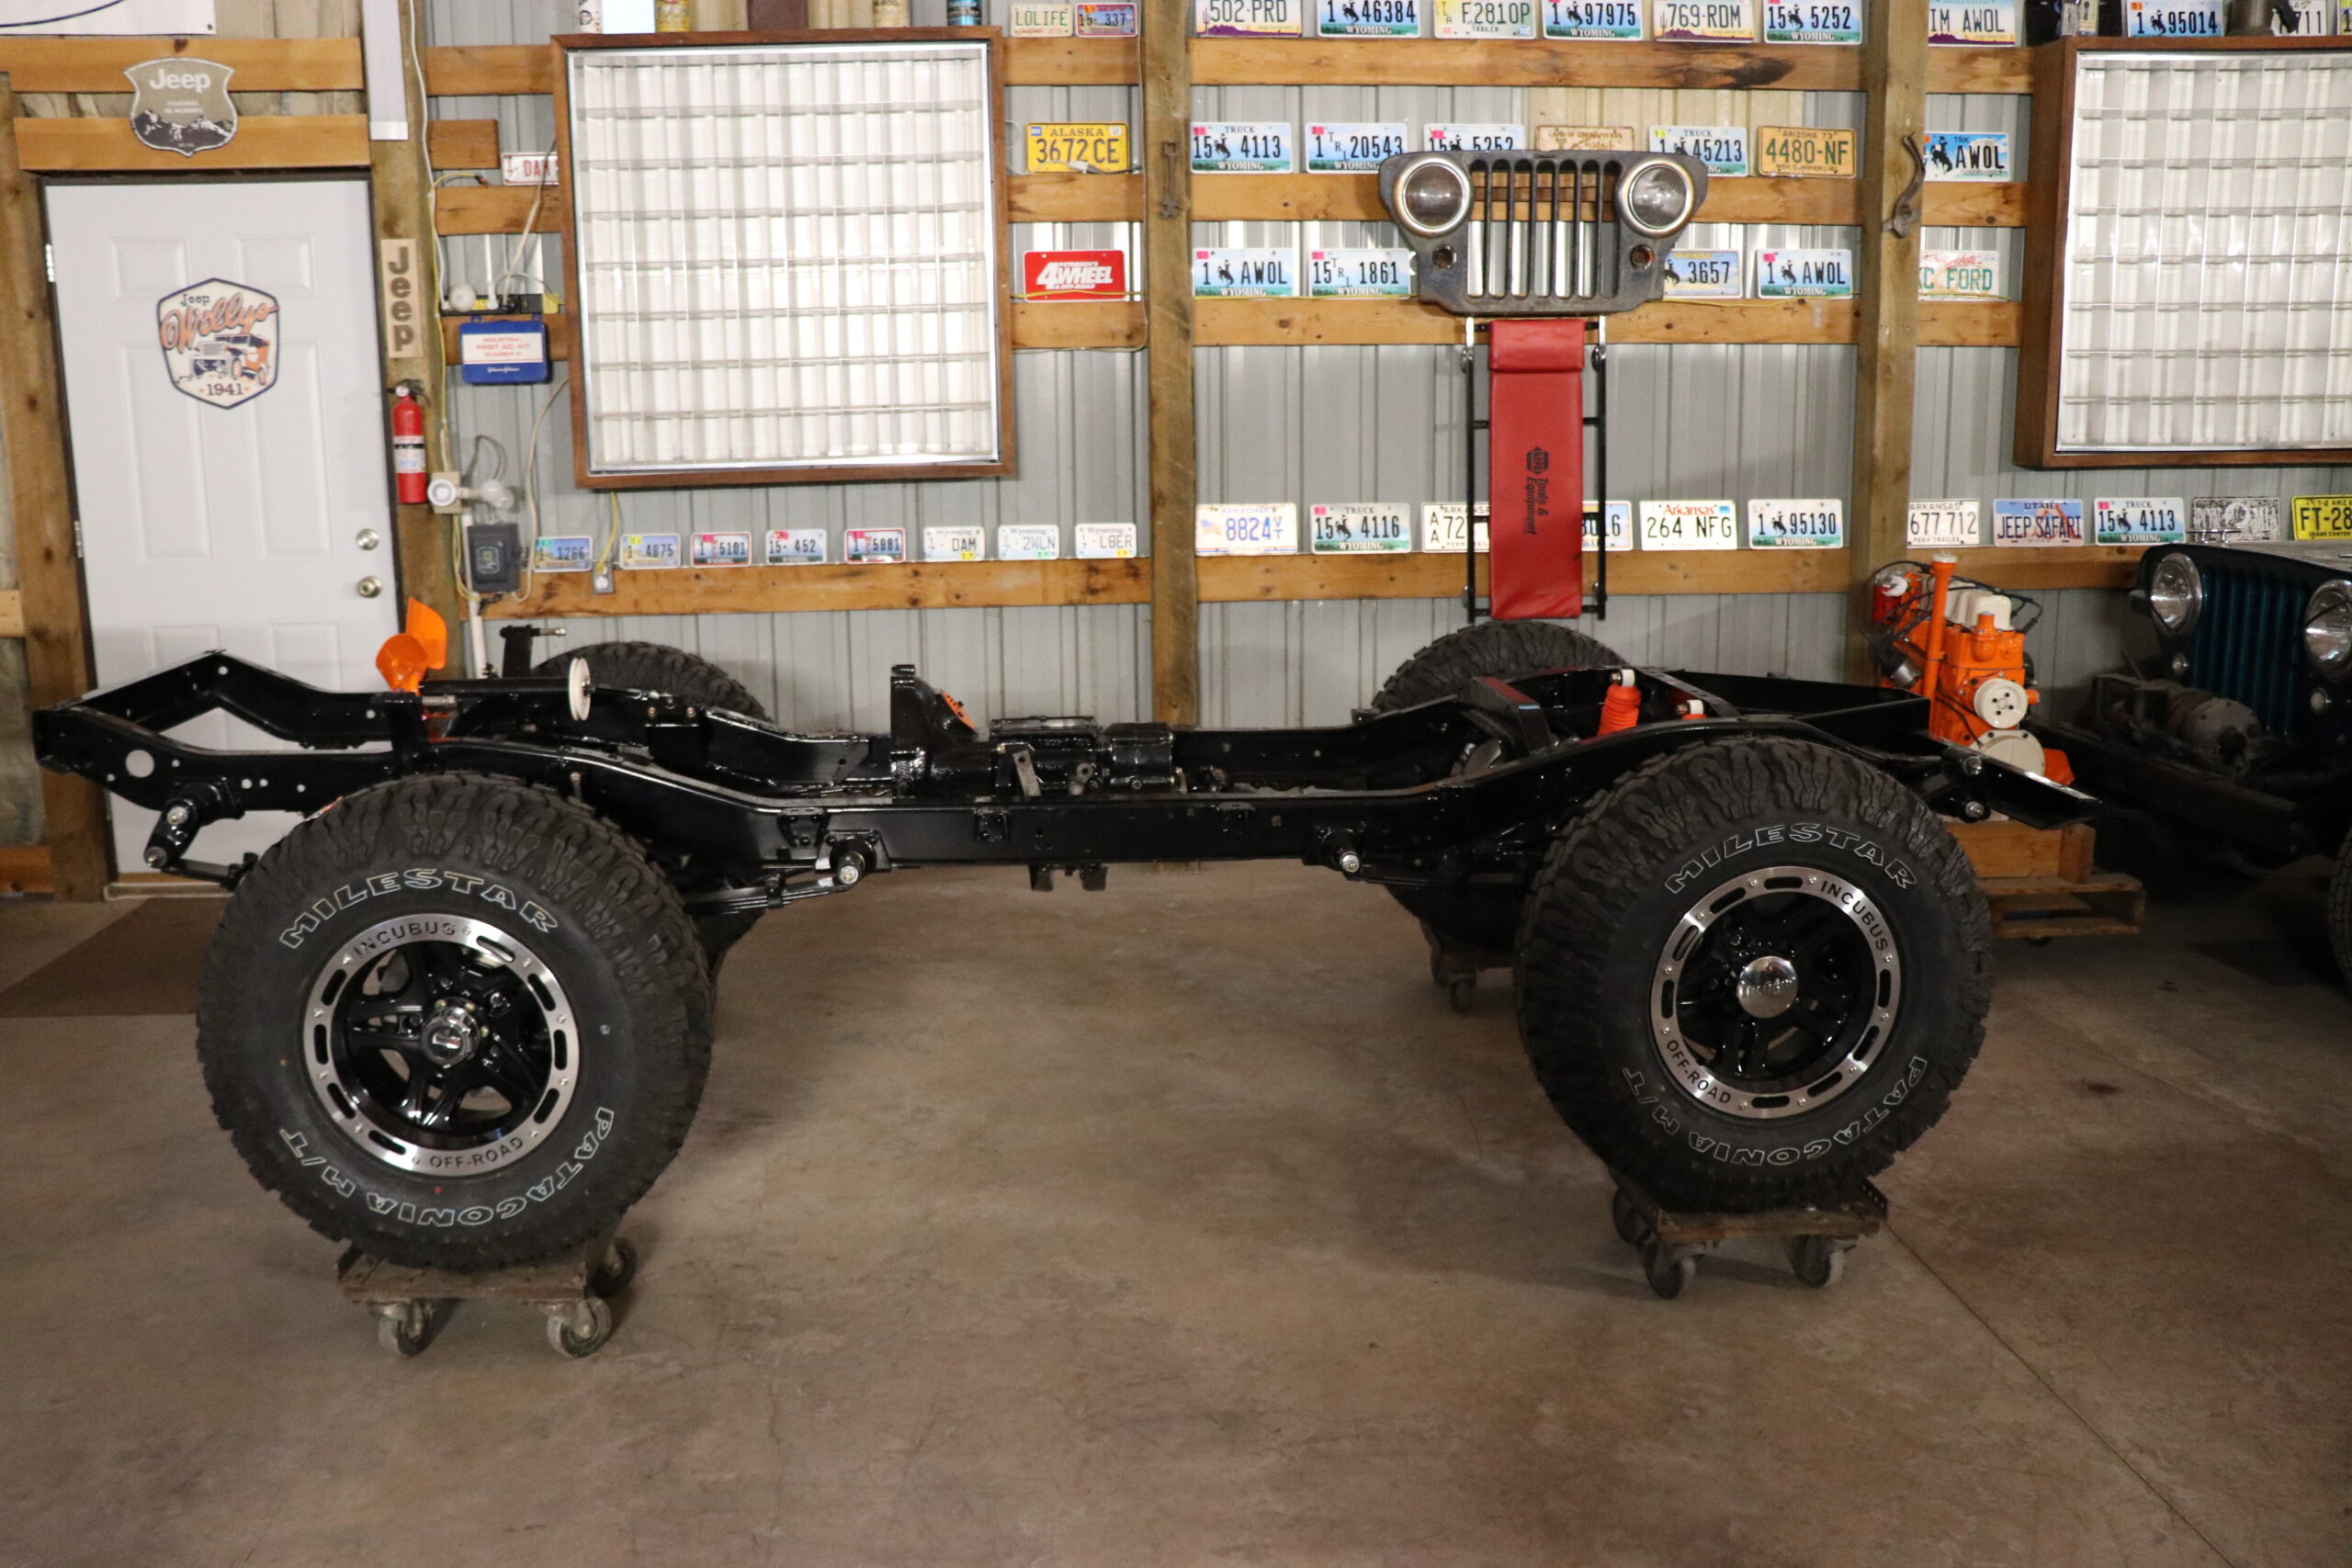
With nothing more than a rolling chassis left we headed back to our shop, got it unloaded from the trailer and began the remaining disassembly. The shocks were a simple removal followed by the u-bolts freeing the rear axle up so it could be removed. The same process was repeated up front; we removed the leaf springs and shackles leaving us with a bare frame that was ready to be delivered to Matt and Aaron at Rugged Werx for powder coating.
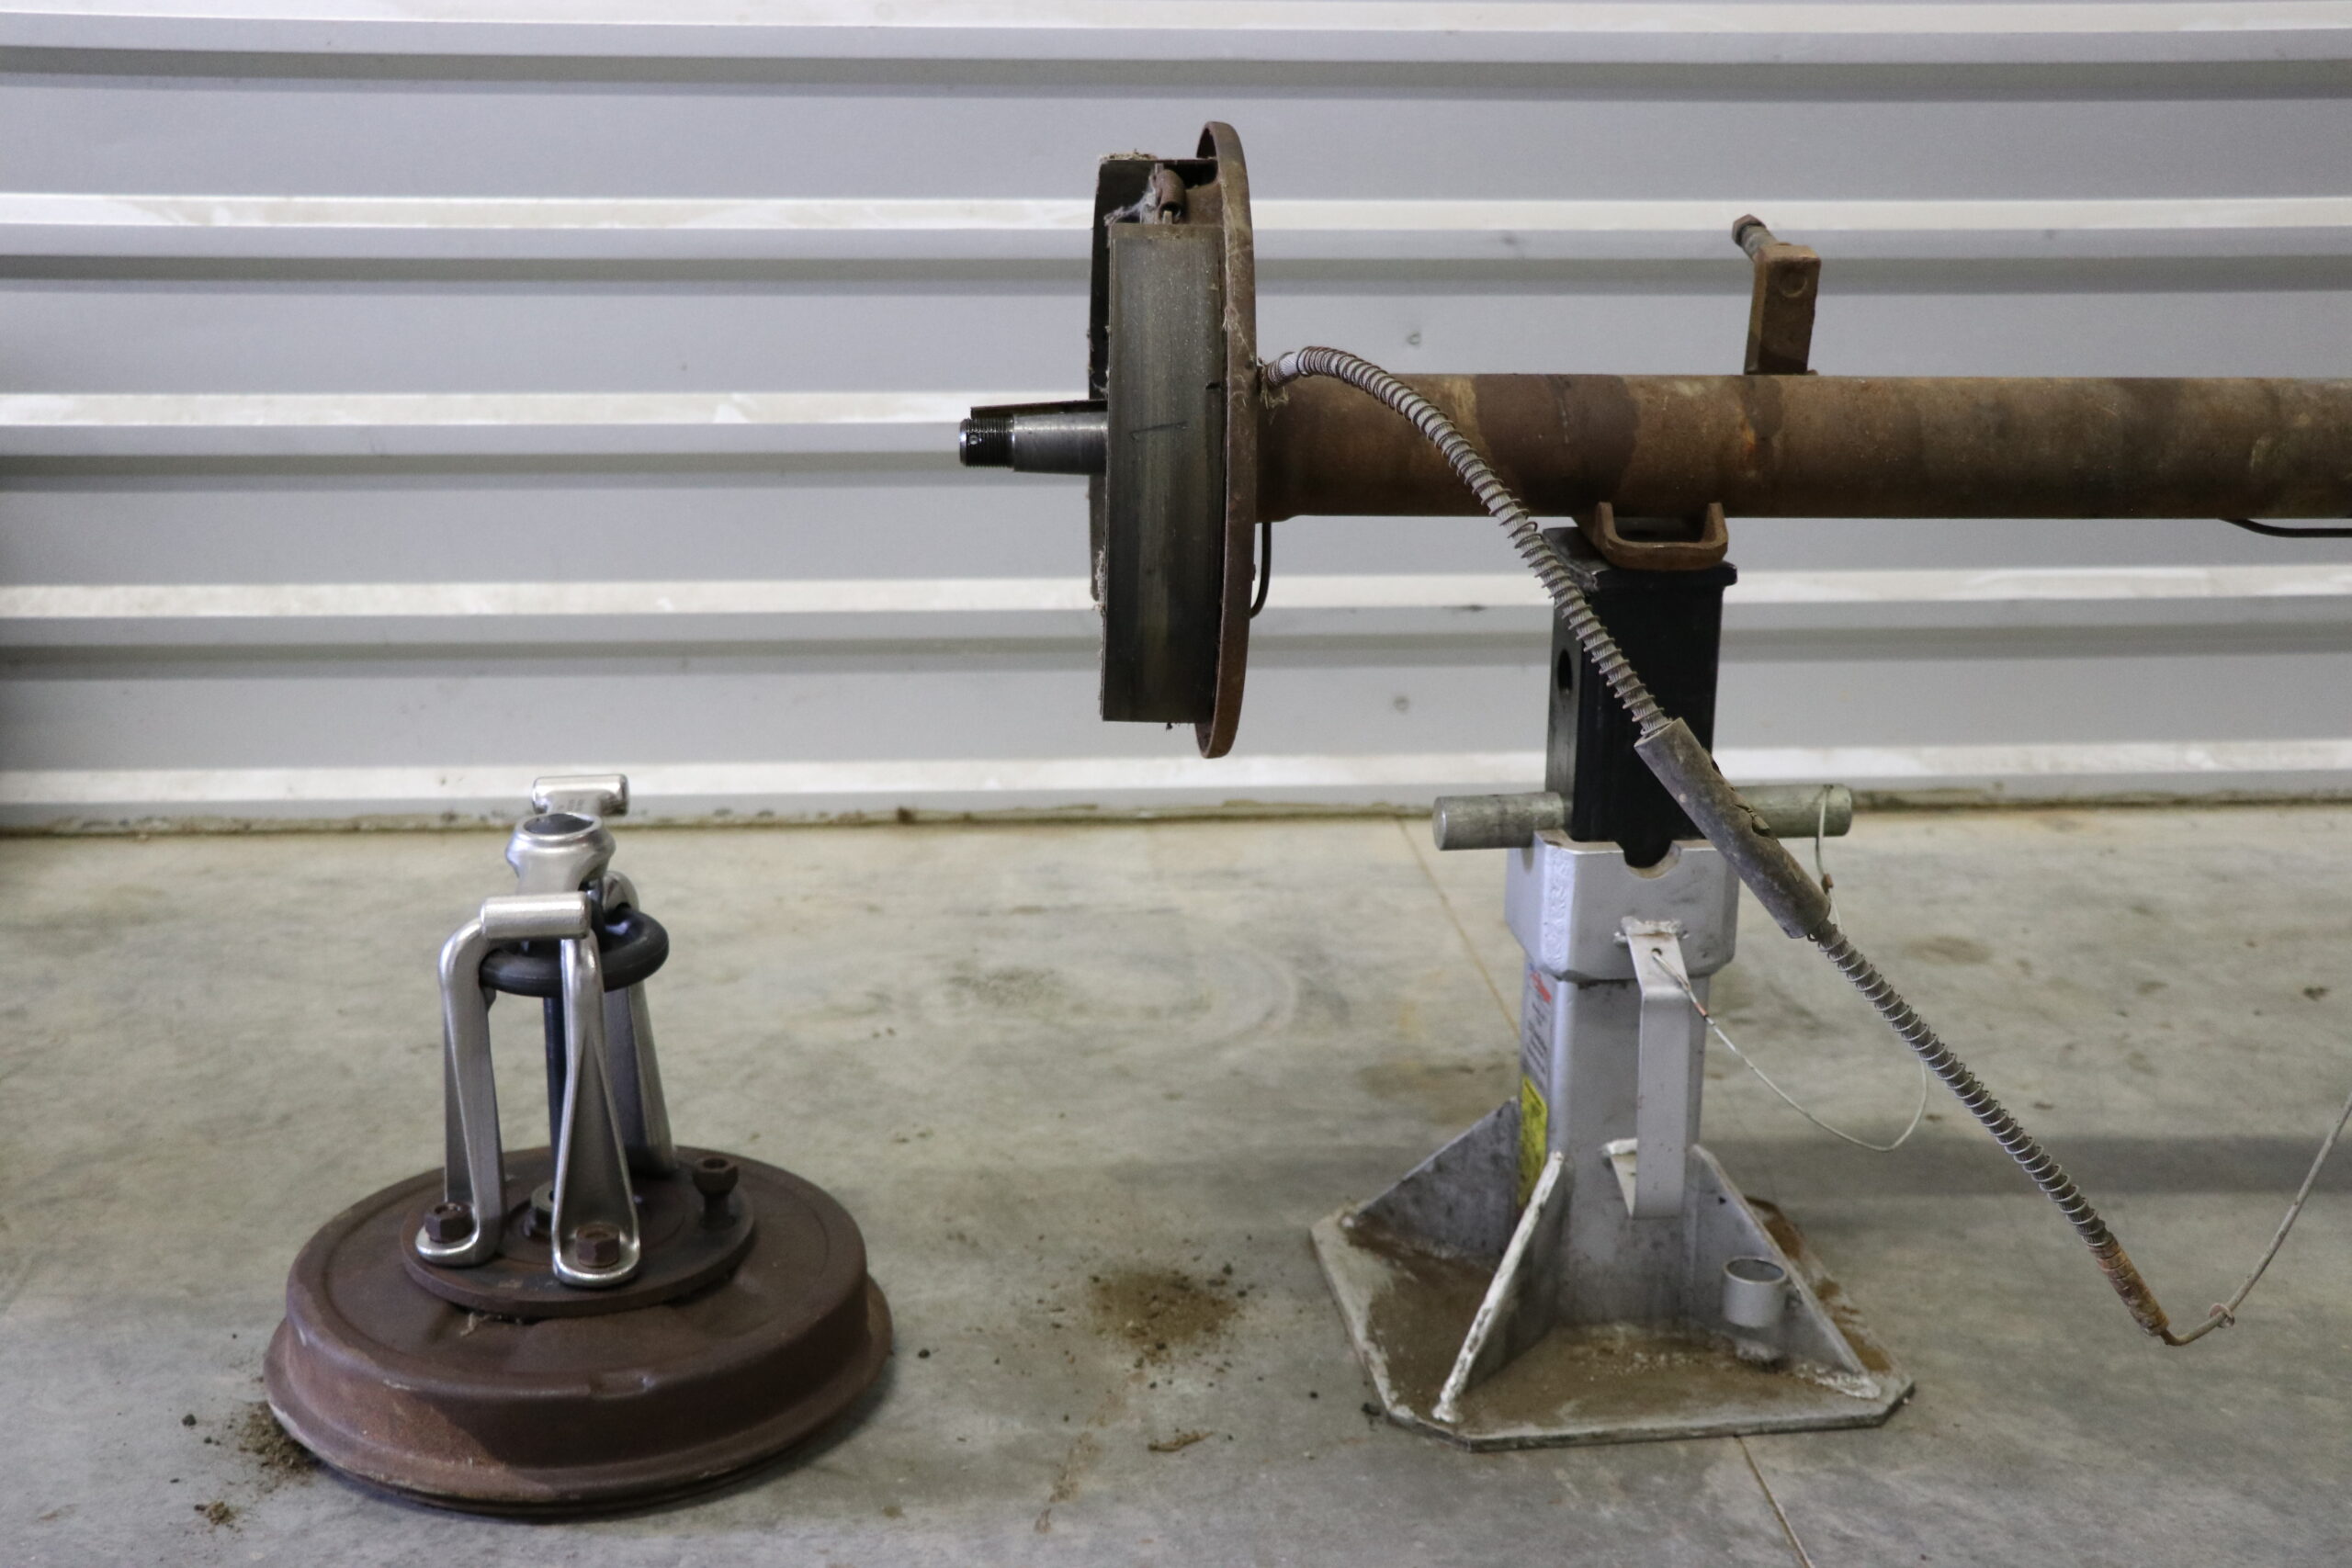
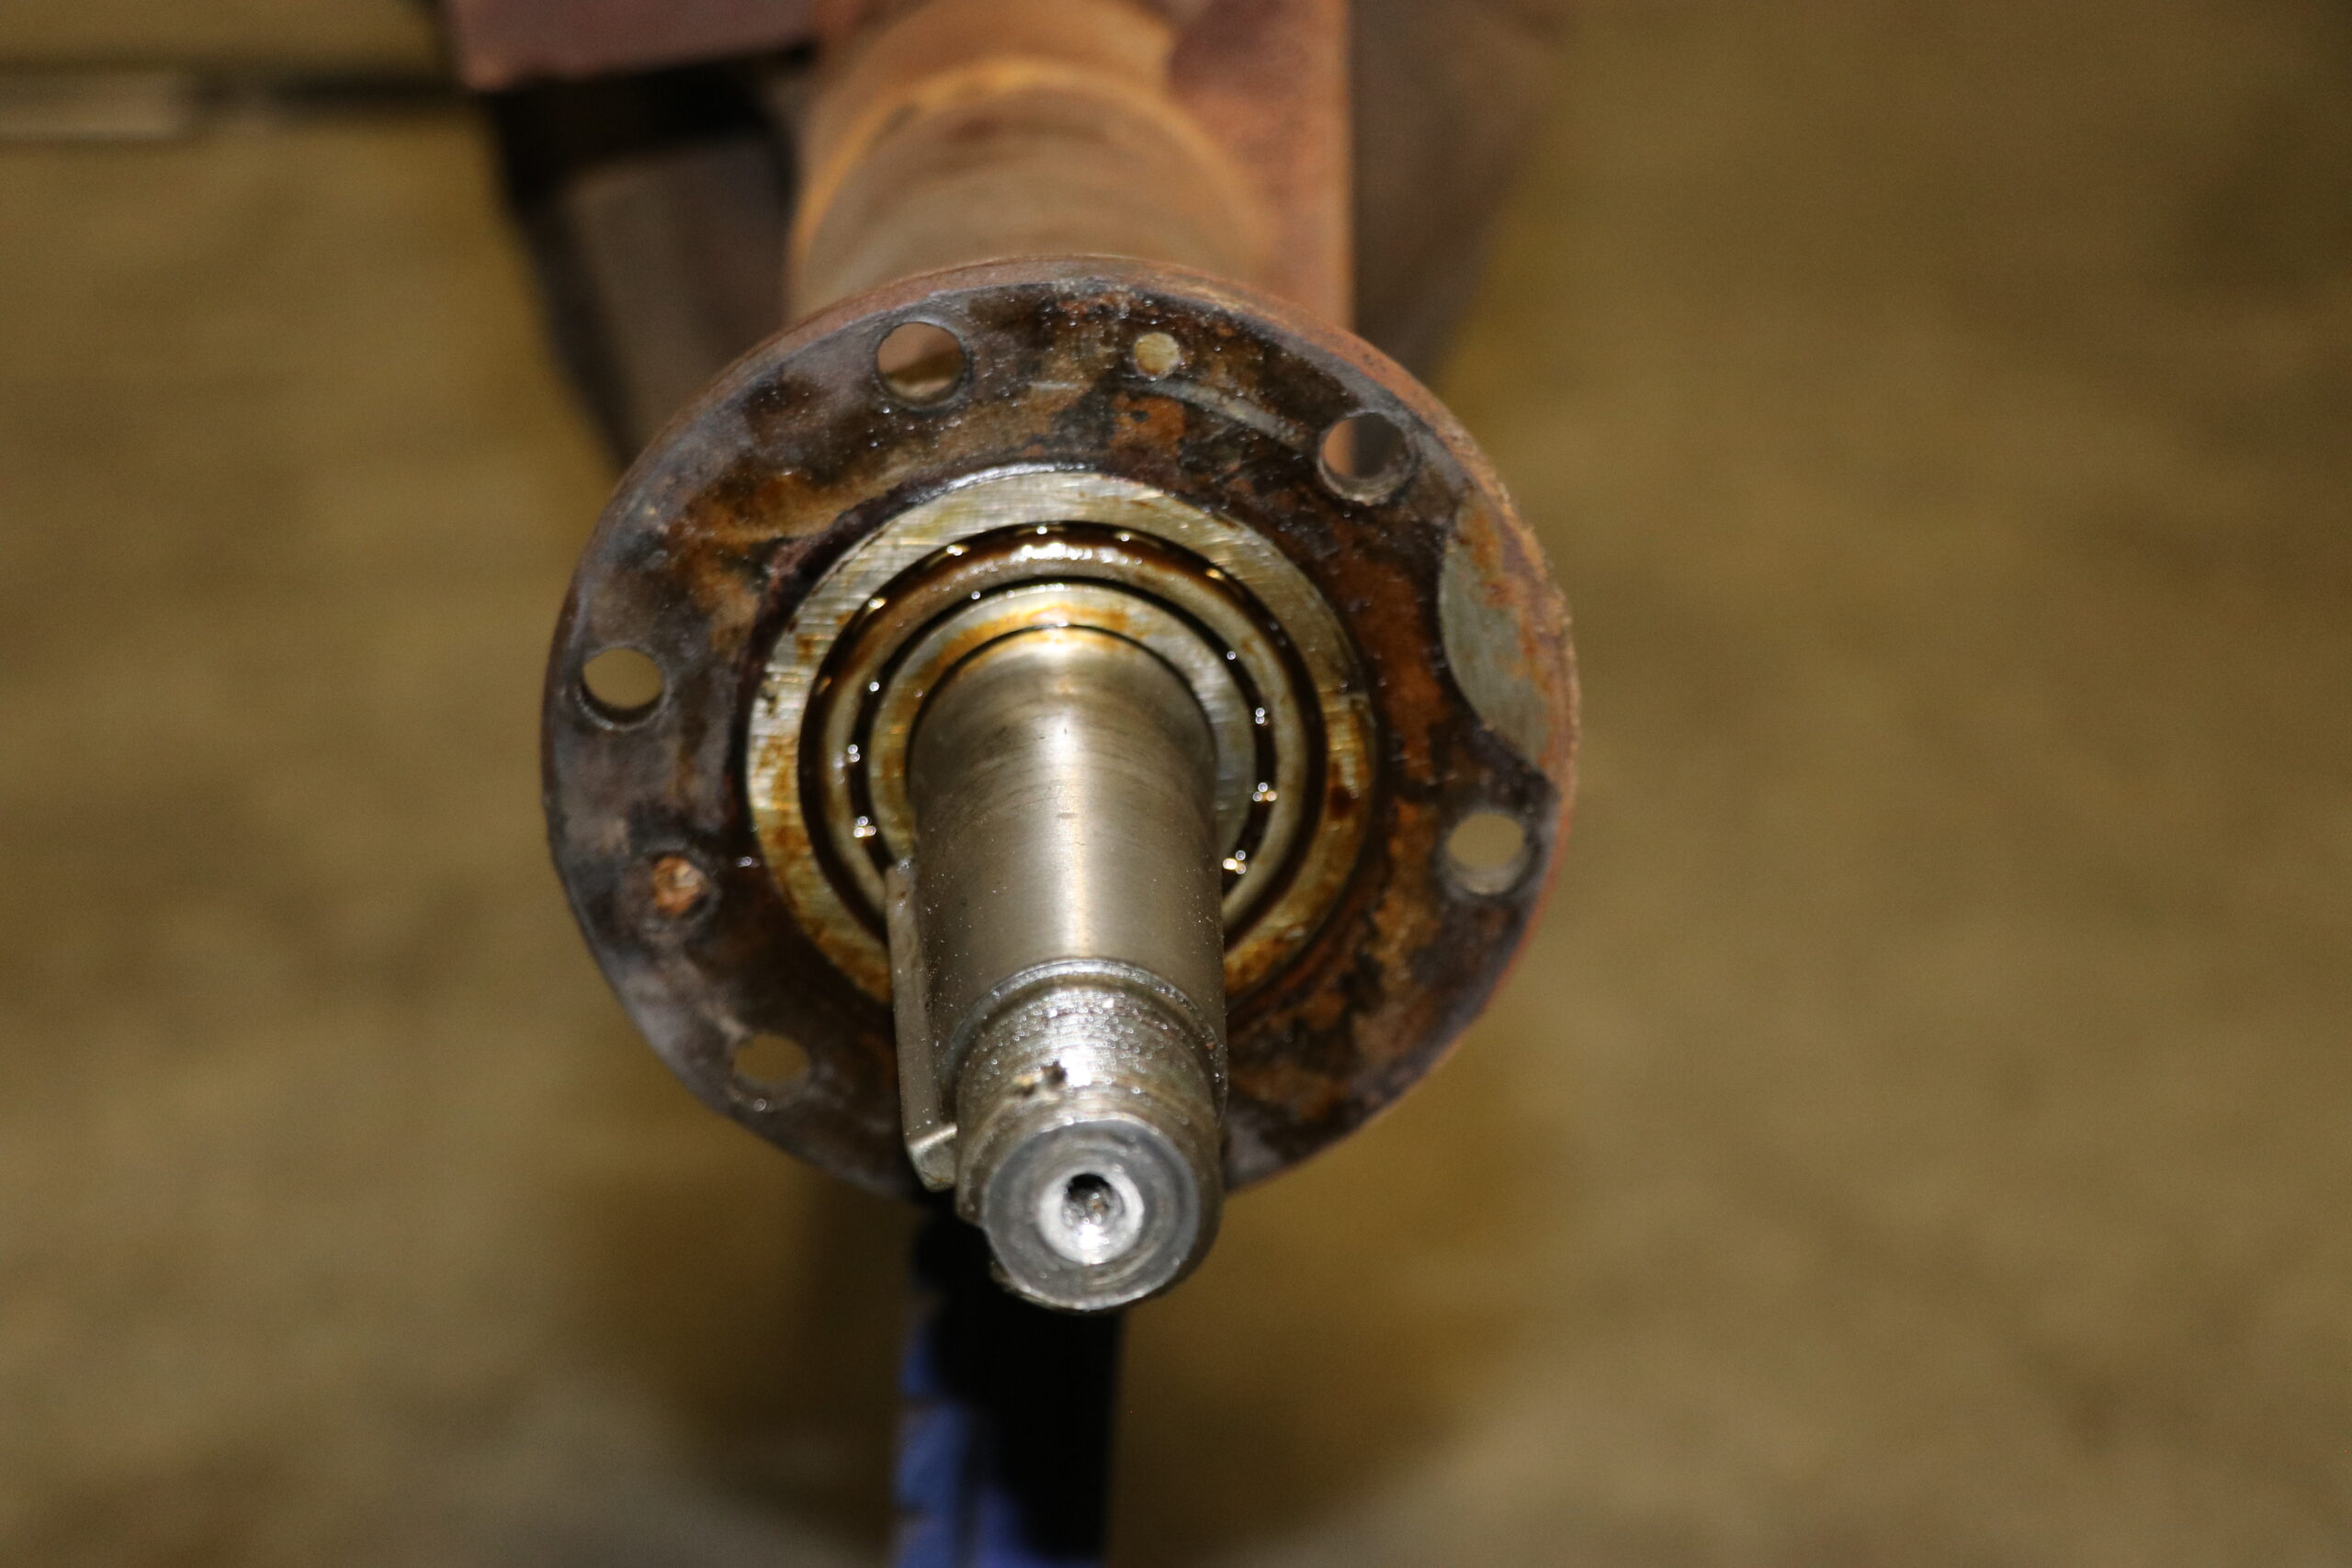
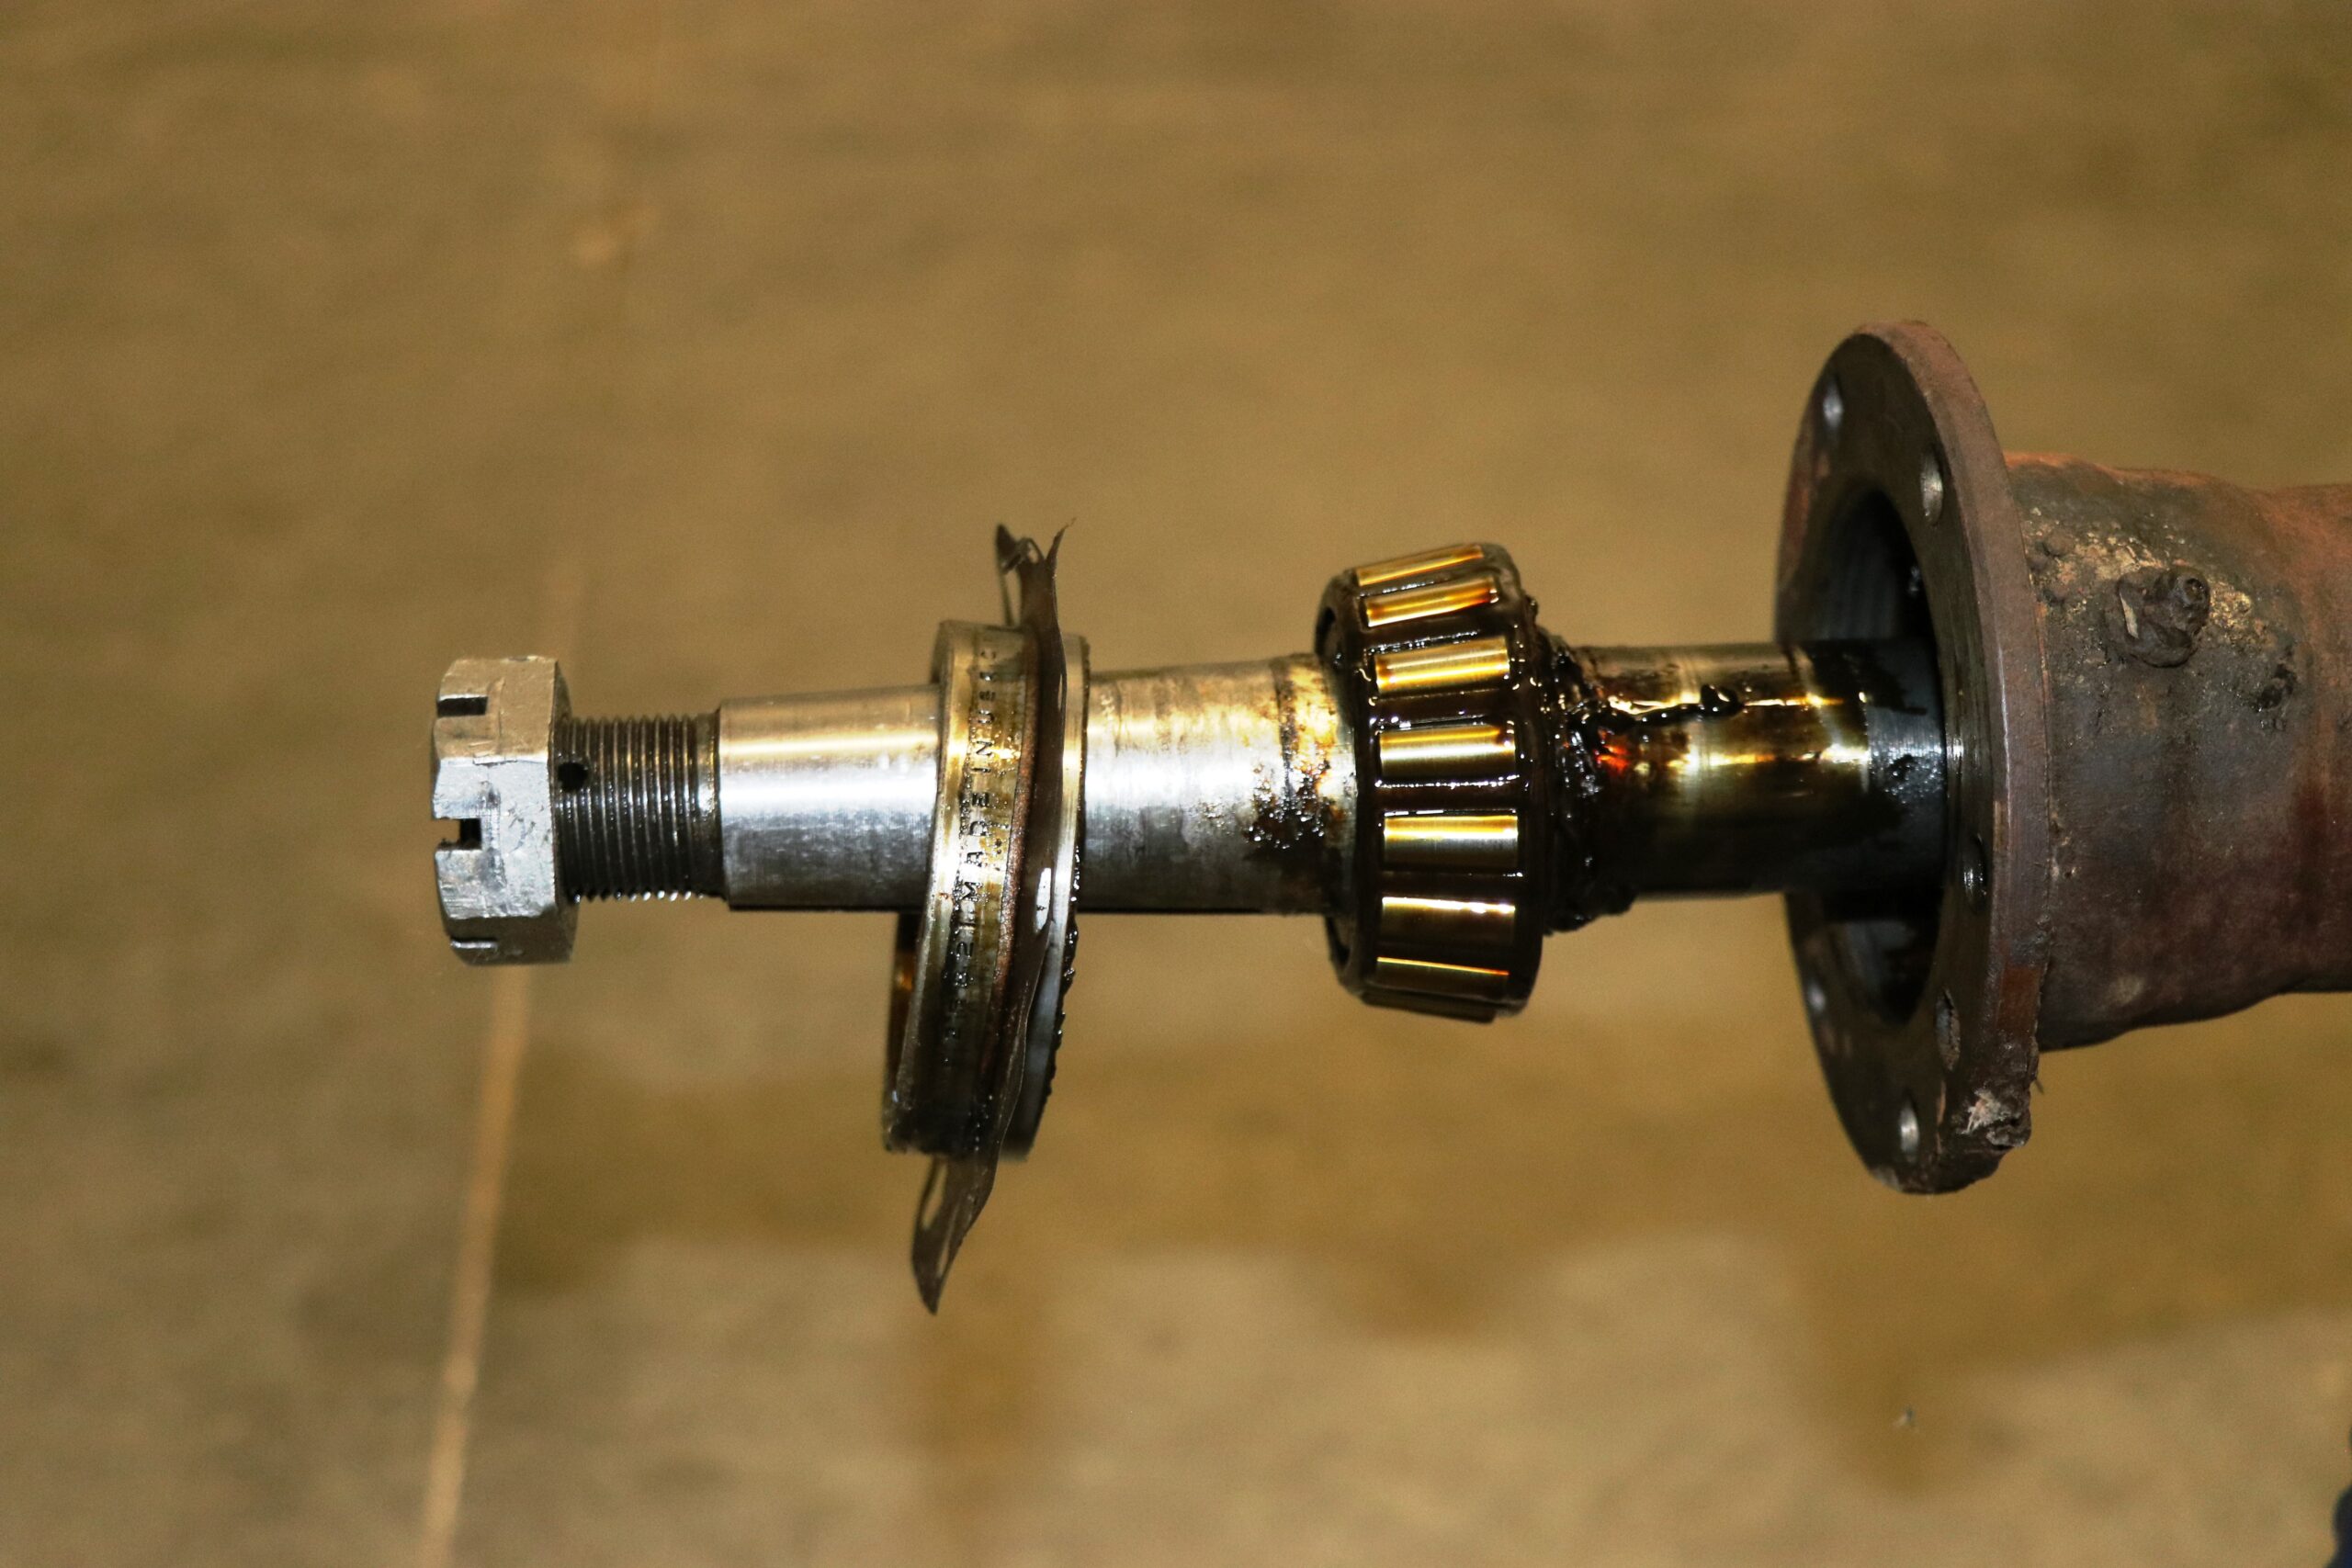
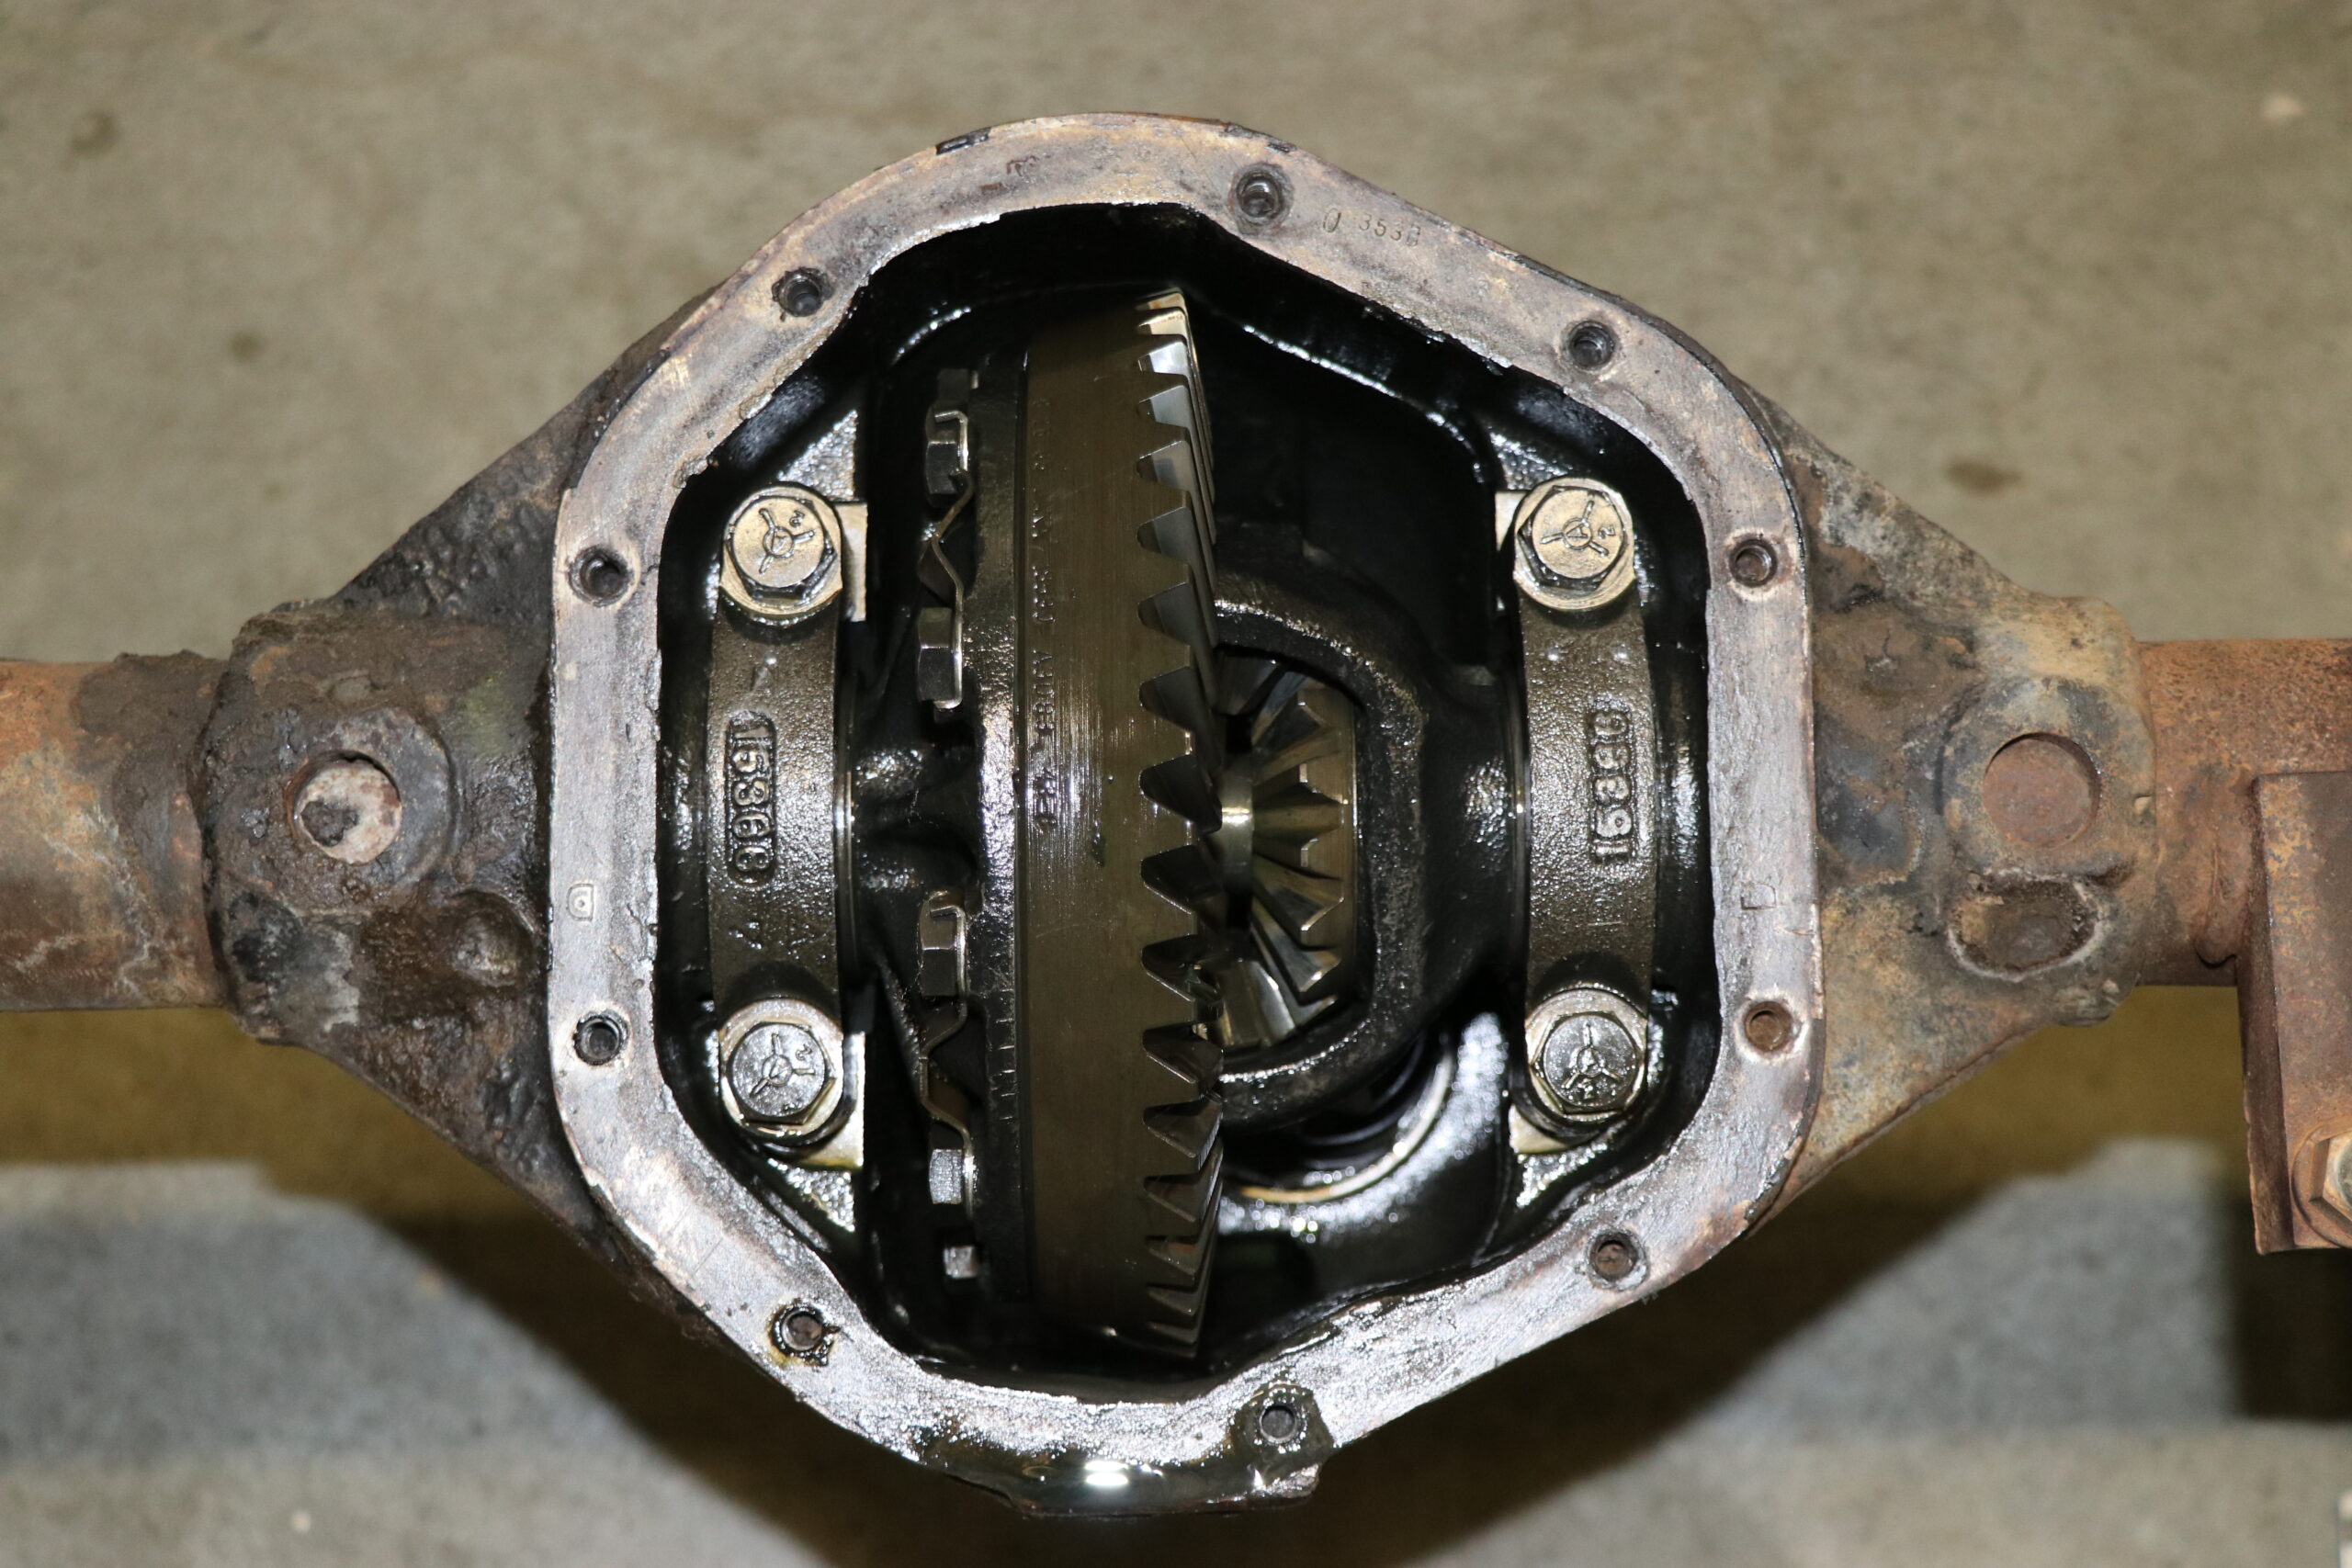
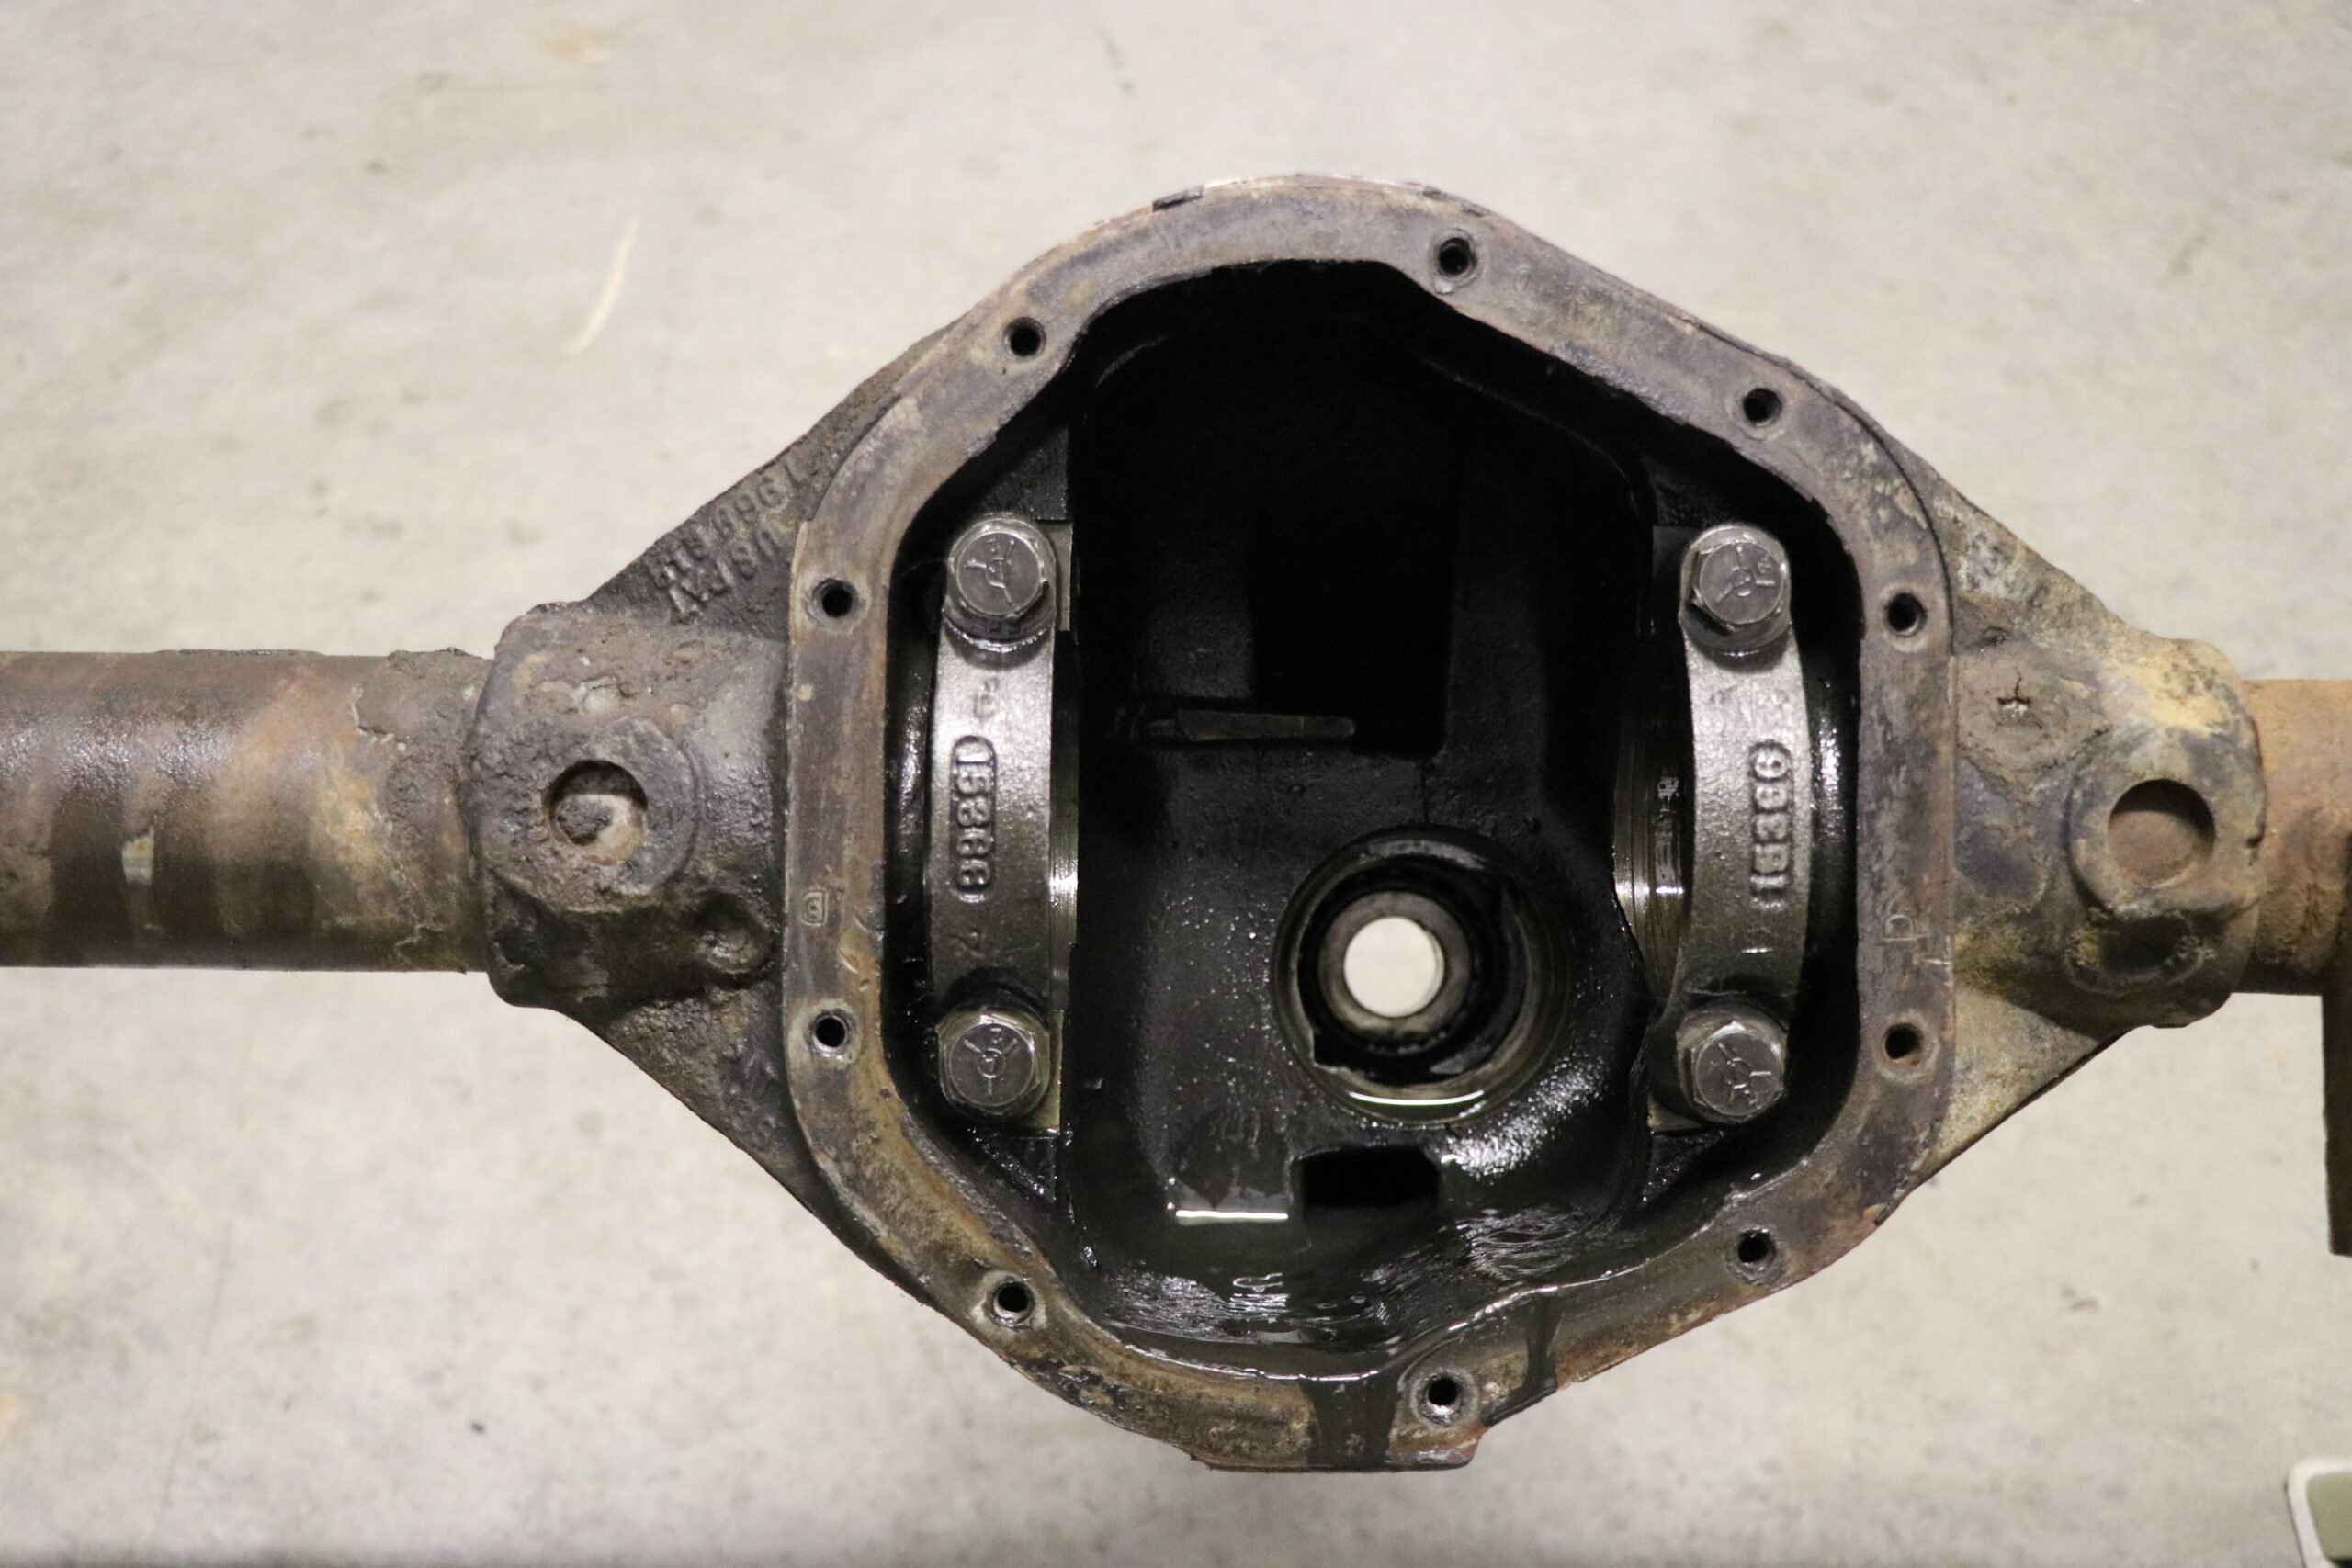
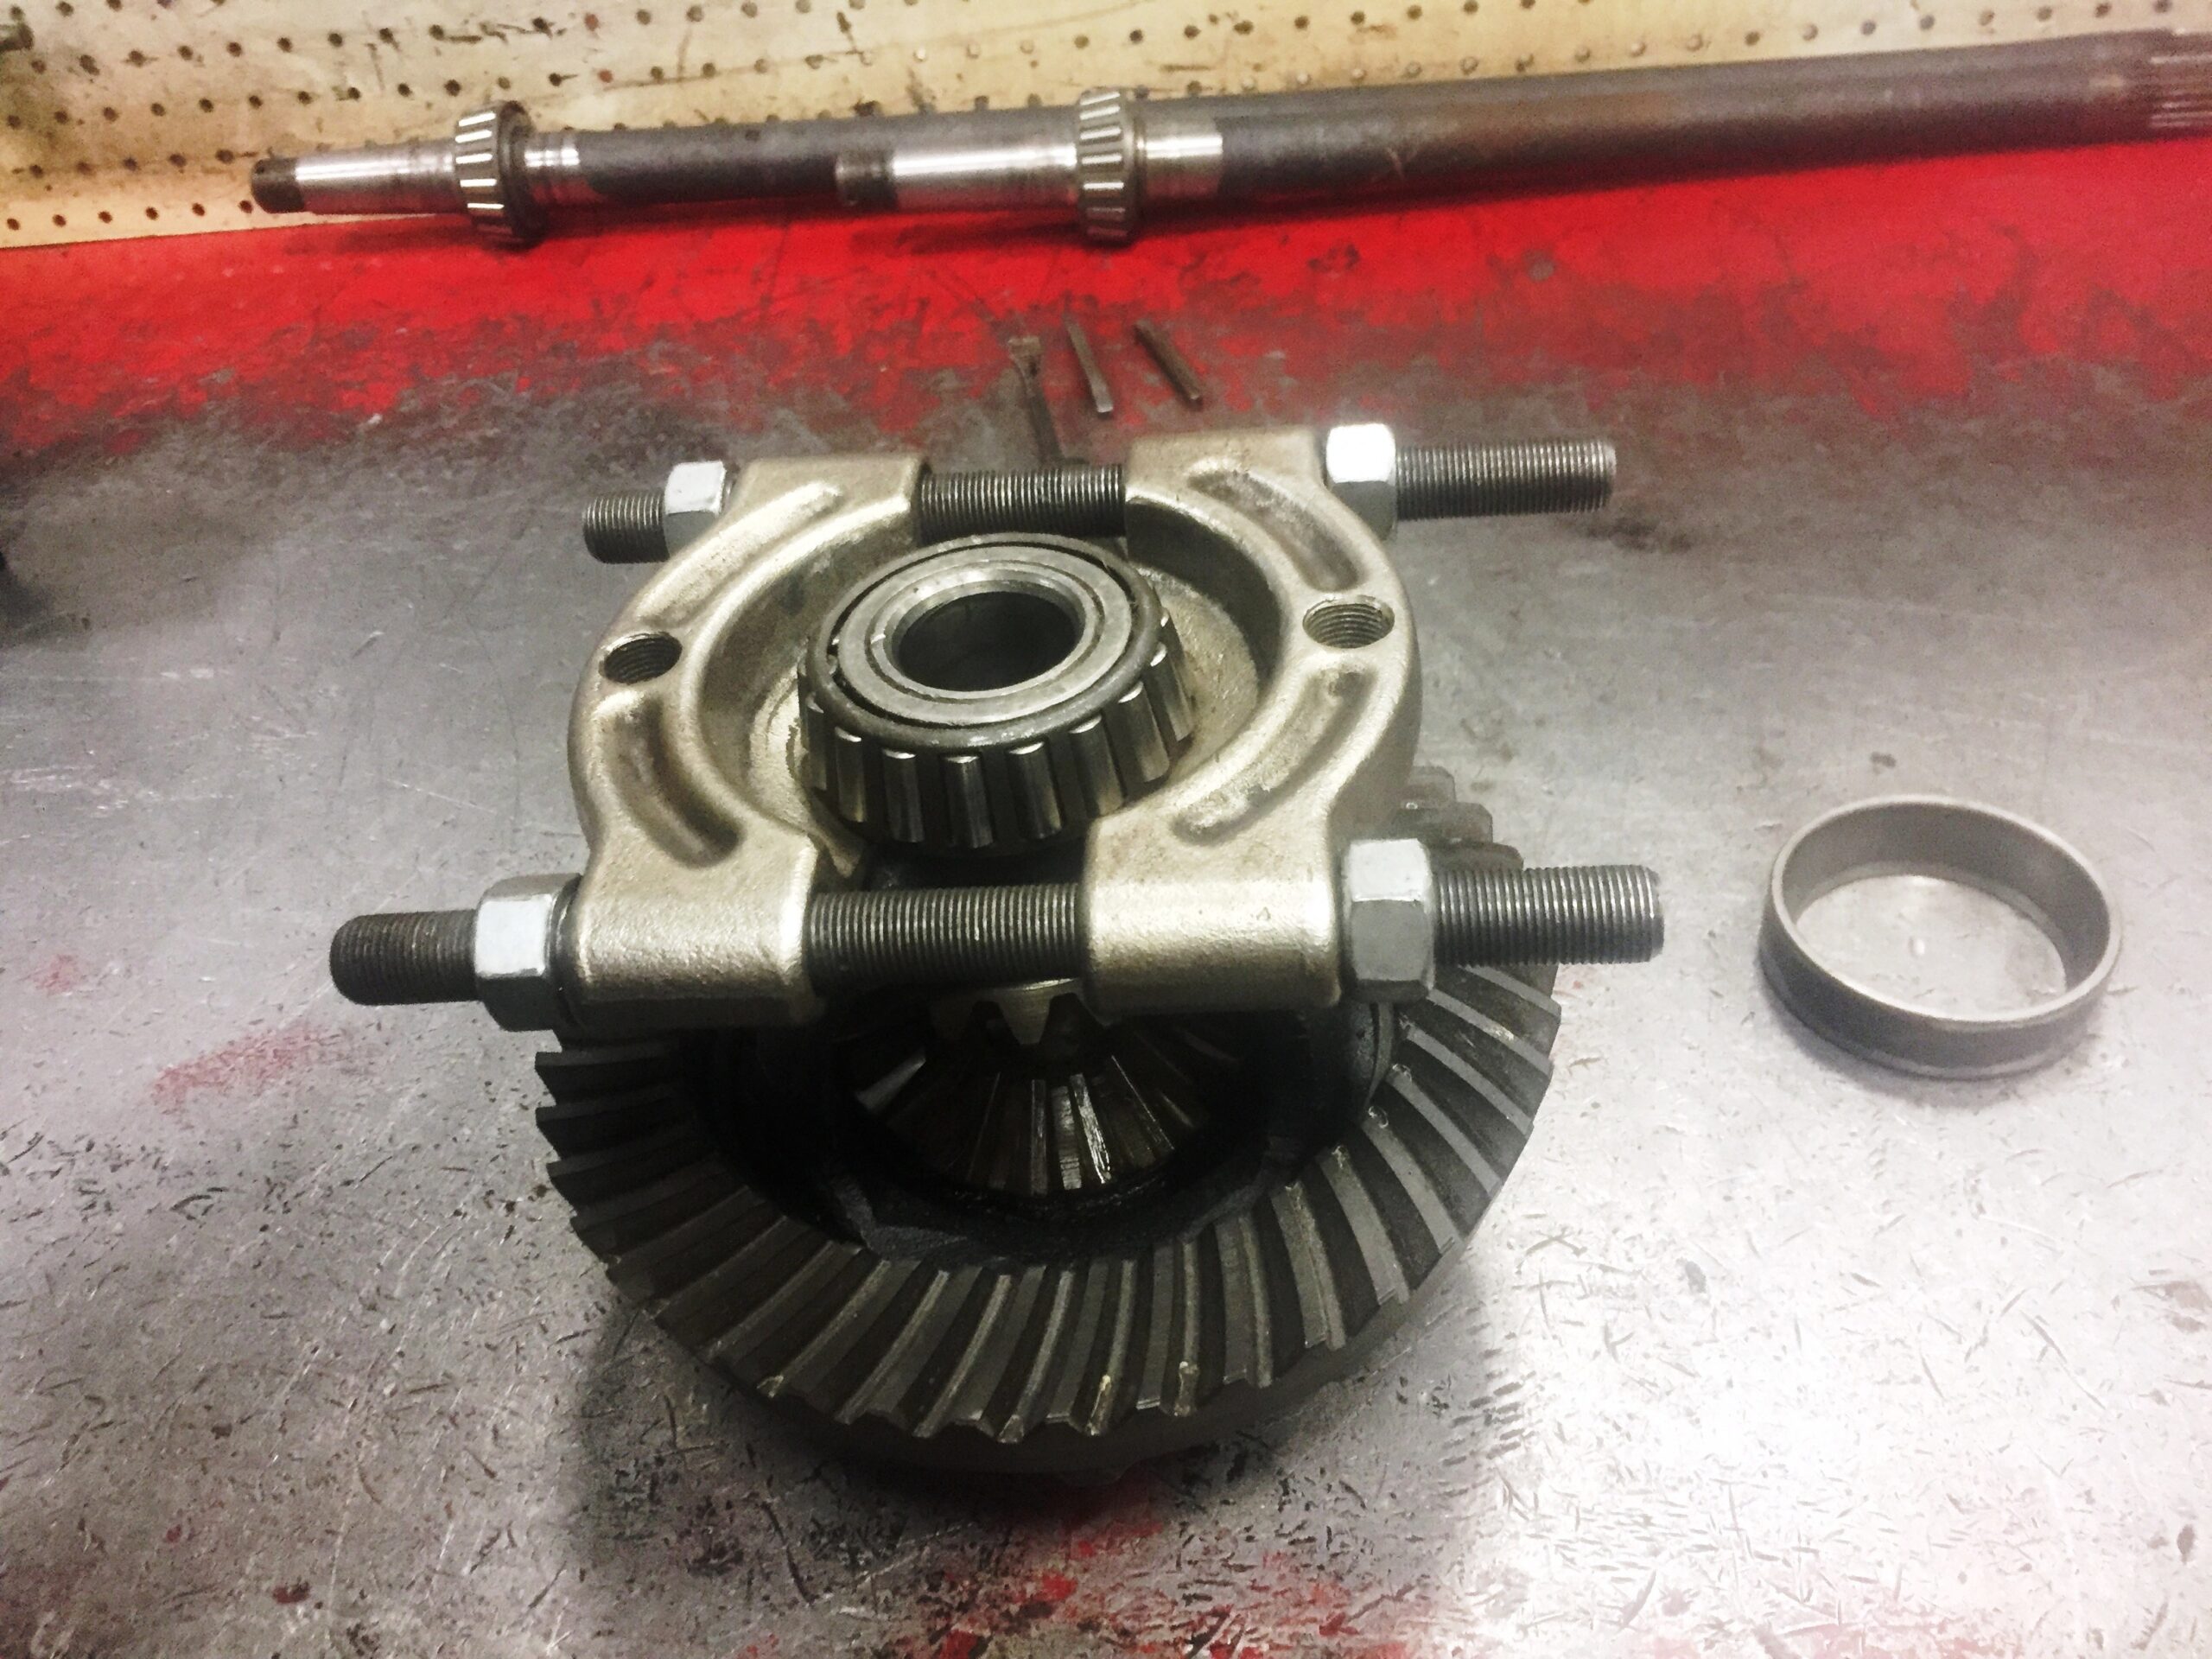
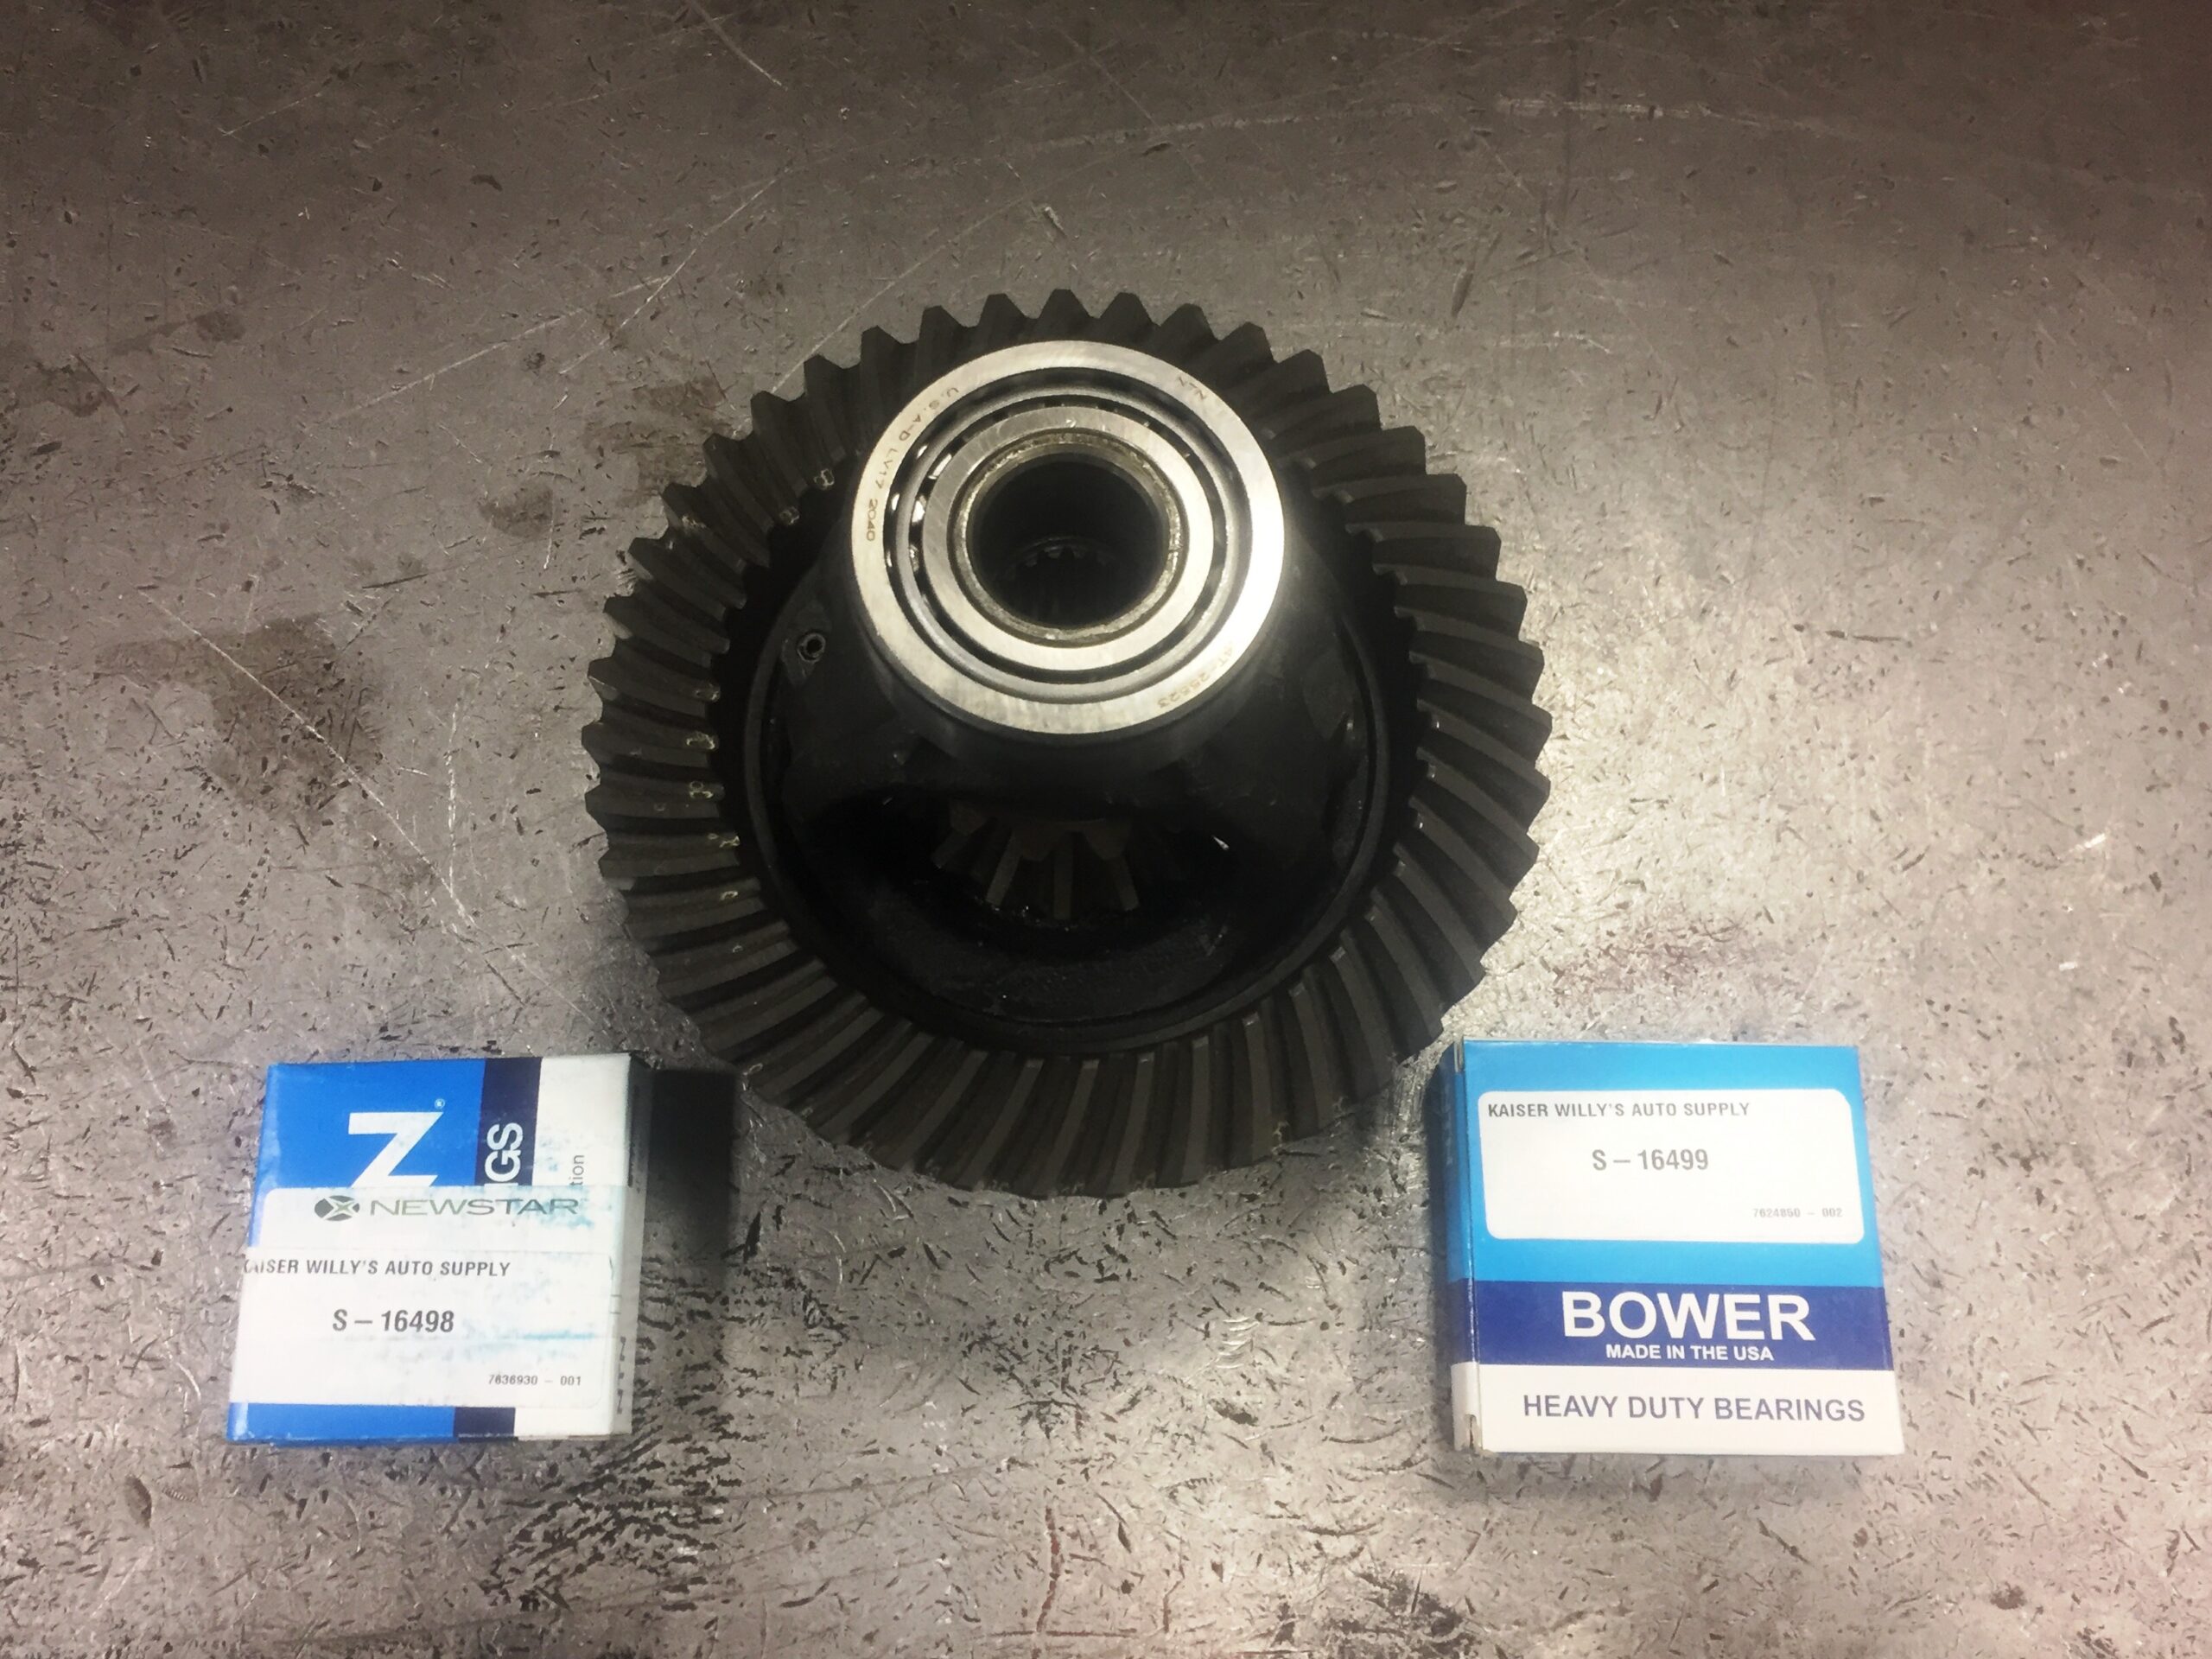
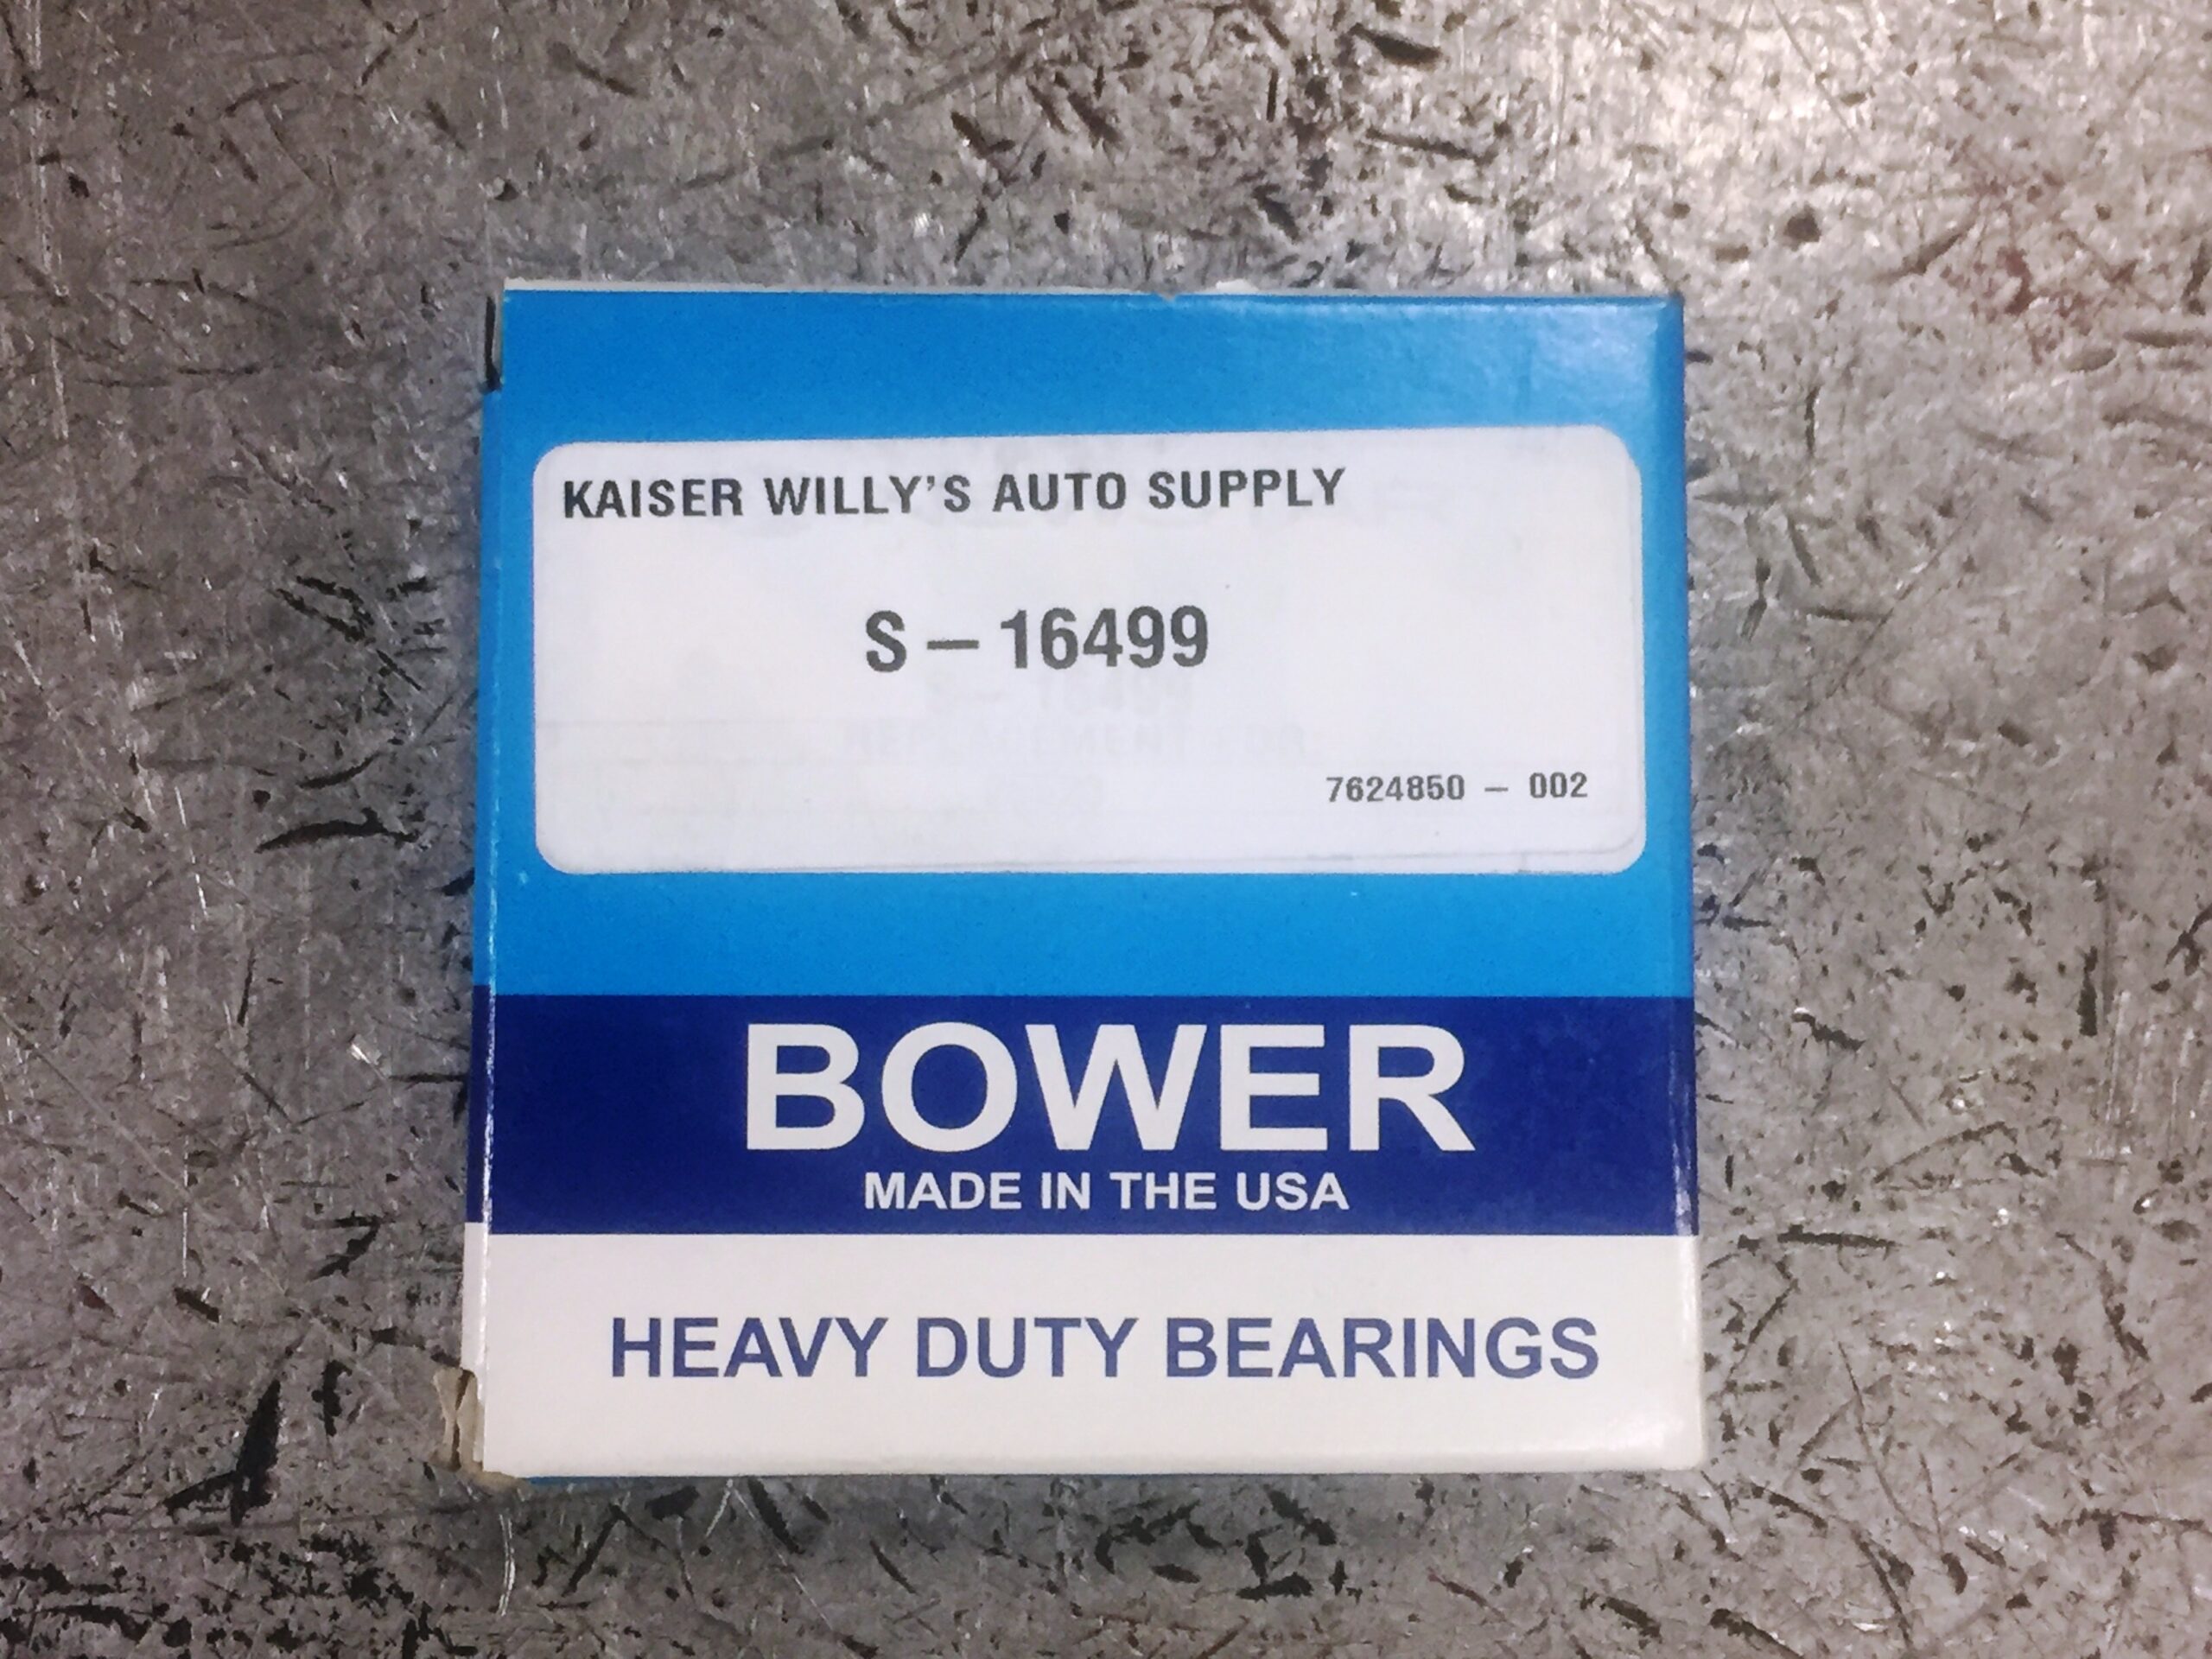
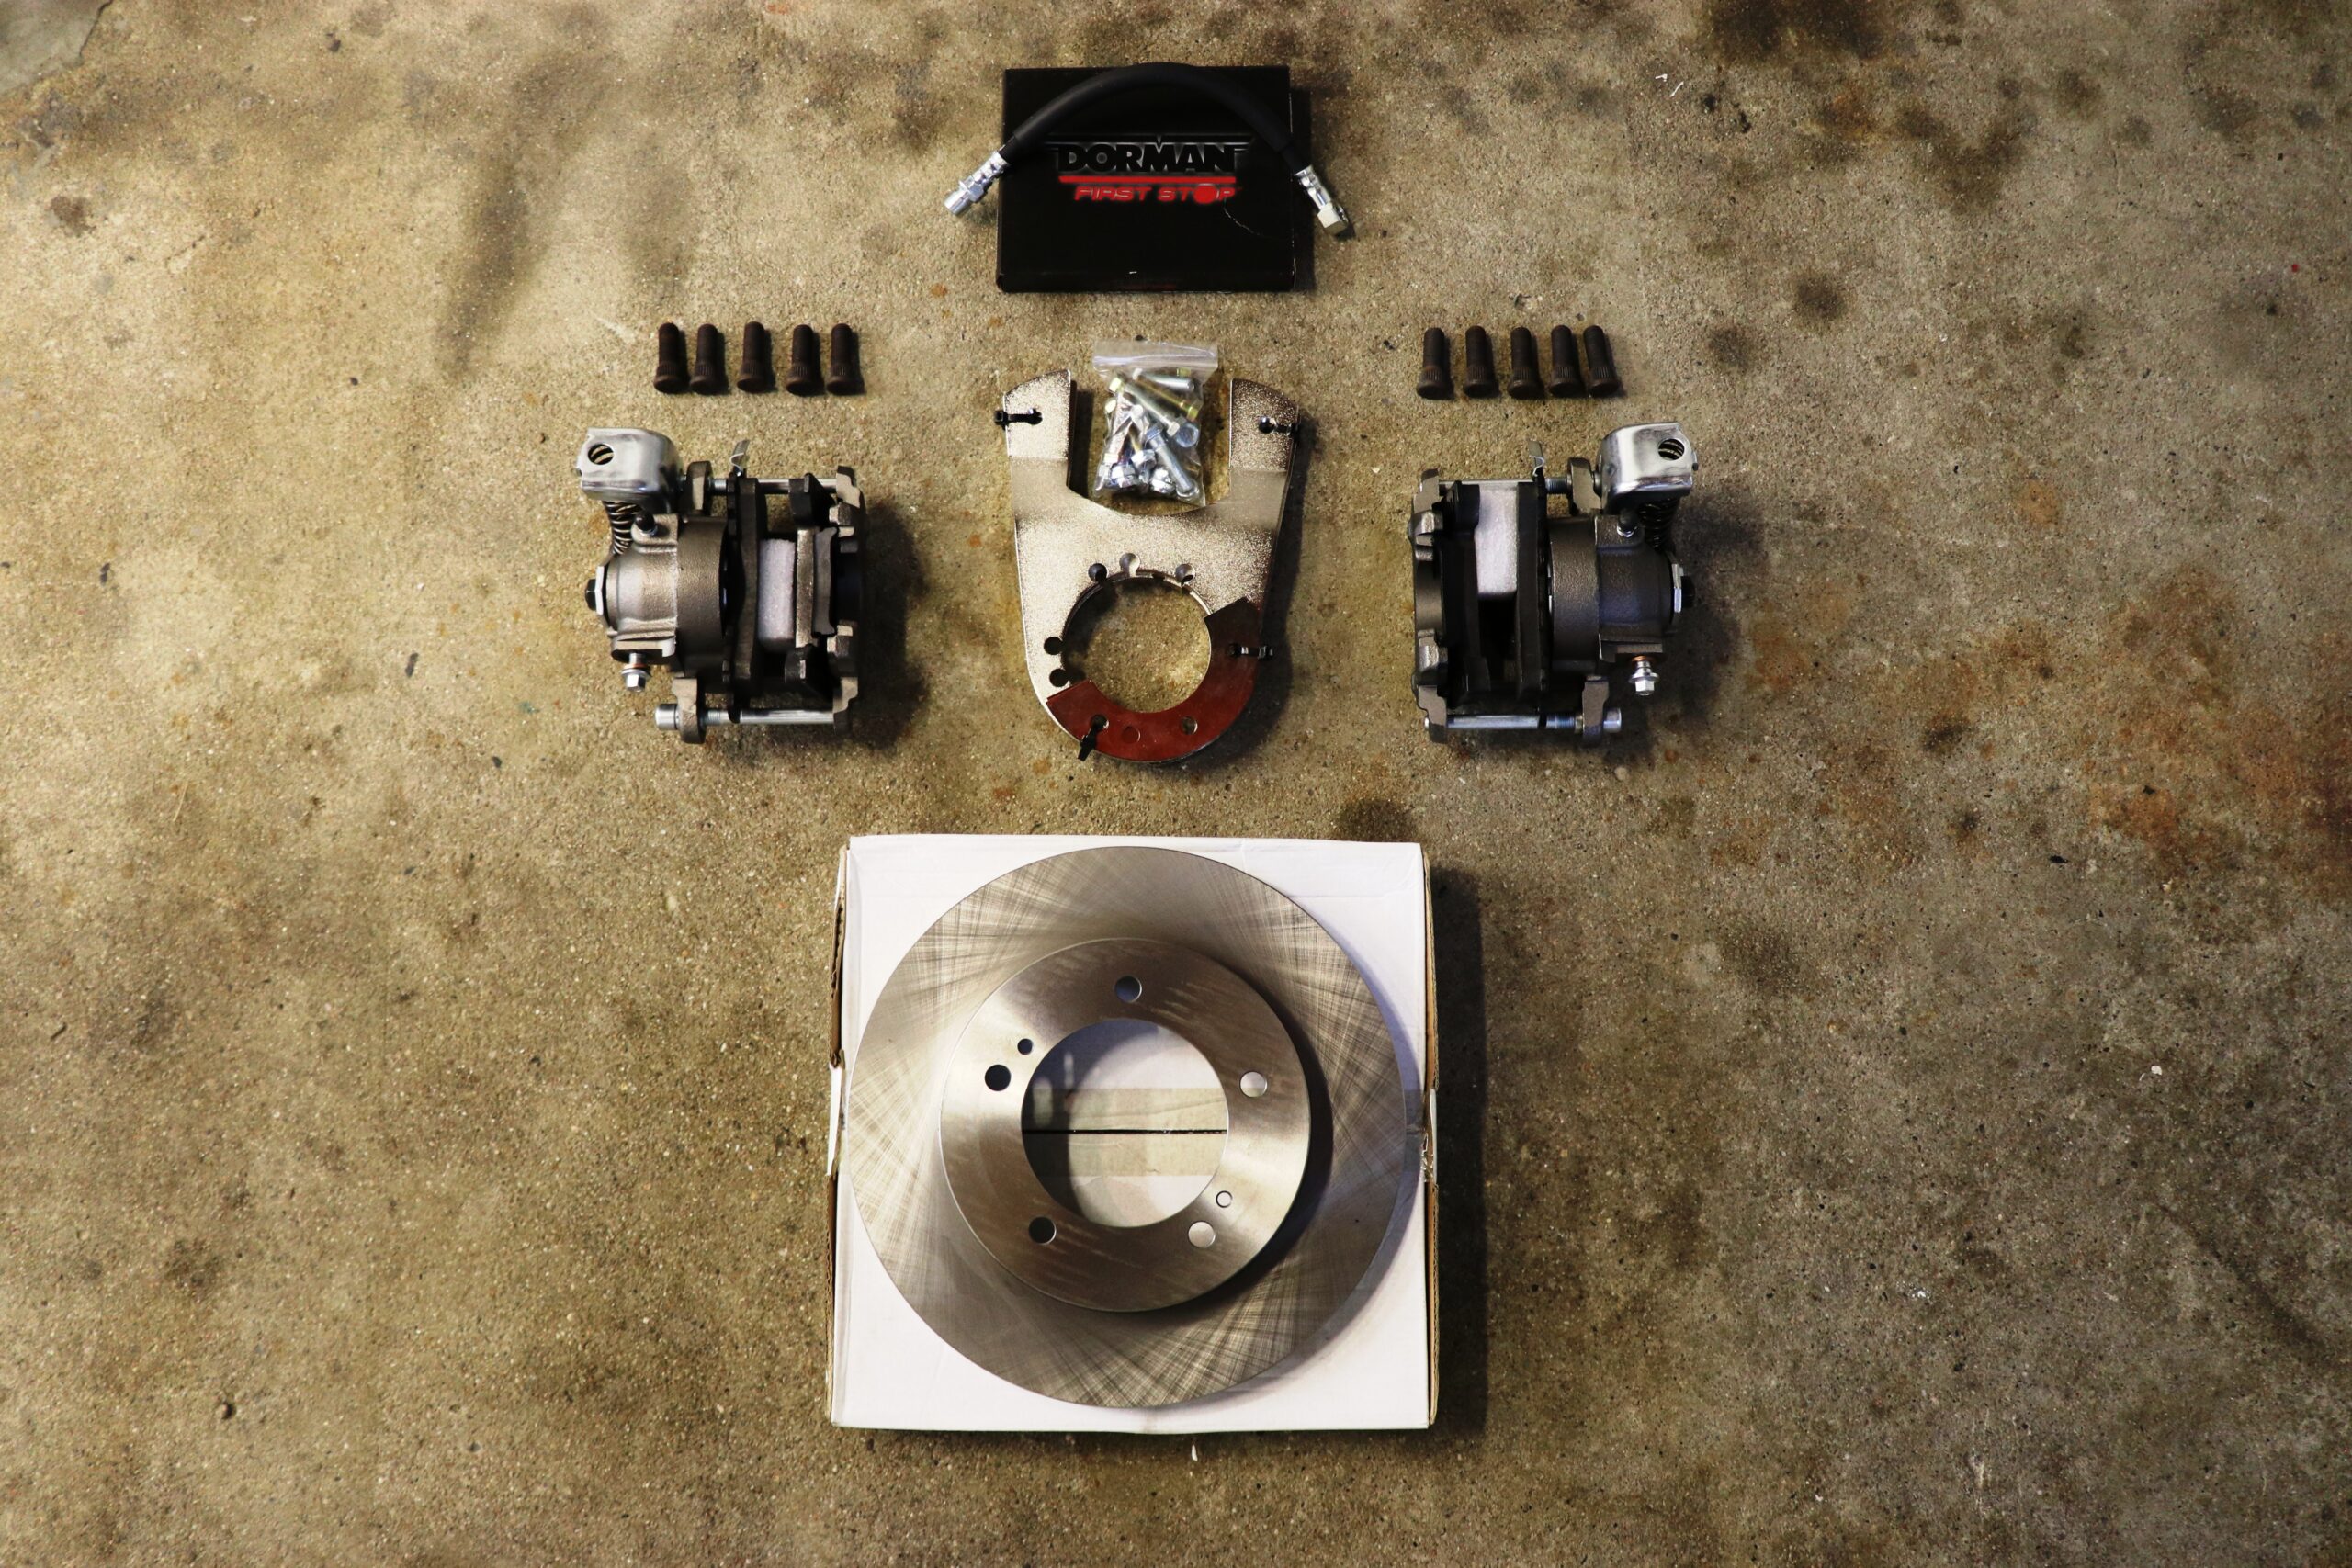
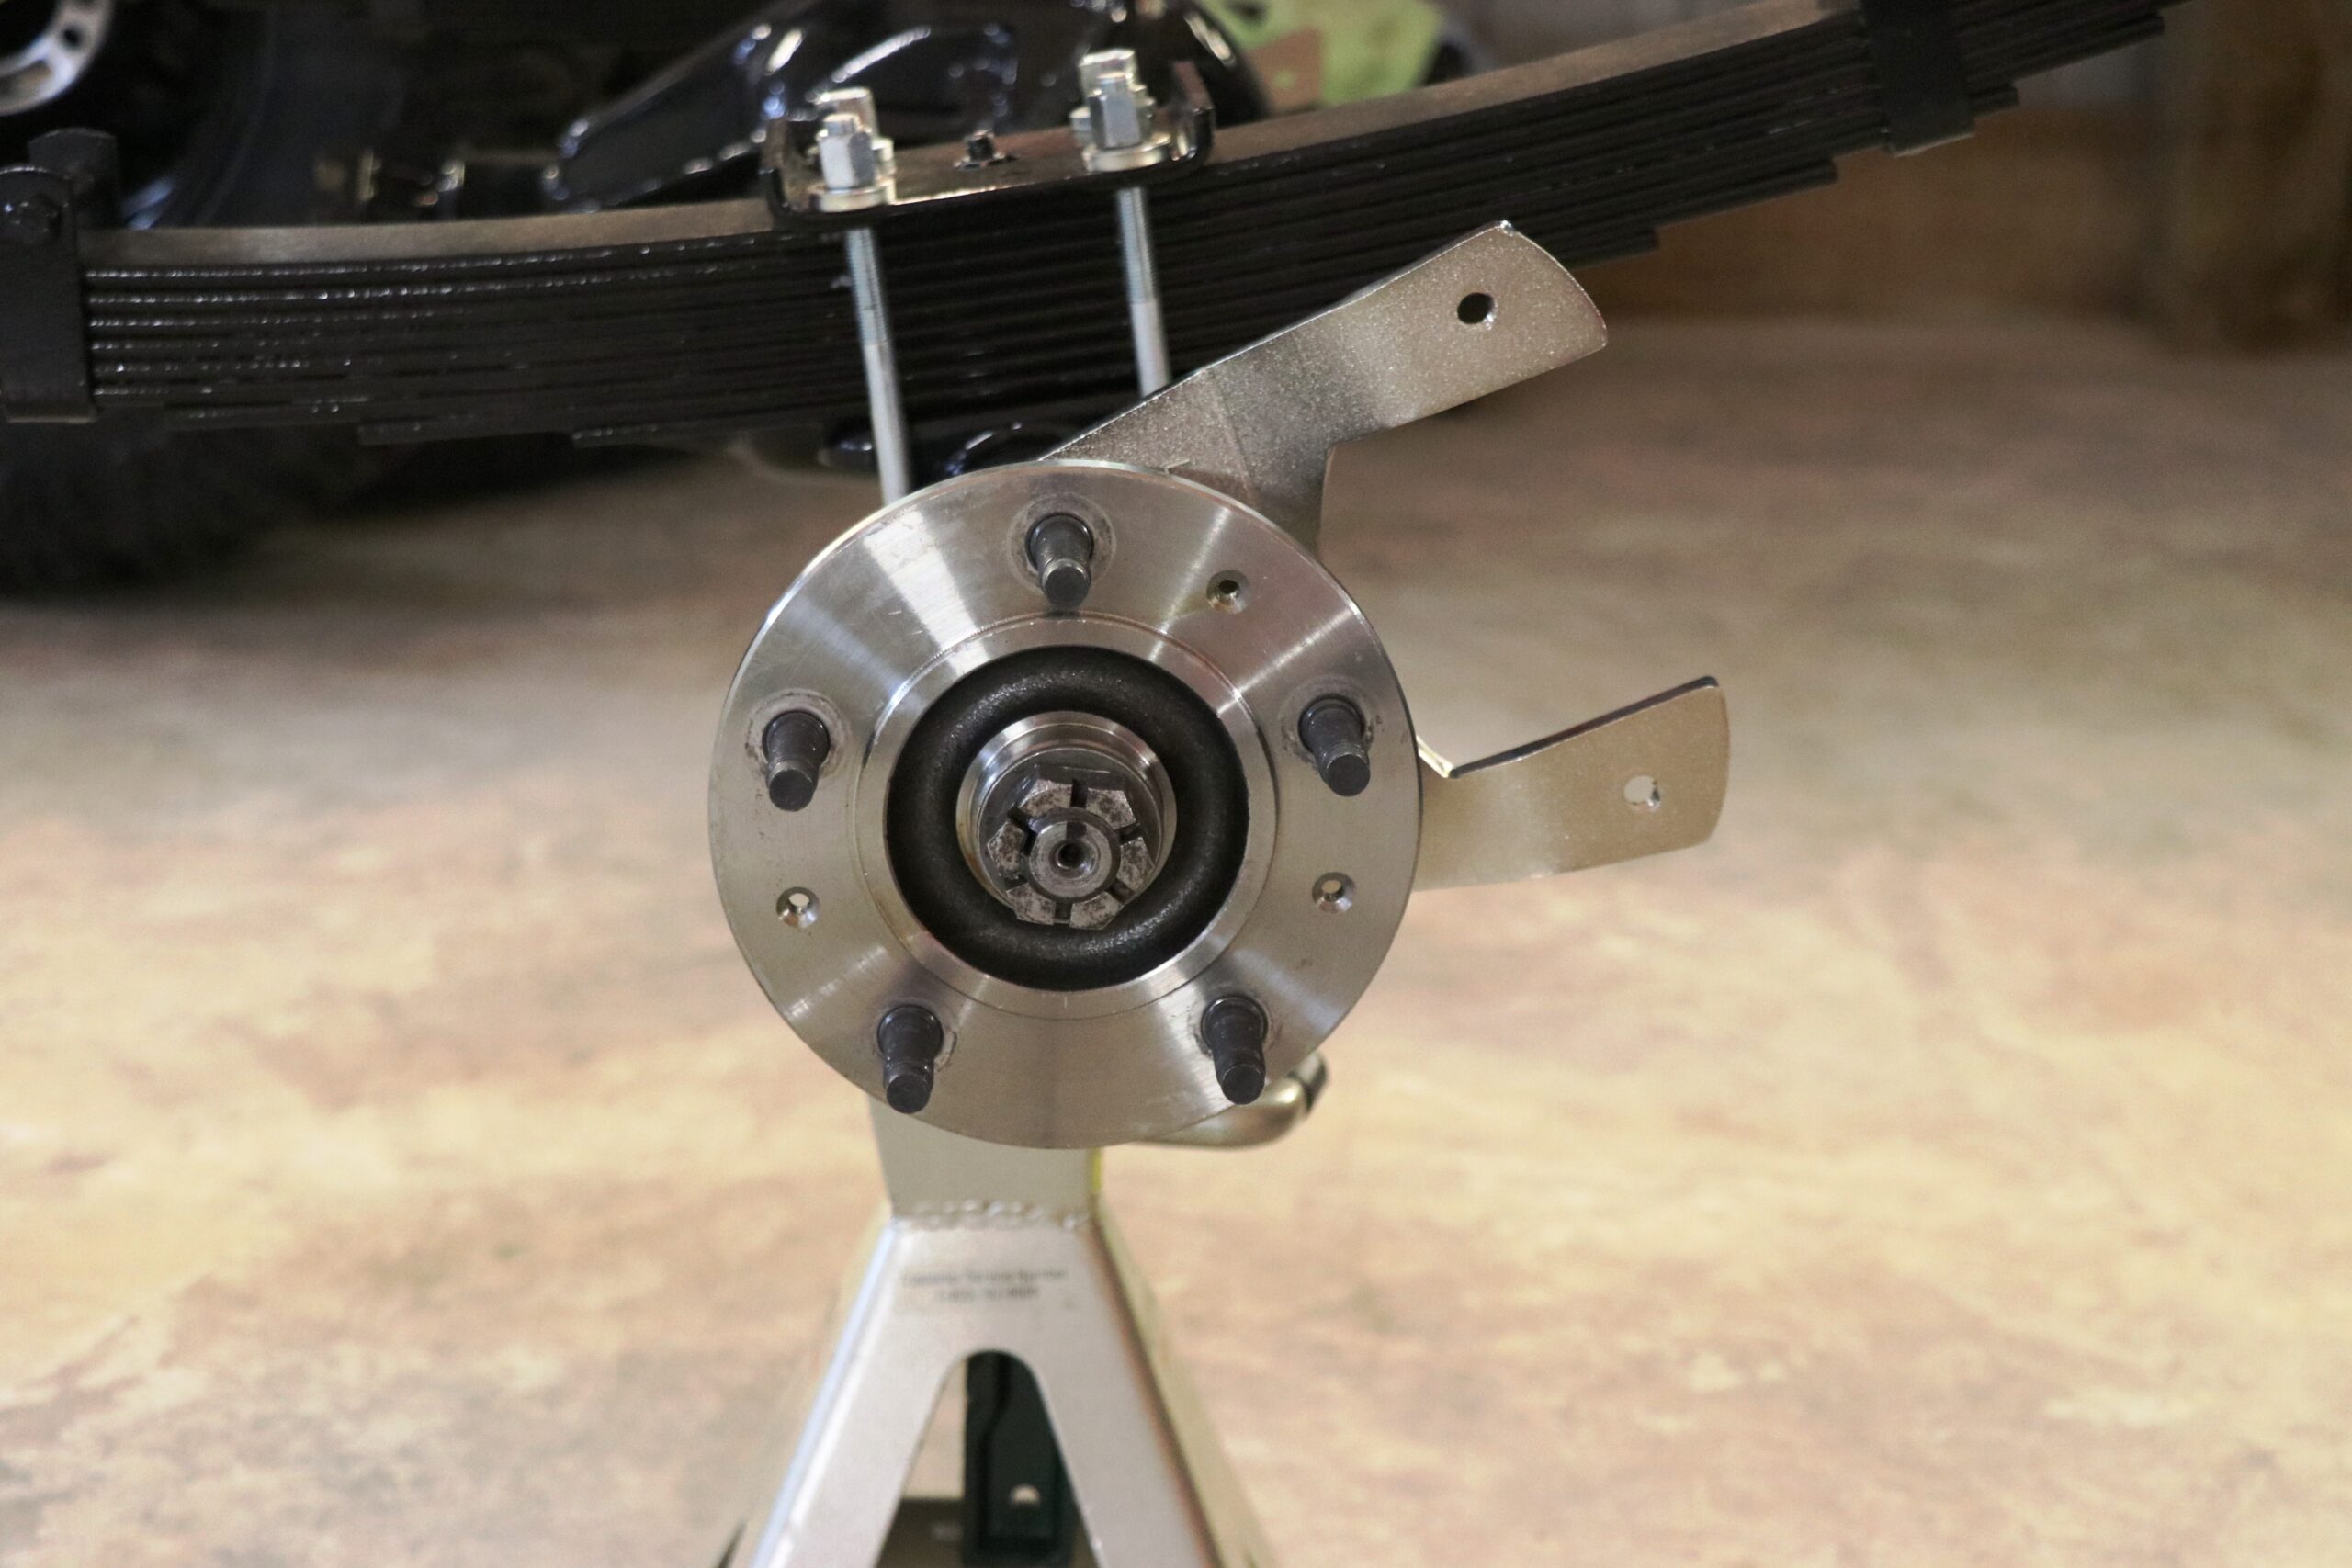
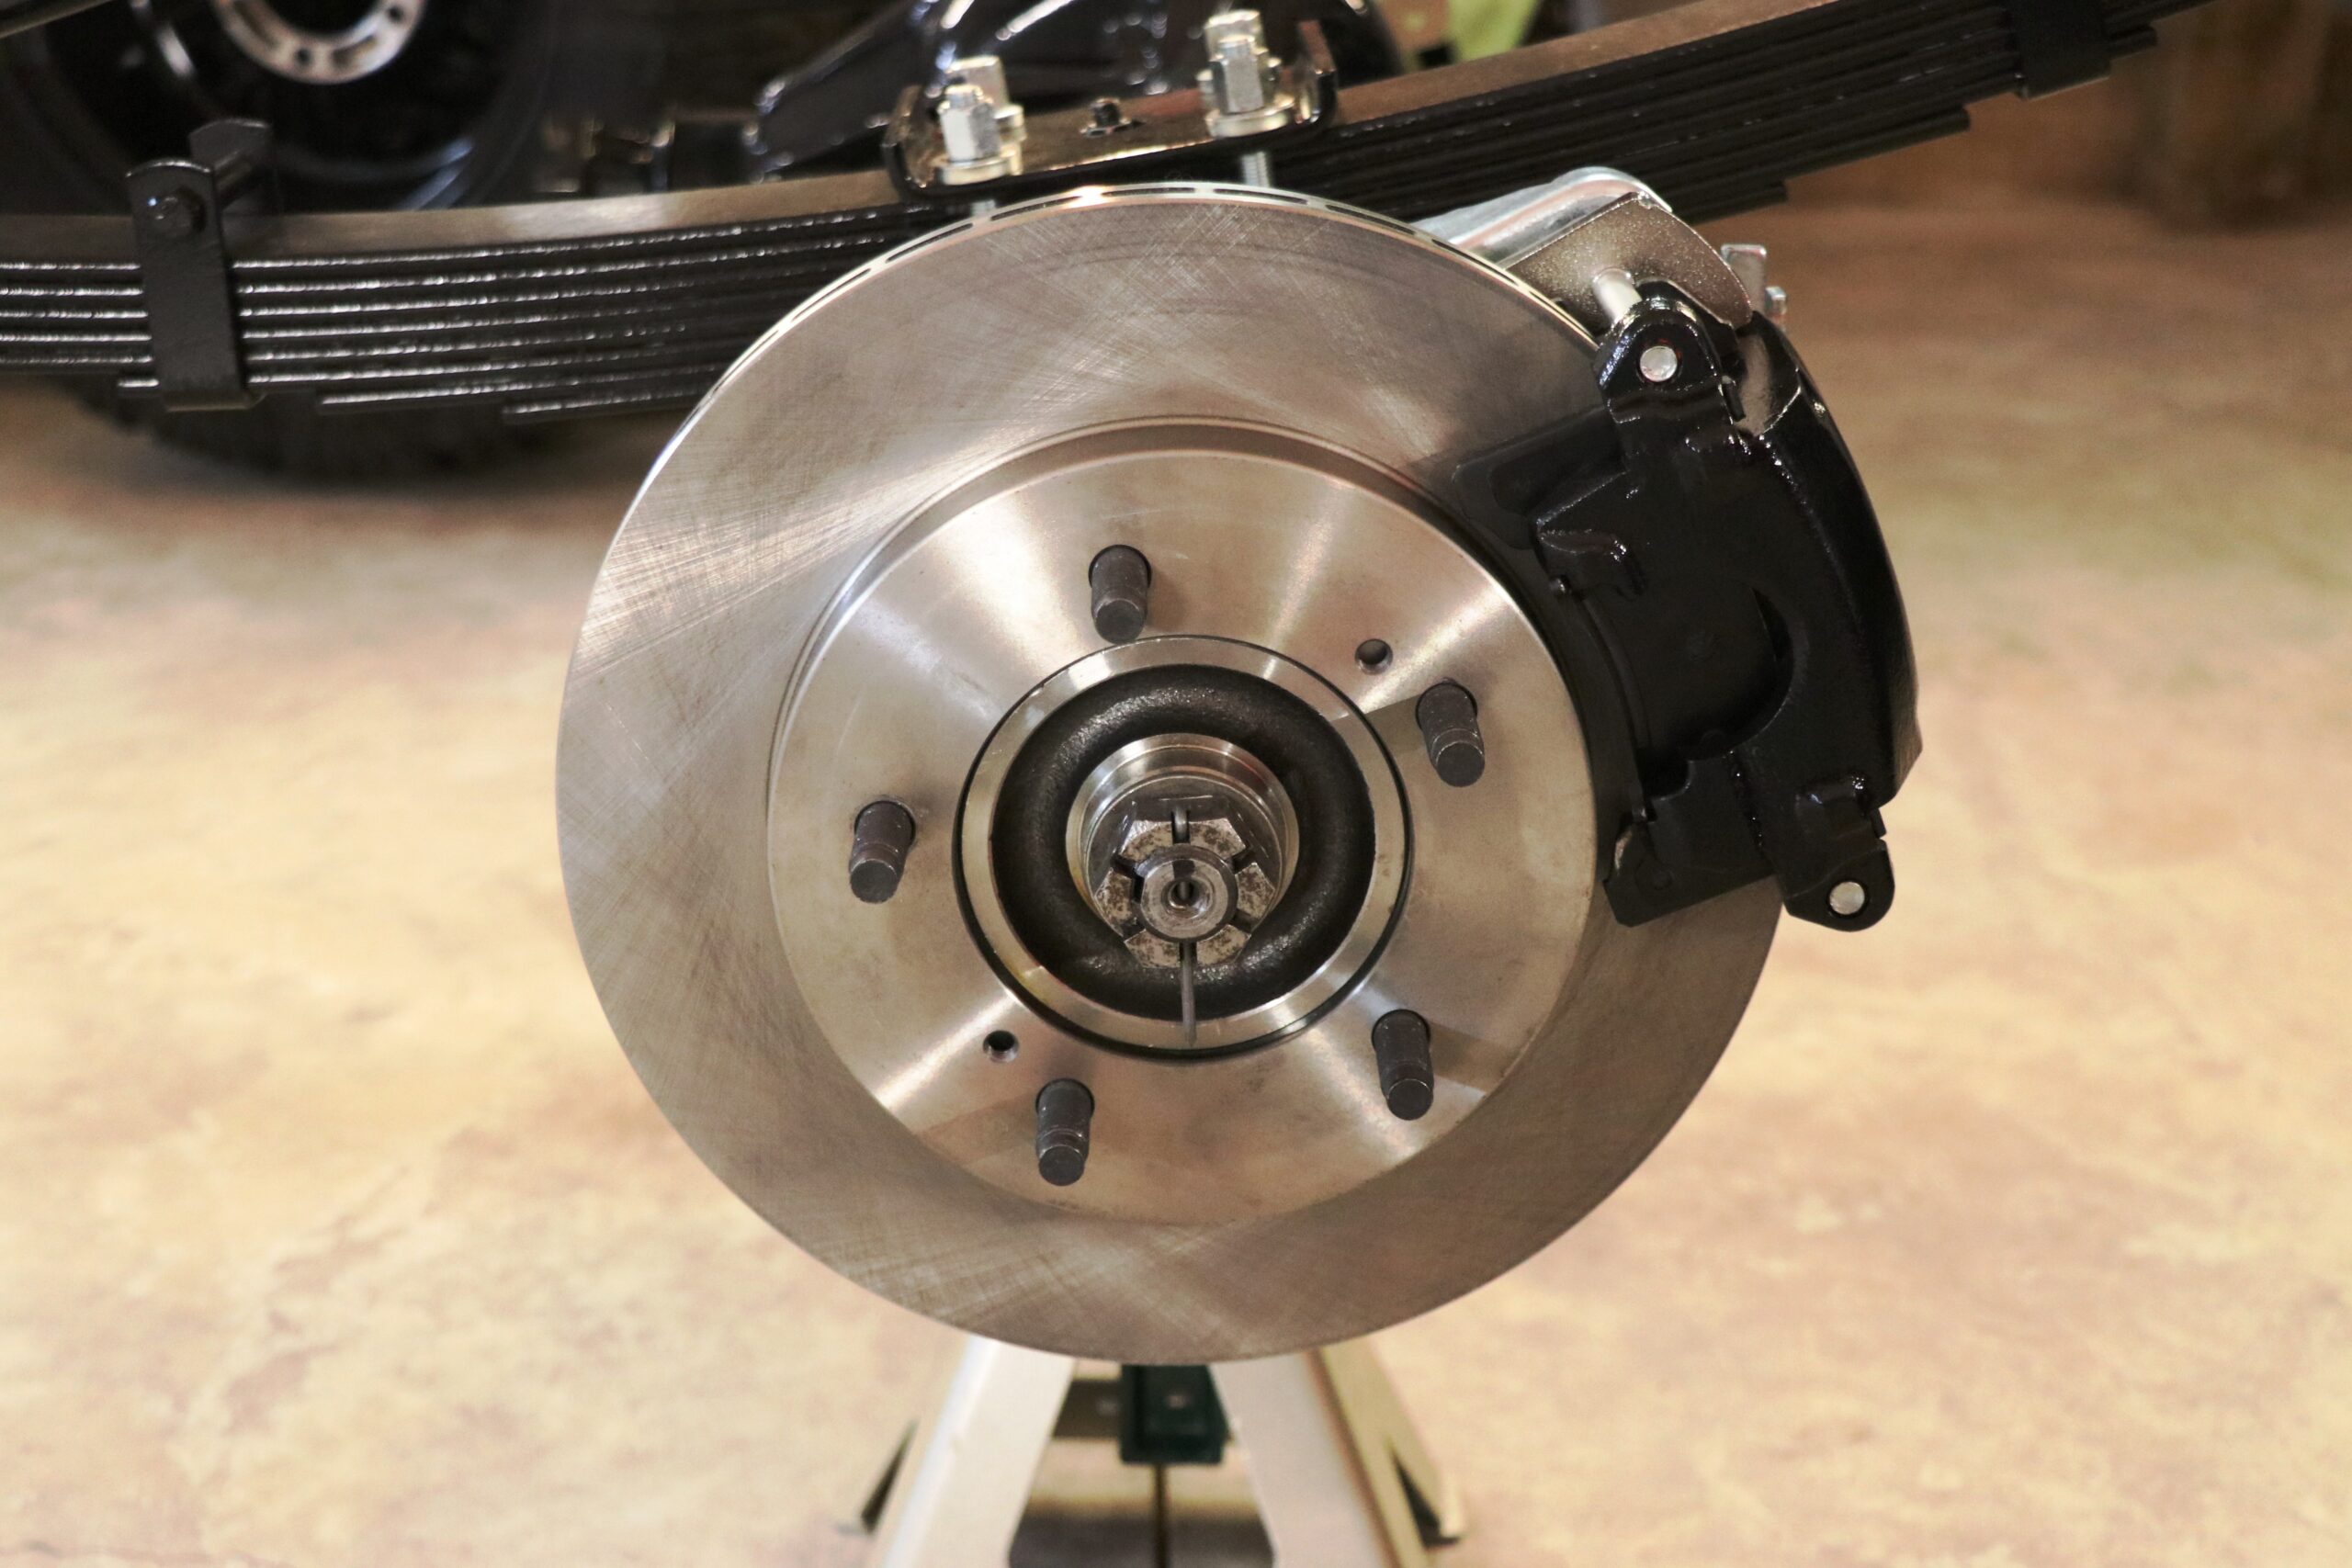
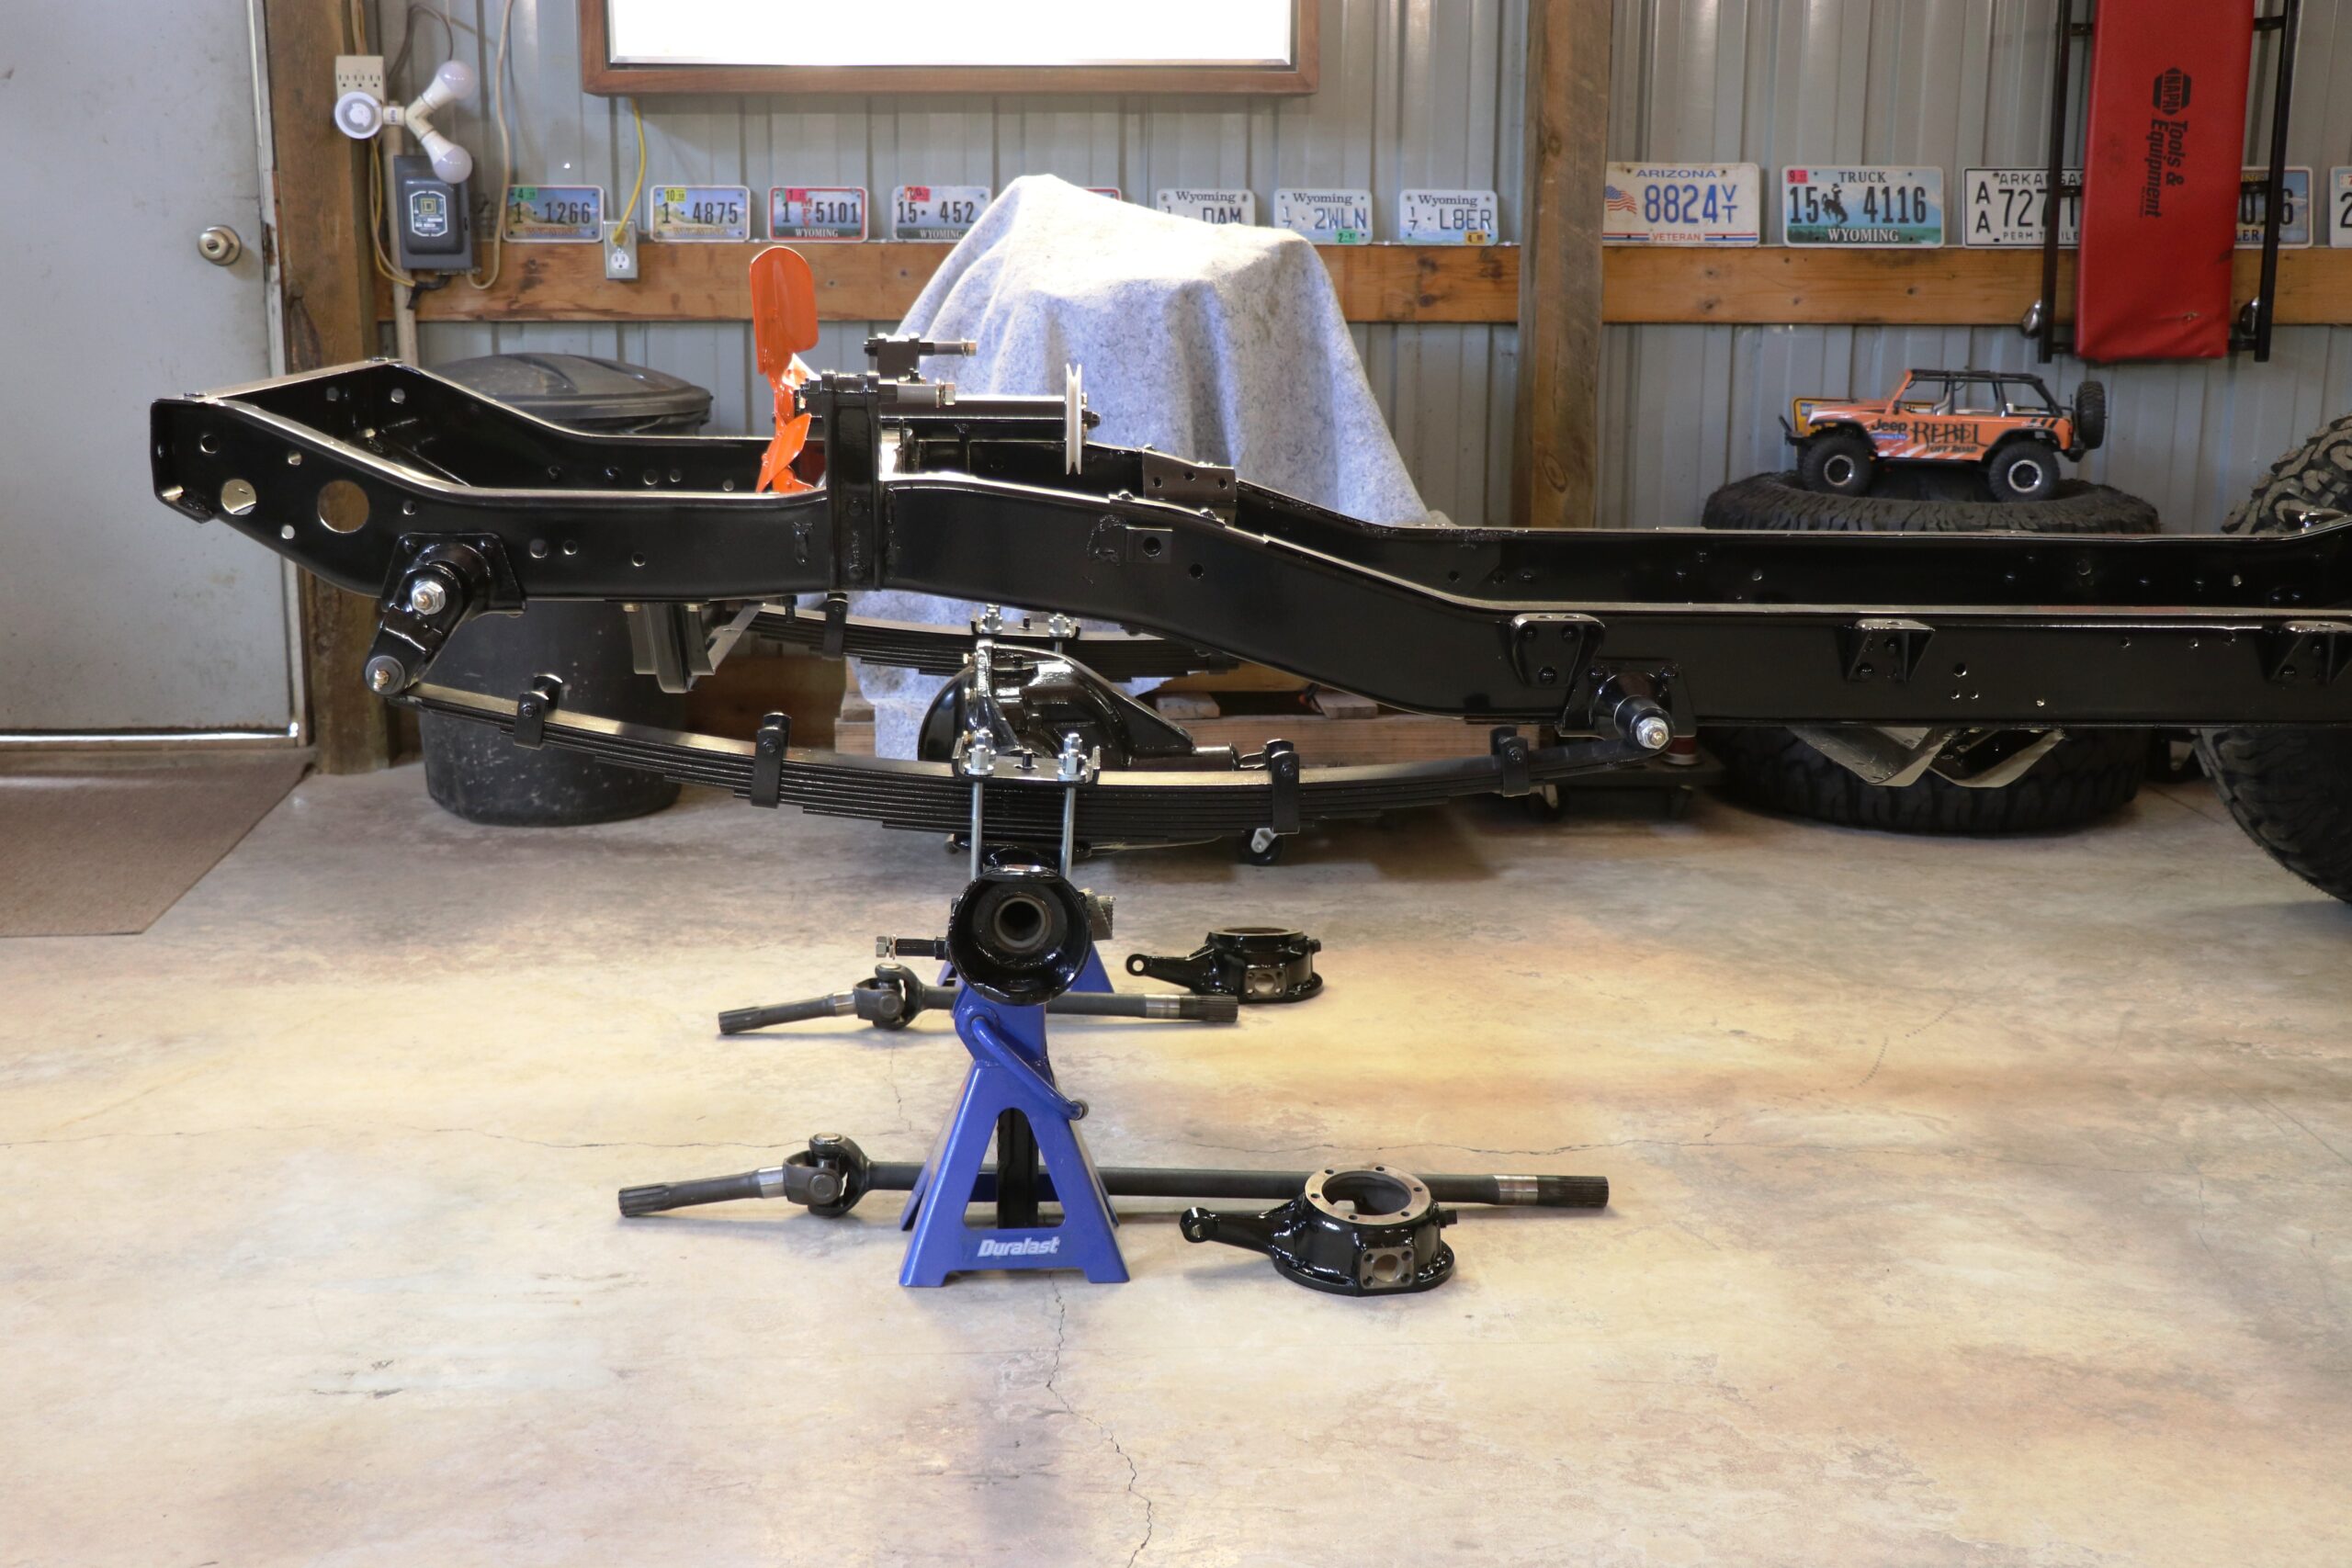
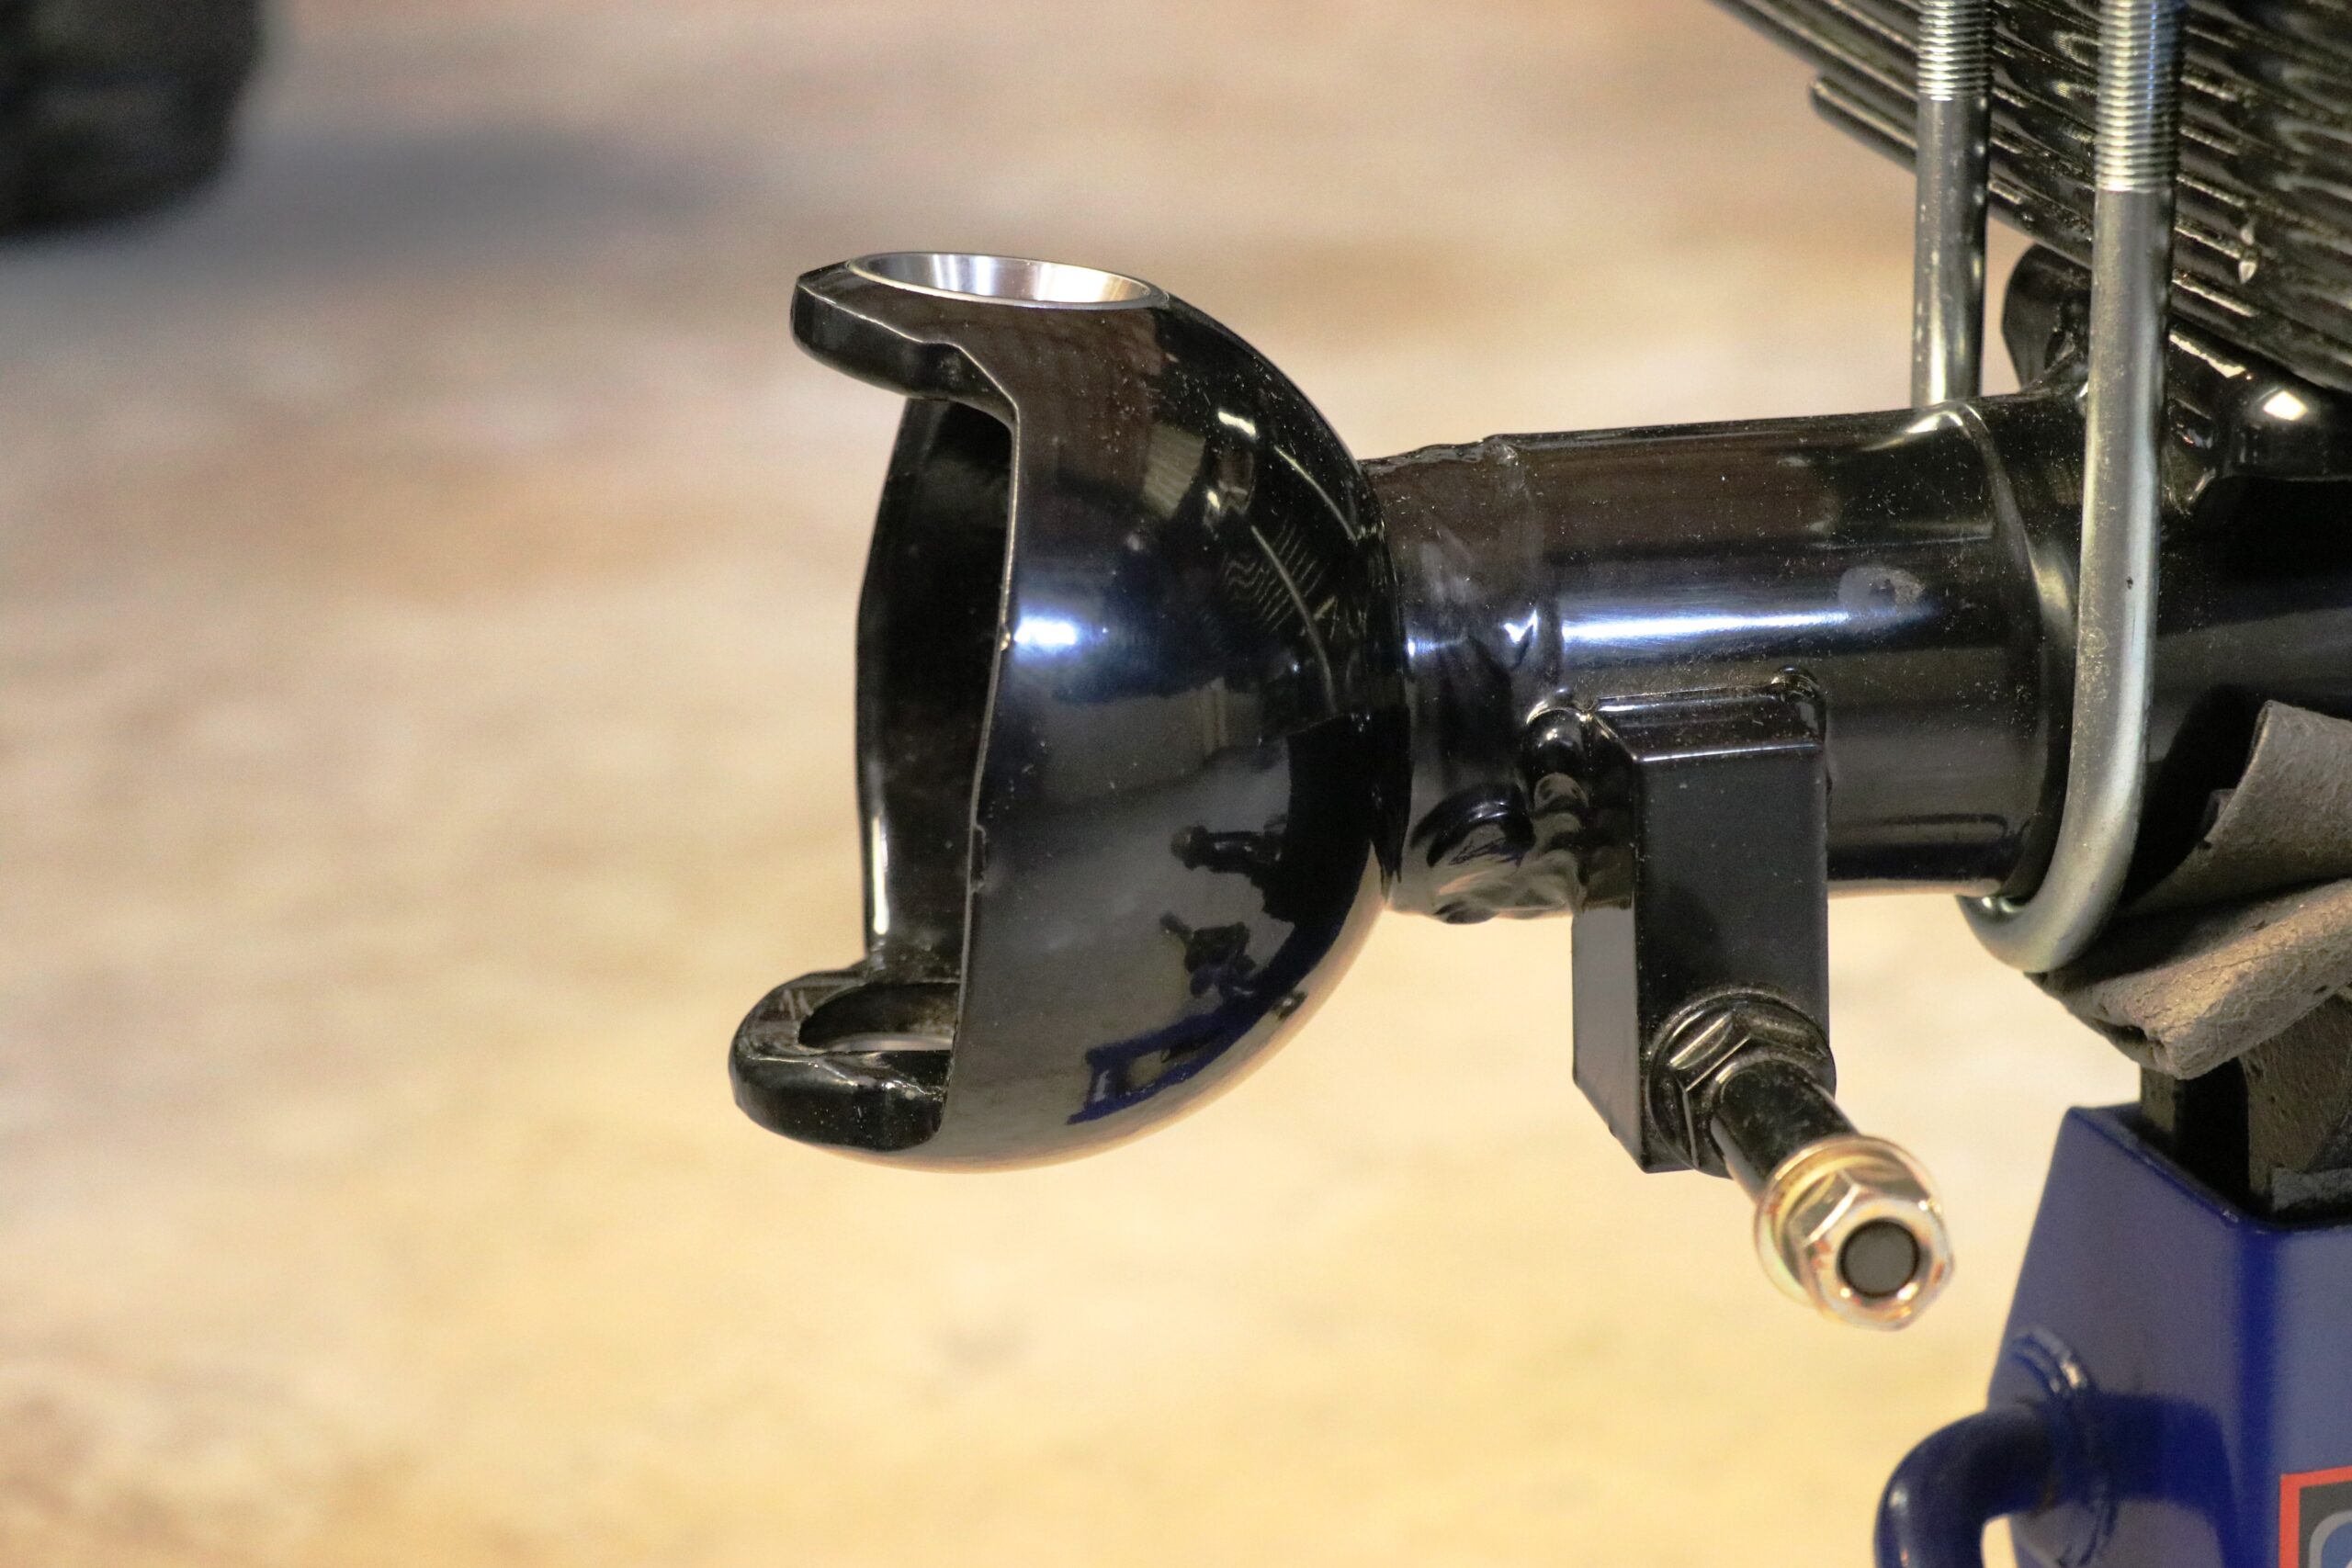
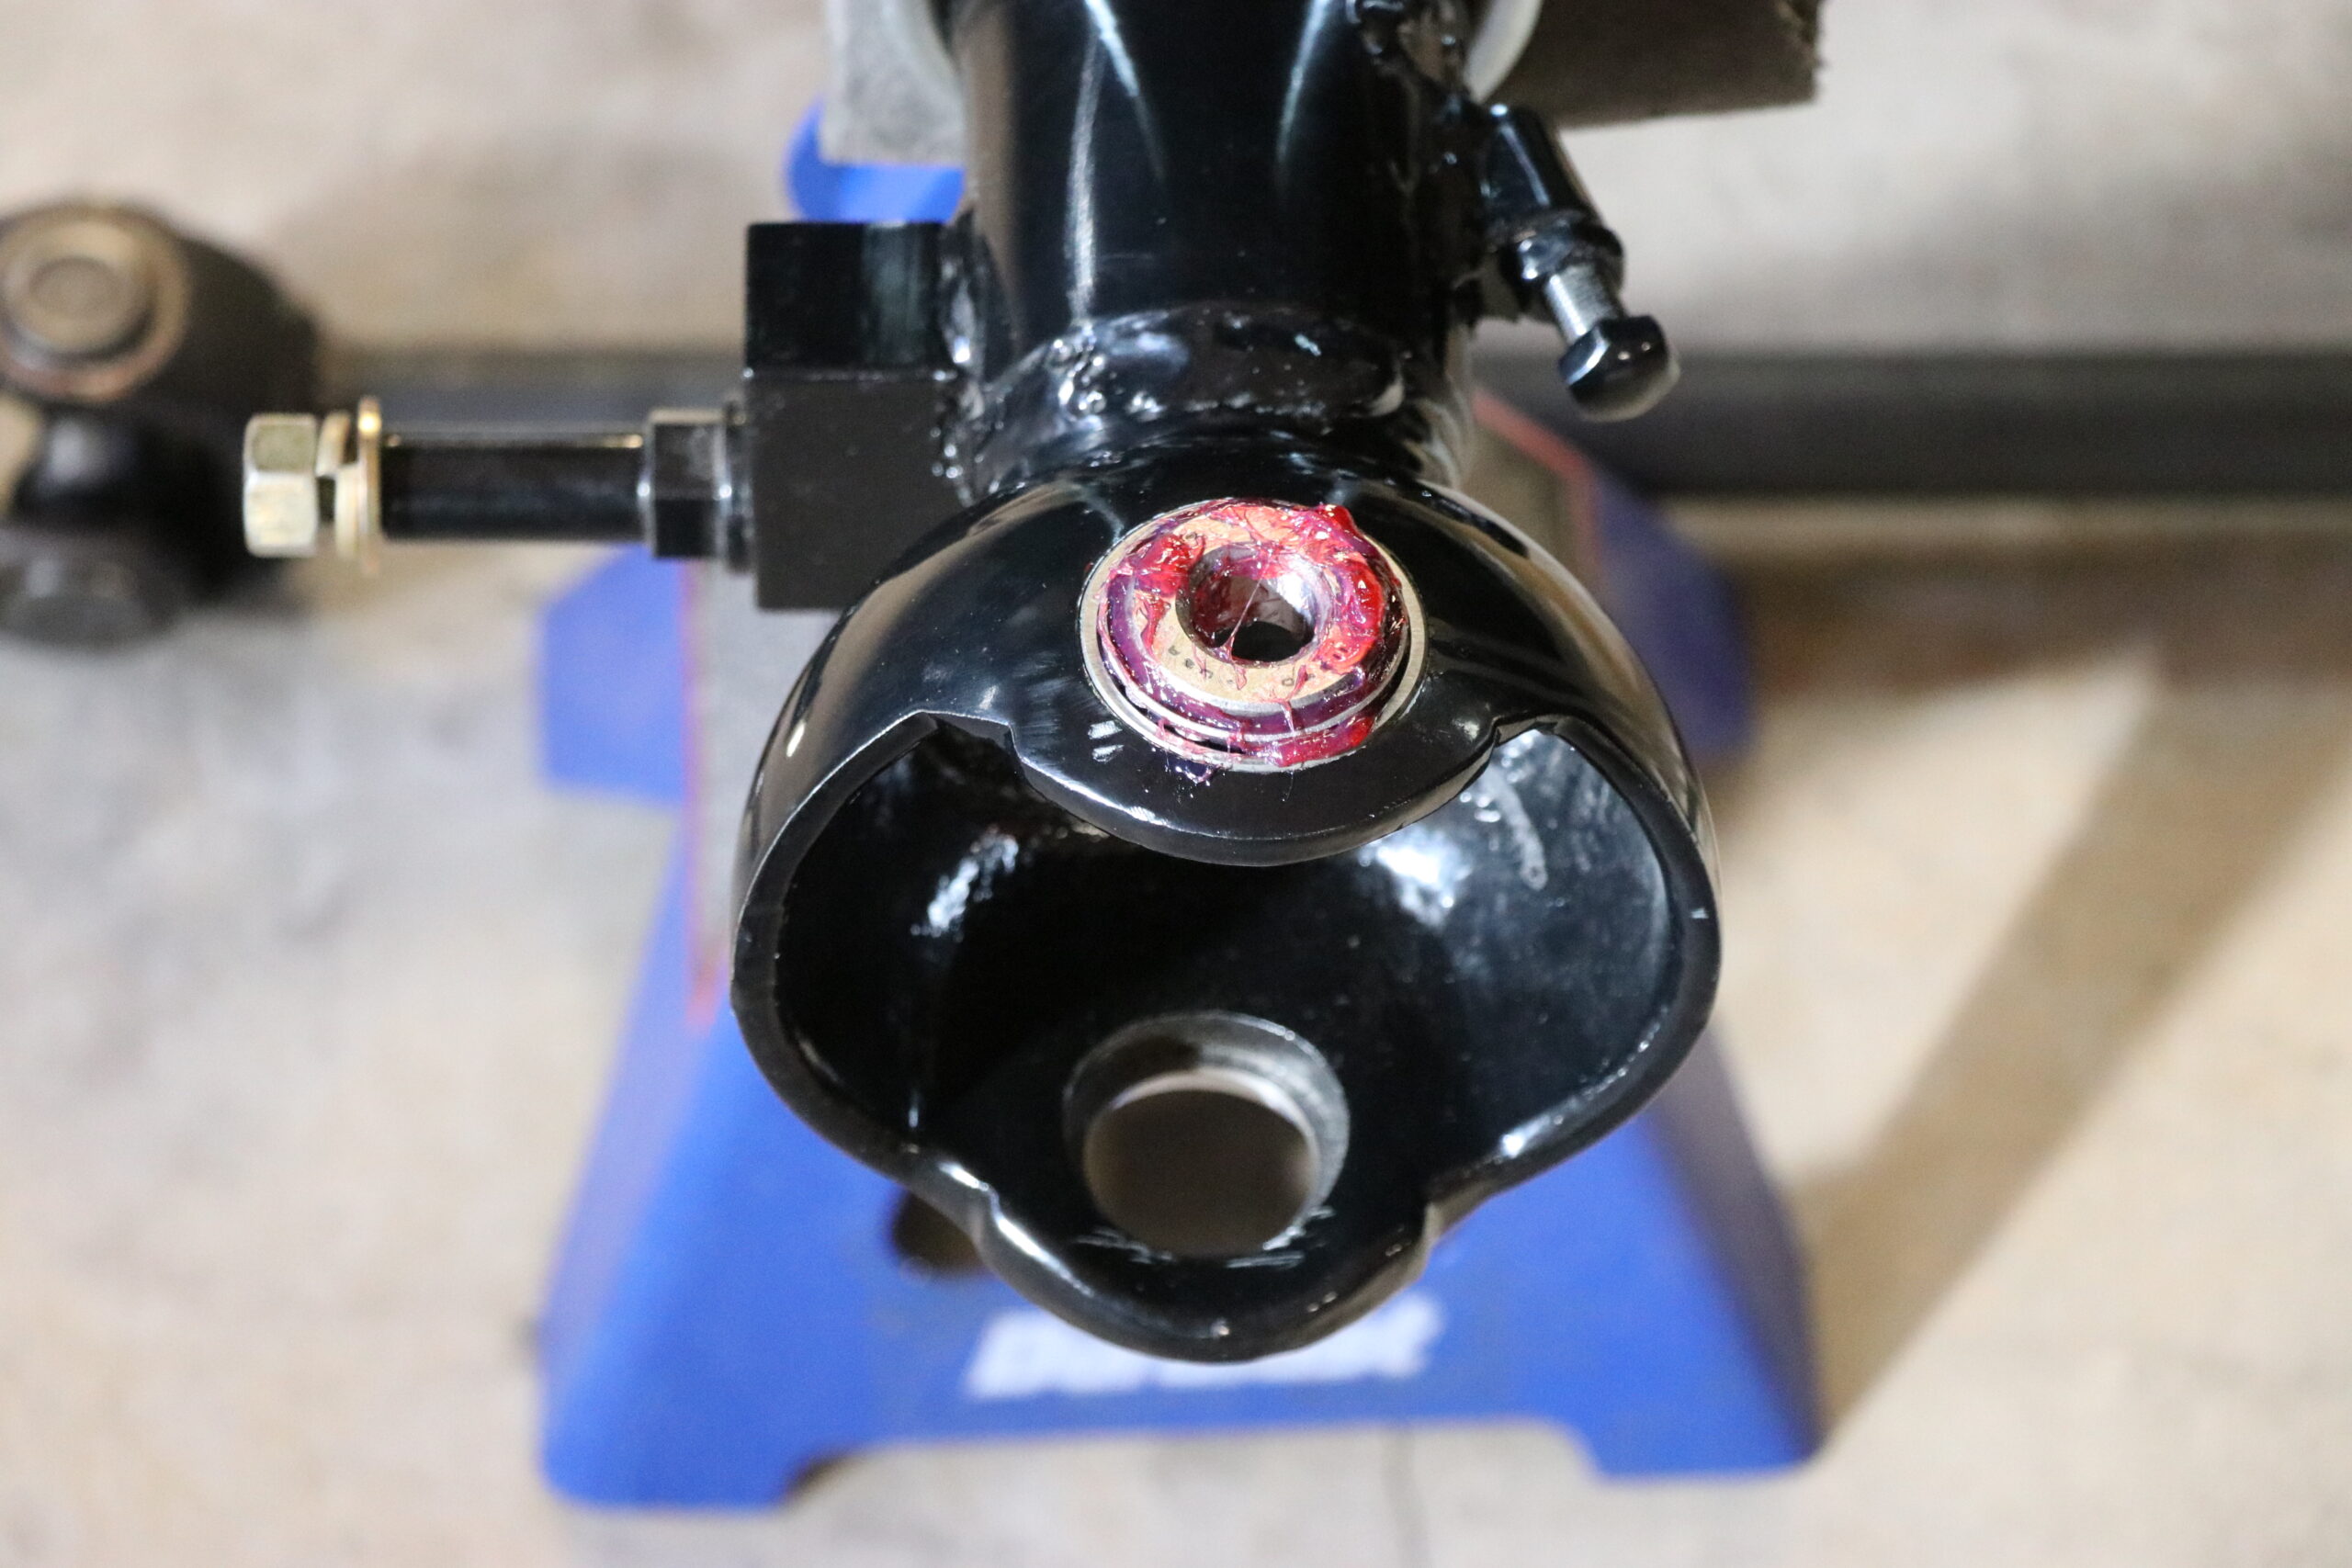
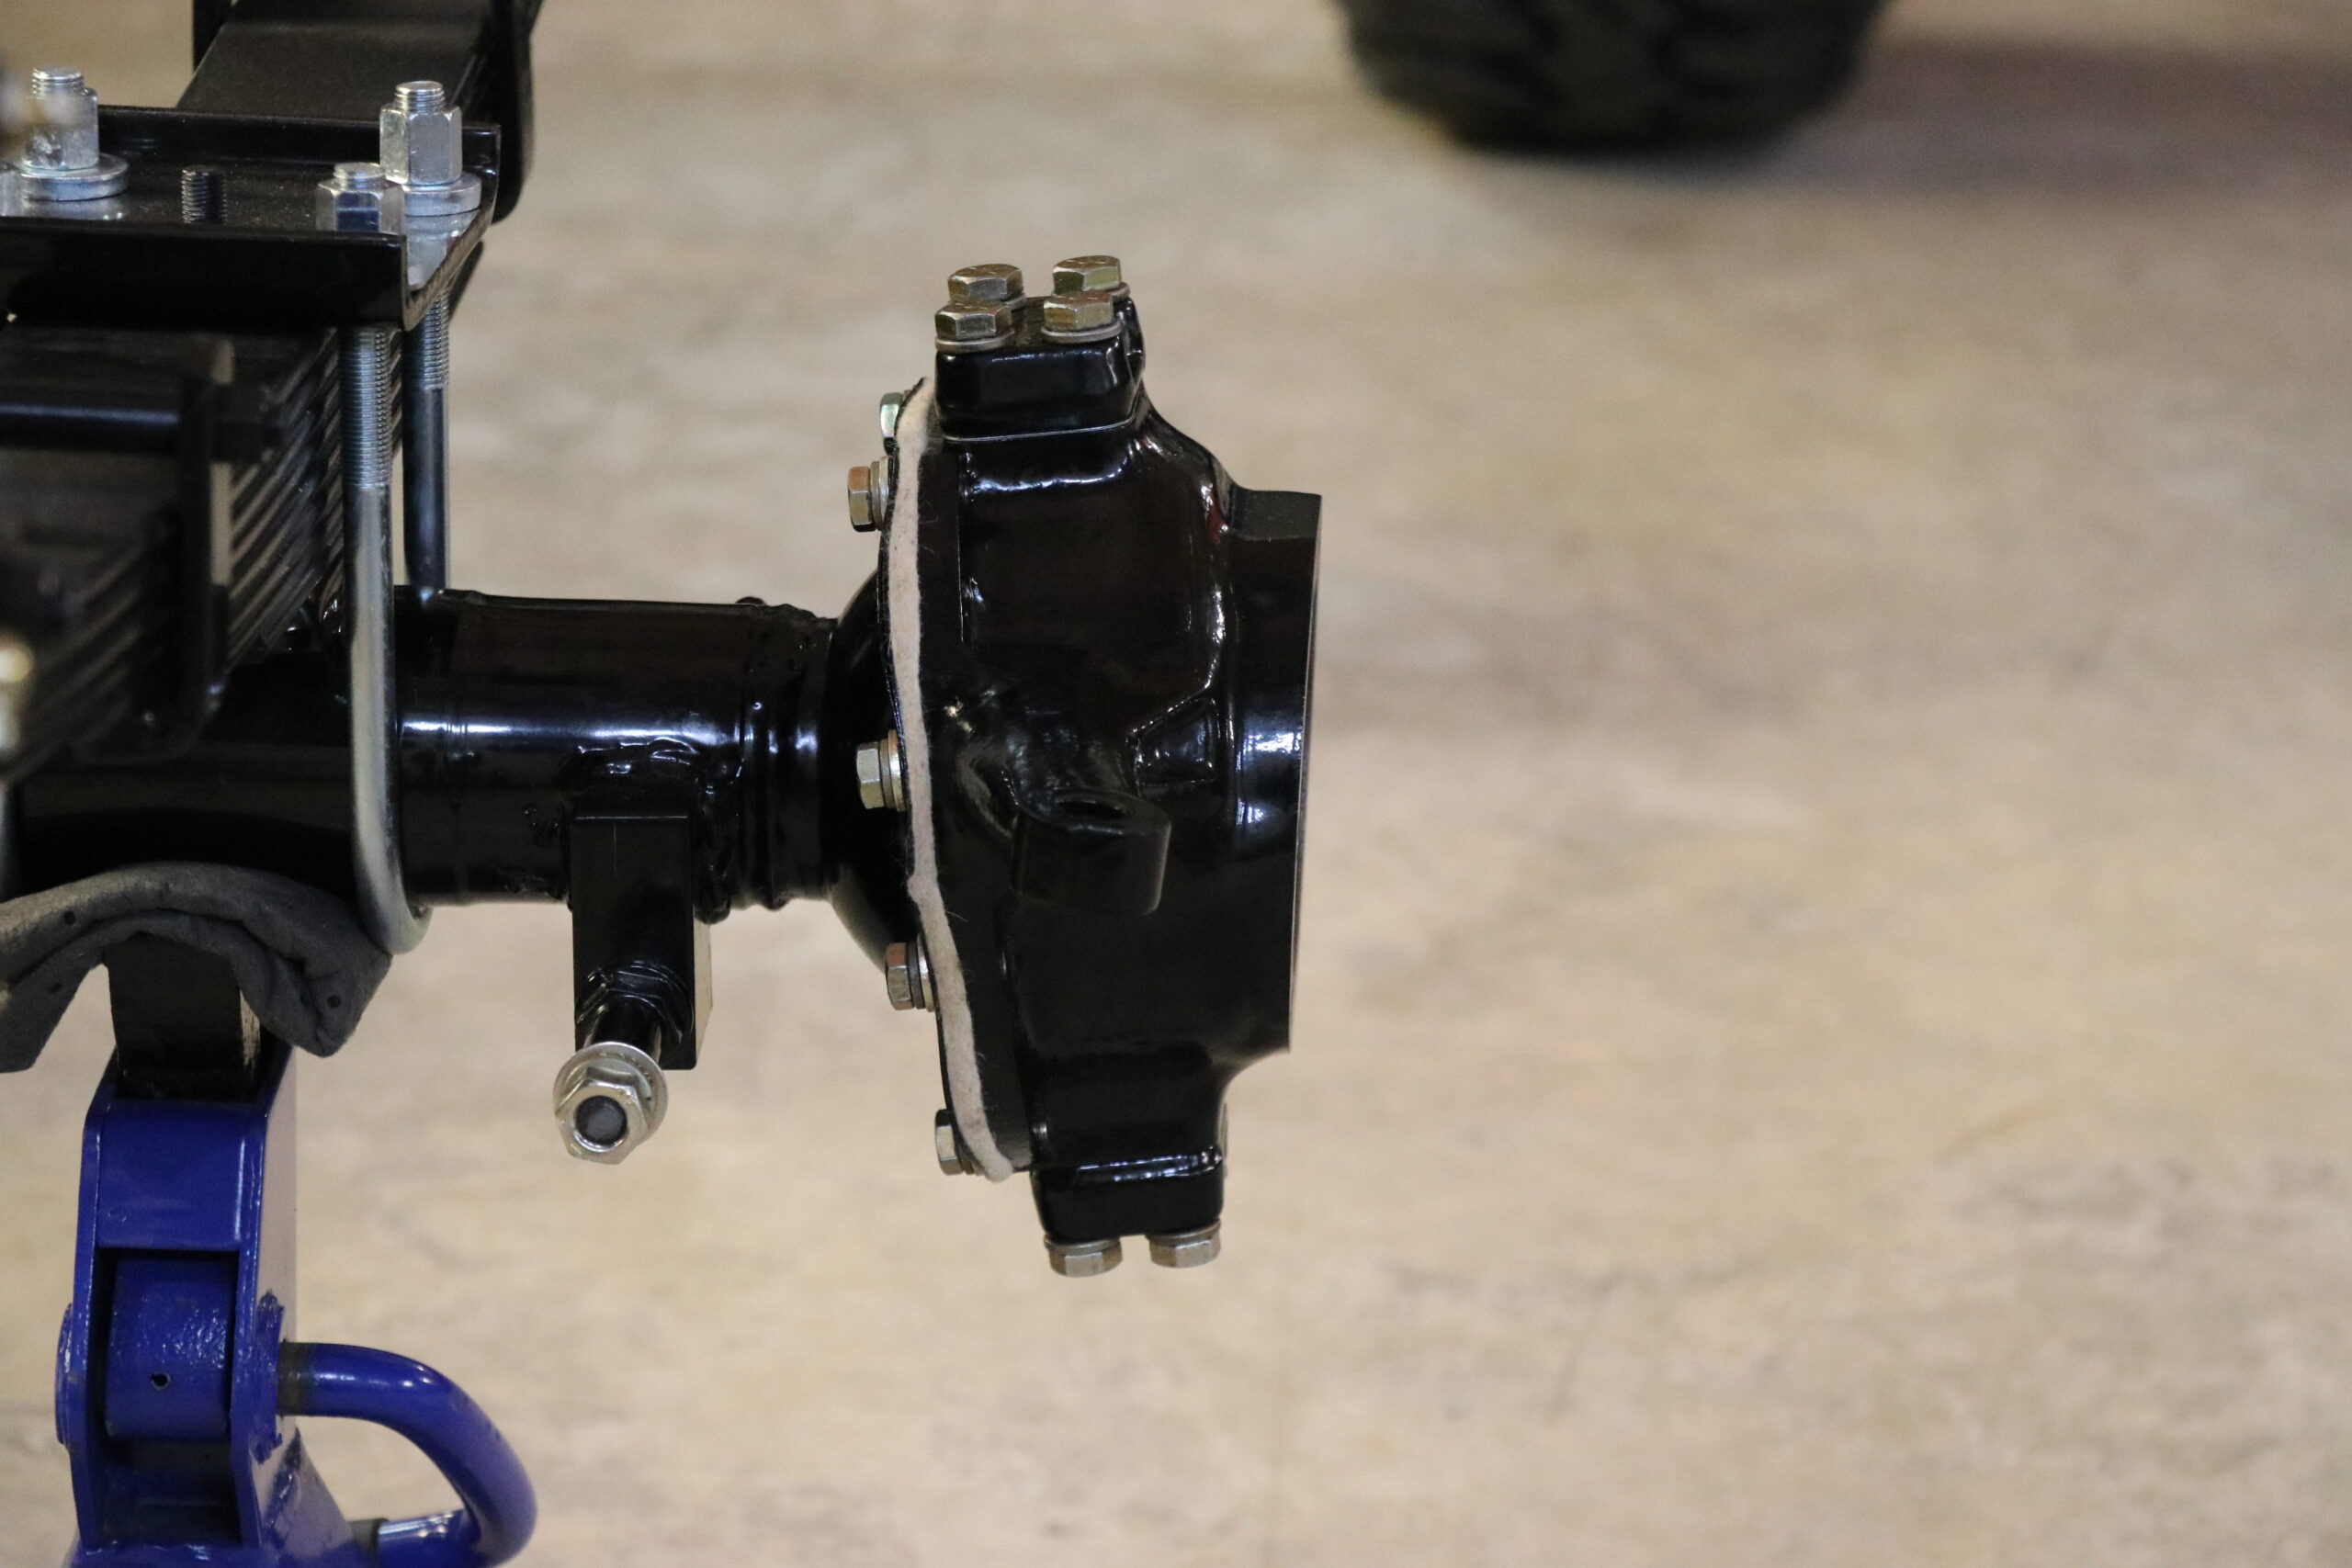
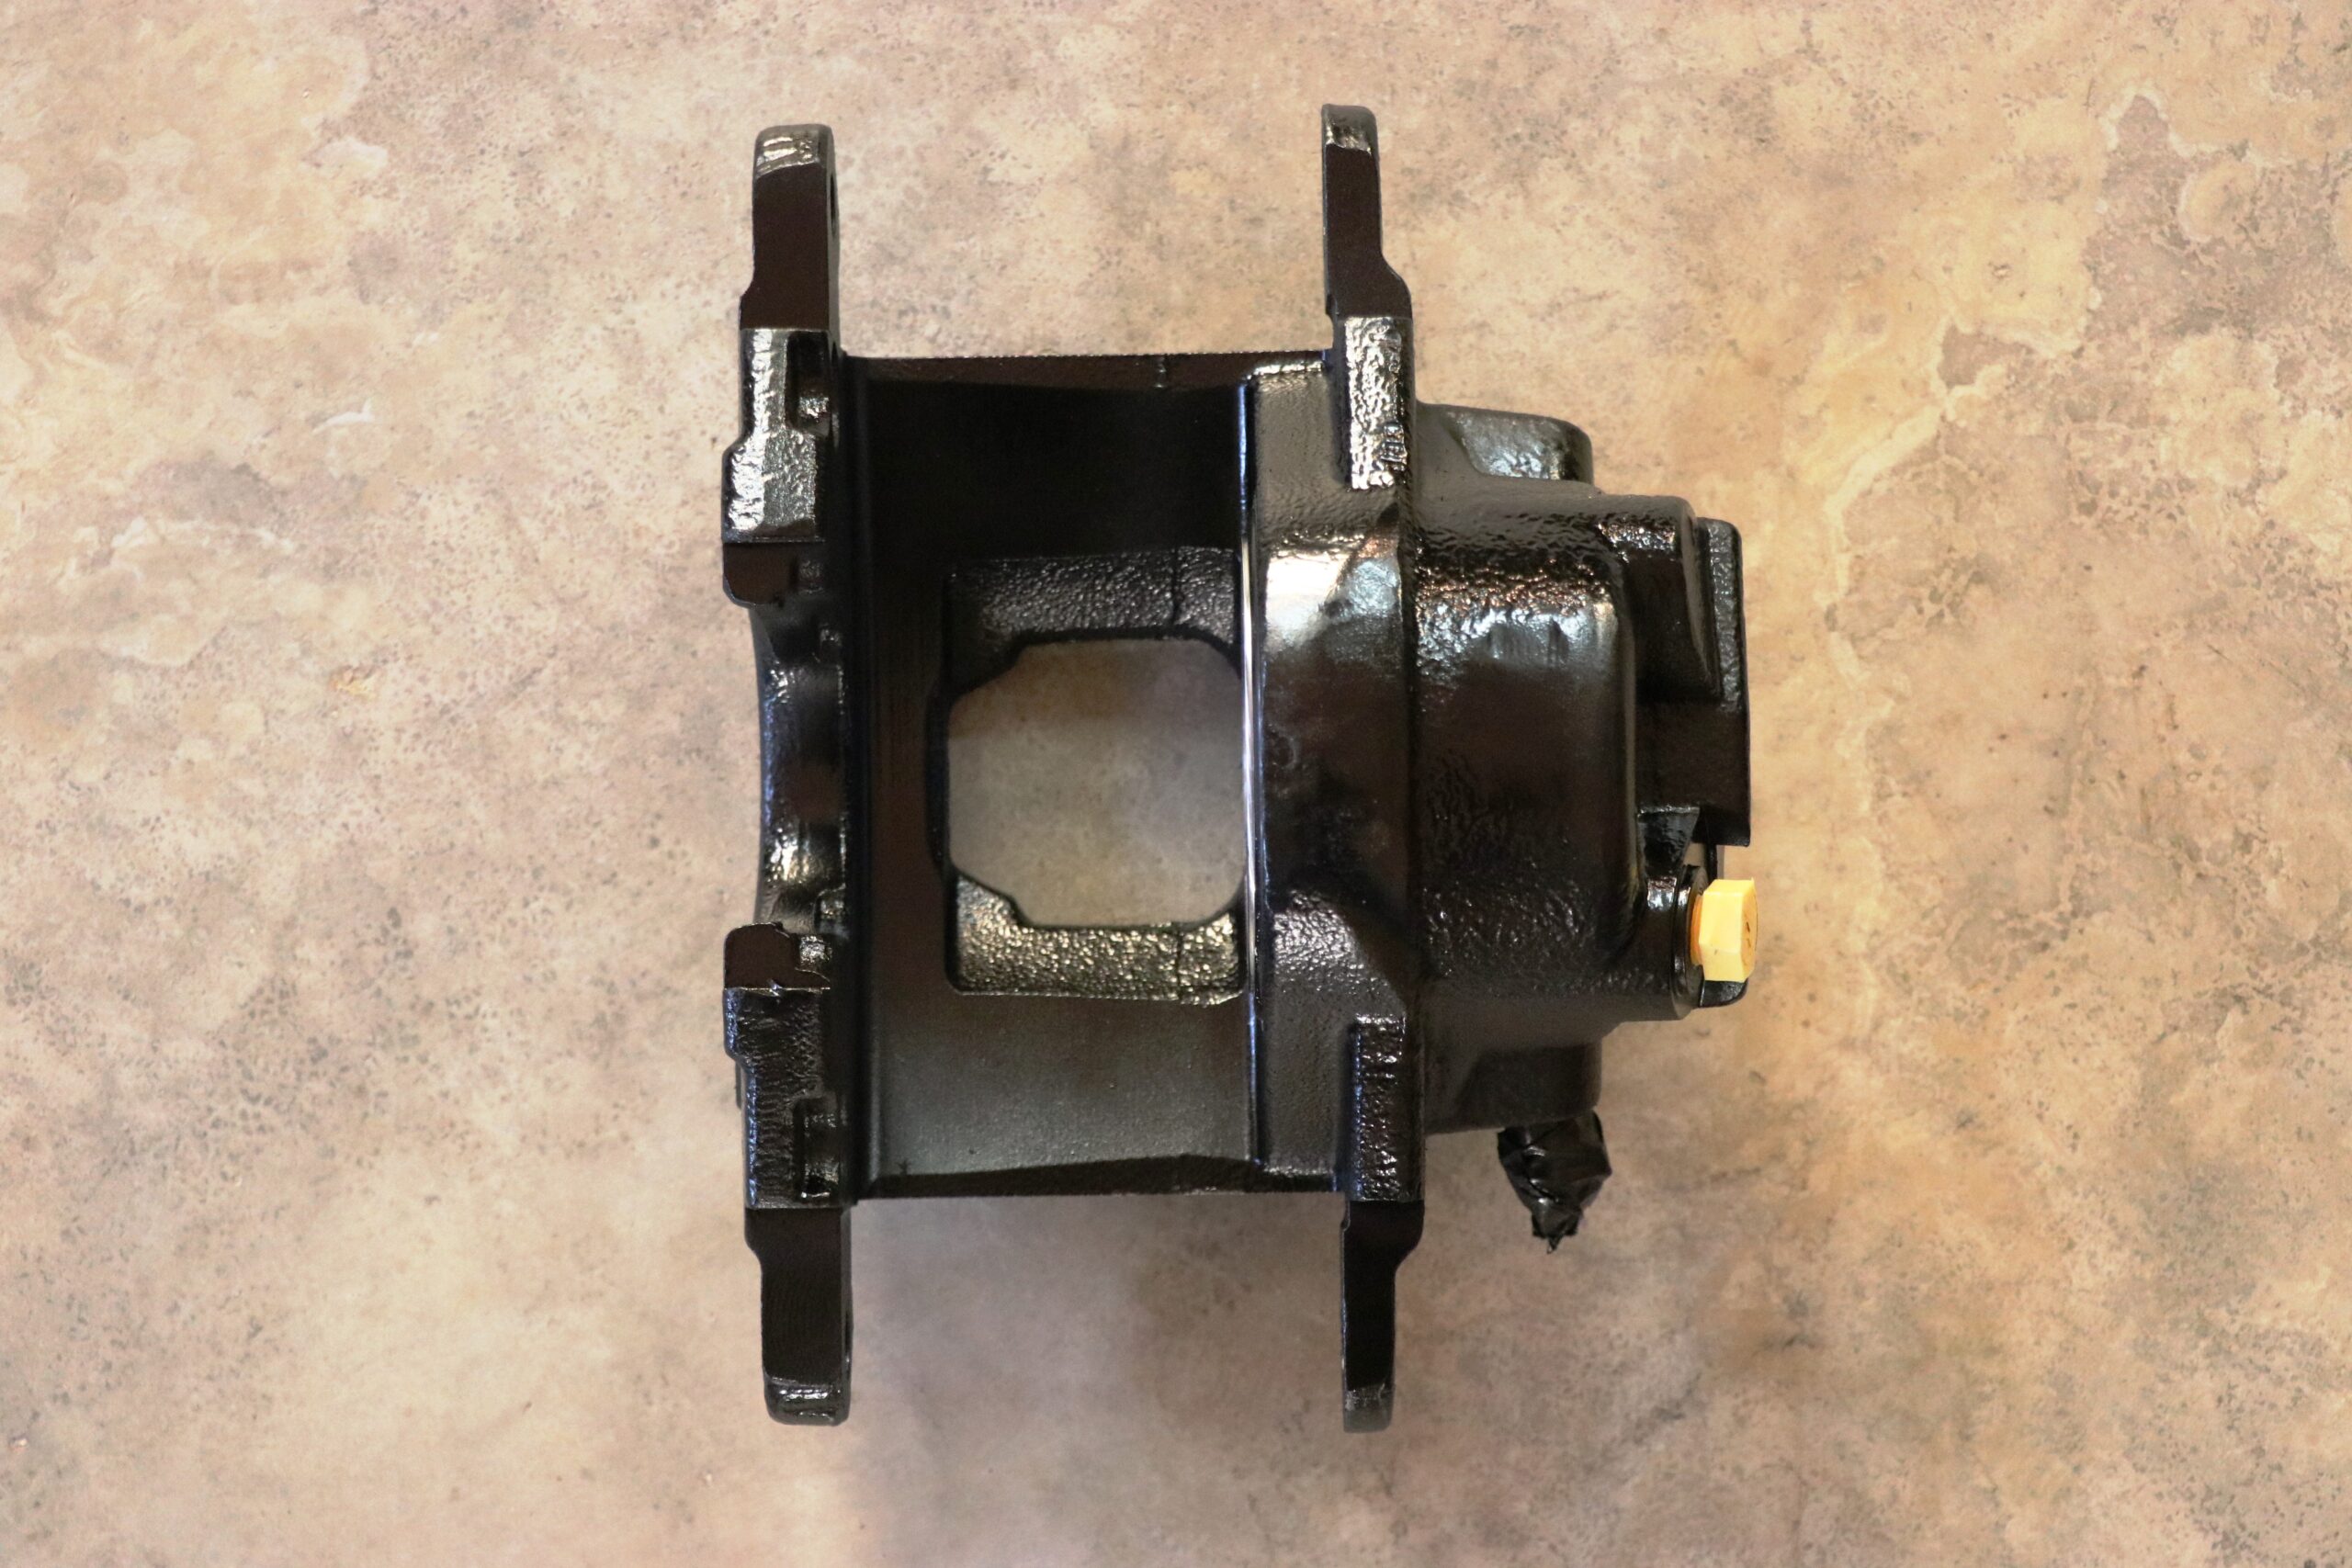
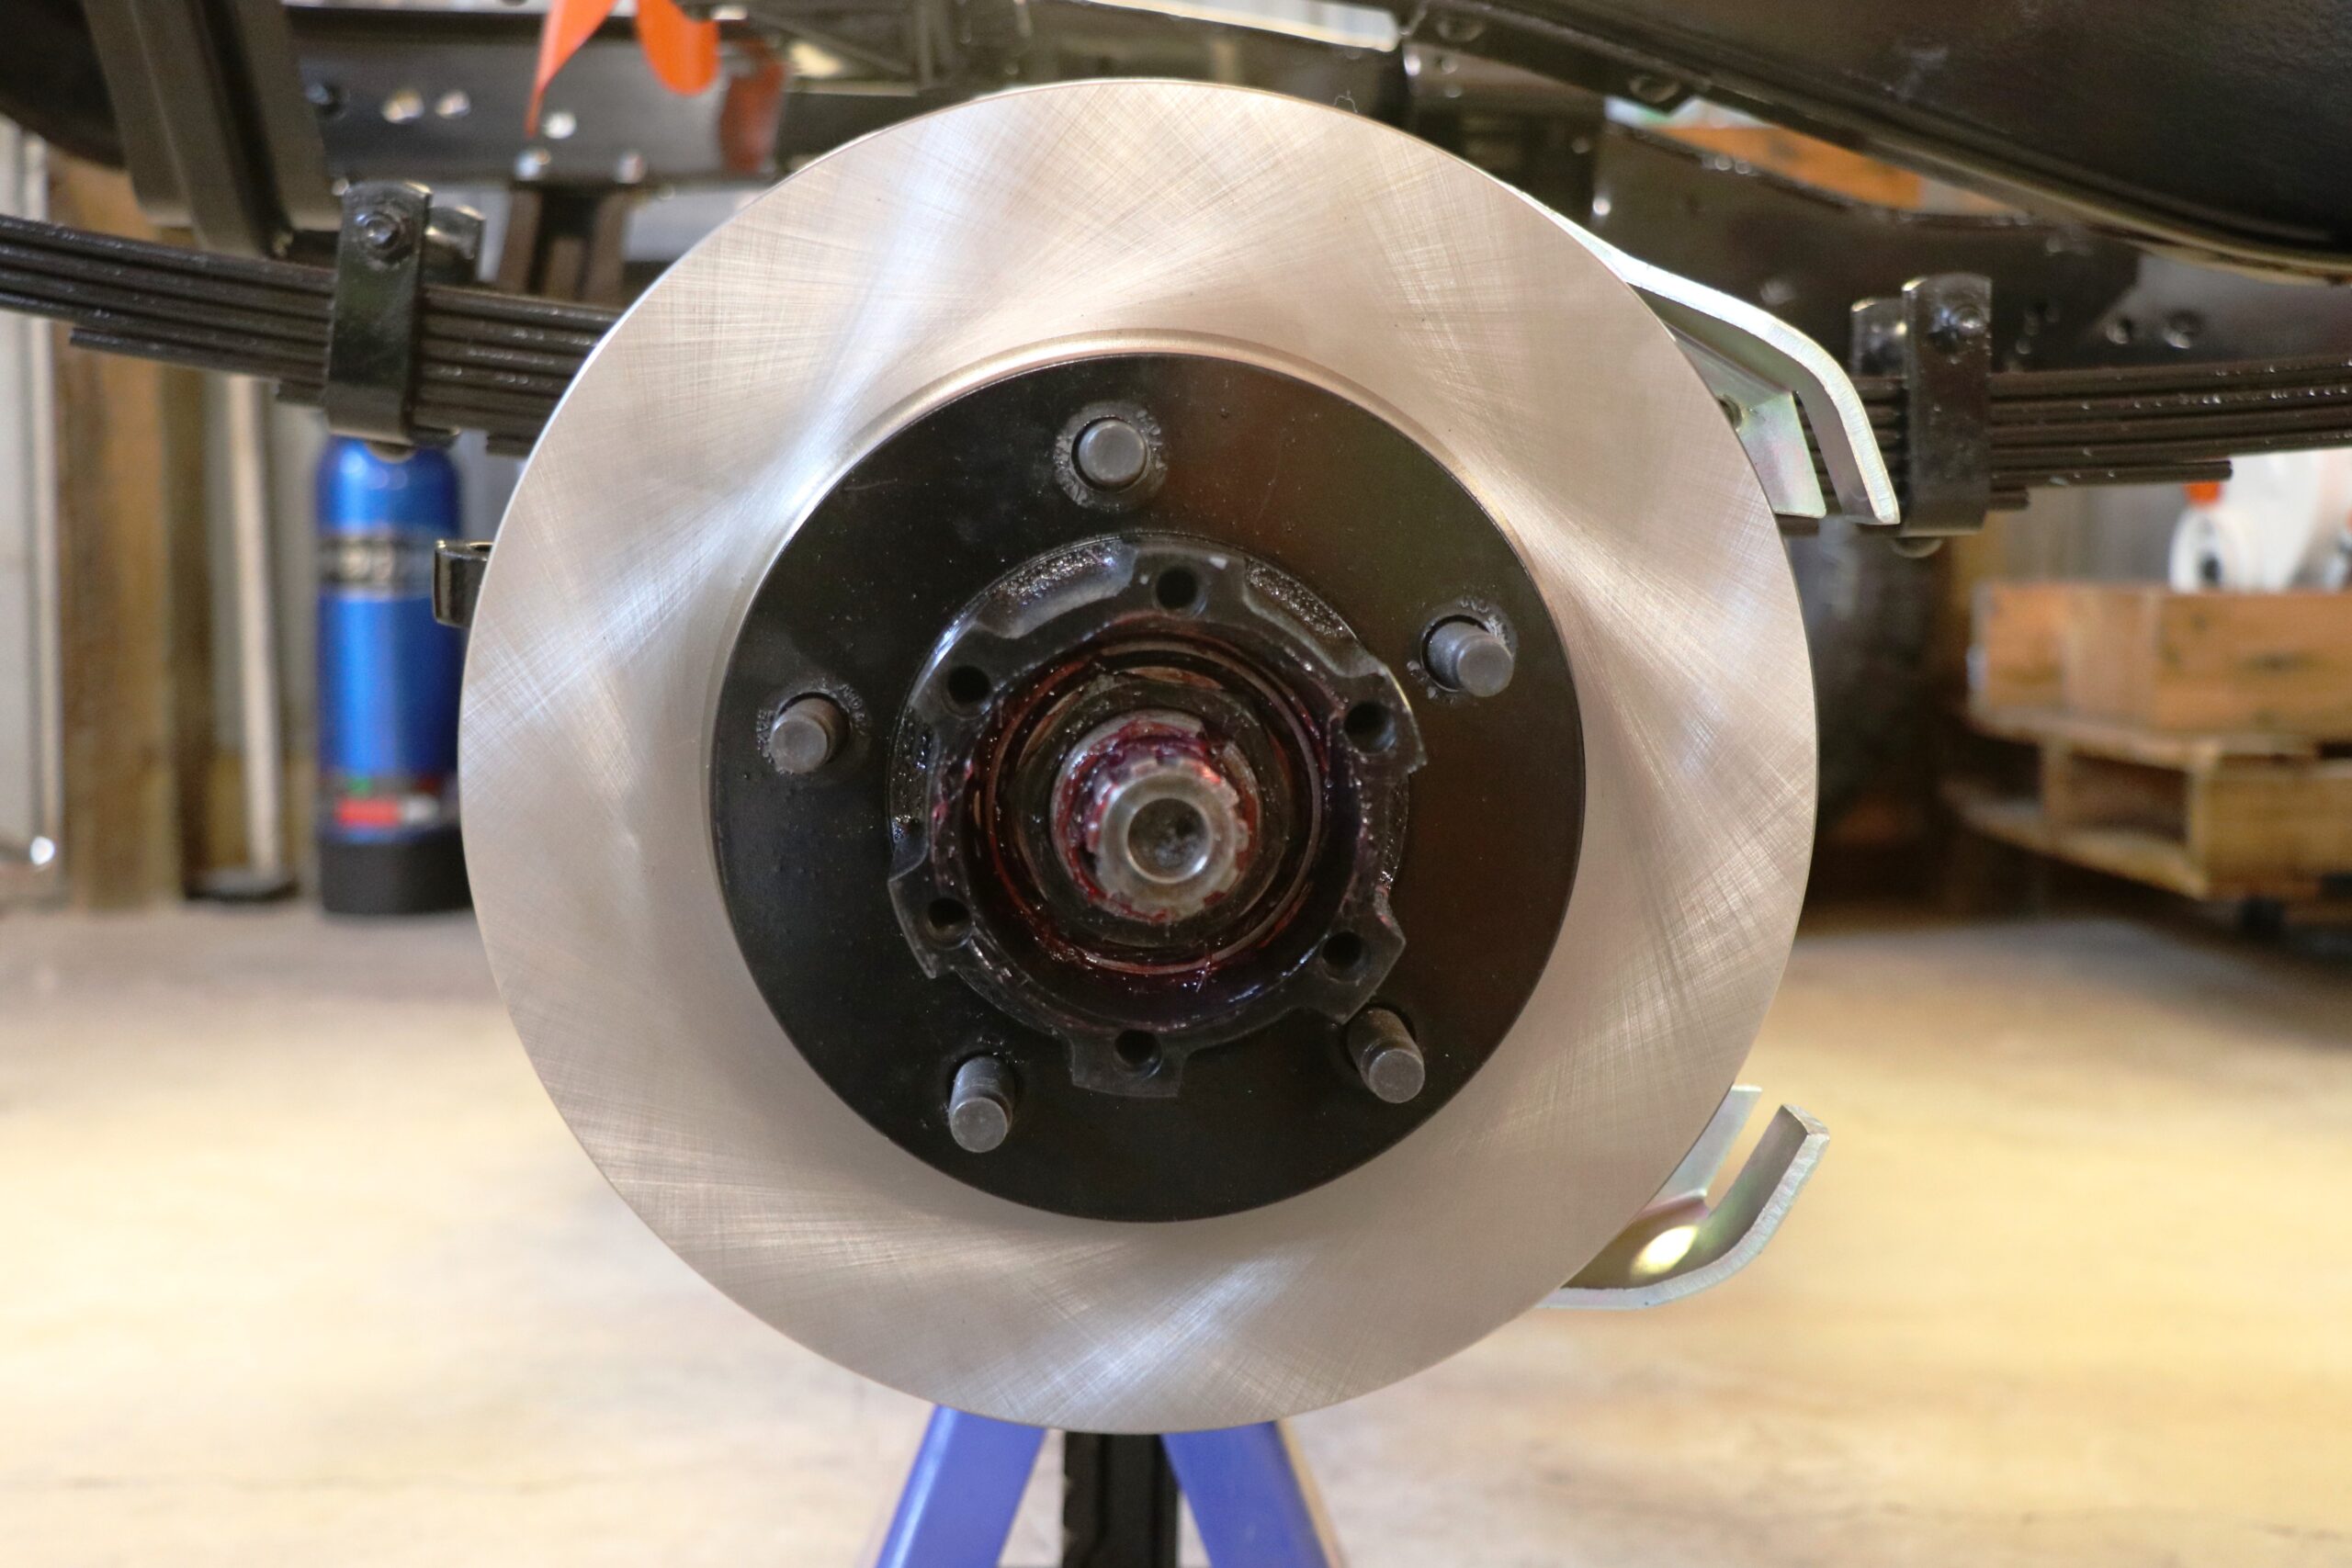
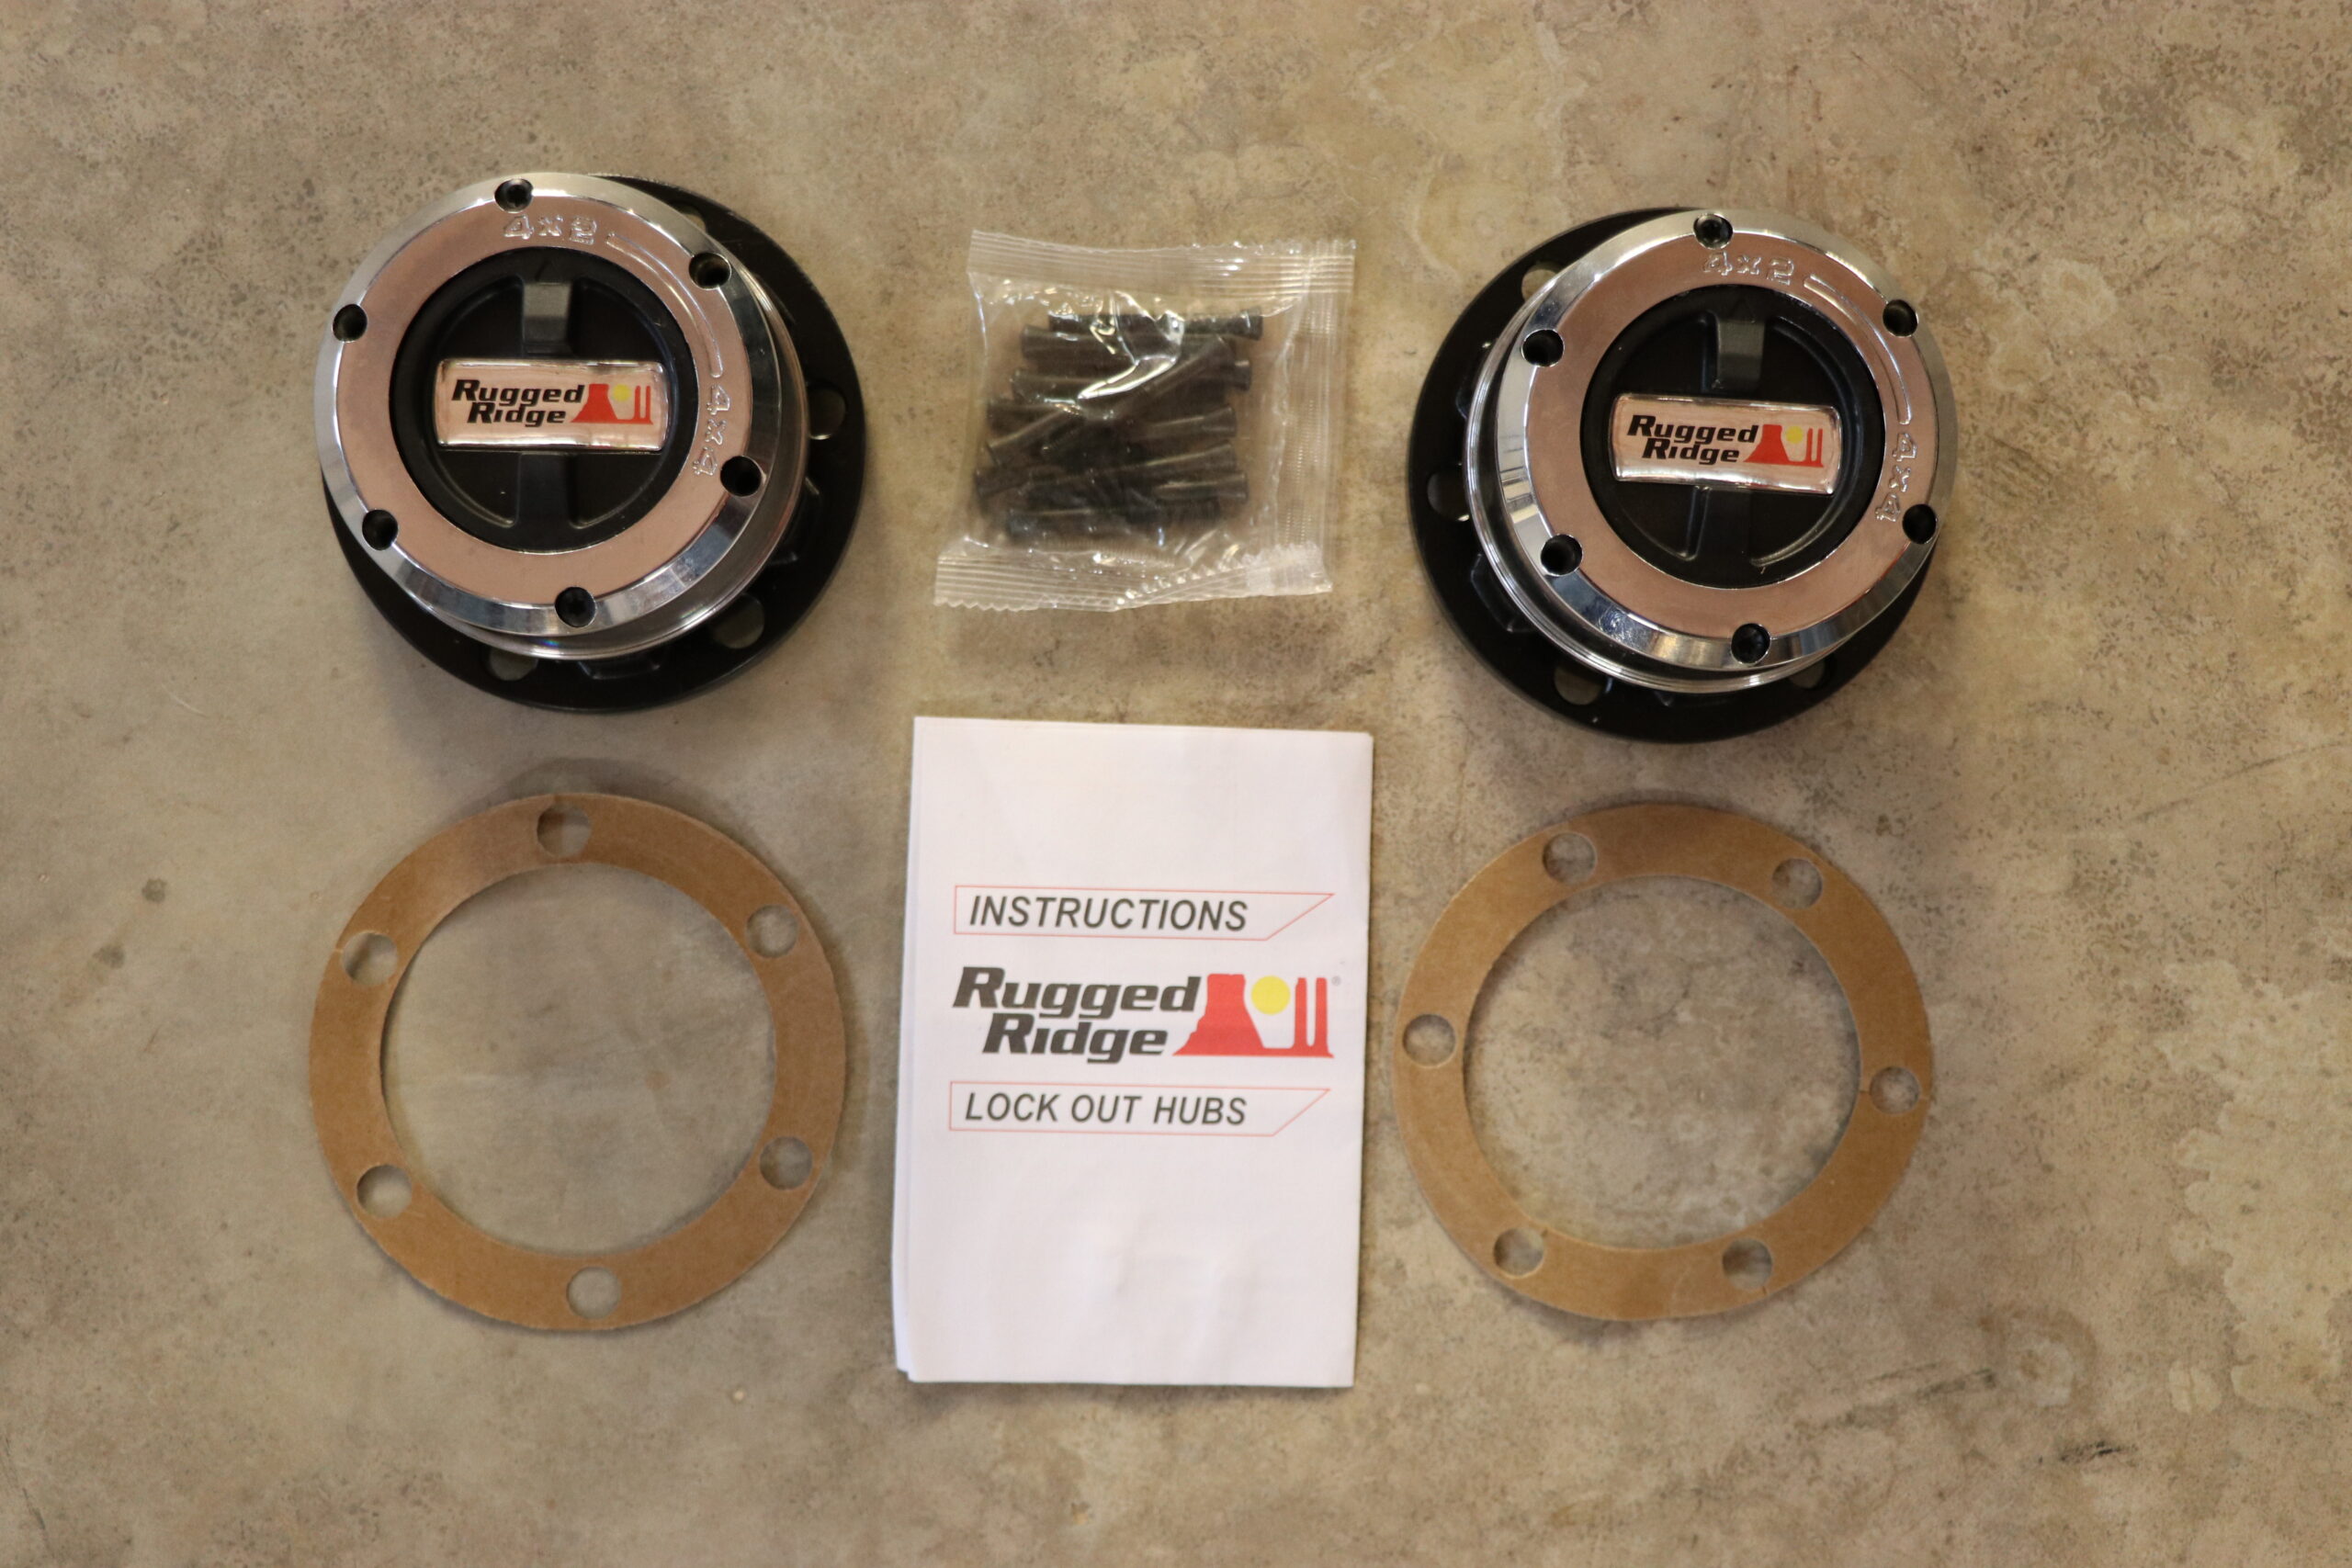
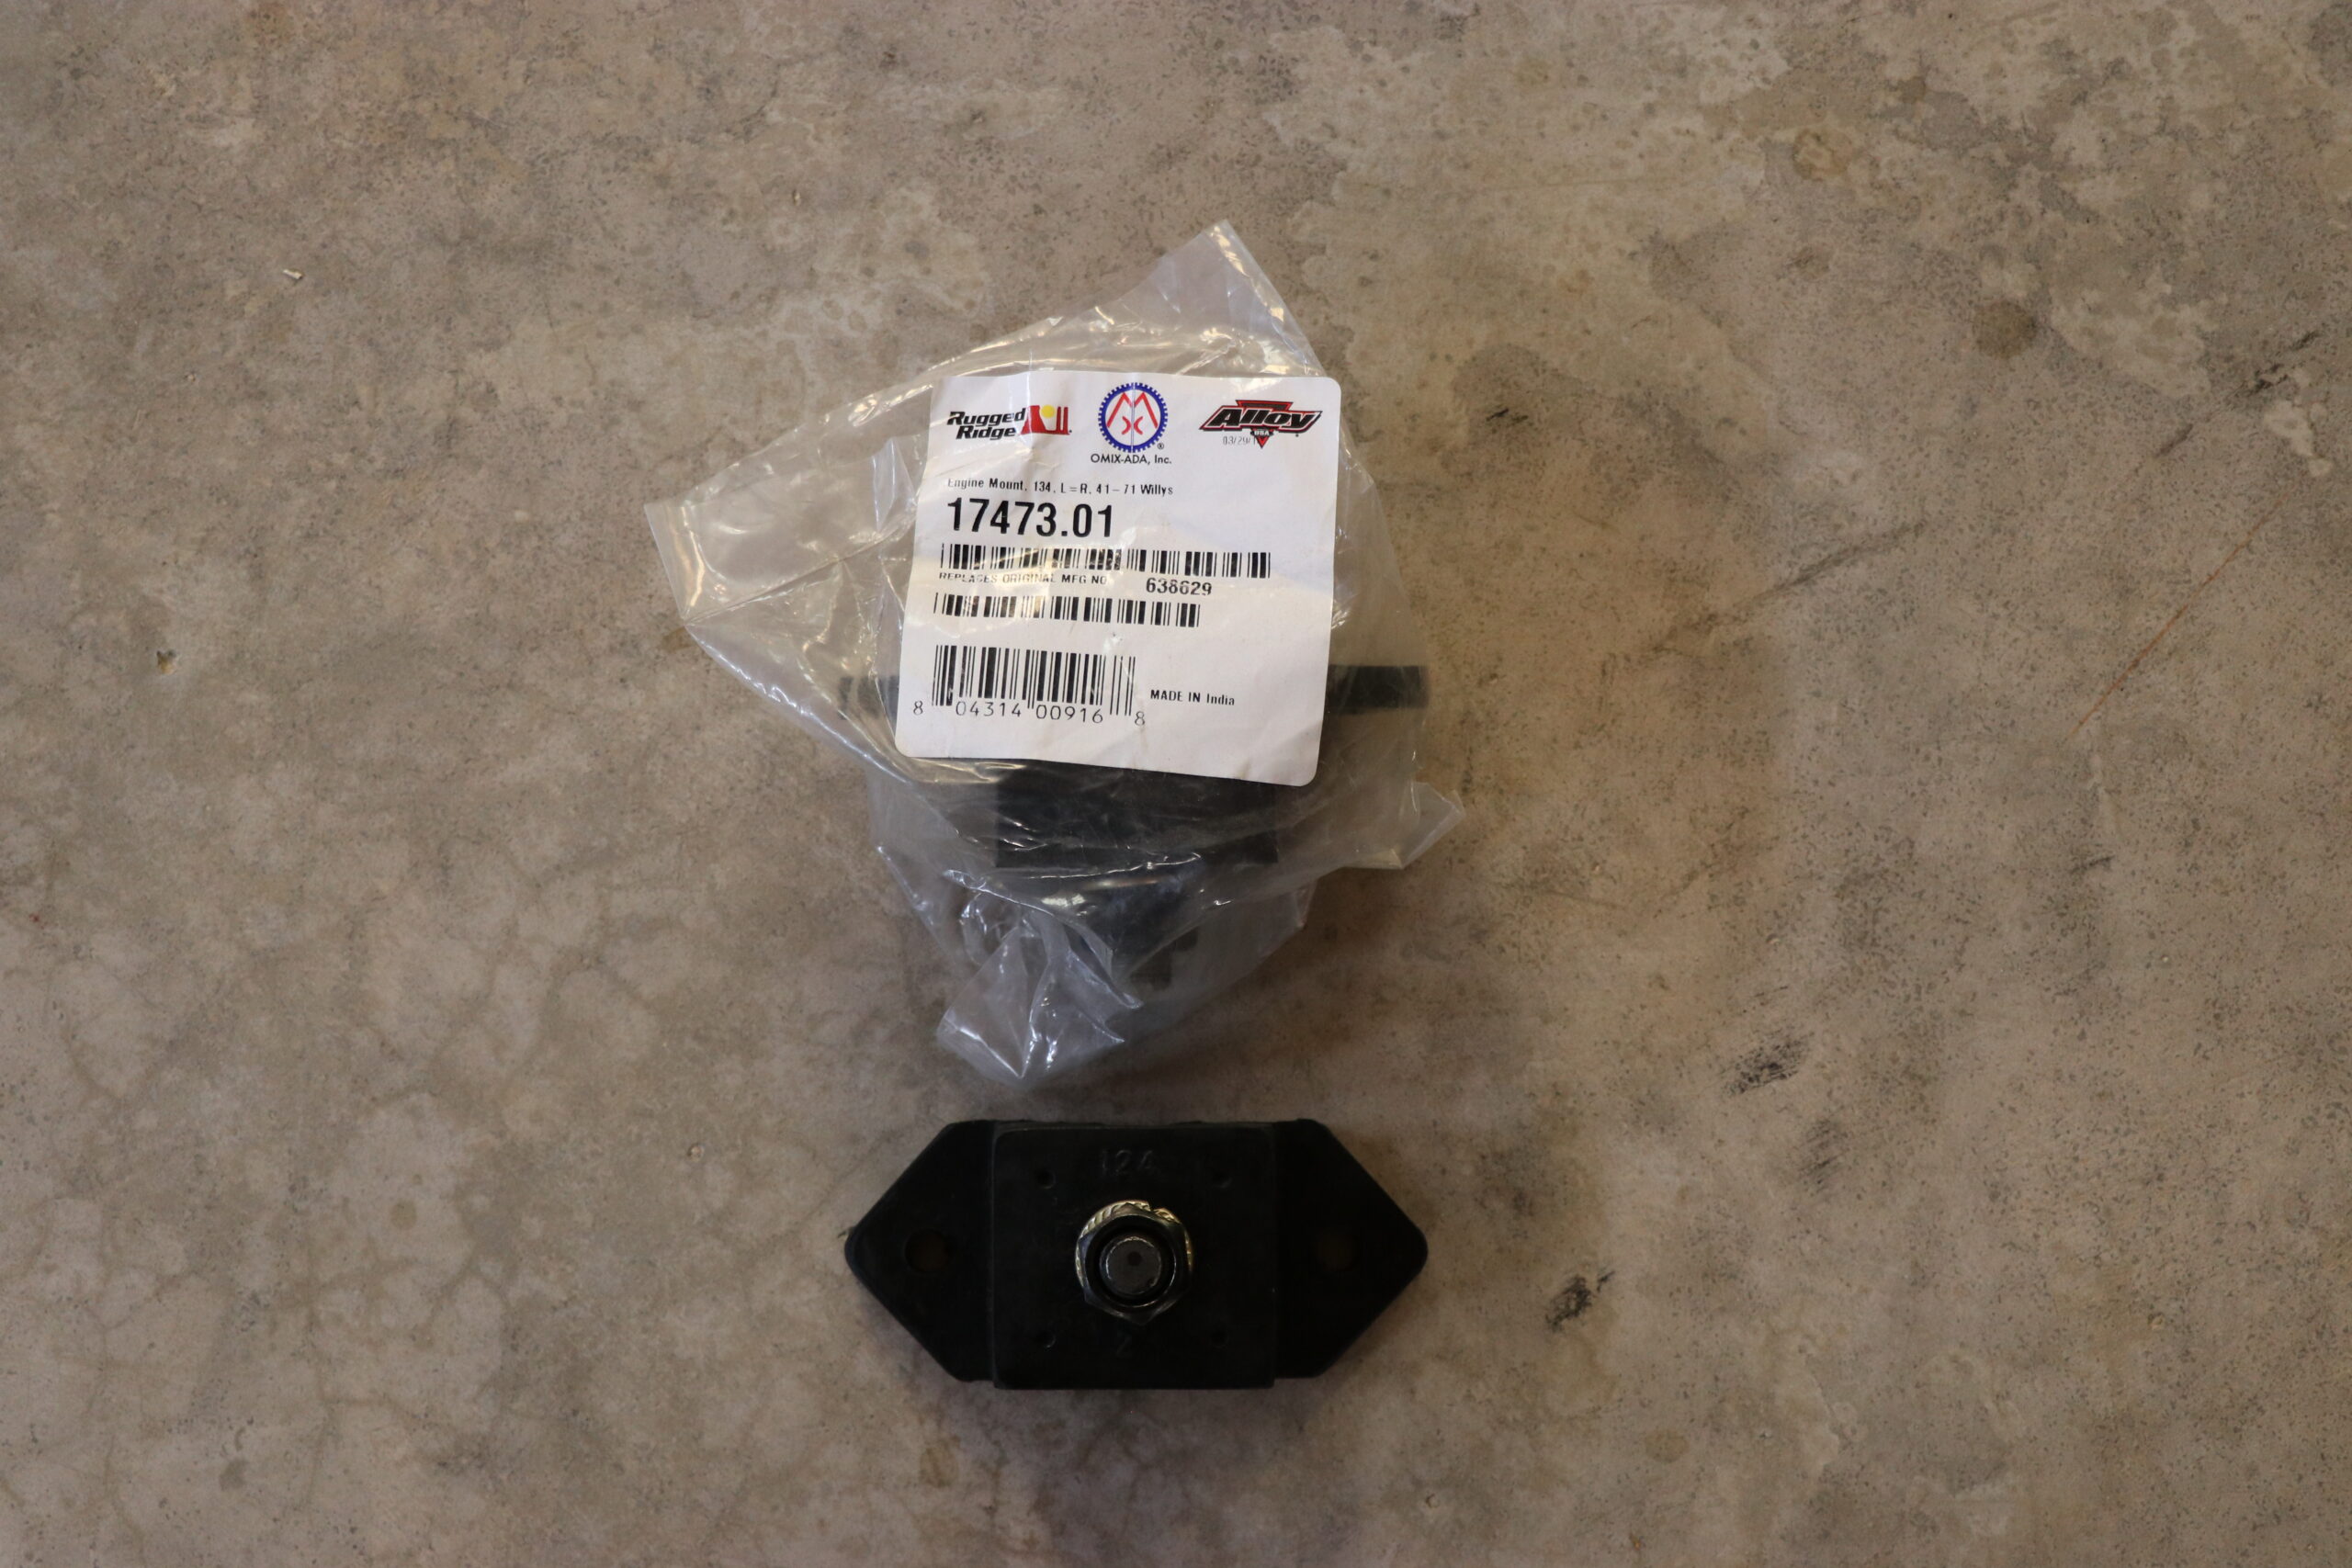
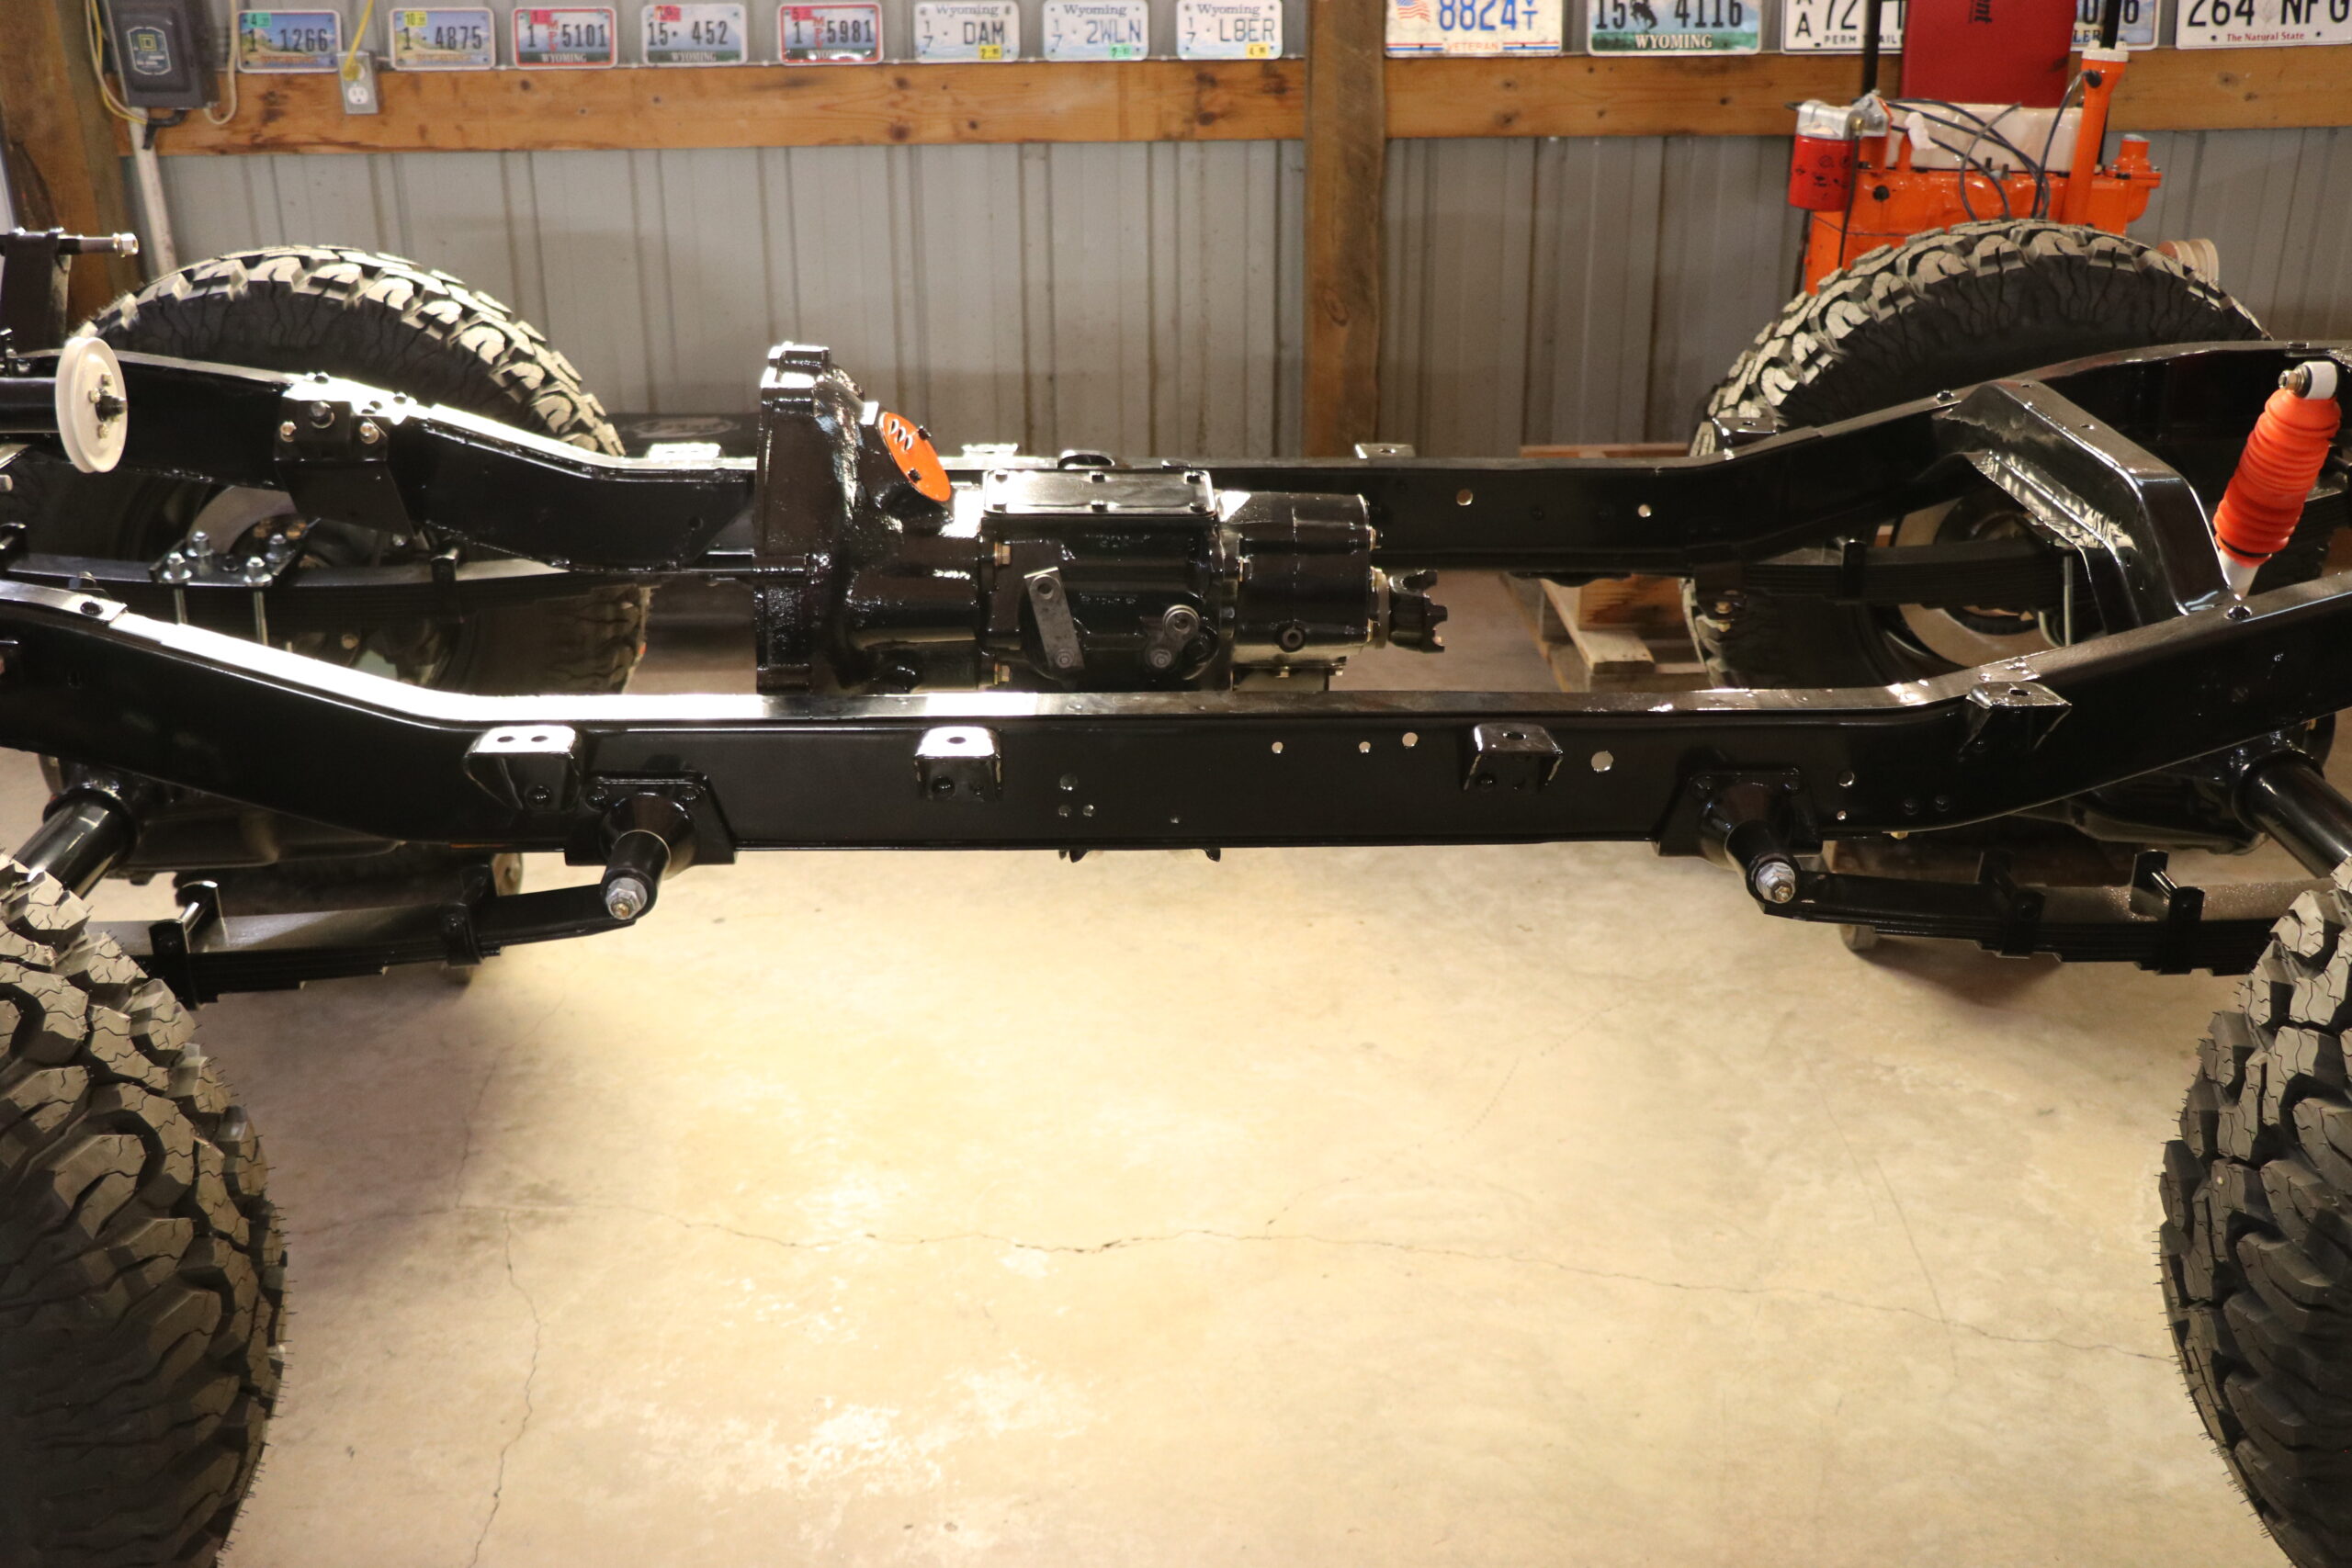
The last items to be completely disassembled were the front and rear axles. Our intention is to powder coat the axle housings before we rebuild them with new bearings and seals provided in our rebuild kits sourced from the fine folks over at Kaiser-Willys Auto Supply. Since we have the axles torn down this far and will be completely rebuilding them, it seems like the perfect time for a brake upgrade. Utilizing our disc brake upgrade kits, also sourced from Kaiser-Willys, we know there’s no time better than now to improve the stopping power of this FC!
The last parts to be dropped off and the first that will be refinished and the base for our build will be the front and rear axle housings. Another trip over to see the guys at Rugged Werx and they were delivered, once we get those back we will begin the process of putting humpty FC back together.


Since the guys at Rugged Werx have a large work area and plenty of experience with projects of this nature, we knew the cab and box from this FC would be in good hands and well protected while we worked on the priority items first. Both were delivered for work that would be addressed down the road but it seemed like a good idea to have them there for when the time would come.
Anyone who has ever done a build of this caliber or a ground up restoration knows how long the process can take. The tear-down is the easy part, waiting on replacement parts, items from body shops or a motor rebuild can be gut wrenching; especially as the anticipation of recreating a rare vehicle looms over ones head. We absolutely experienced this as the groundwork items were either being powder coated, shipped or being built. During this time and process we were forced to take a class in patience while being reminded that “Reality TV” isn’t real, full builds don’t happen overnight without a full crew working behind the scenes to make it happen.
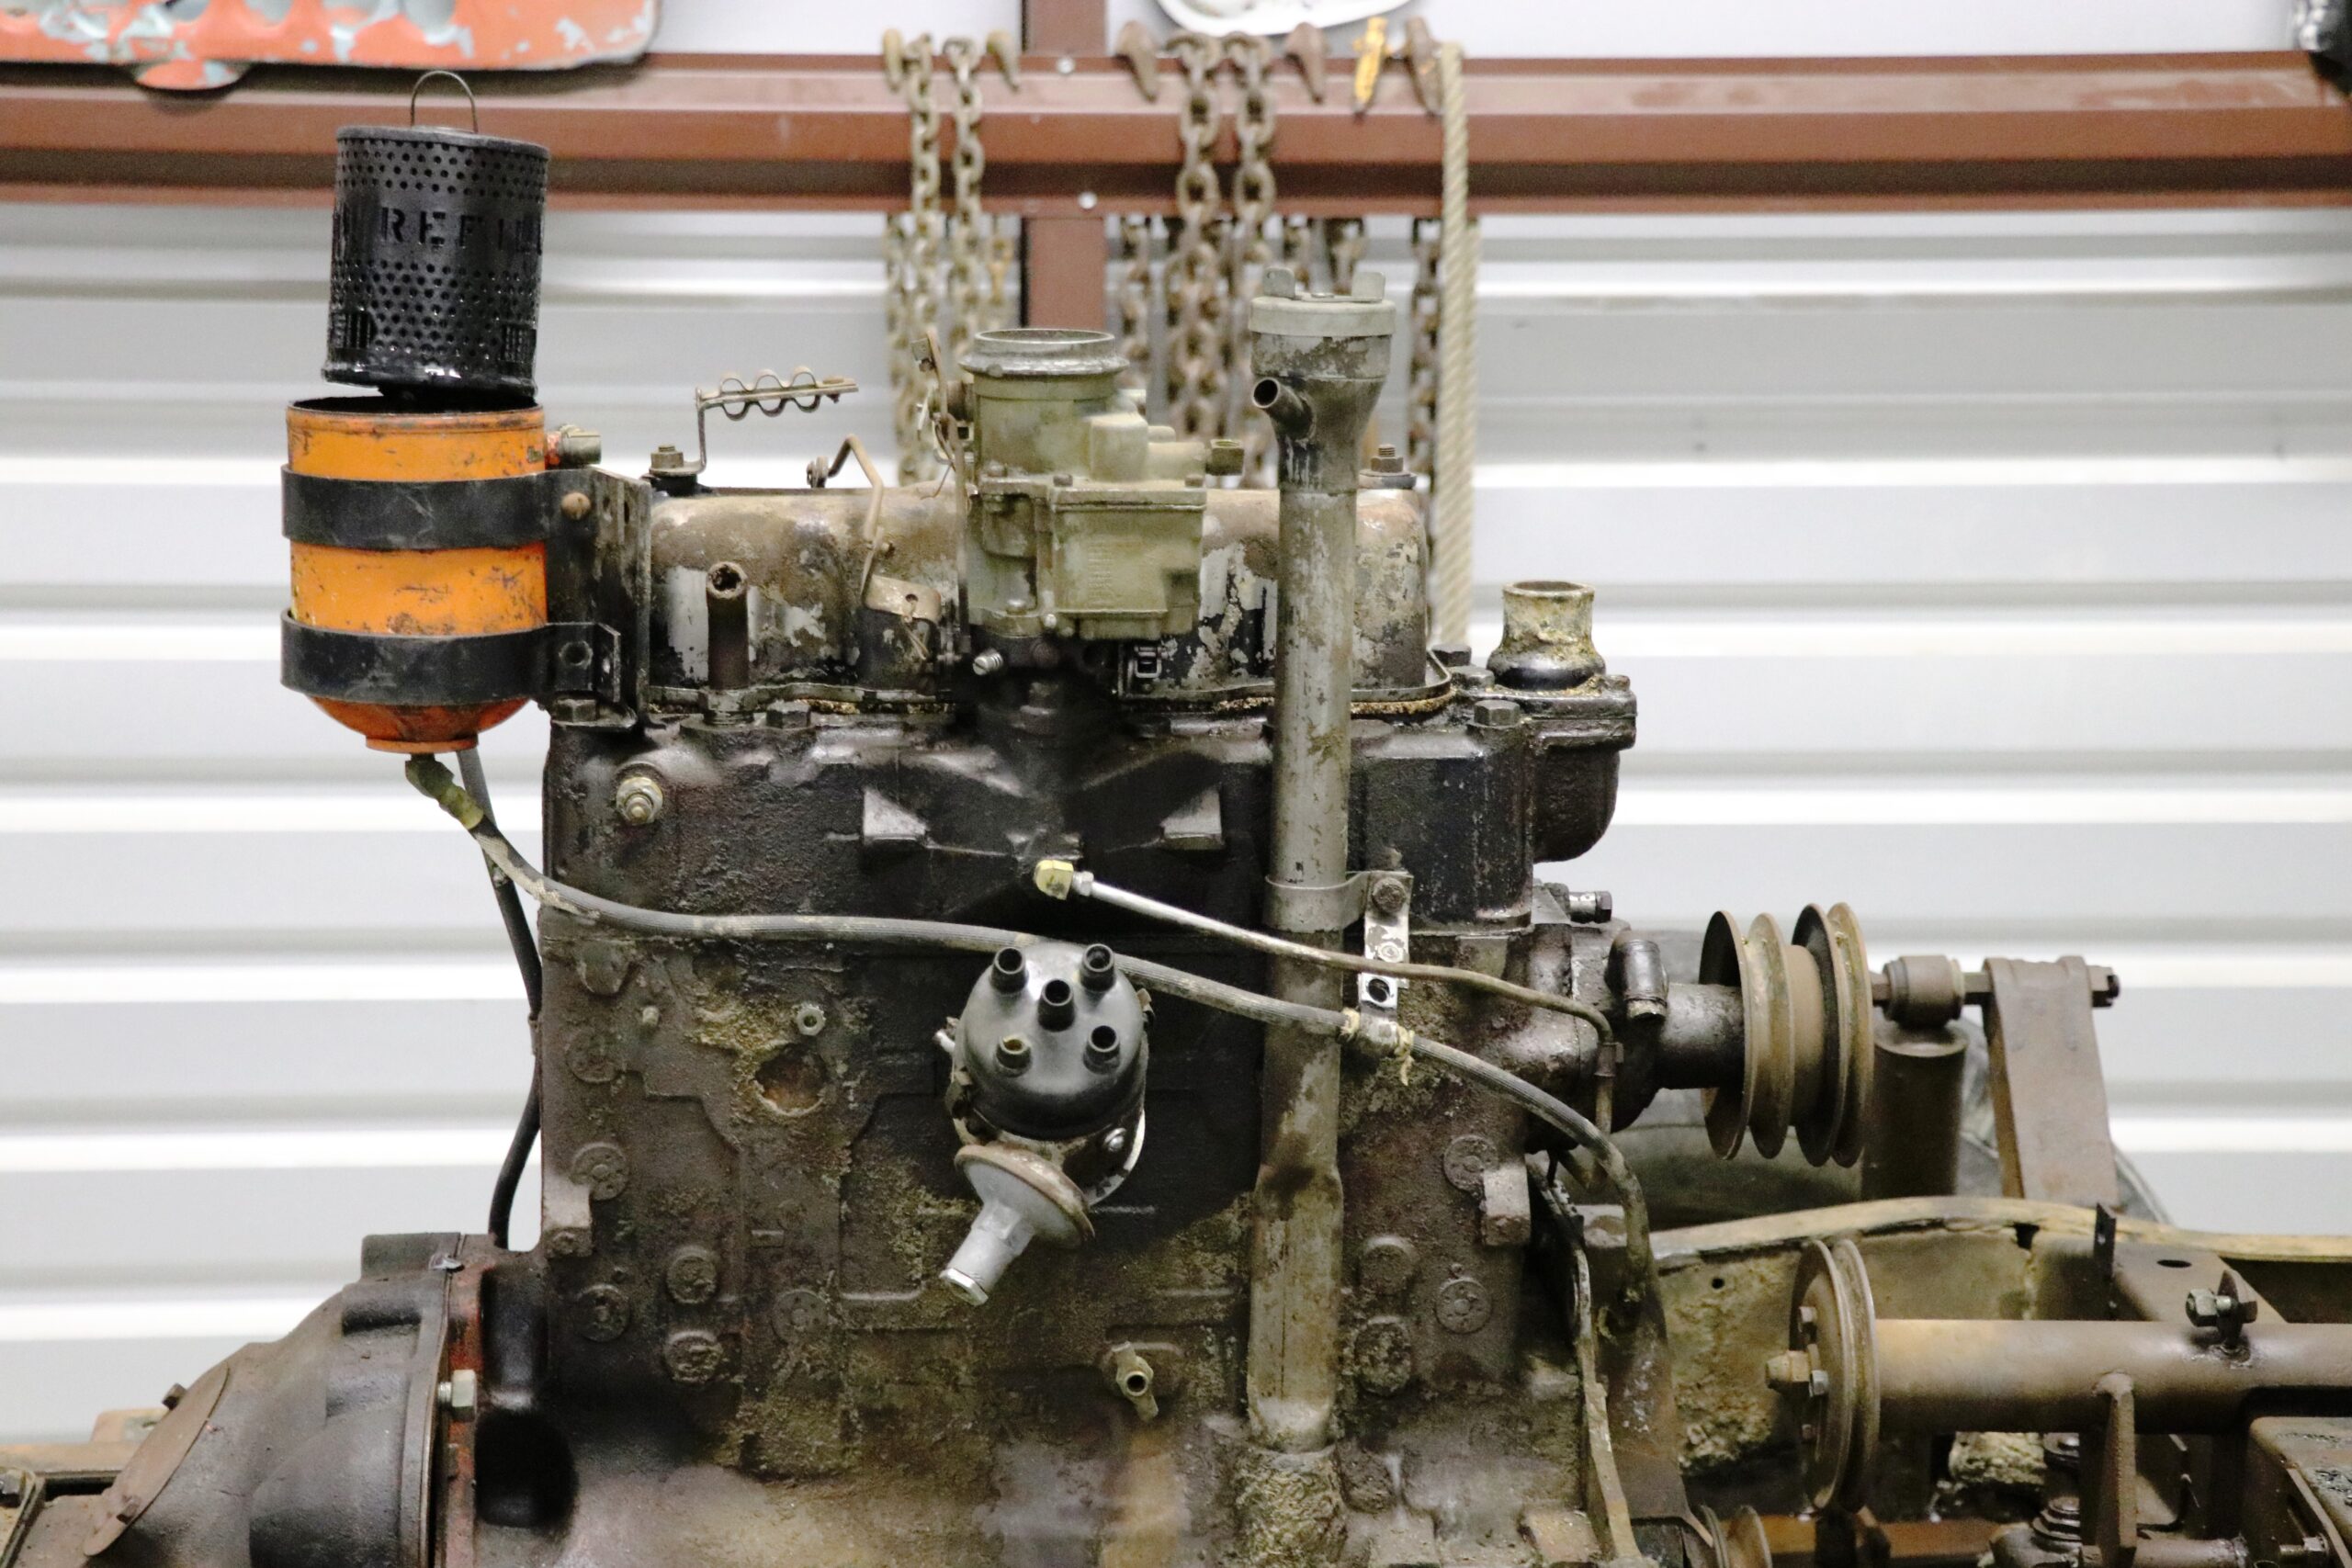
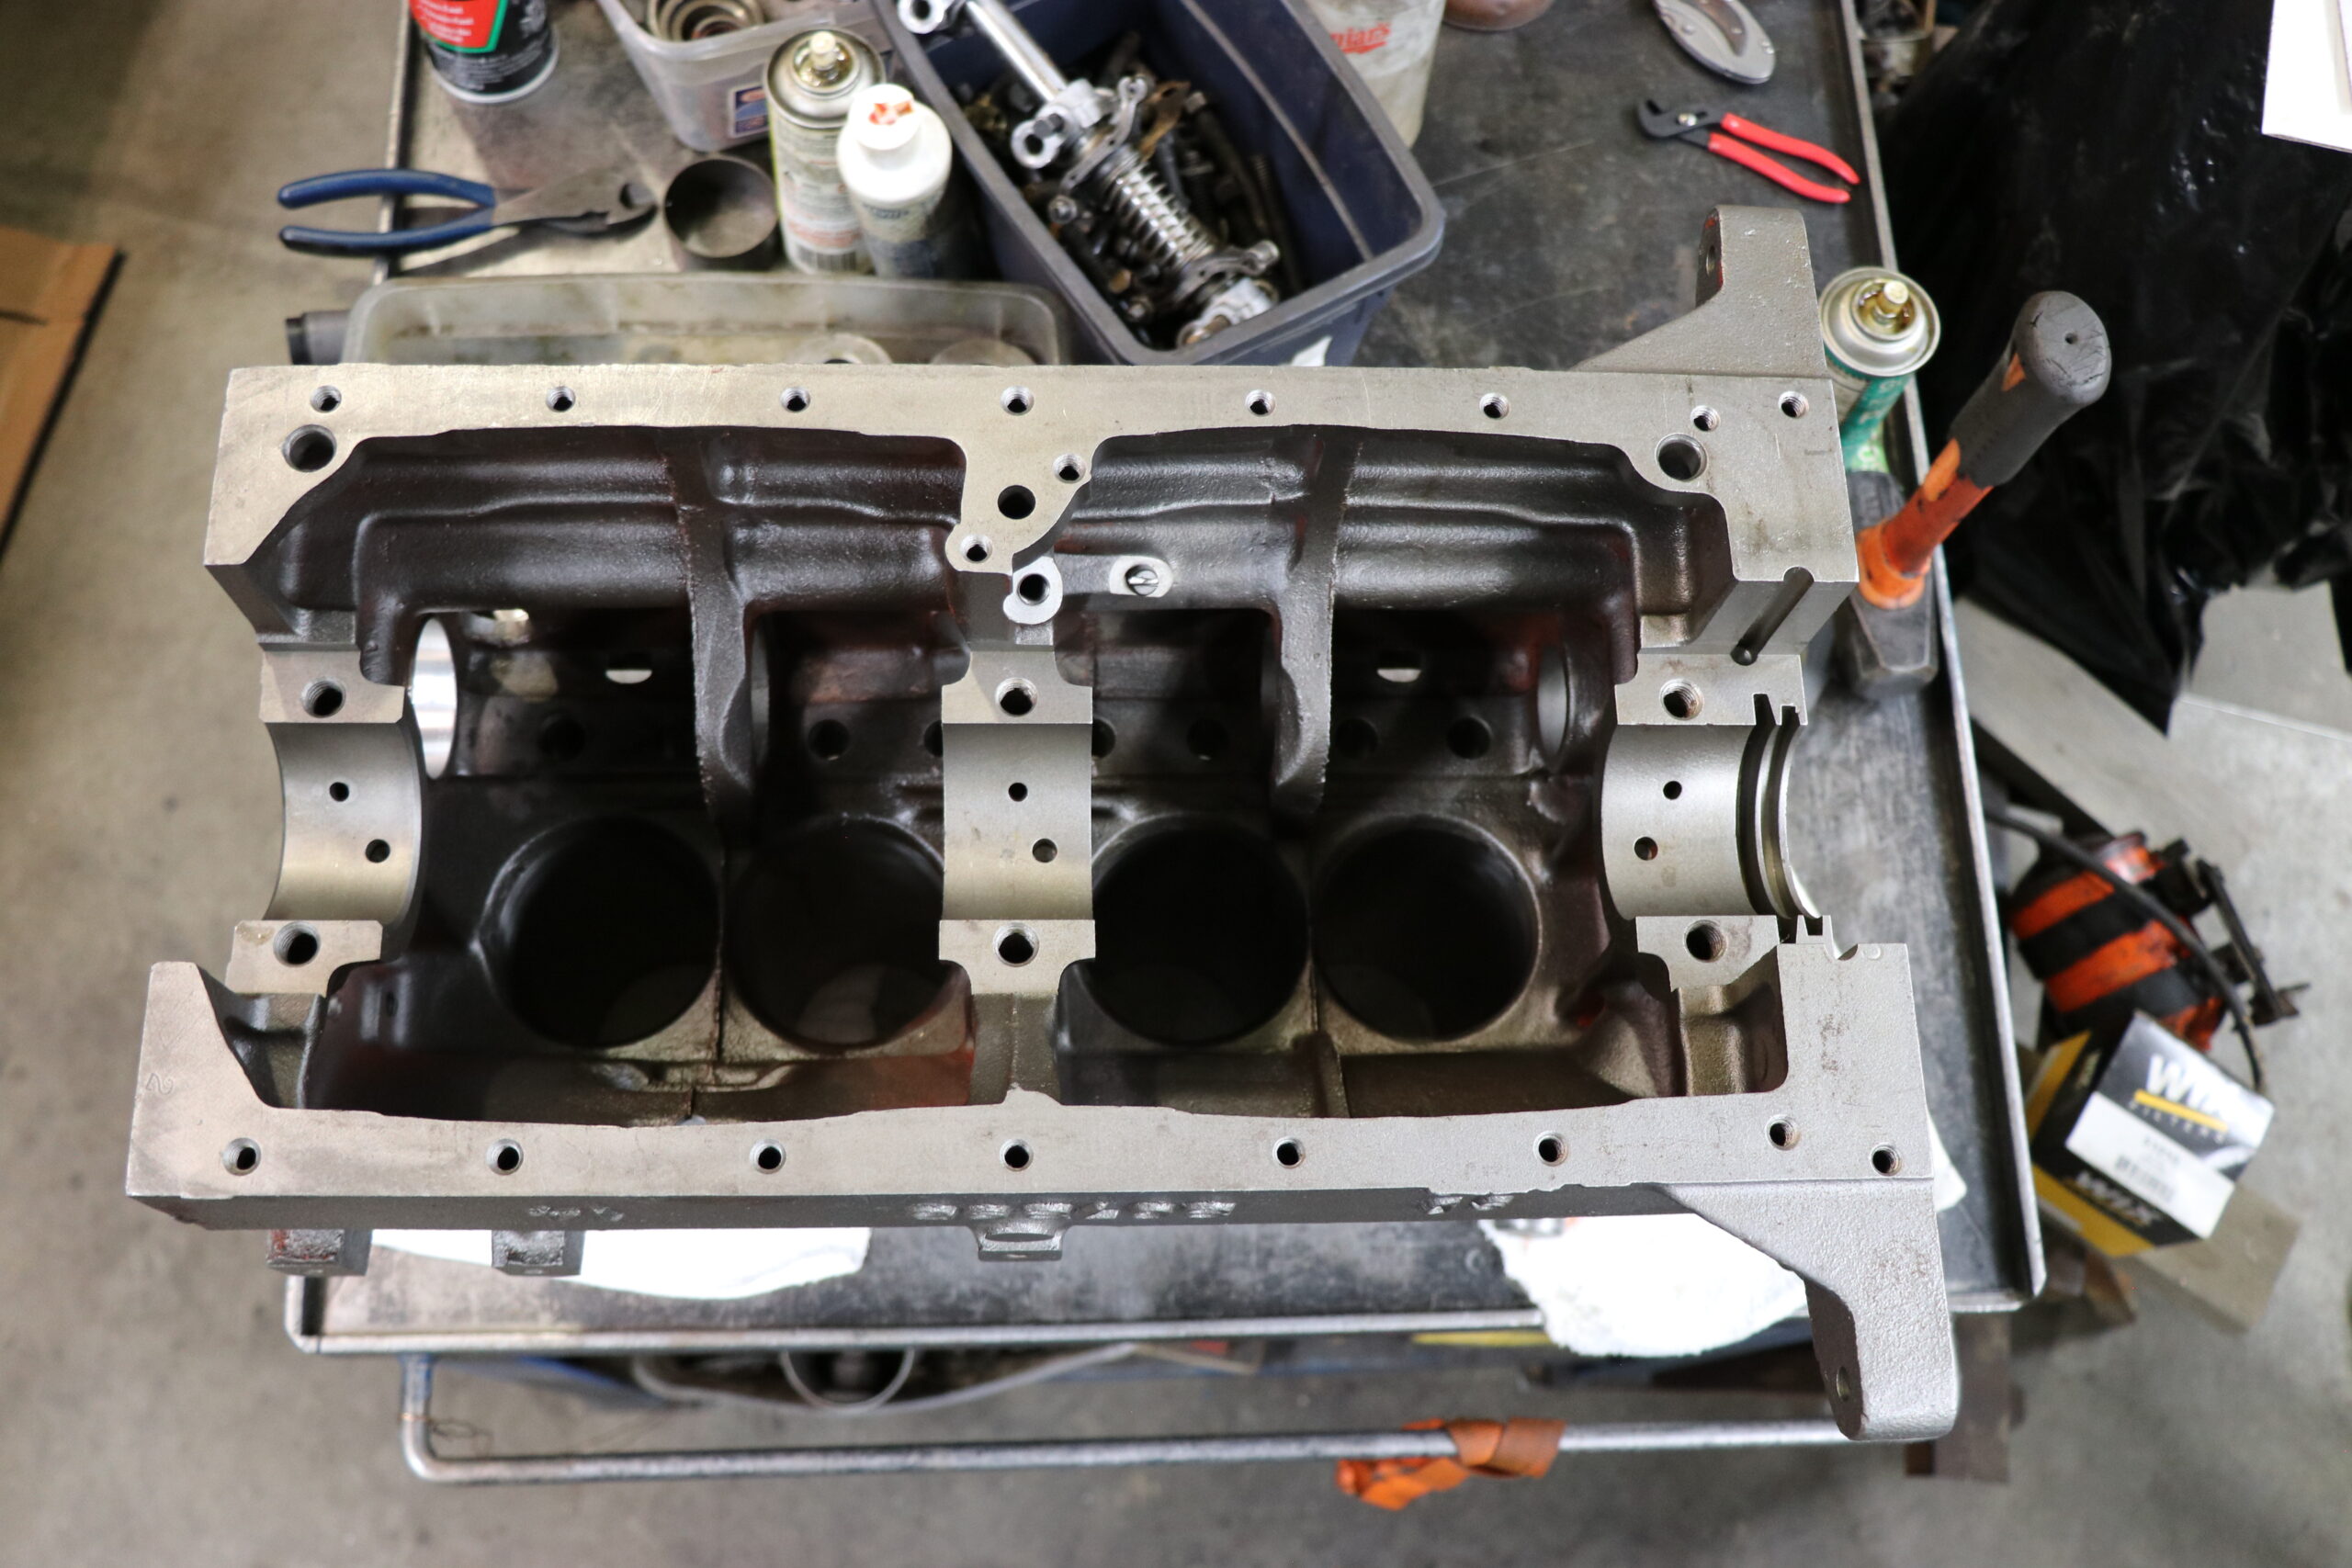
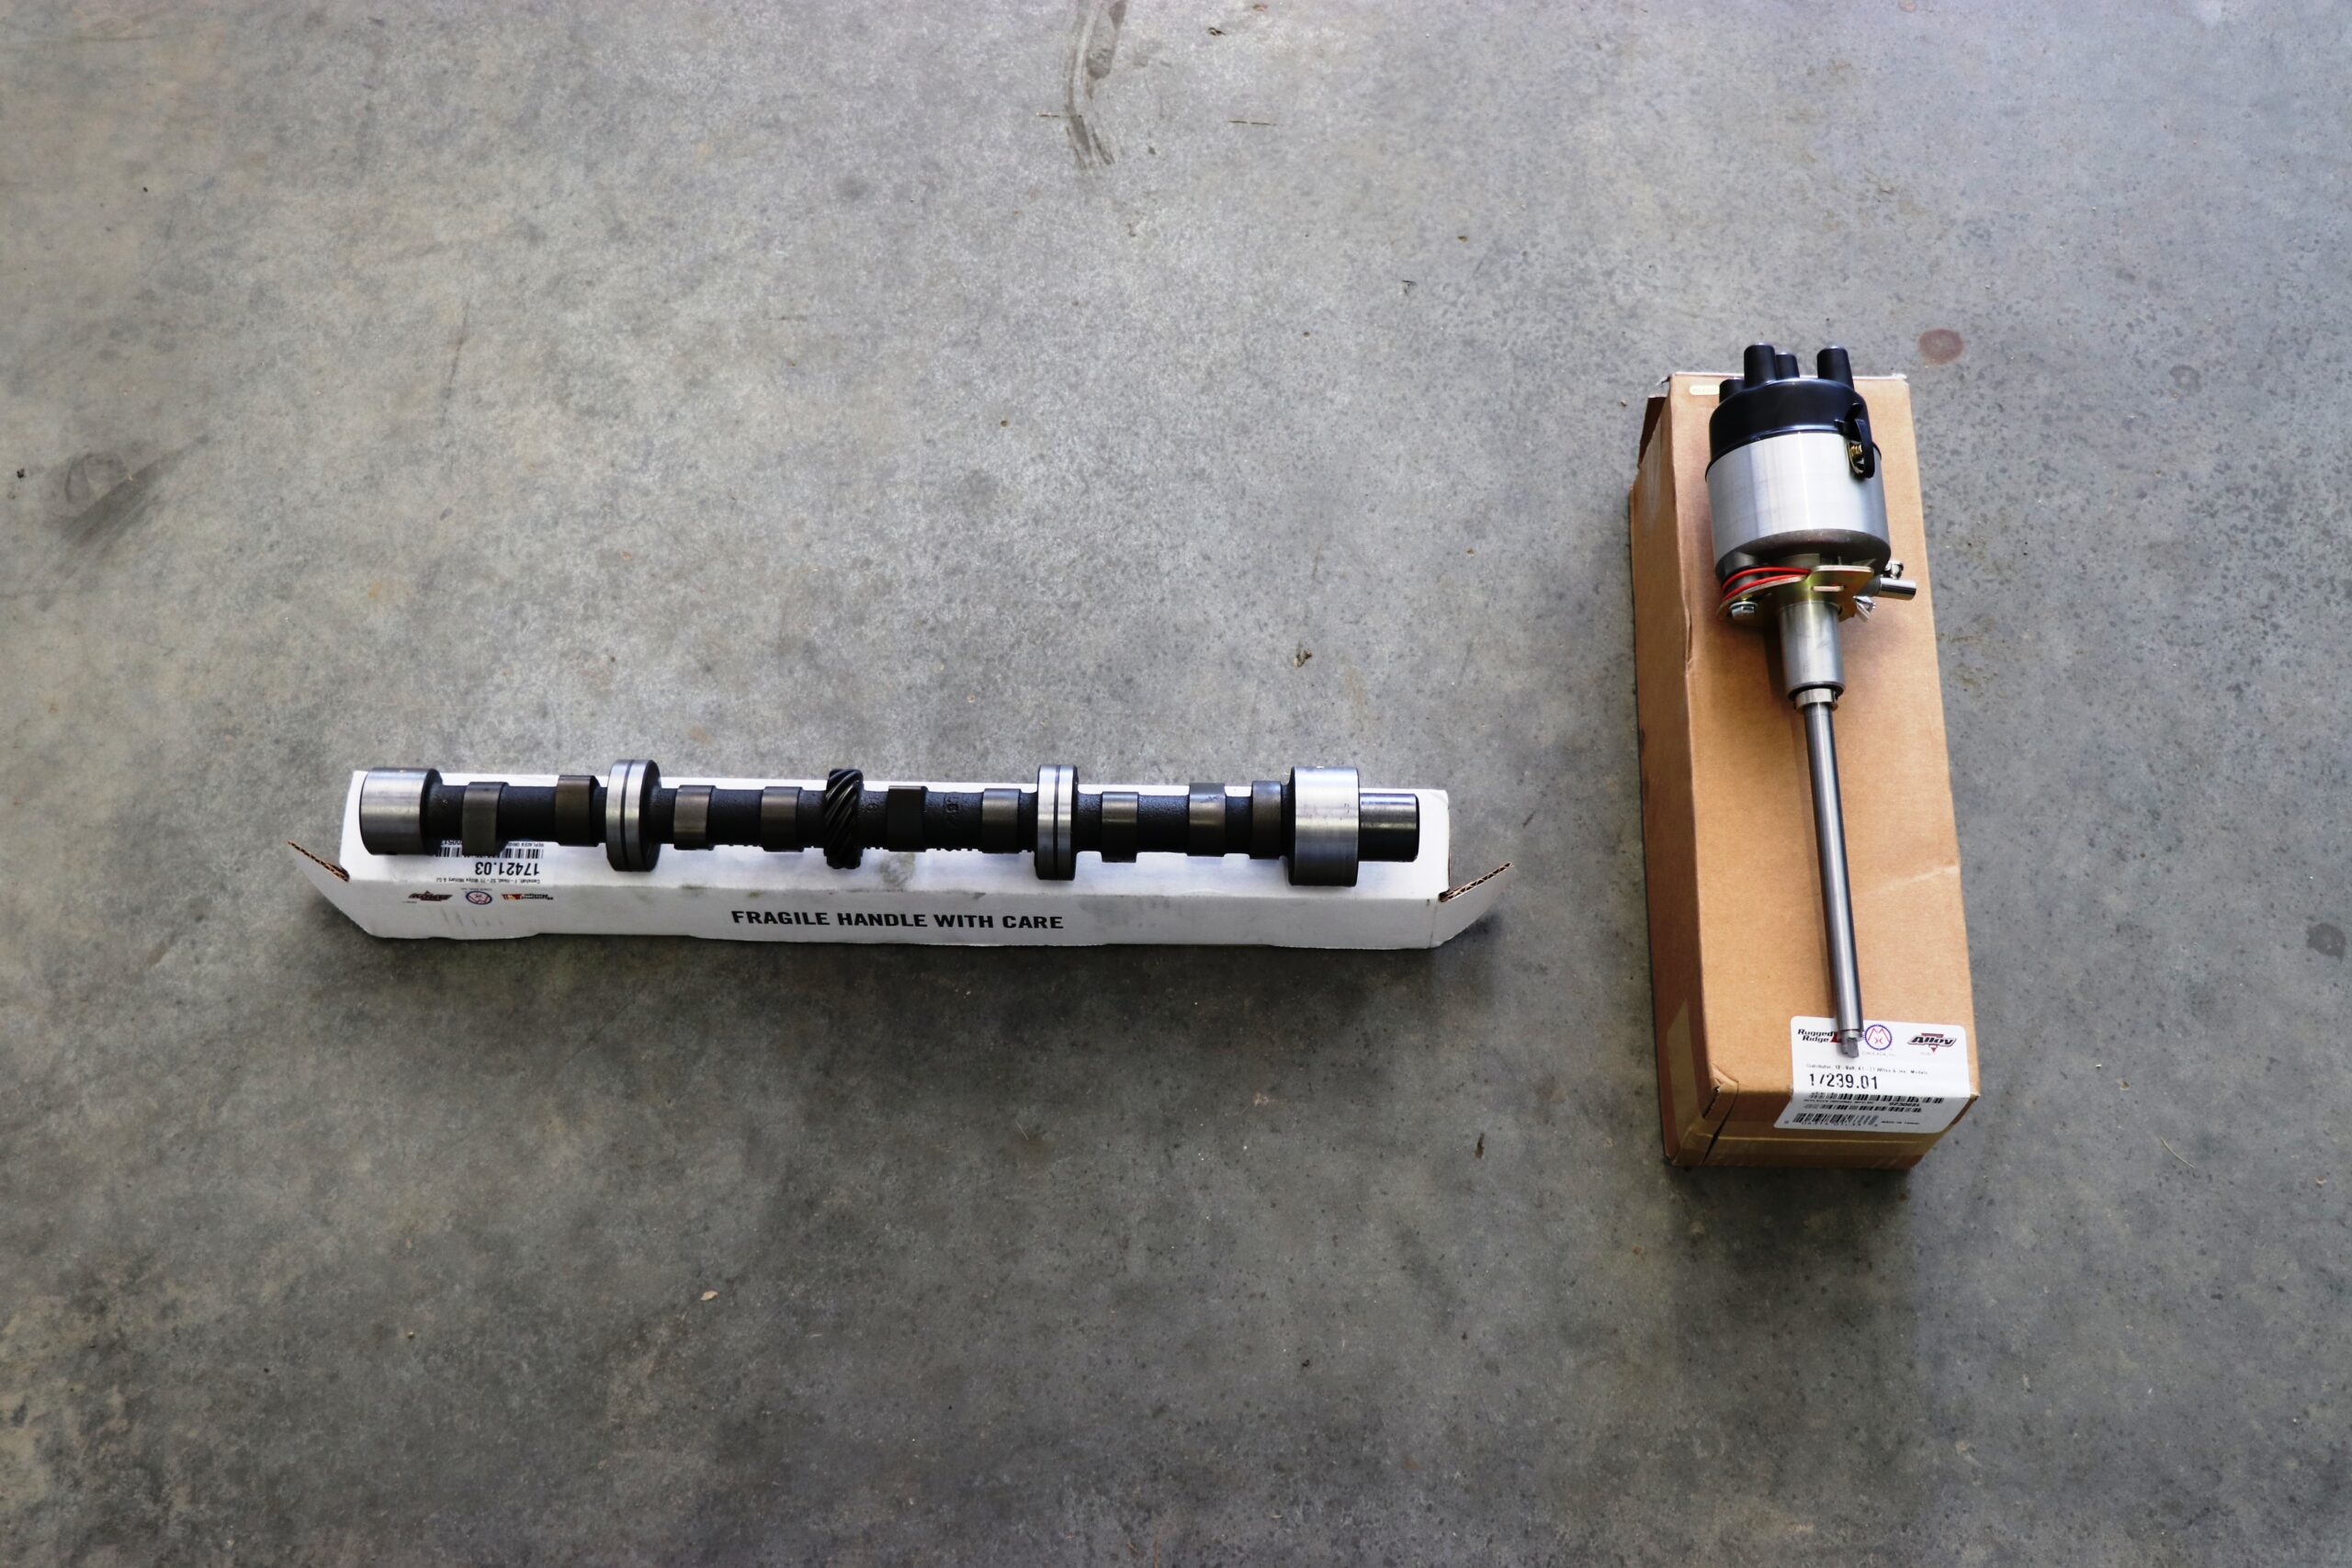
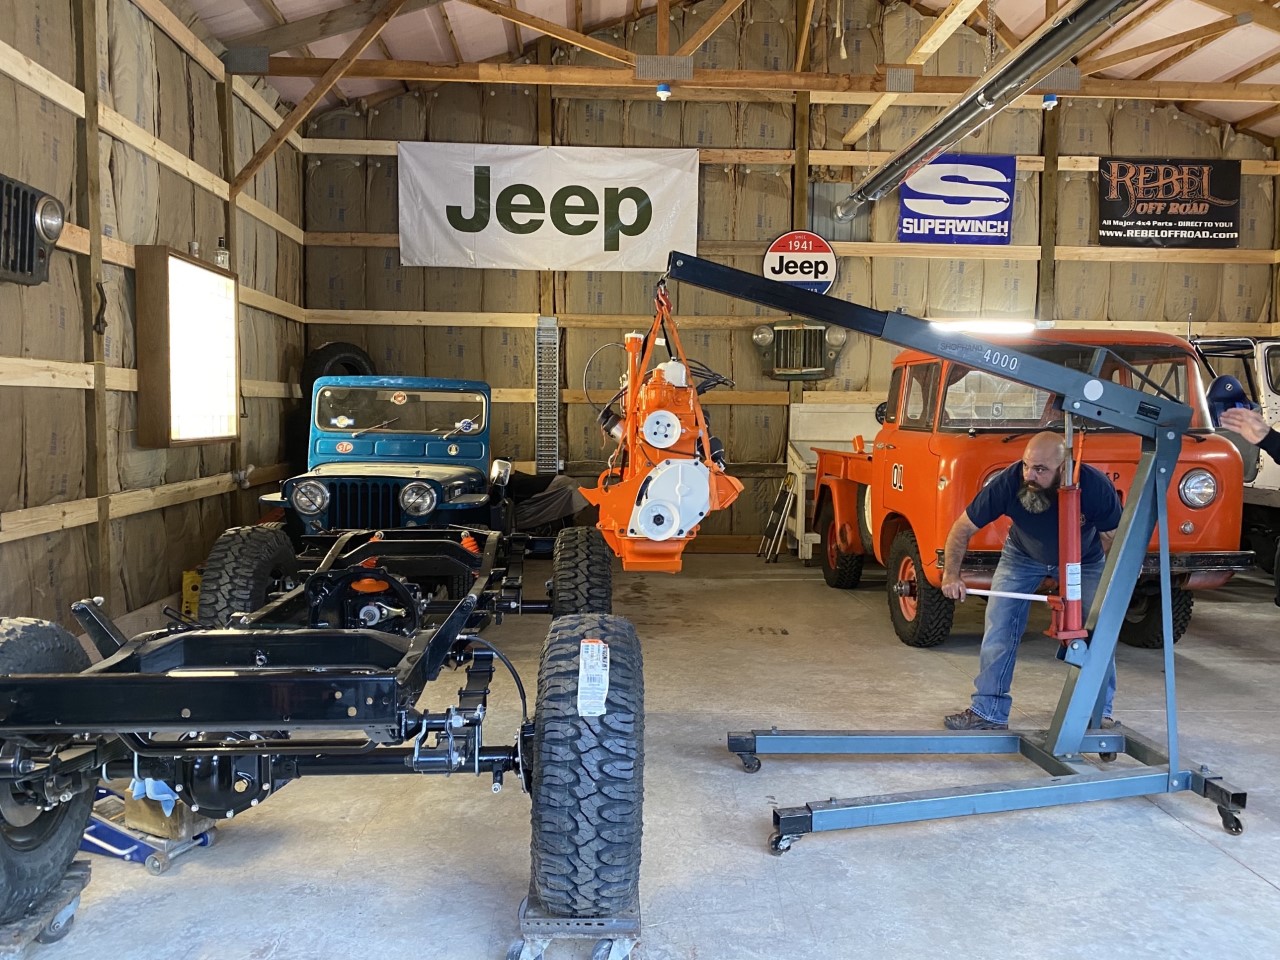
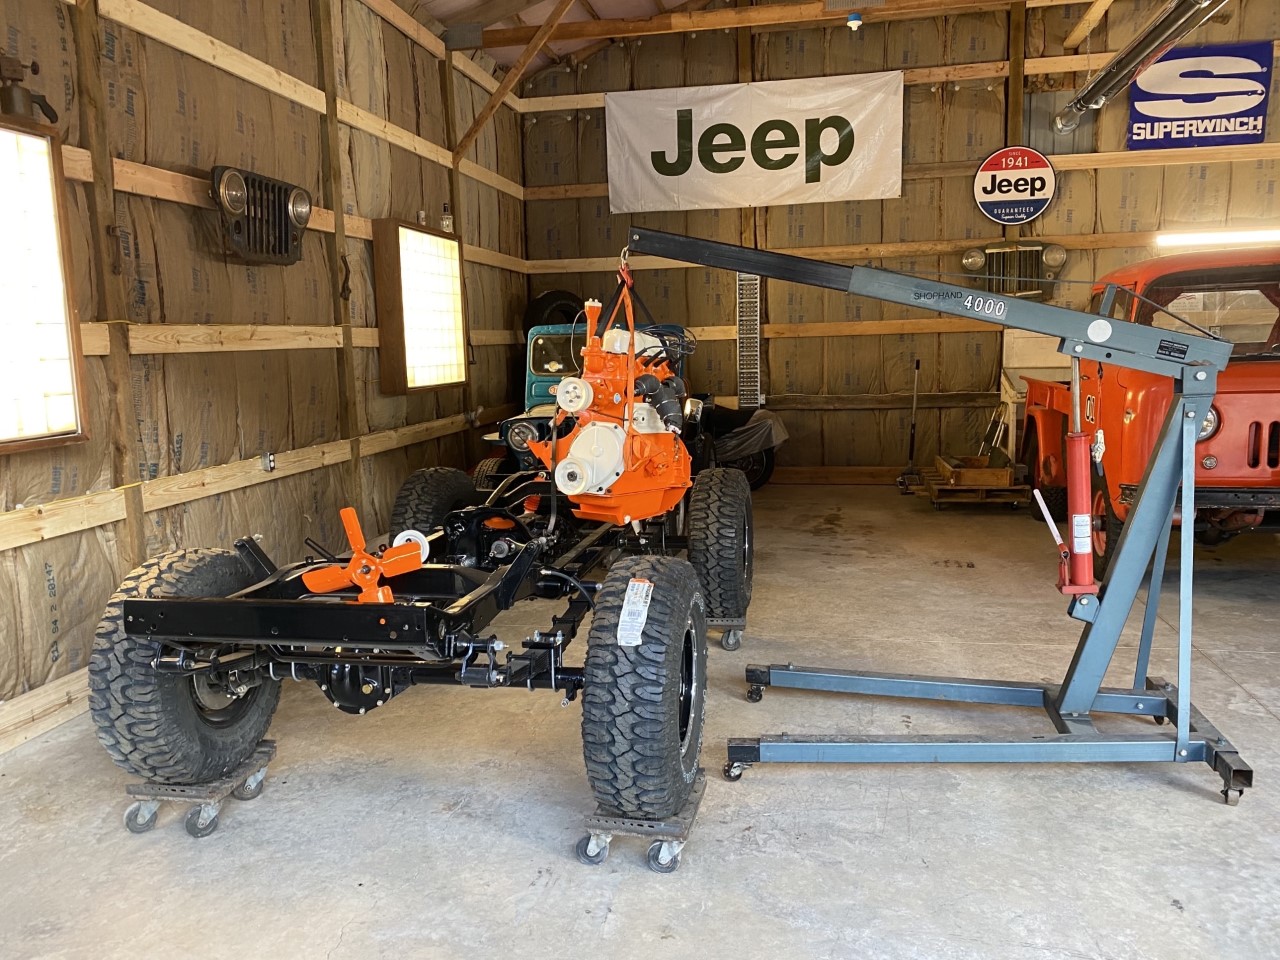
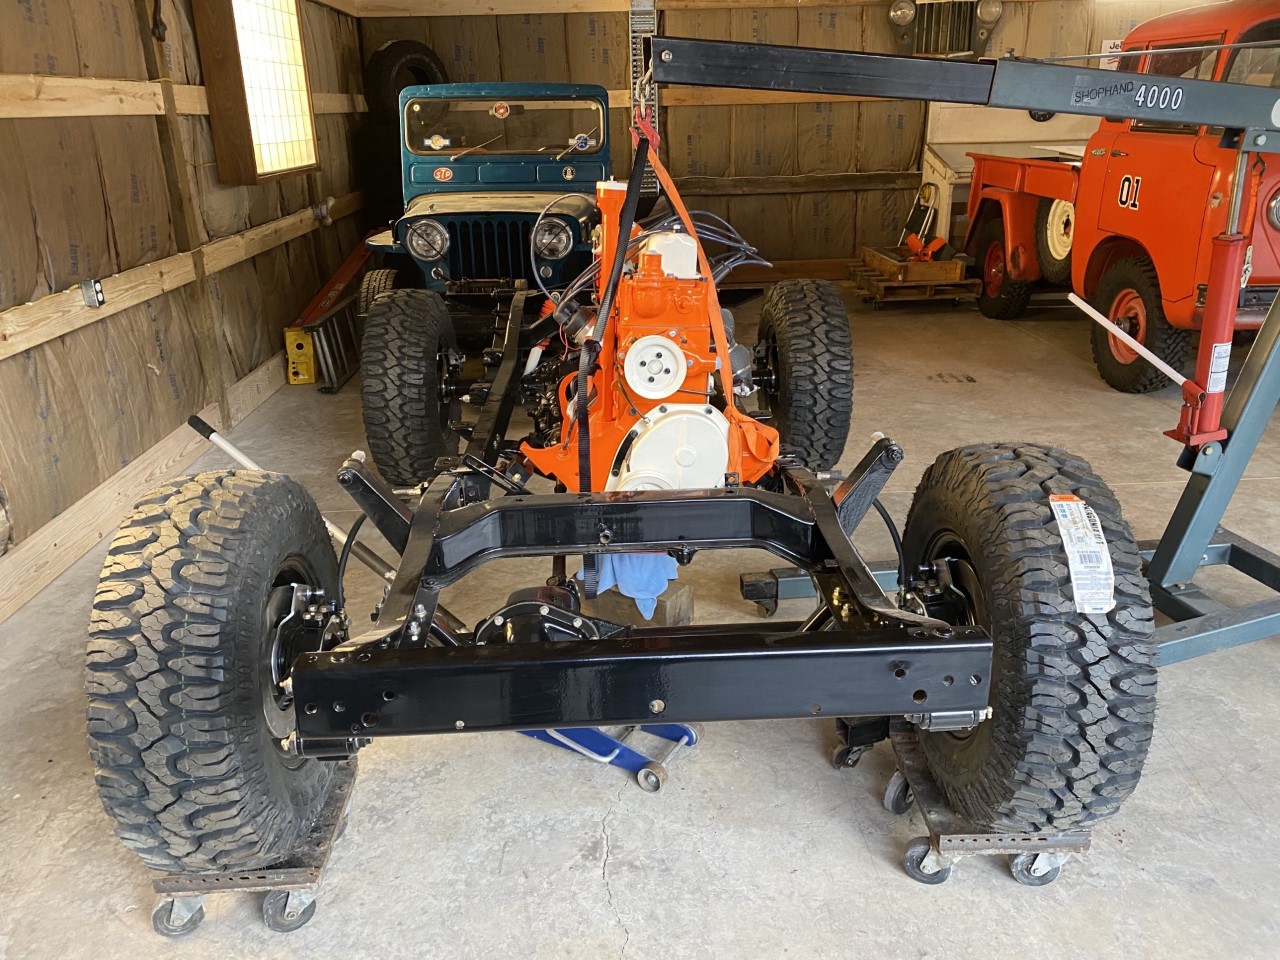
Wilbur Thompson over at Engines by Thompson in Greybull, Wyoming has been an engine builder in the area for decades. As luck has it; Wilbur happened to know this specific FC and the history behind it so we were pretty excited when he agreed to sign on and do the engine rebuild for us. Thanks to our great sponsors over at Omix-ADA we have plentiful access to the parts he’ll be in need of for the engine build. In addition to years of experience Wilbur has a full machine shop in his backyard ready to do any machine work that will be needed along the way. We decided that even as enticing as it would be to have a blown V-8 tucked away it made more sense to keep things as close to original equipment to keep sight of what made them unique at the time they were being produced.
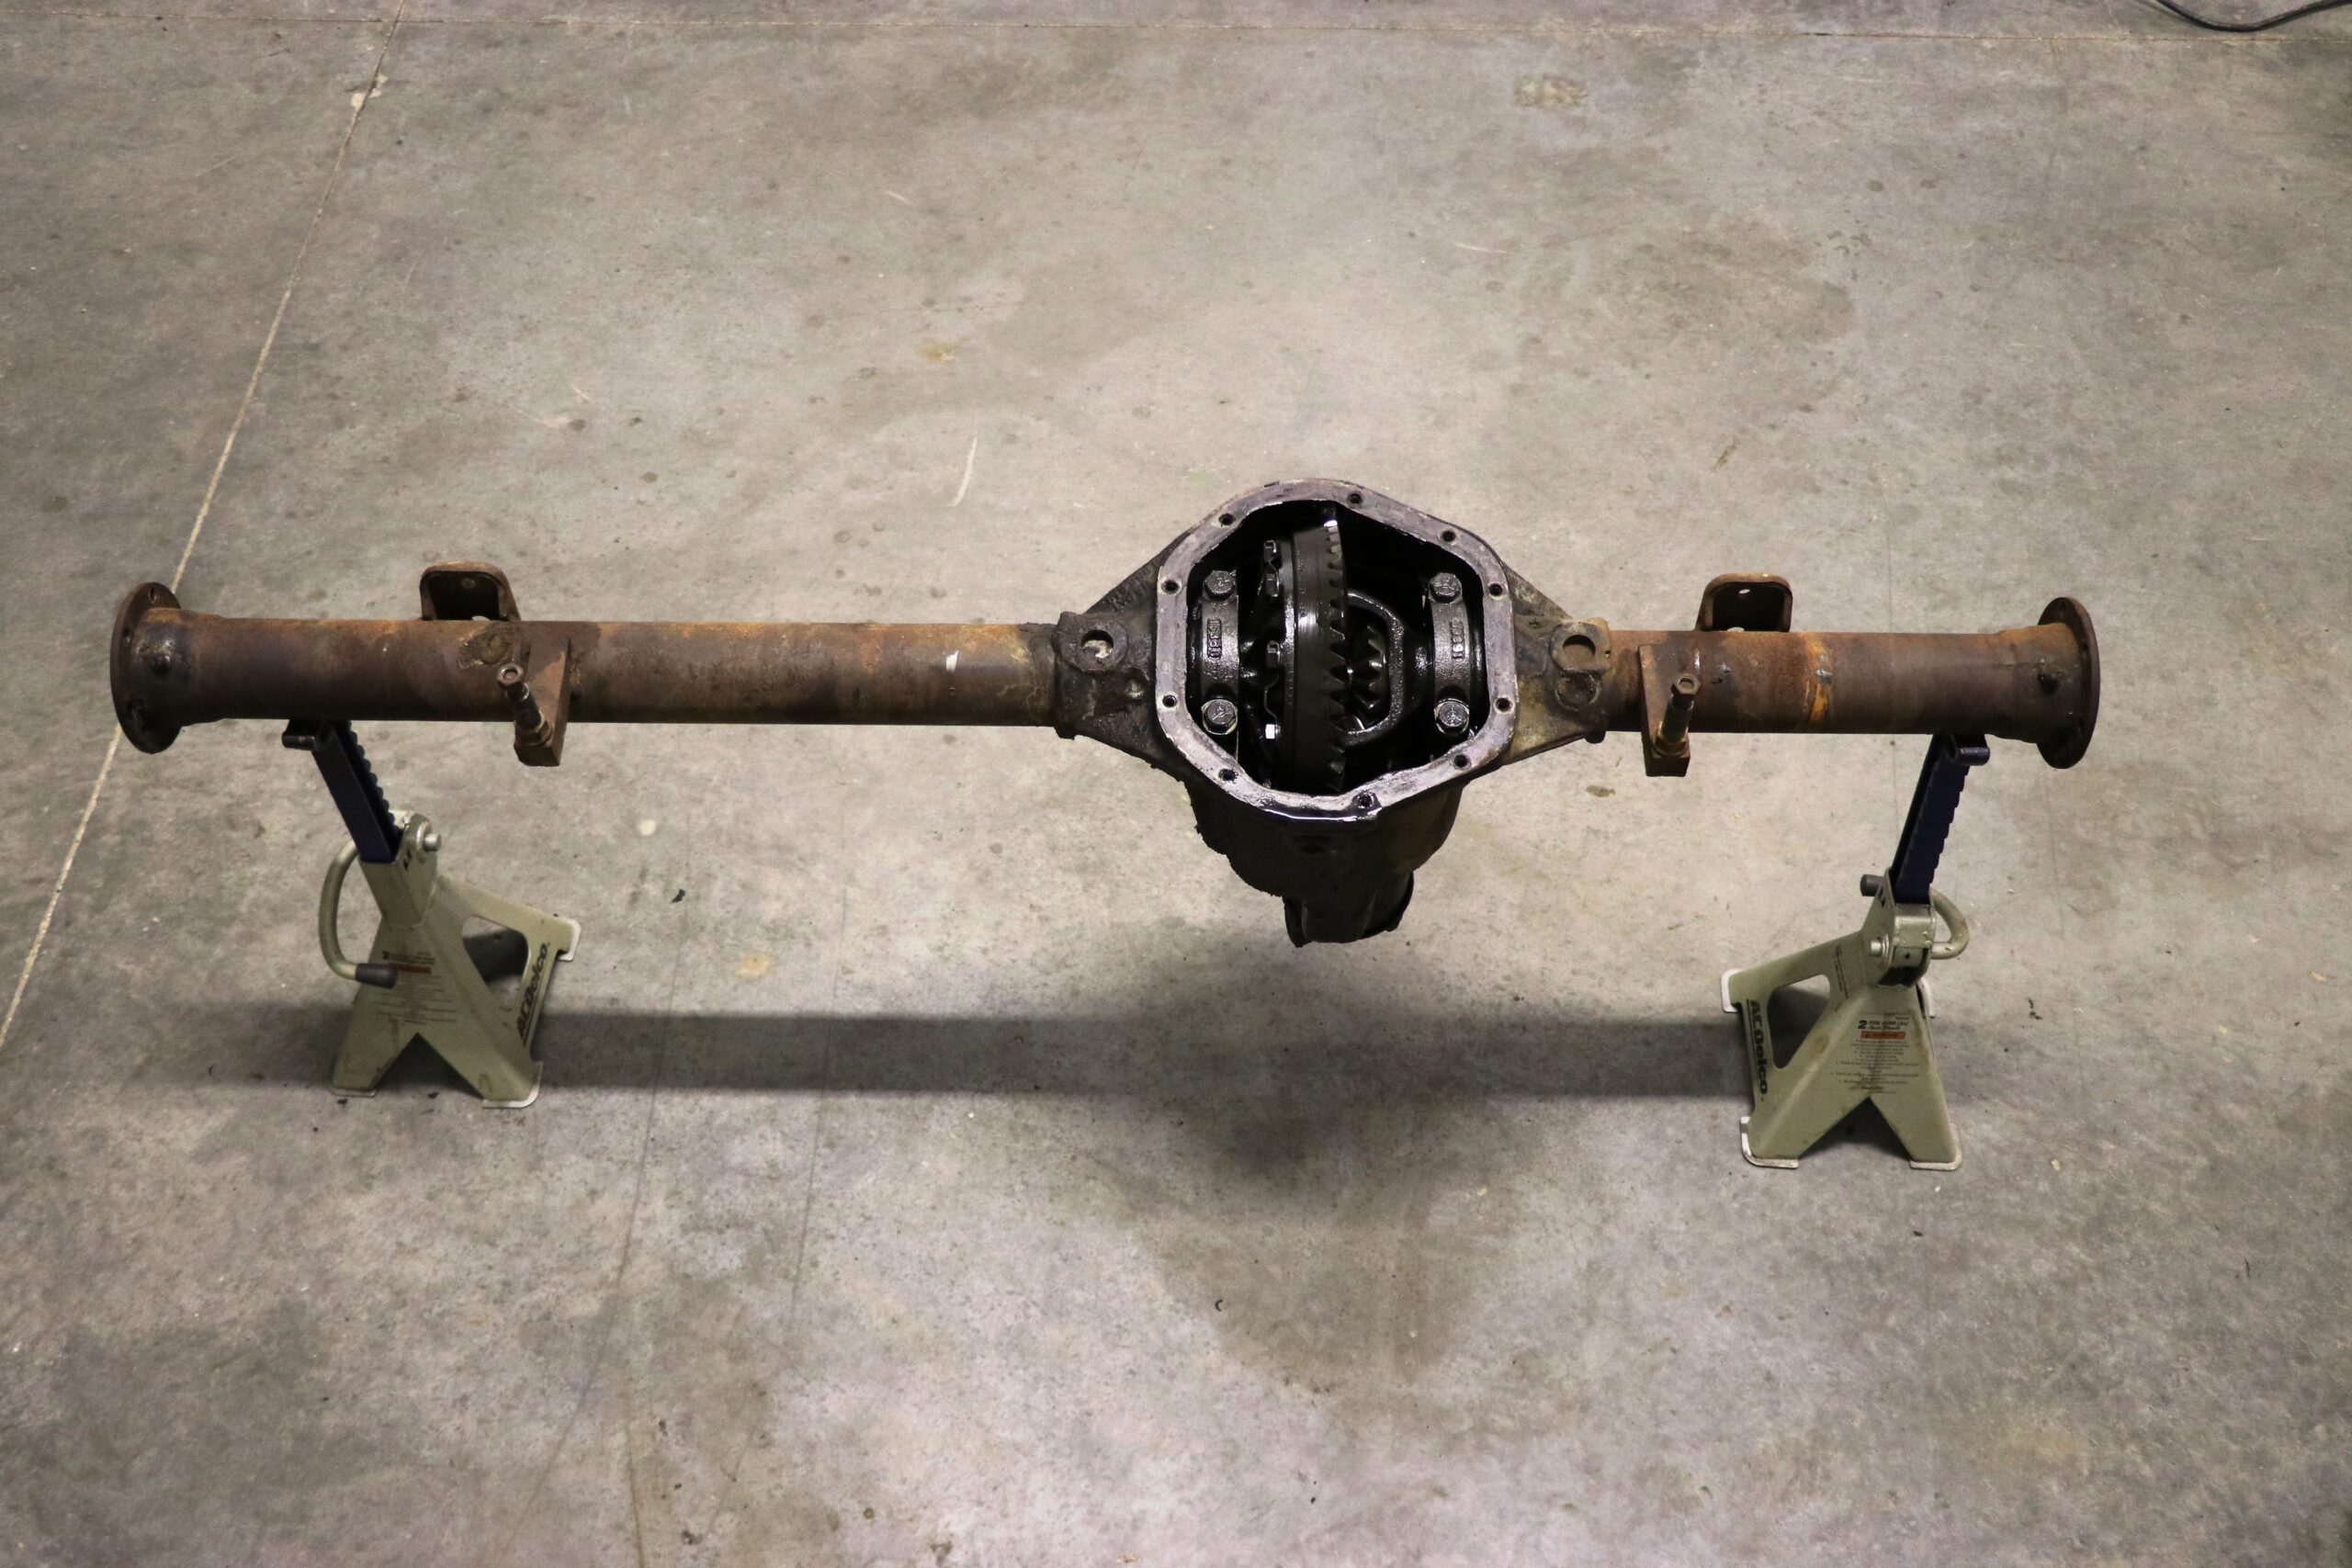
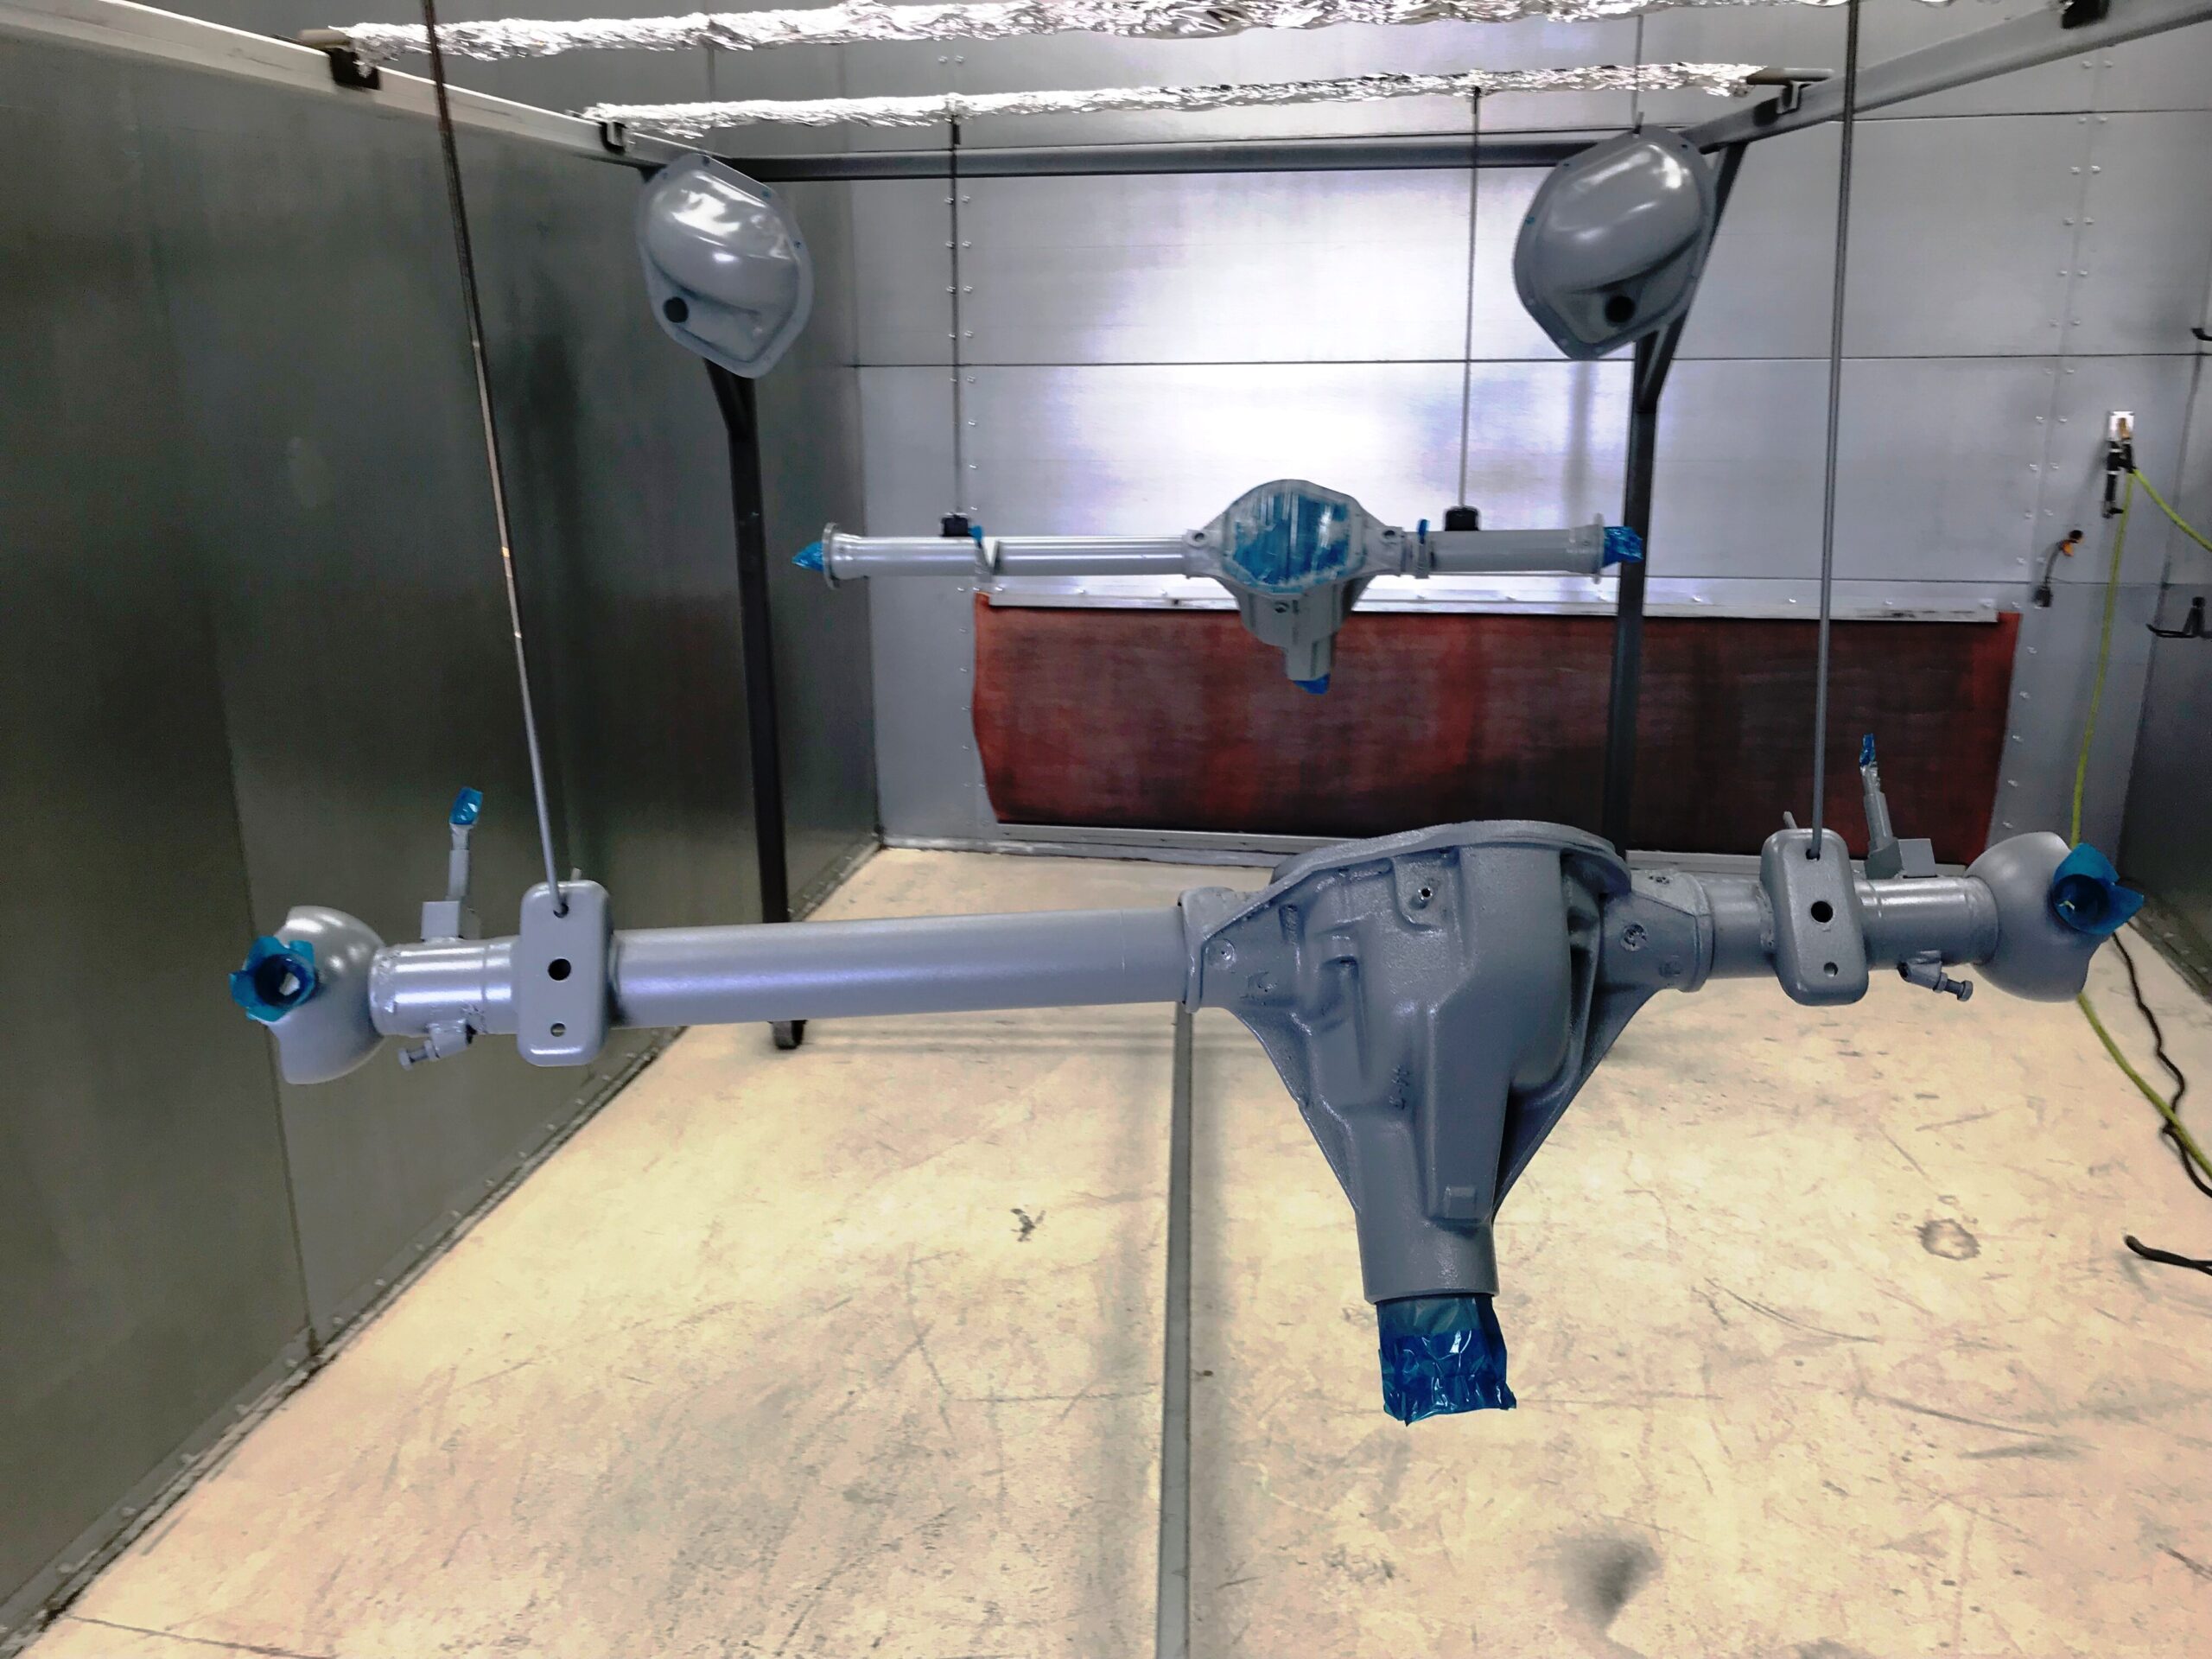
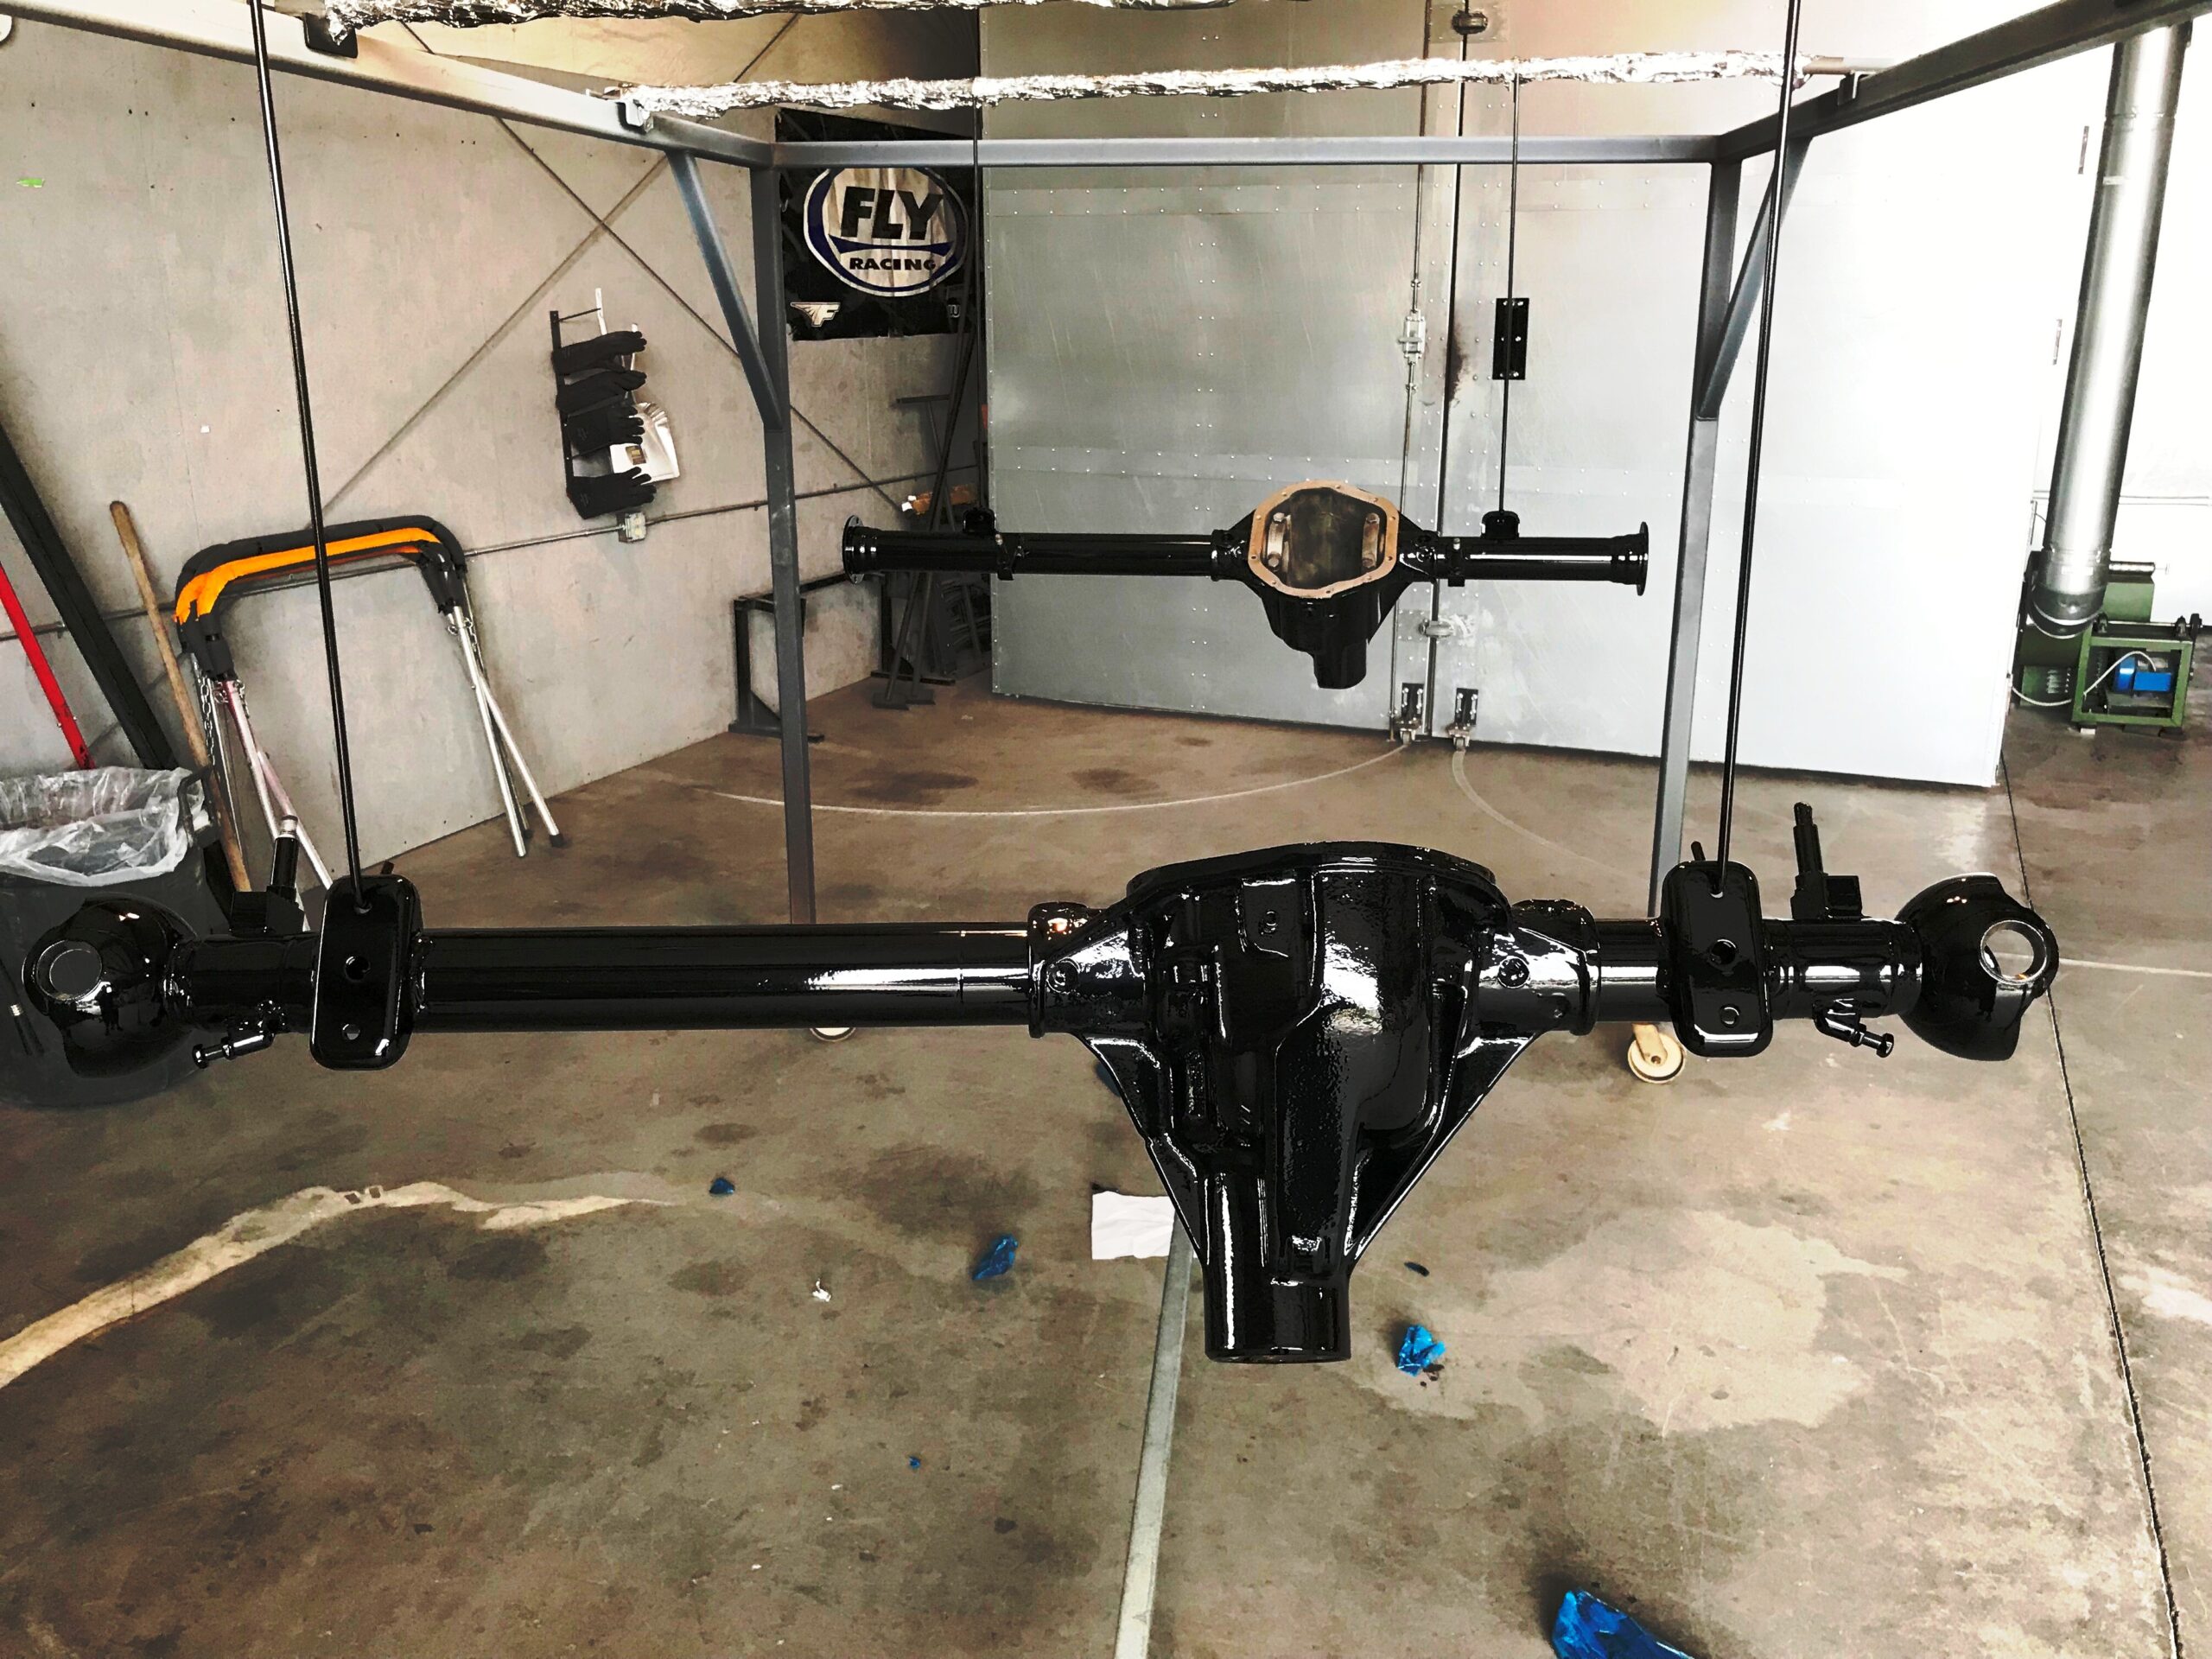
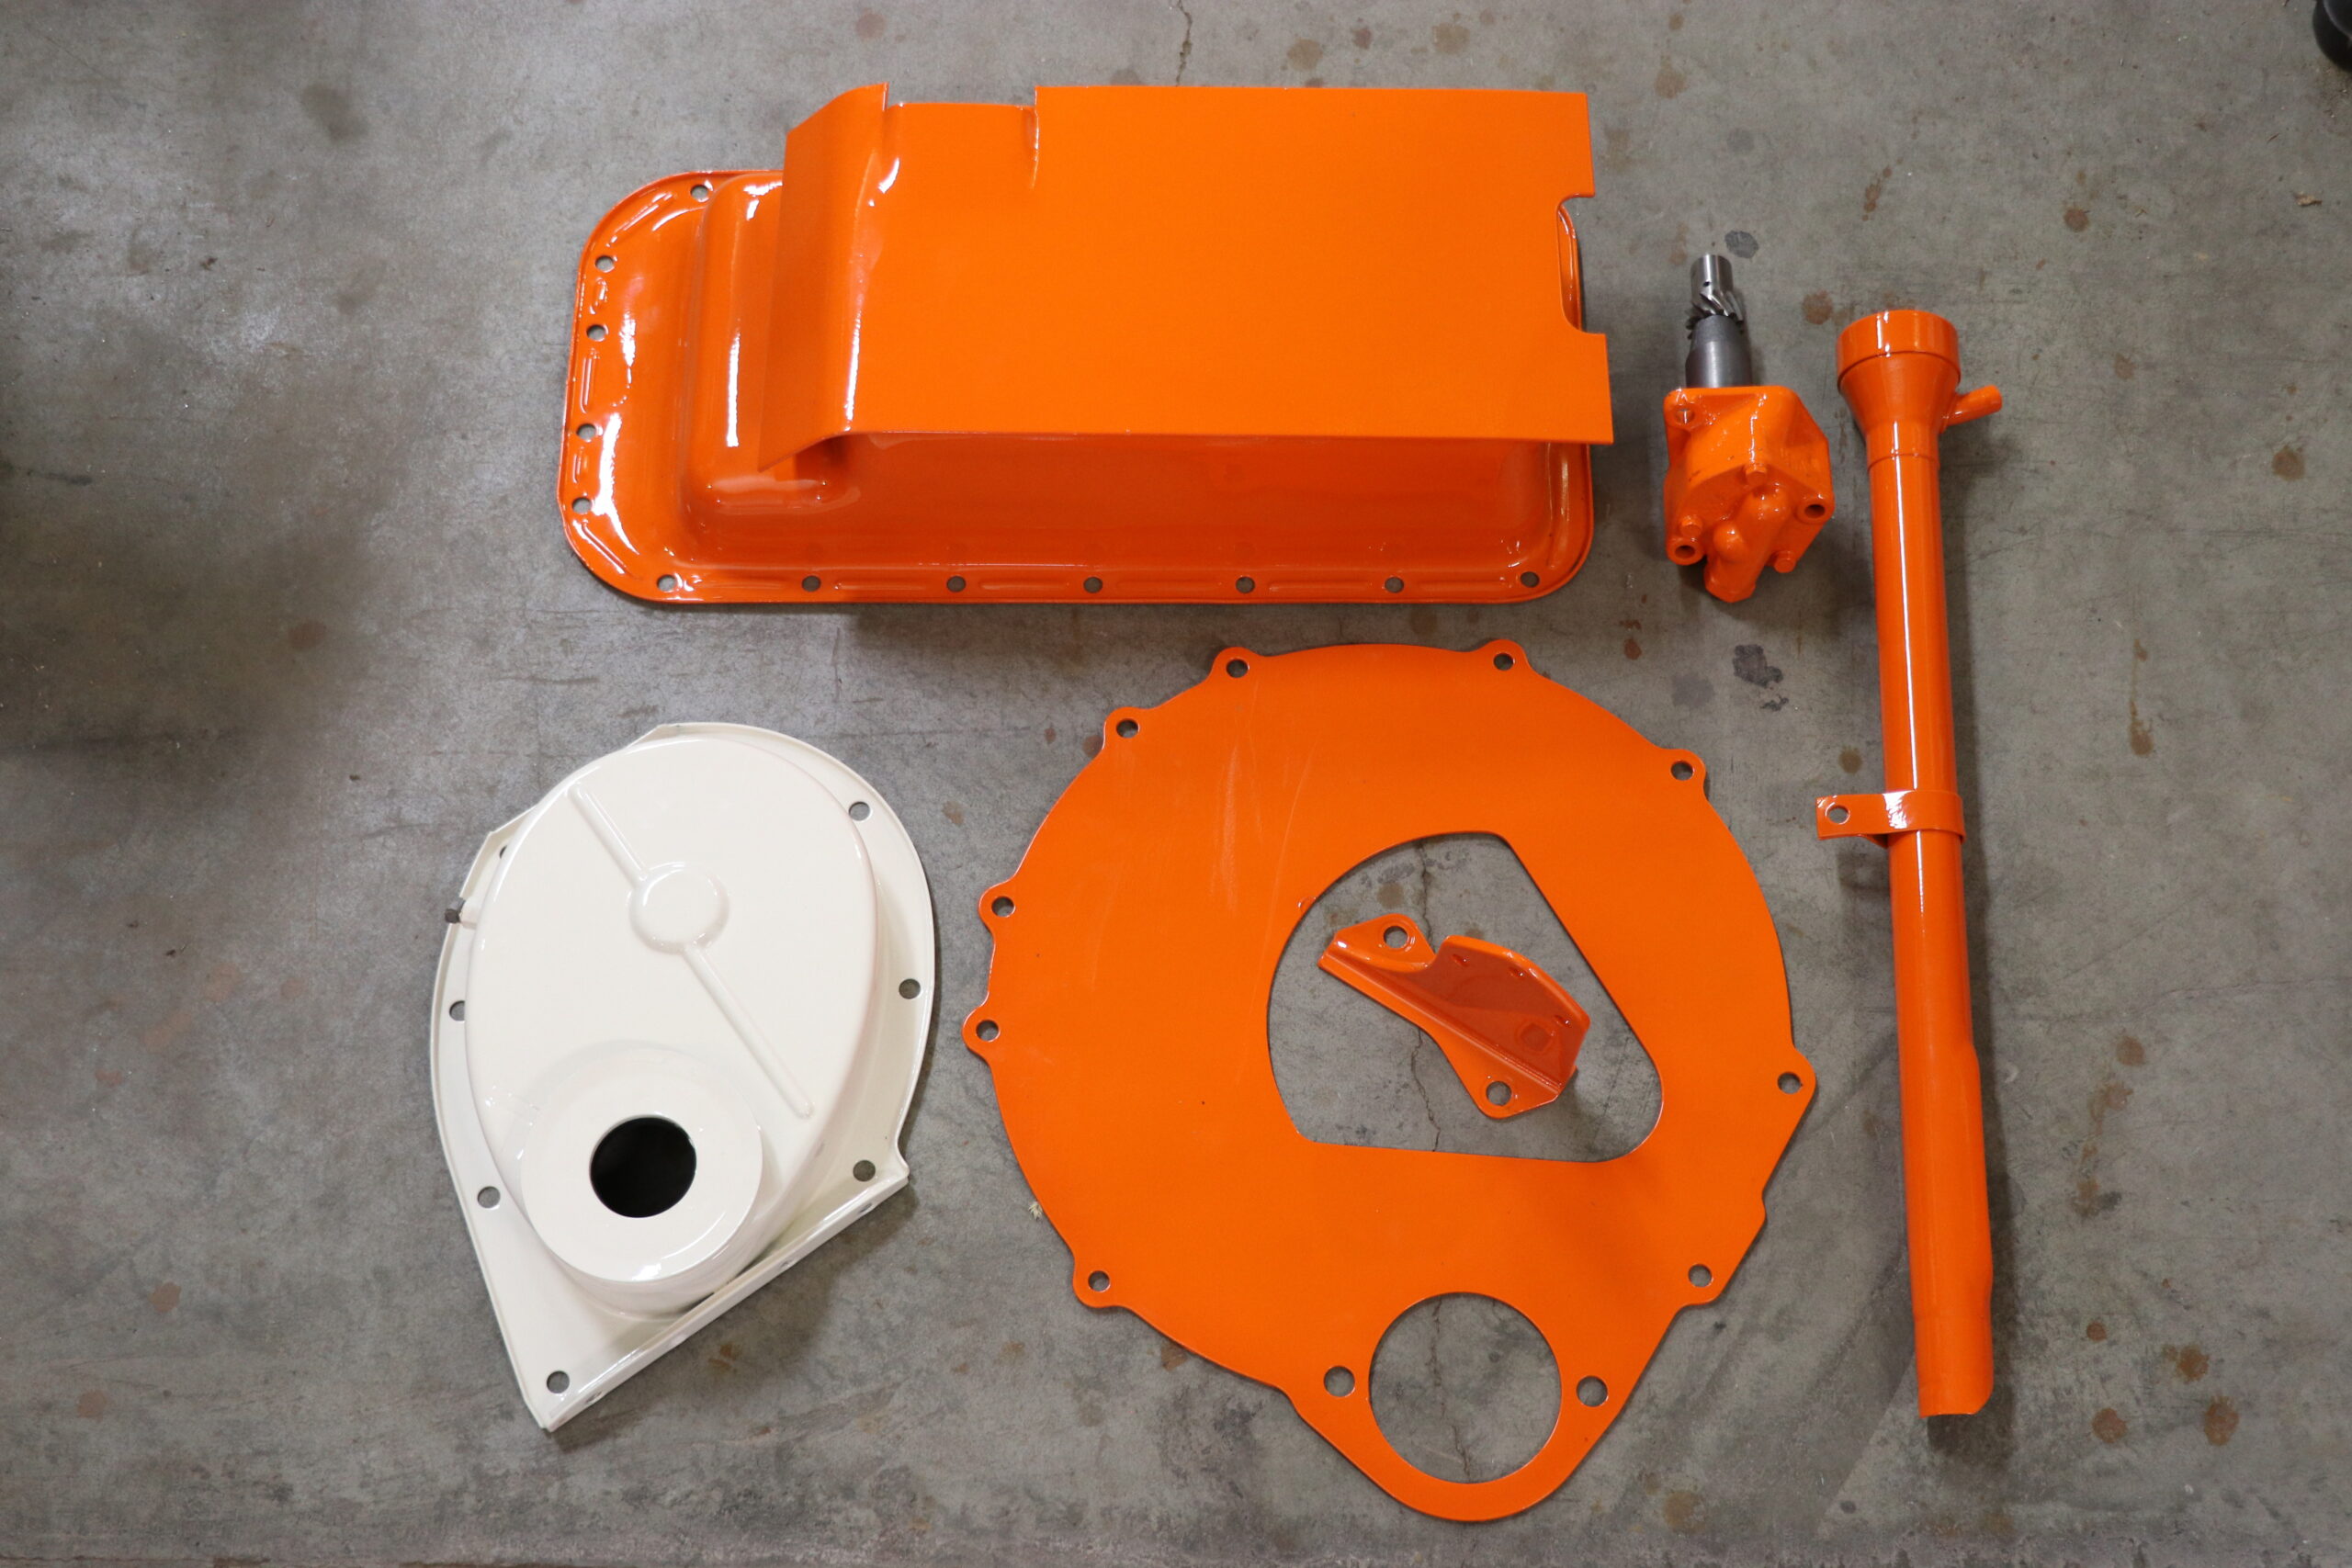
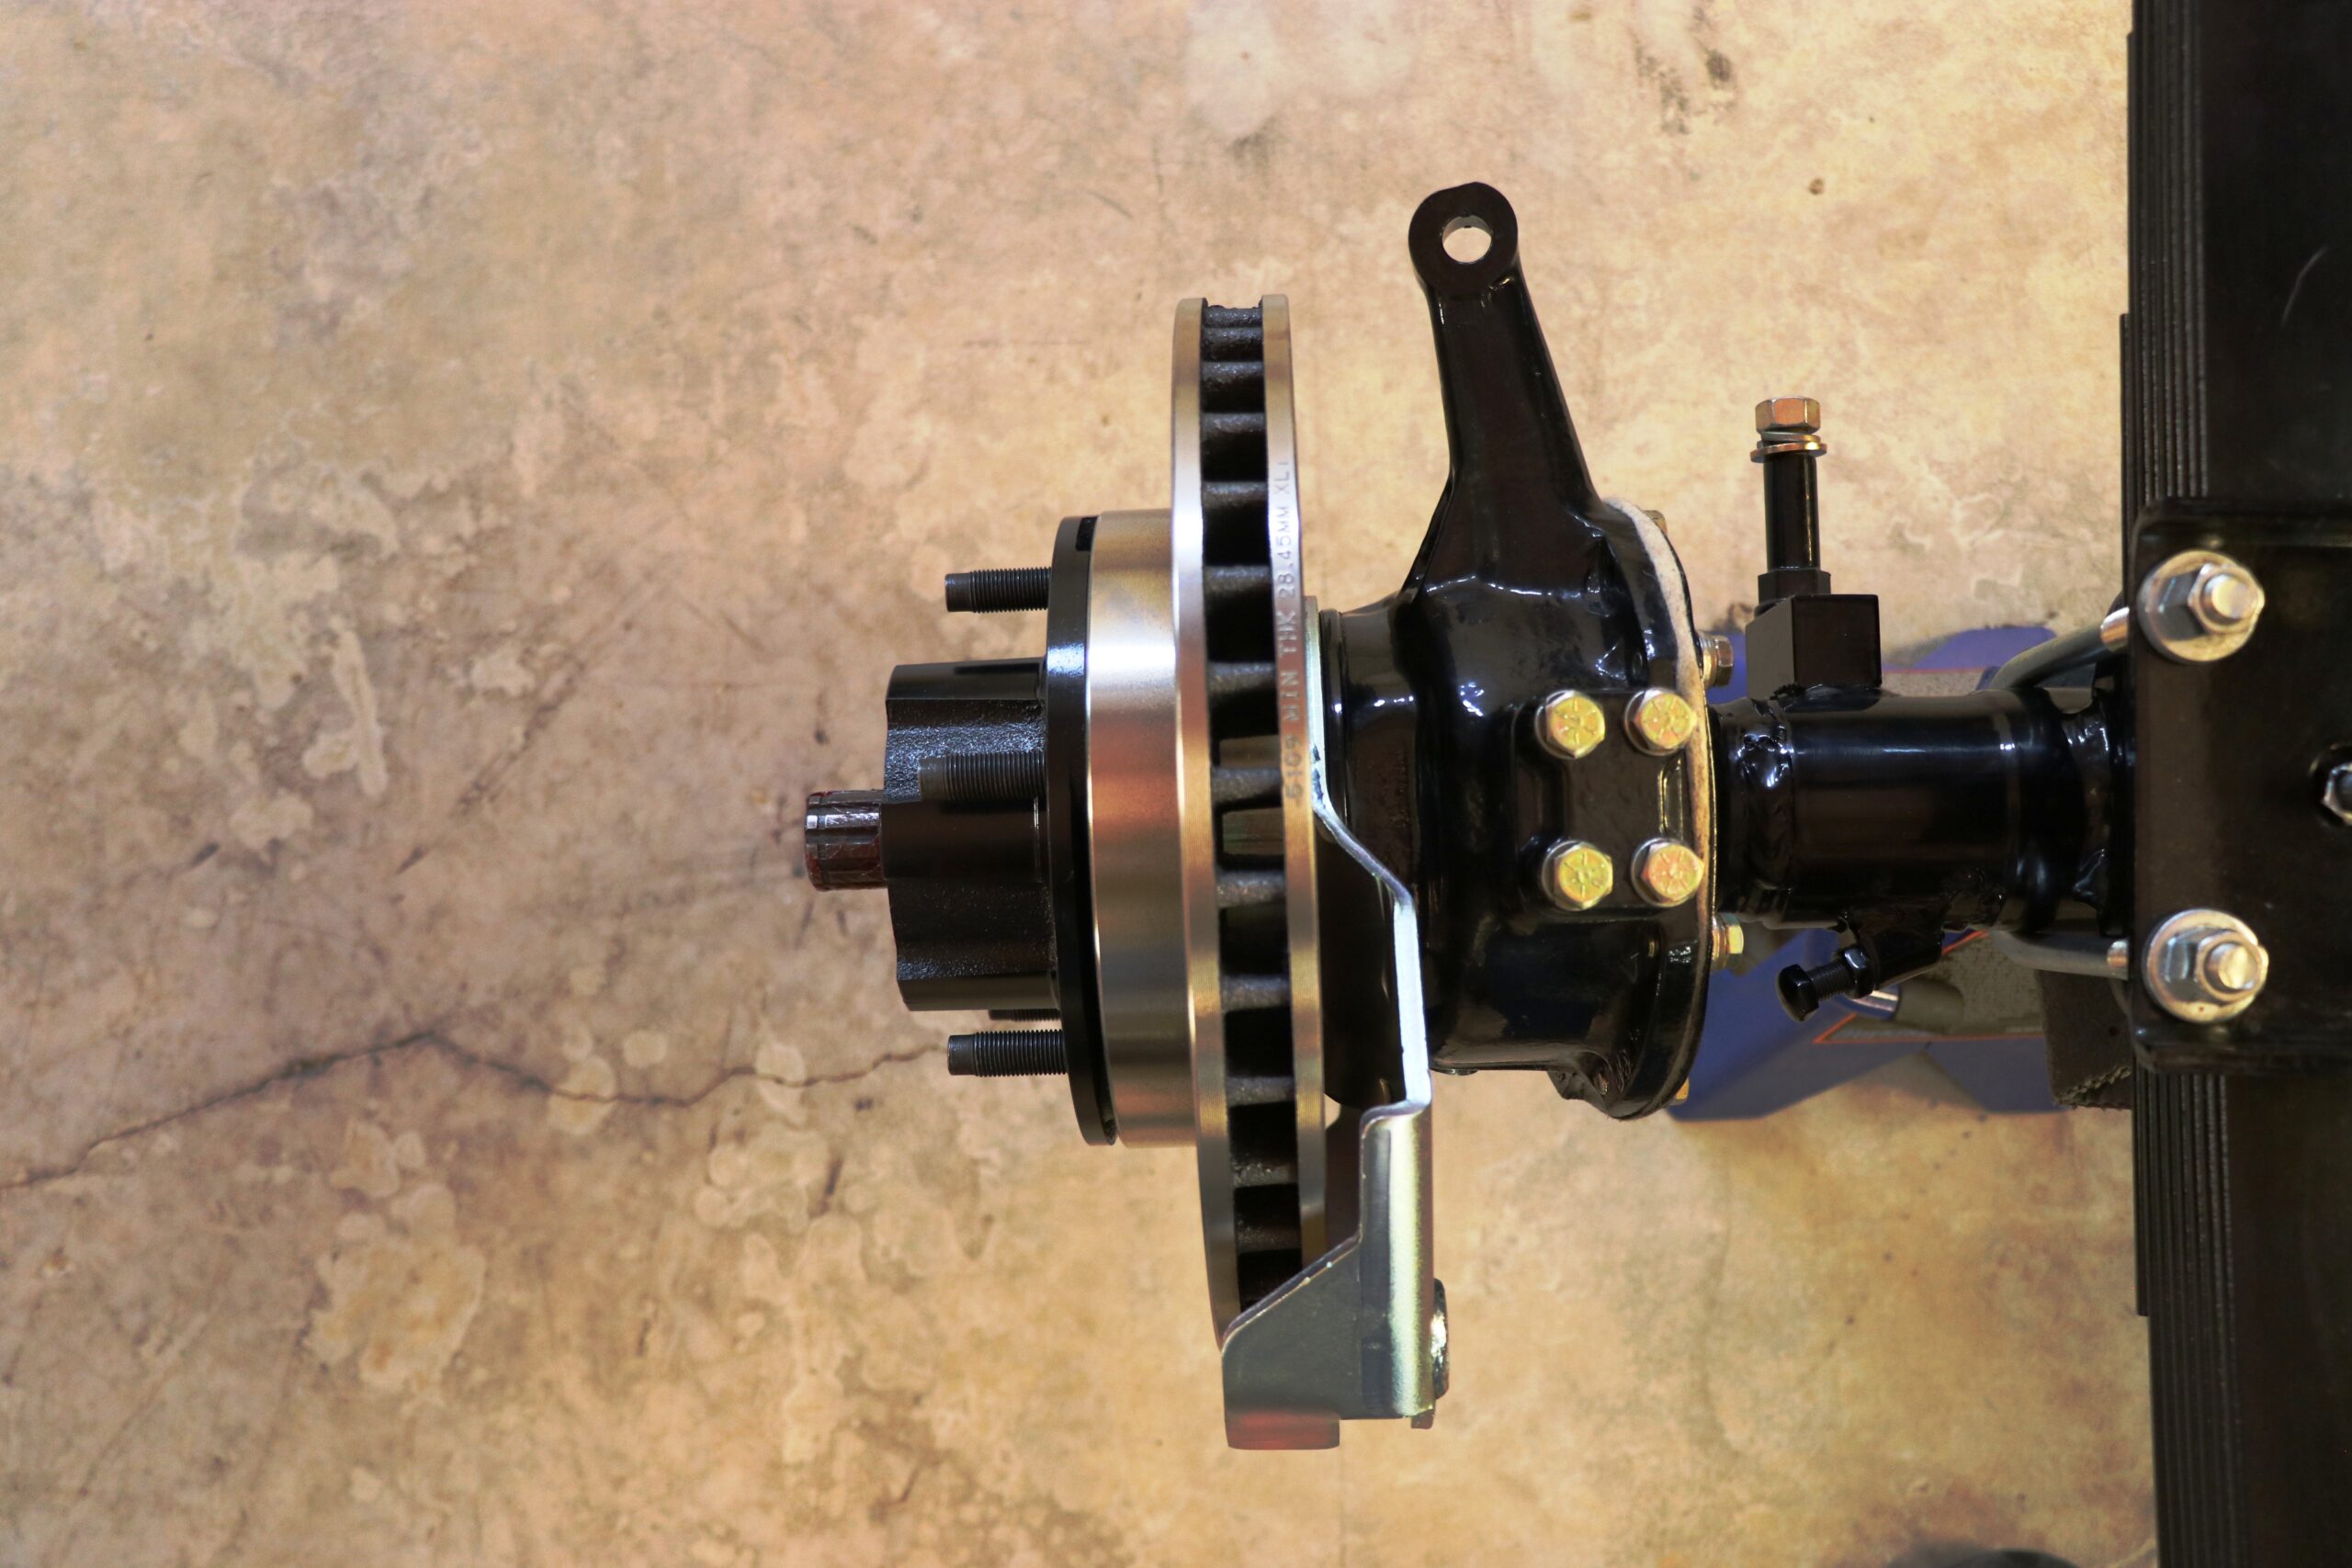
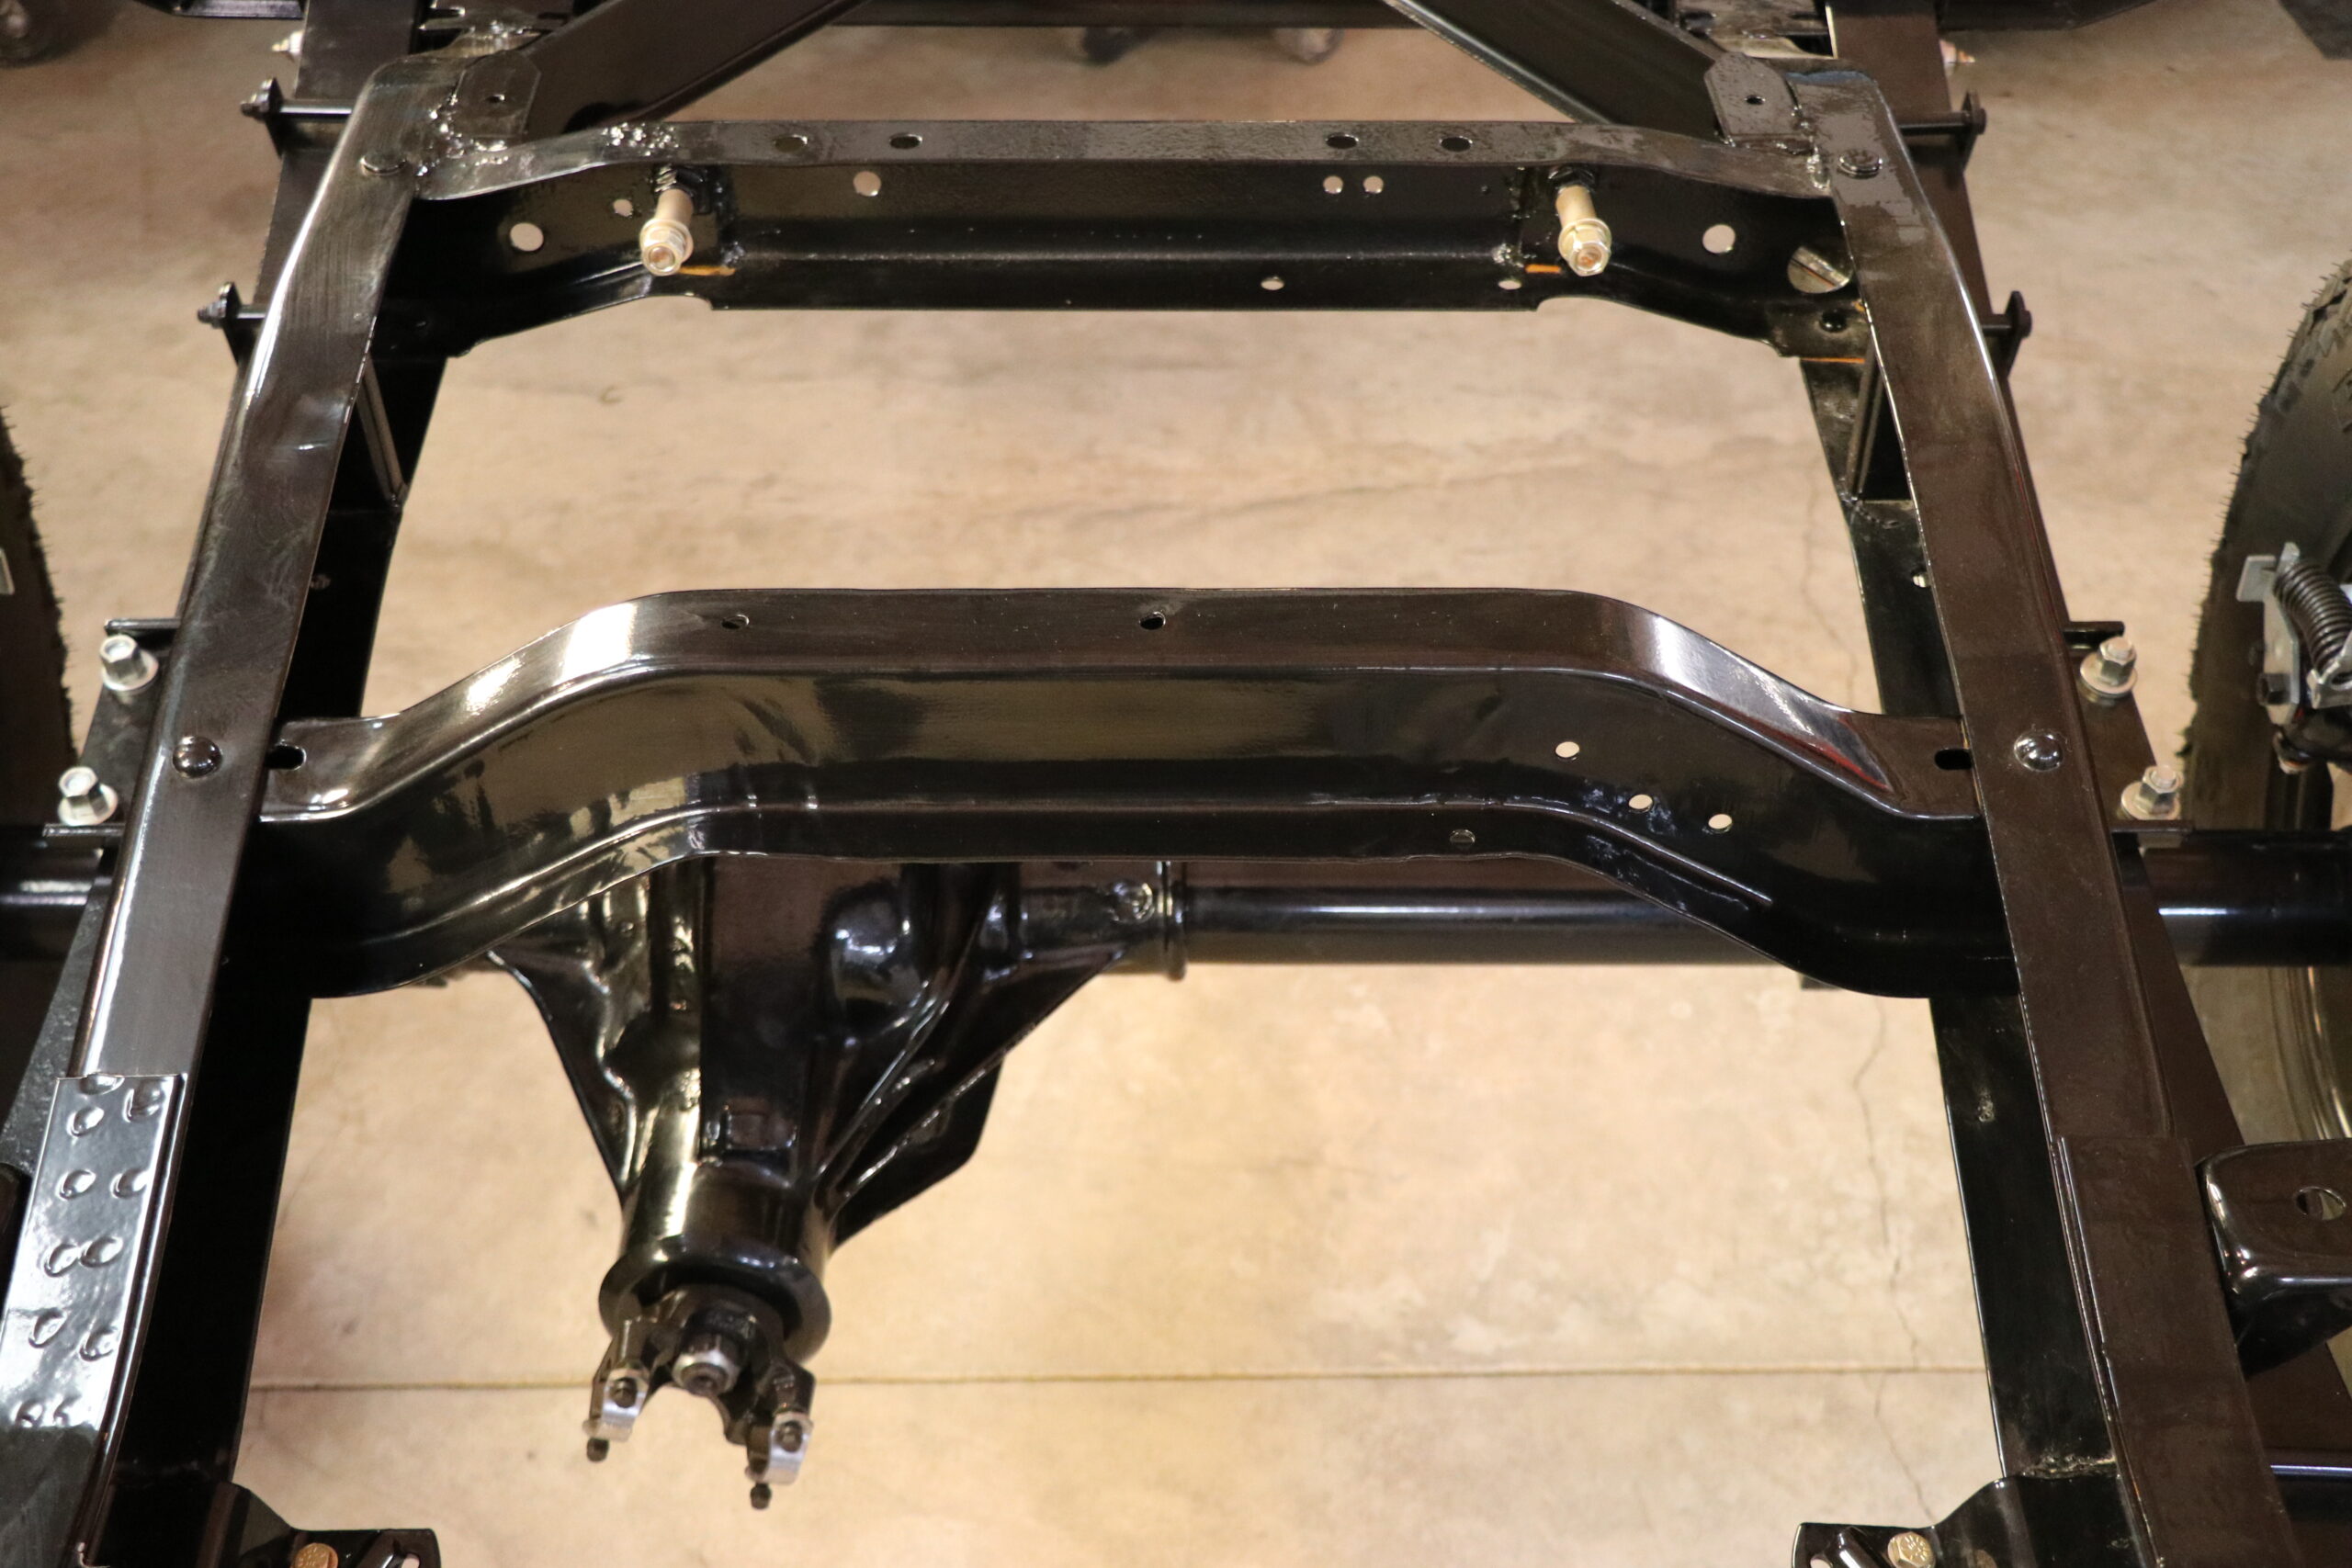
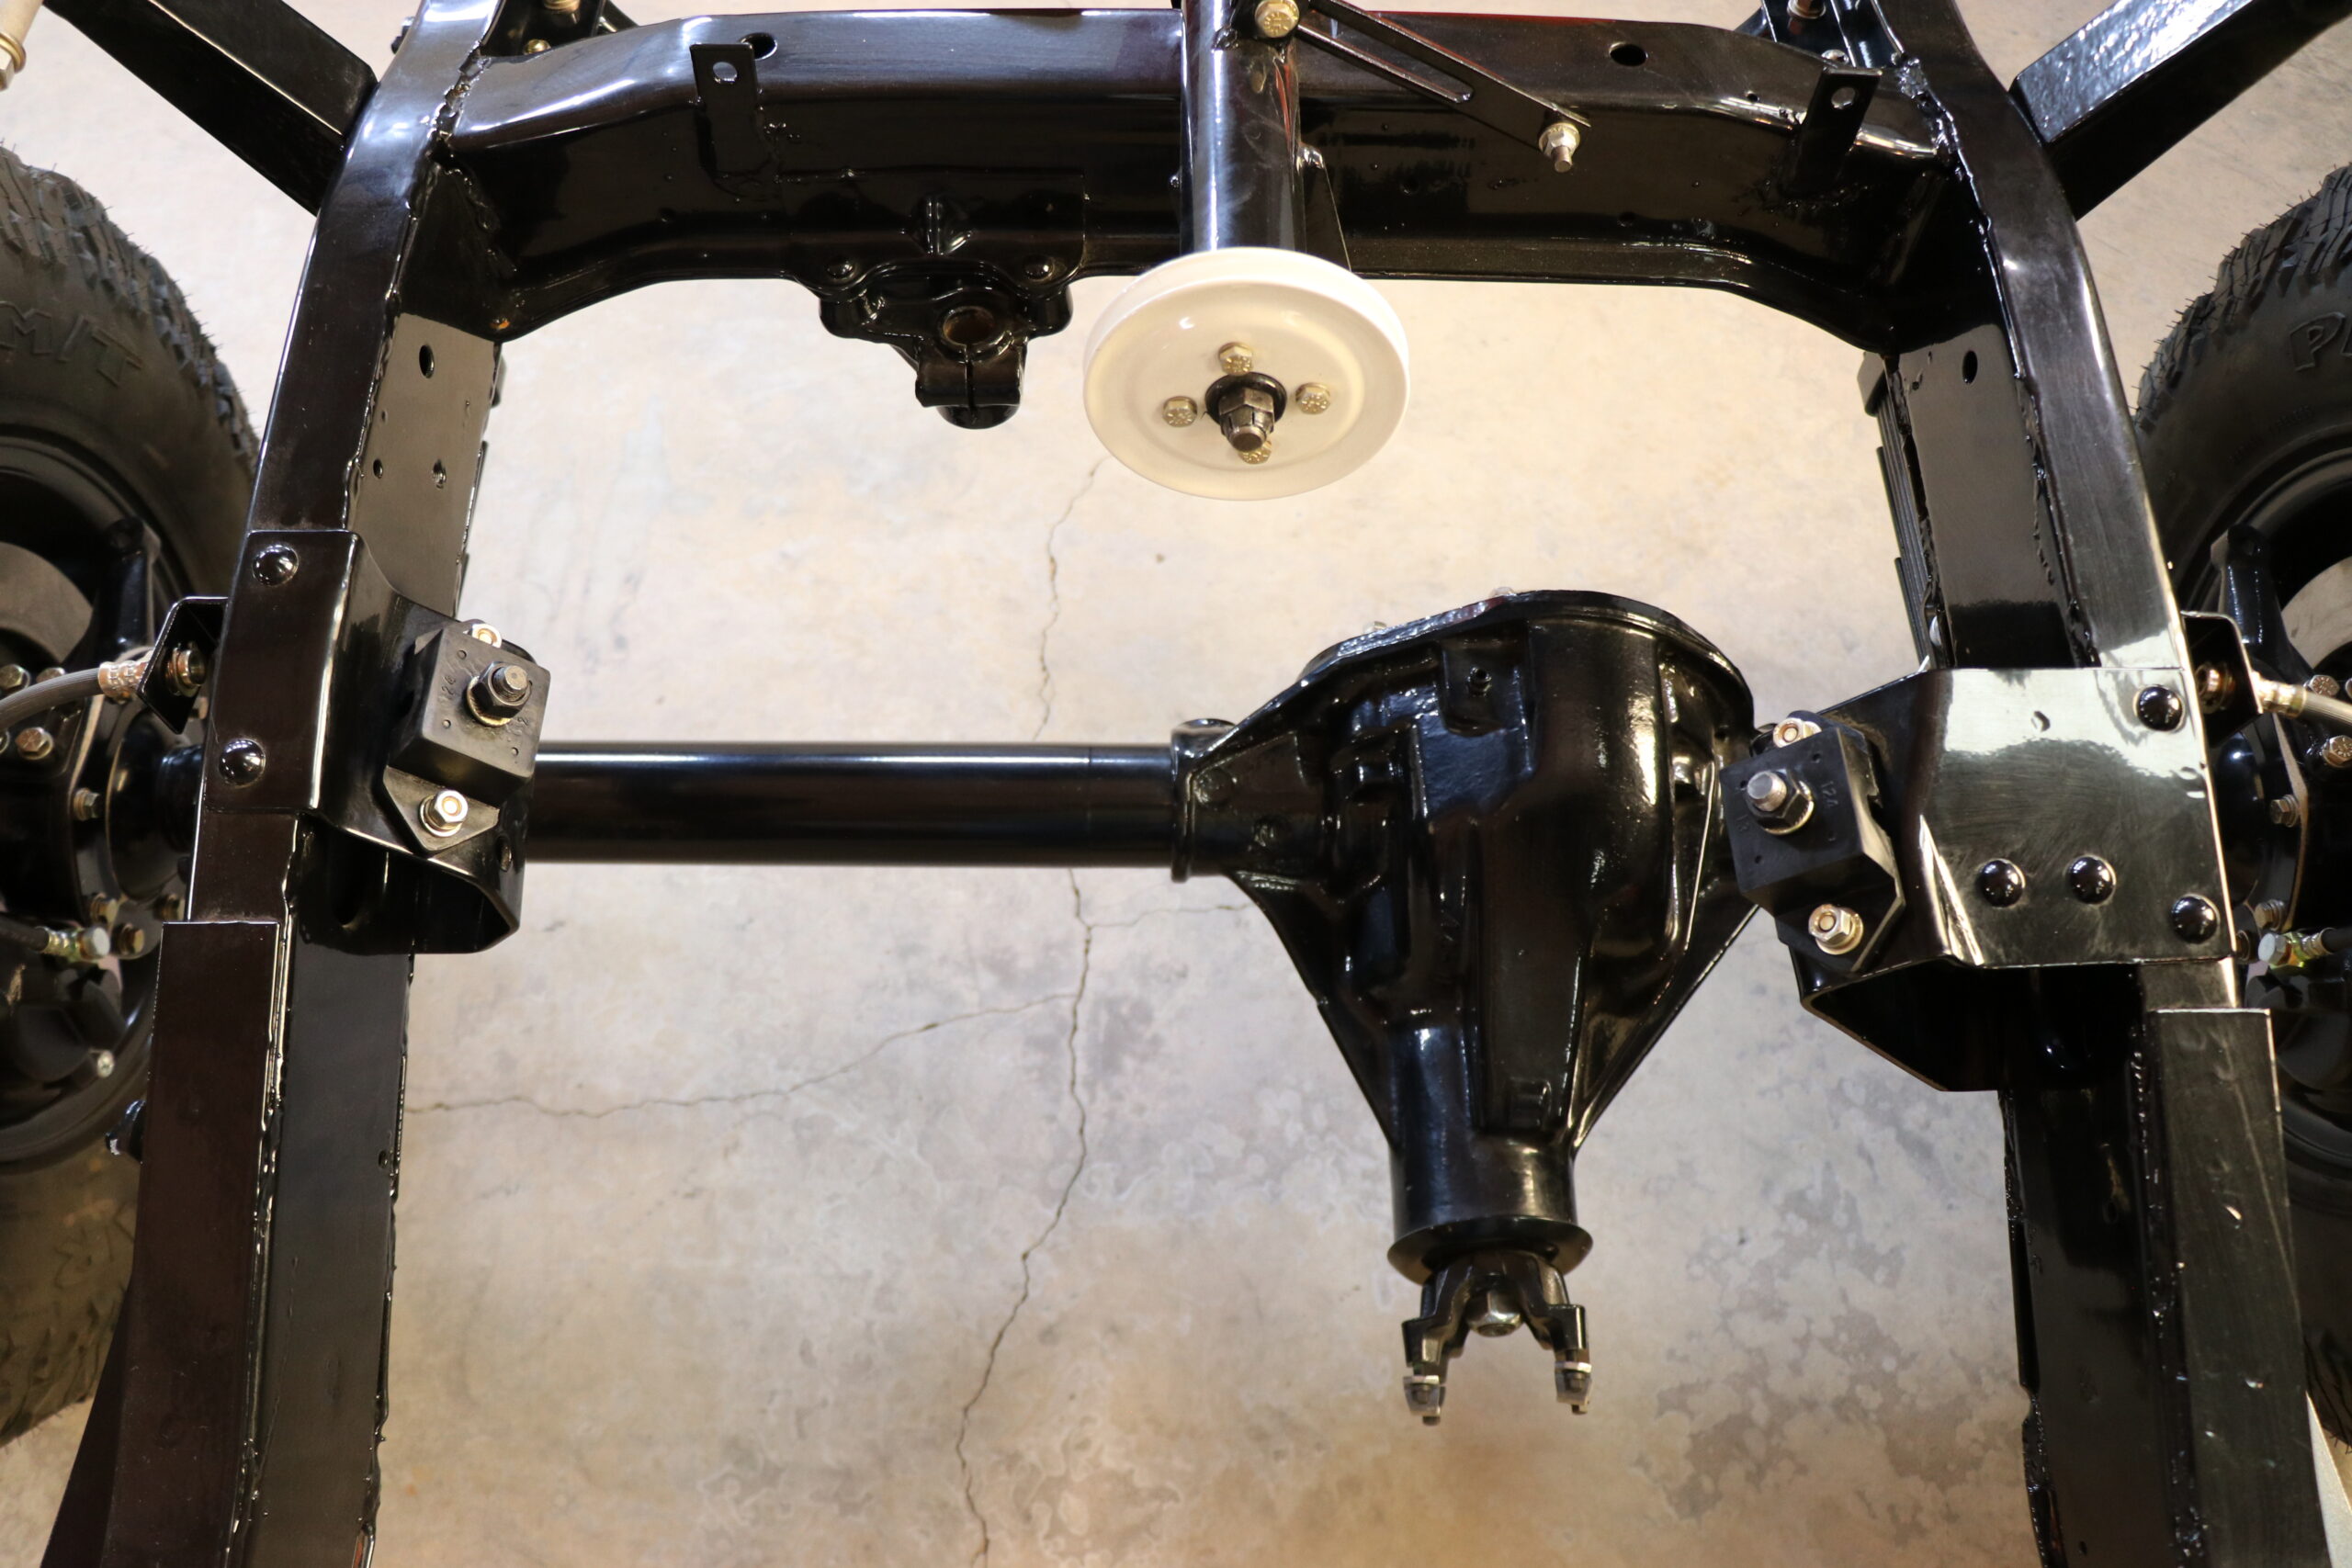
While Wilbur was getting the motor torn down and the larger components cleaned up and ready for powder, we received word that the front and rear axle housings were freshly coated with gloss black and ready to be picked up. We scheduled a trip back to Rugged Werx to drop off the engine block, head and several other components to be coated and at the same time, we picked up the axles. Seeing the housings with a fresh coat of color was a pivotal moment, since they are the very first components to be refinished and the base of the build, it finally felt like we would soon be seeing this project begin its new life! The axles look better now than they could have ever hoped to have when they first rolled off of the assembly line and we were stoked to see more work from the Brothers Russell.
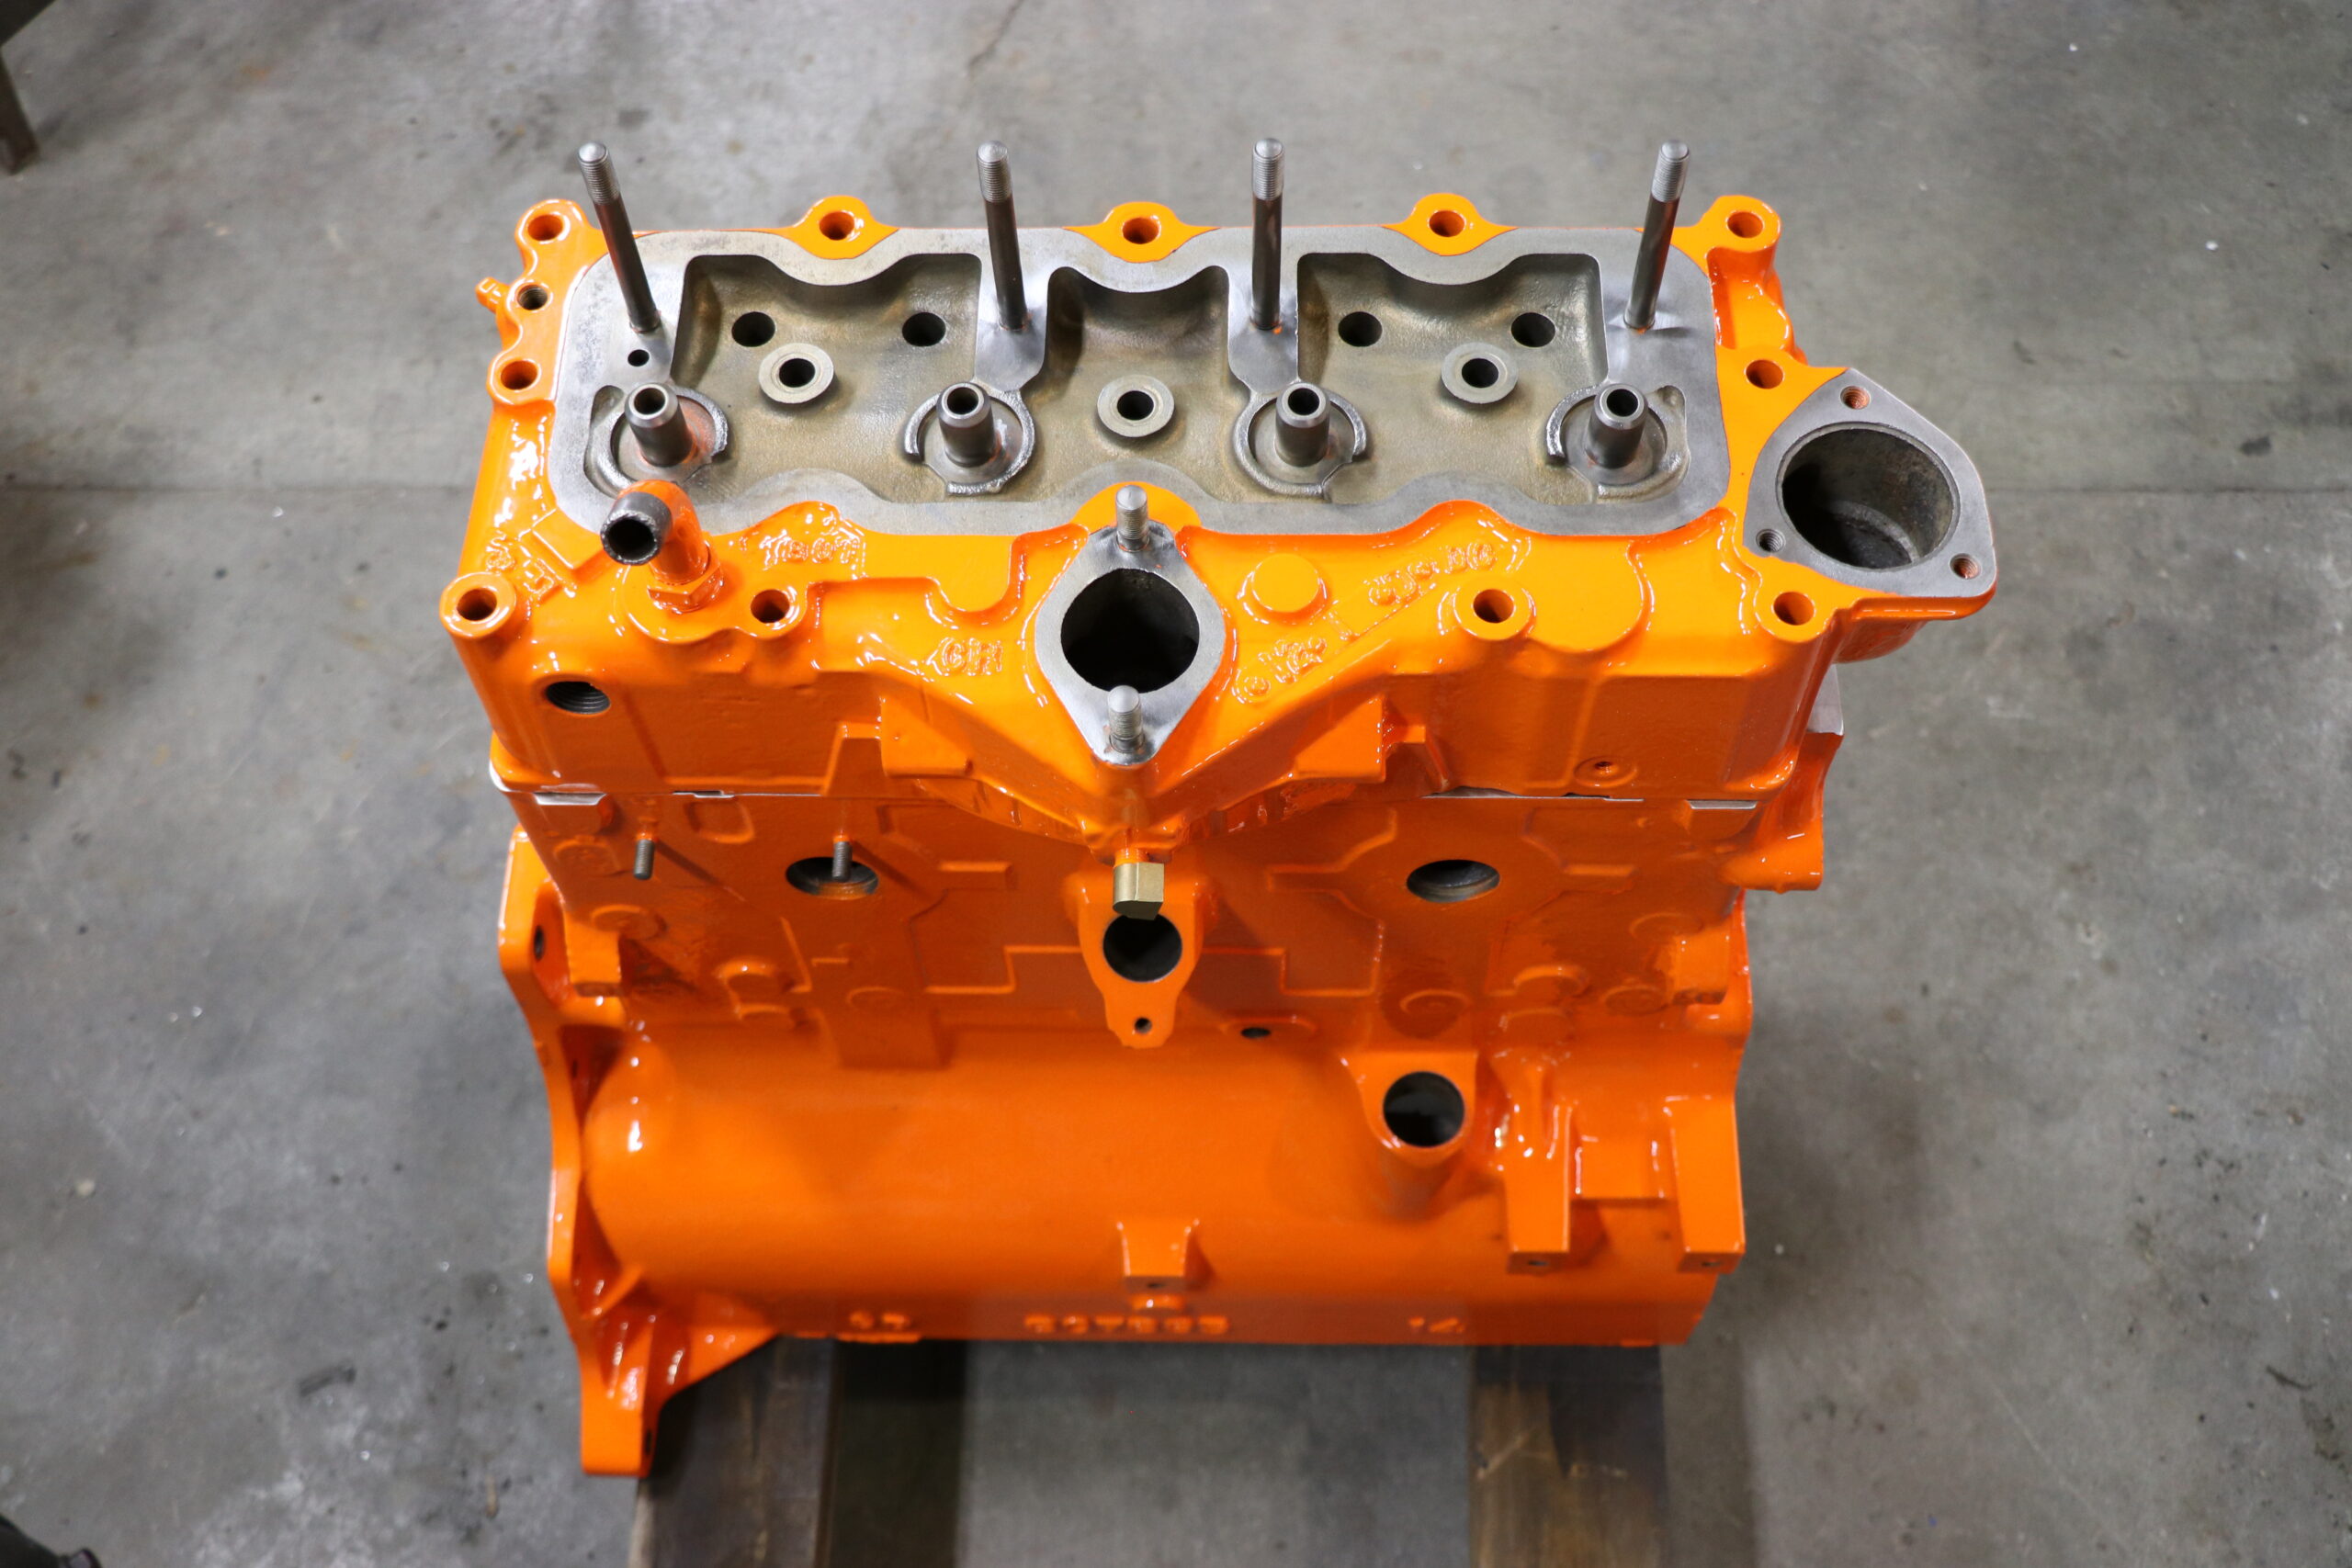
Before moving towards the next steps we had a very difficult decision to make, the color choices. After much deliberation; countless hours comparing color swatches and looking over pictures of other custom classics, the choice was made. Bright orange and a light cream would be the colors this FC would be sporting.
We discussed the color choices with Aaron, picked out some powders and dropped off additional engine components and eagerly awaited the call to let us know when the engine block and head would be ready to pick up. We needed those first so we could get them back to Wilbur at Engines by Thompson so he could work on the internals while the other parts were getting coated. When the call to came we headed over to get our first look at the finished product and knew immediately; this was going to be a build that will stand out to say the least. The bright orange is exactly that and the quality of work well exceeded our expectations!
After picking up the majority of parts that will become the engine with all of their fresh colors, we expedited the parts to Wilbur so he could get our little Hurricane put together. Thanks to our ability to do most of our parts shopping for the engine components through Omix-ADA, we made our wish list and got the important stuff on the way. We were able to source almost all of our engine parts from Omix including a master rebuild kit that covered many of the bases in itself making the task that much easier and expeditious.
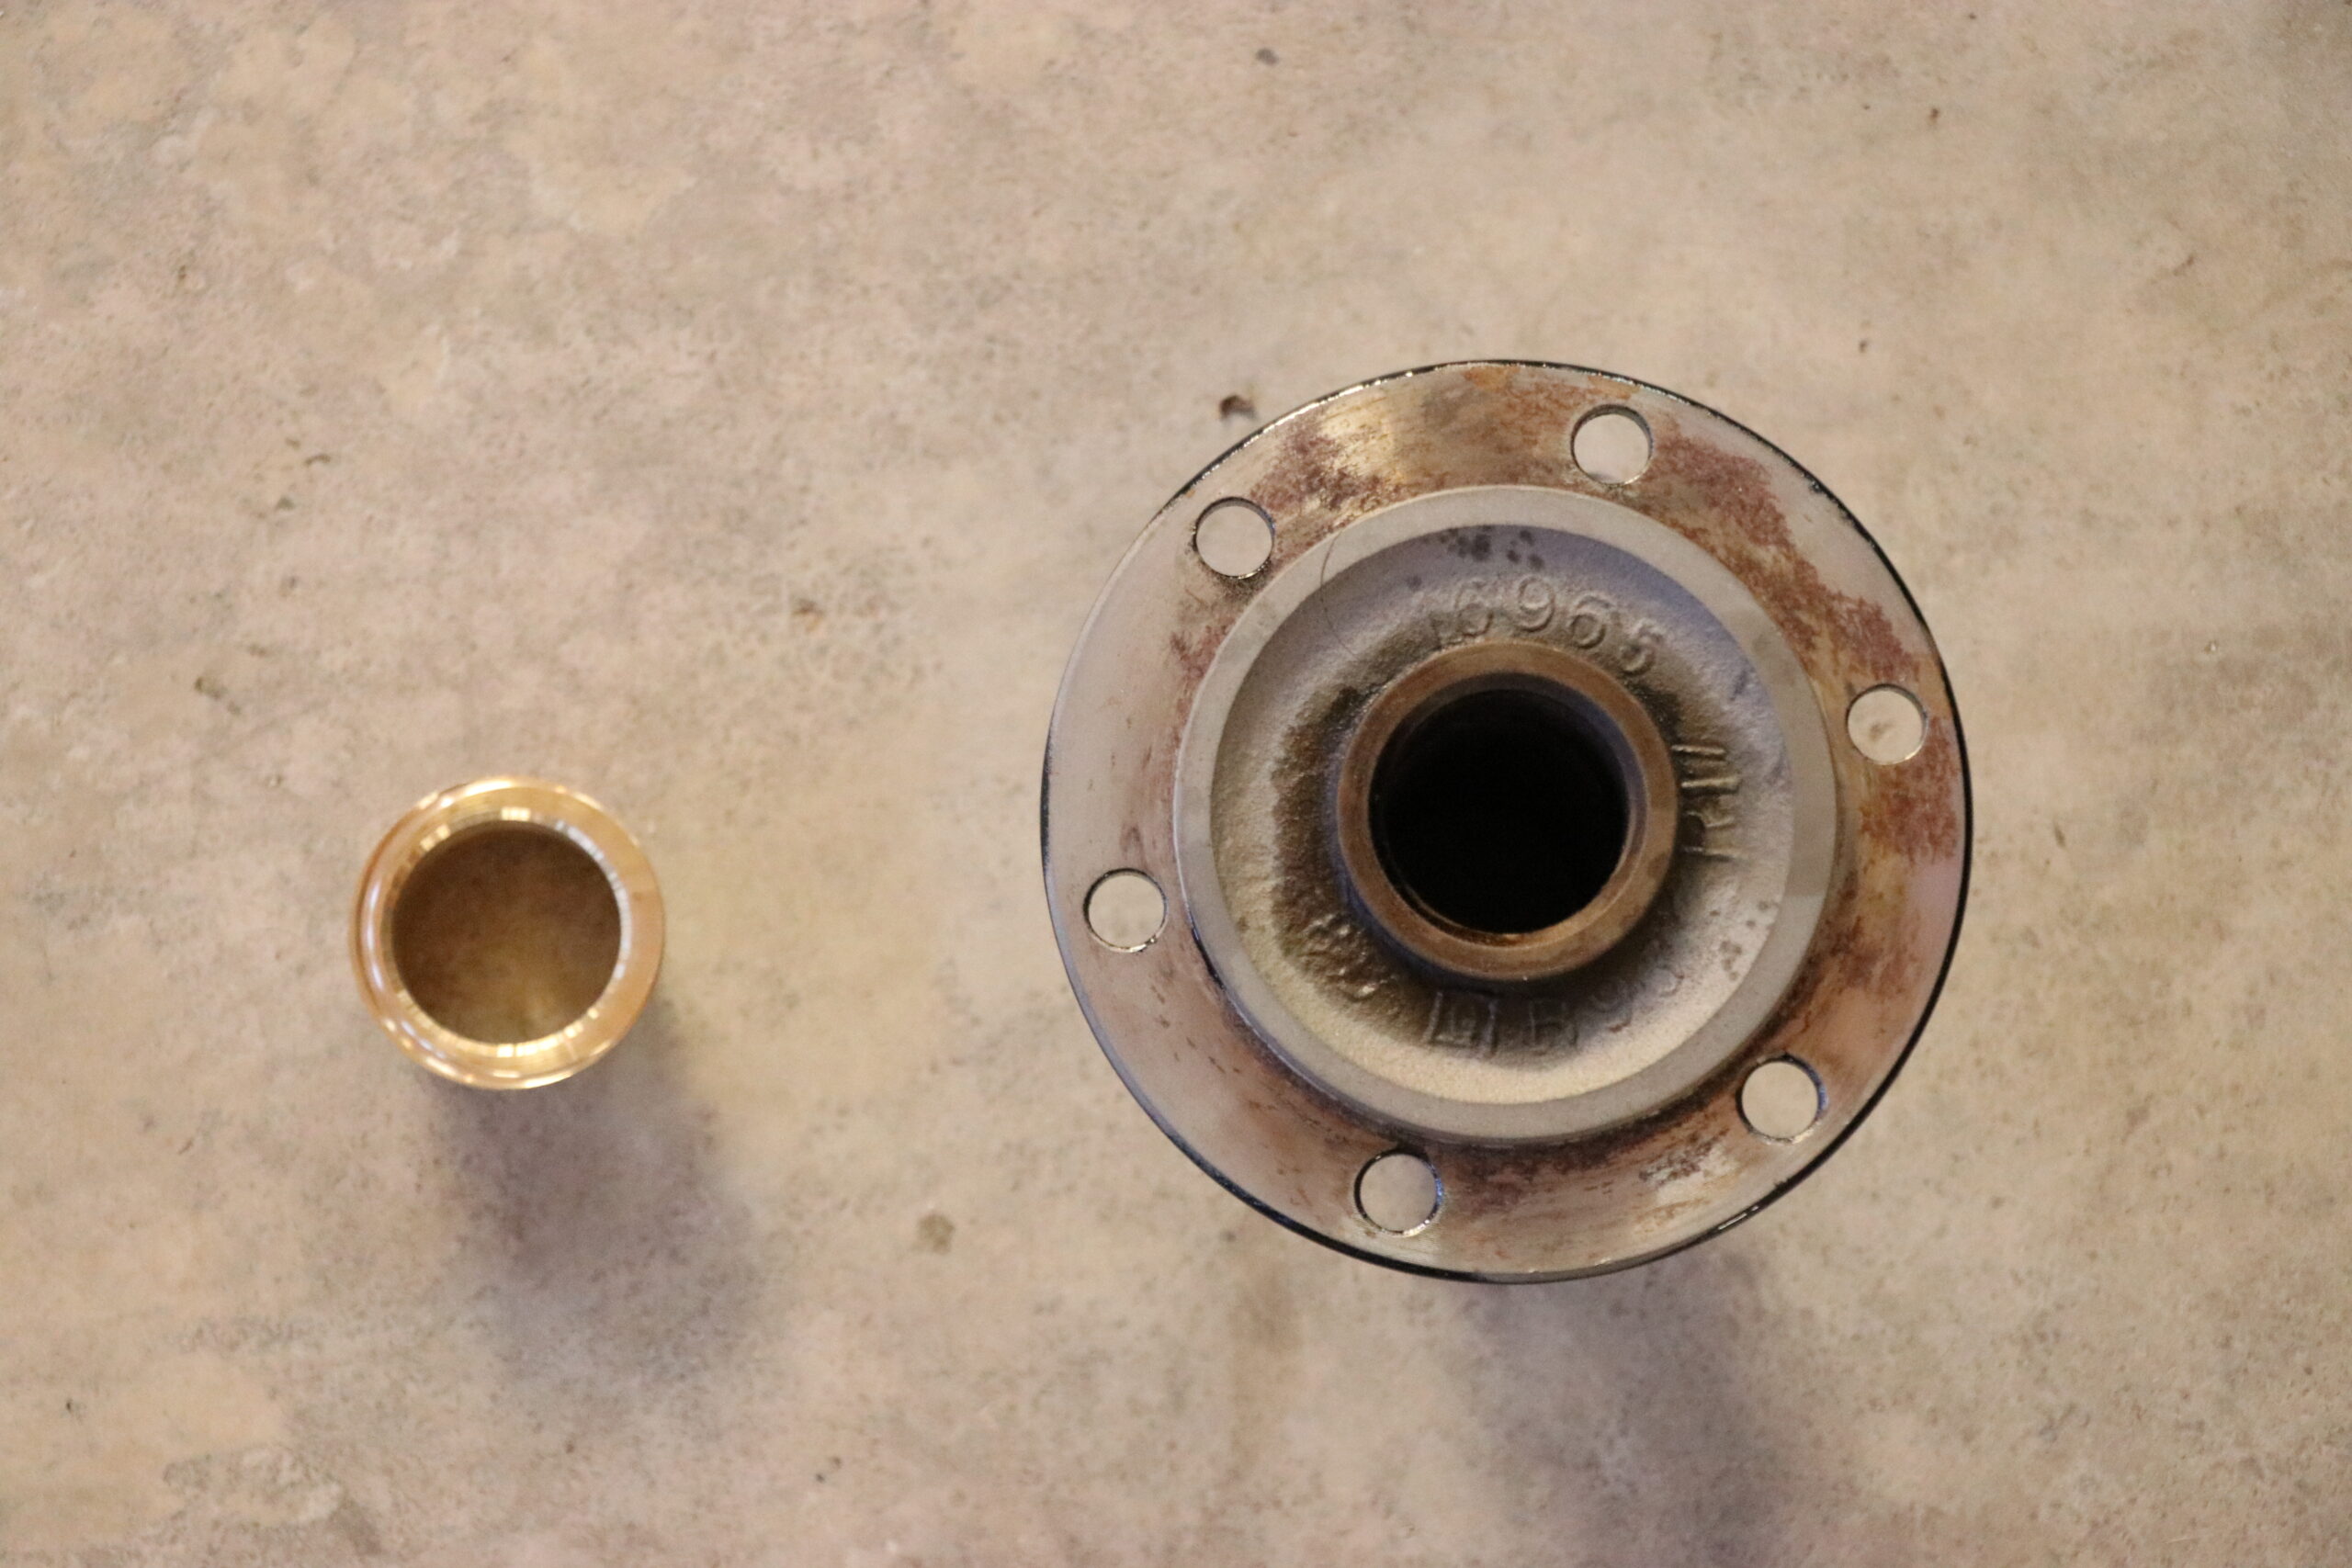
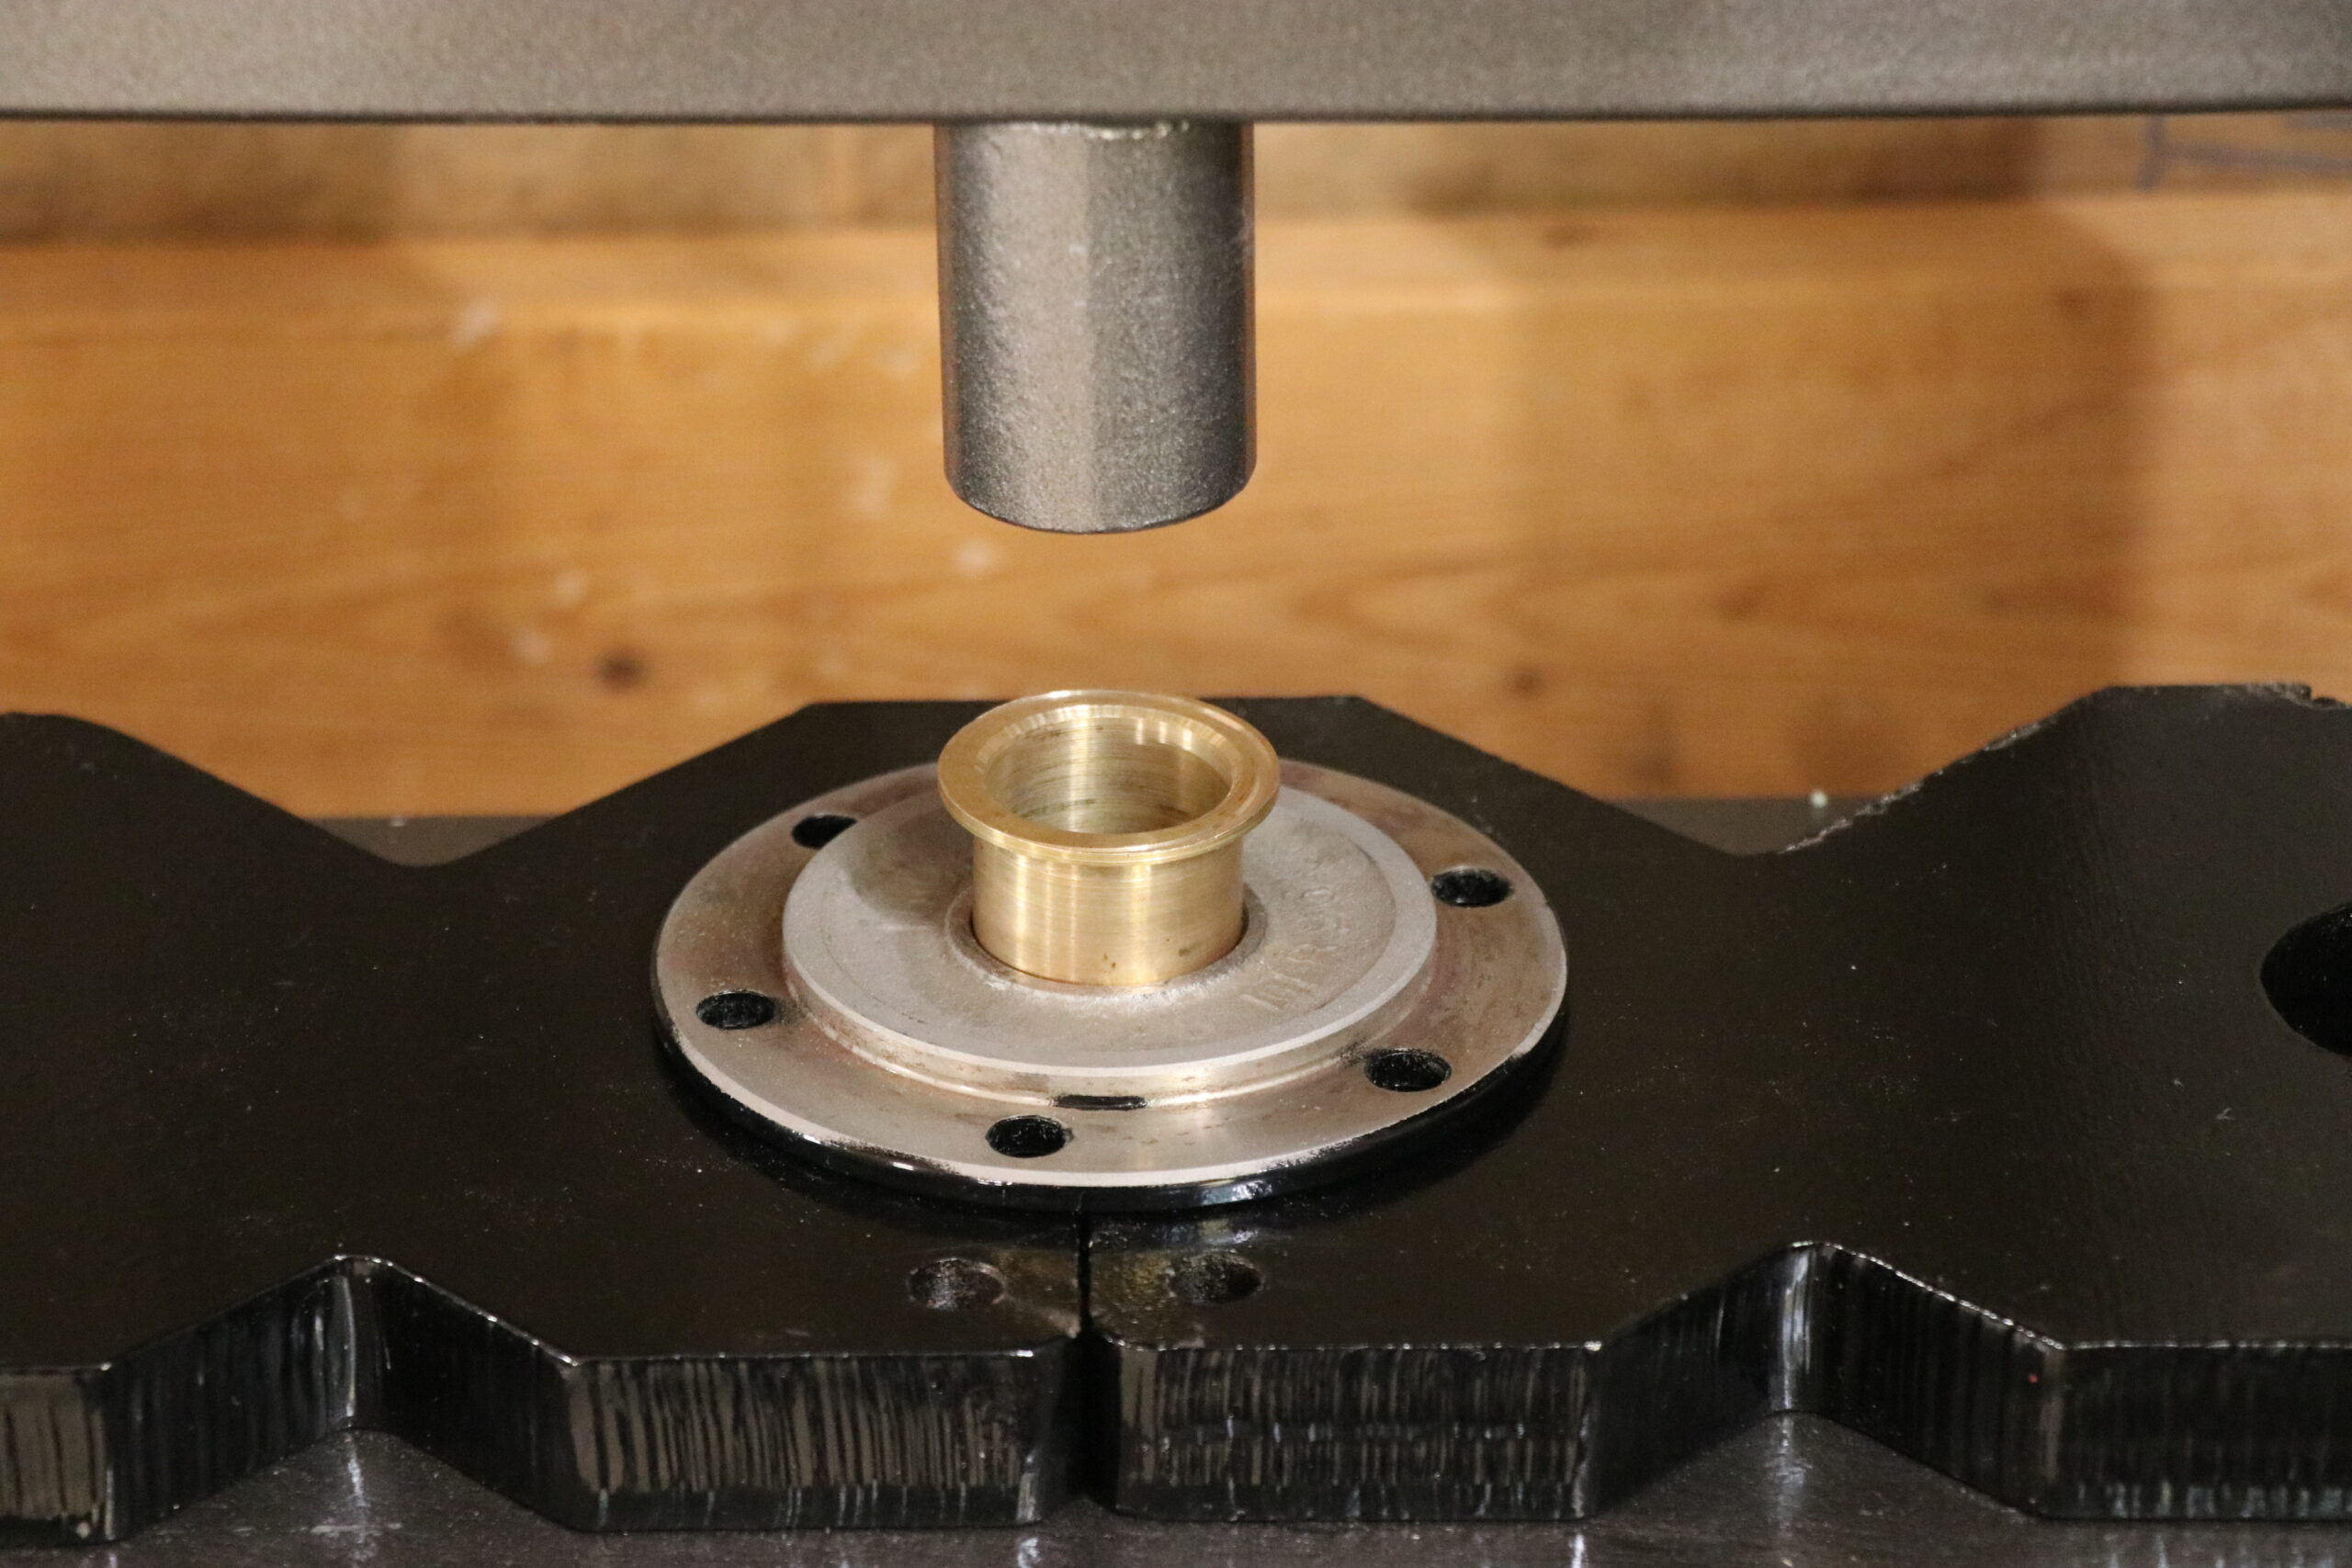
Thanks to our friends over at Kaiser-Willys we had their support and the parts we needed for a complete rebuild of our front and rear axles as well as a full, four corner disc brake conversion. We utilized the “Made in the U.S.A. bearings” and seals sent in the rebuild kit and thanks to the guys down at Inland Truck Parts in Barr Nunn, Wyoming. We were able to get the axles put together while utilizing their press, equipment and knowledge for the proper setup.
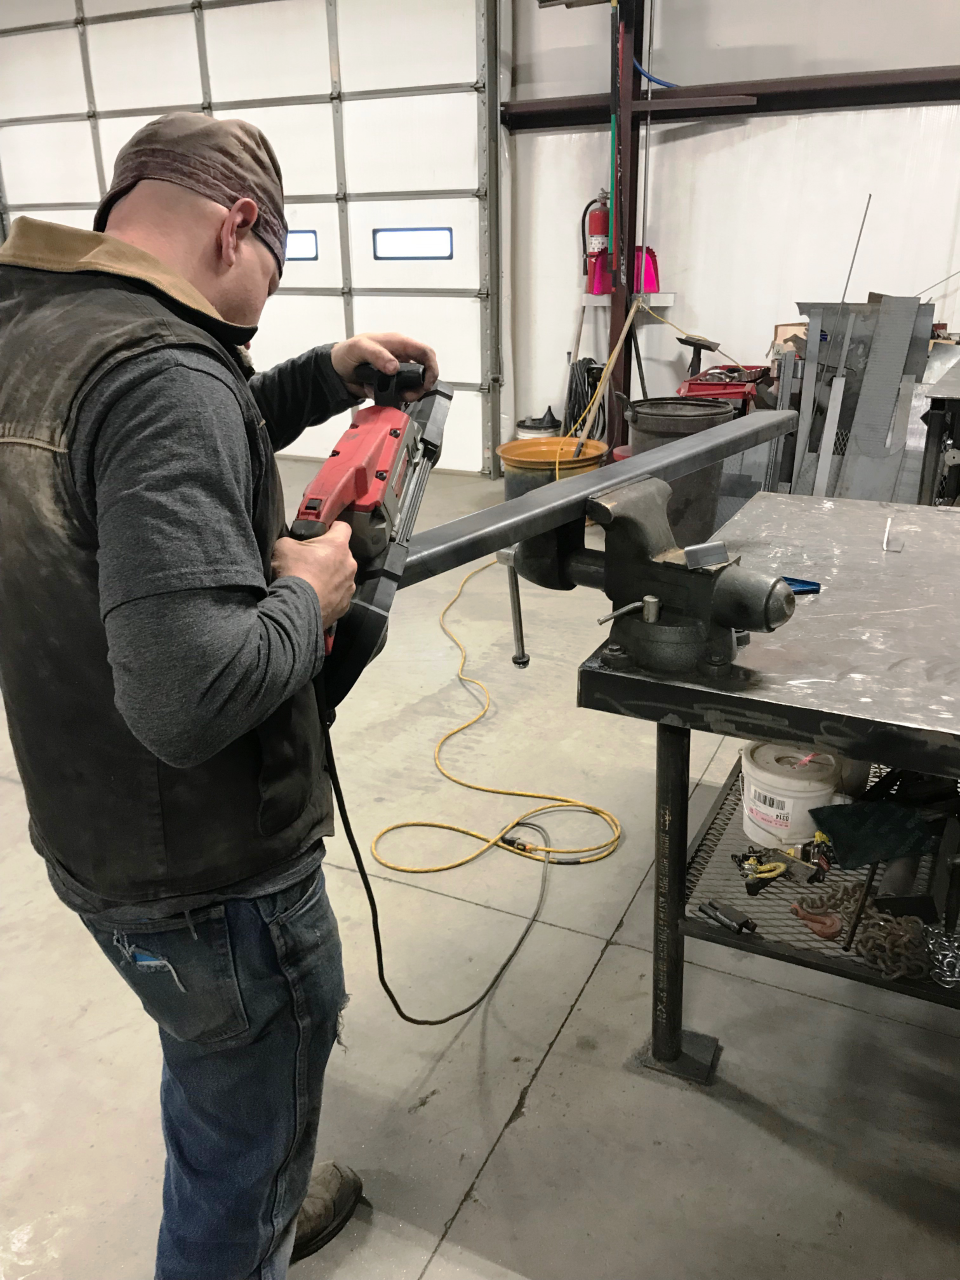
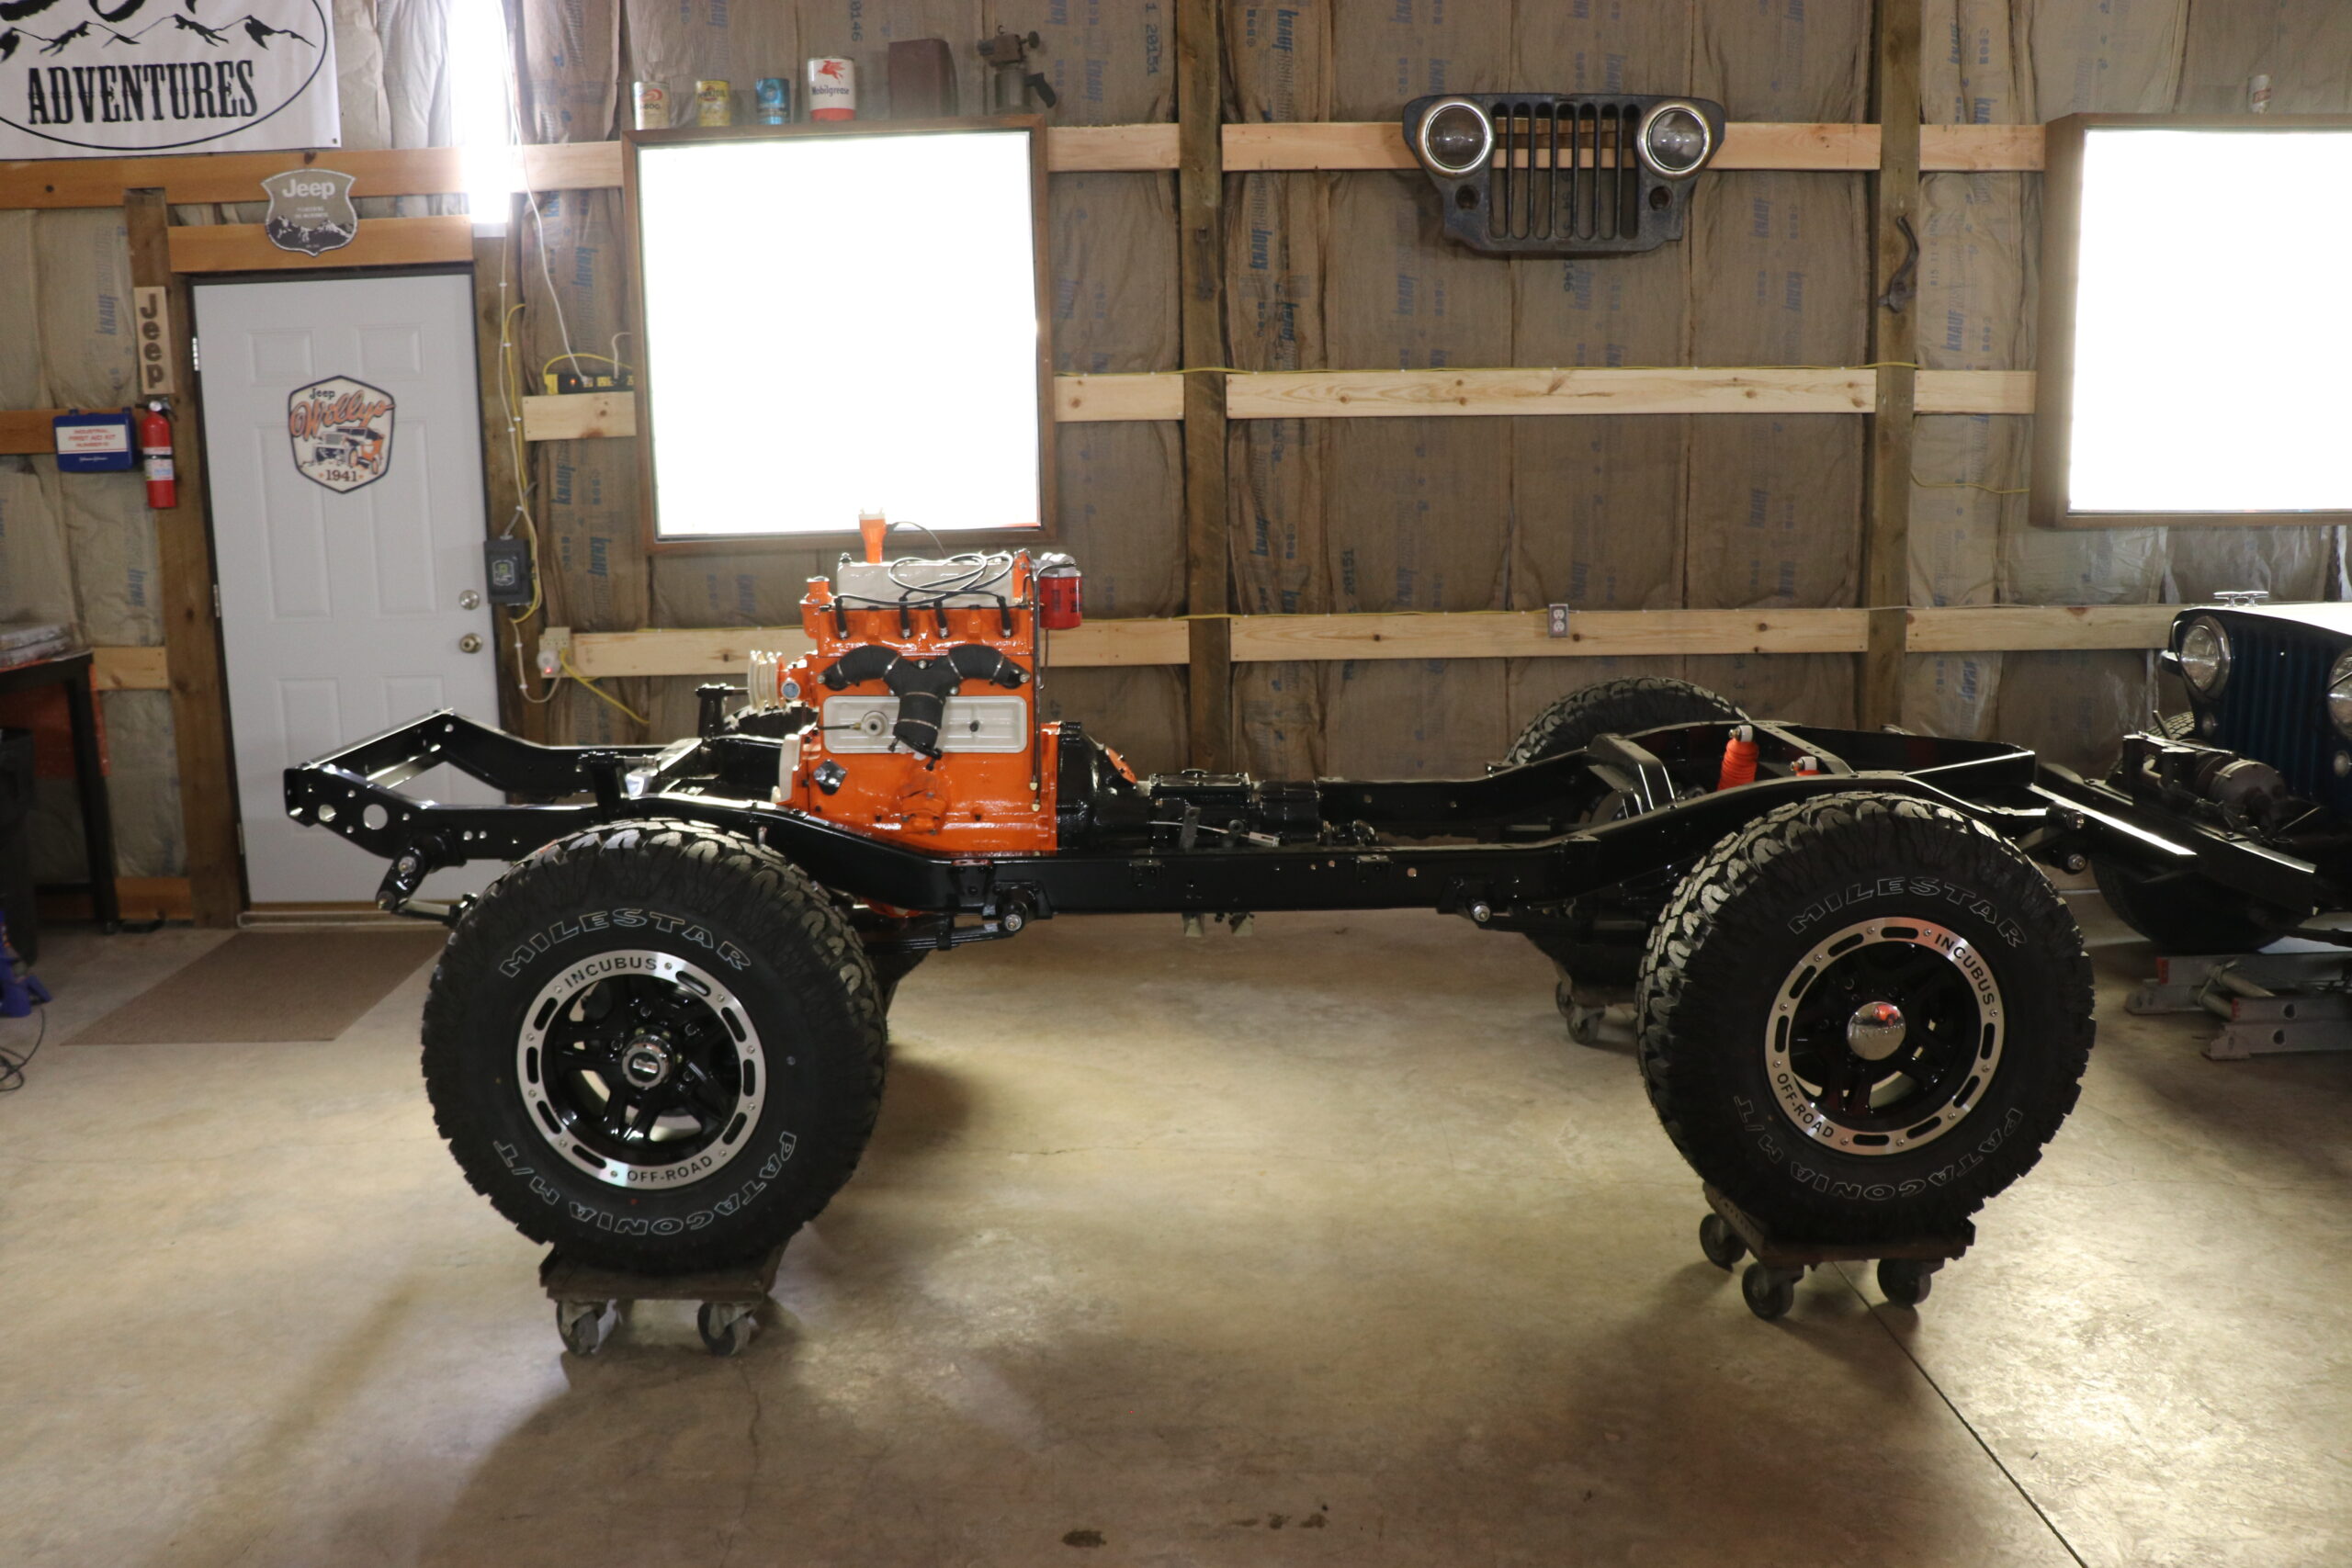
While the engine is getting finished we will be working on prepping the frame. A small amount of metalwork will be needed to repair a crack and straighten a couple of bent areas before media blasting and a fresh coat of gloss black powder are applied. While the guys wrap up the repairs and fab work on our frame we’ll get thing started on the disc brake conversion for the rear axle. Finally, we are able to see things starting to come together on our “Project FC-150”!!


It seemed like a long time coming and as we brought the various parts back to the shop and mocked them up in preparation for the build. The excitement grew with every part we positioned in its rightful place on the floor until things could be bolted together. Since we had enough of our chassis parts gathered it was time to get started.
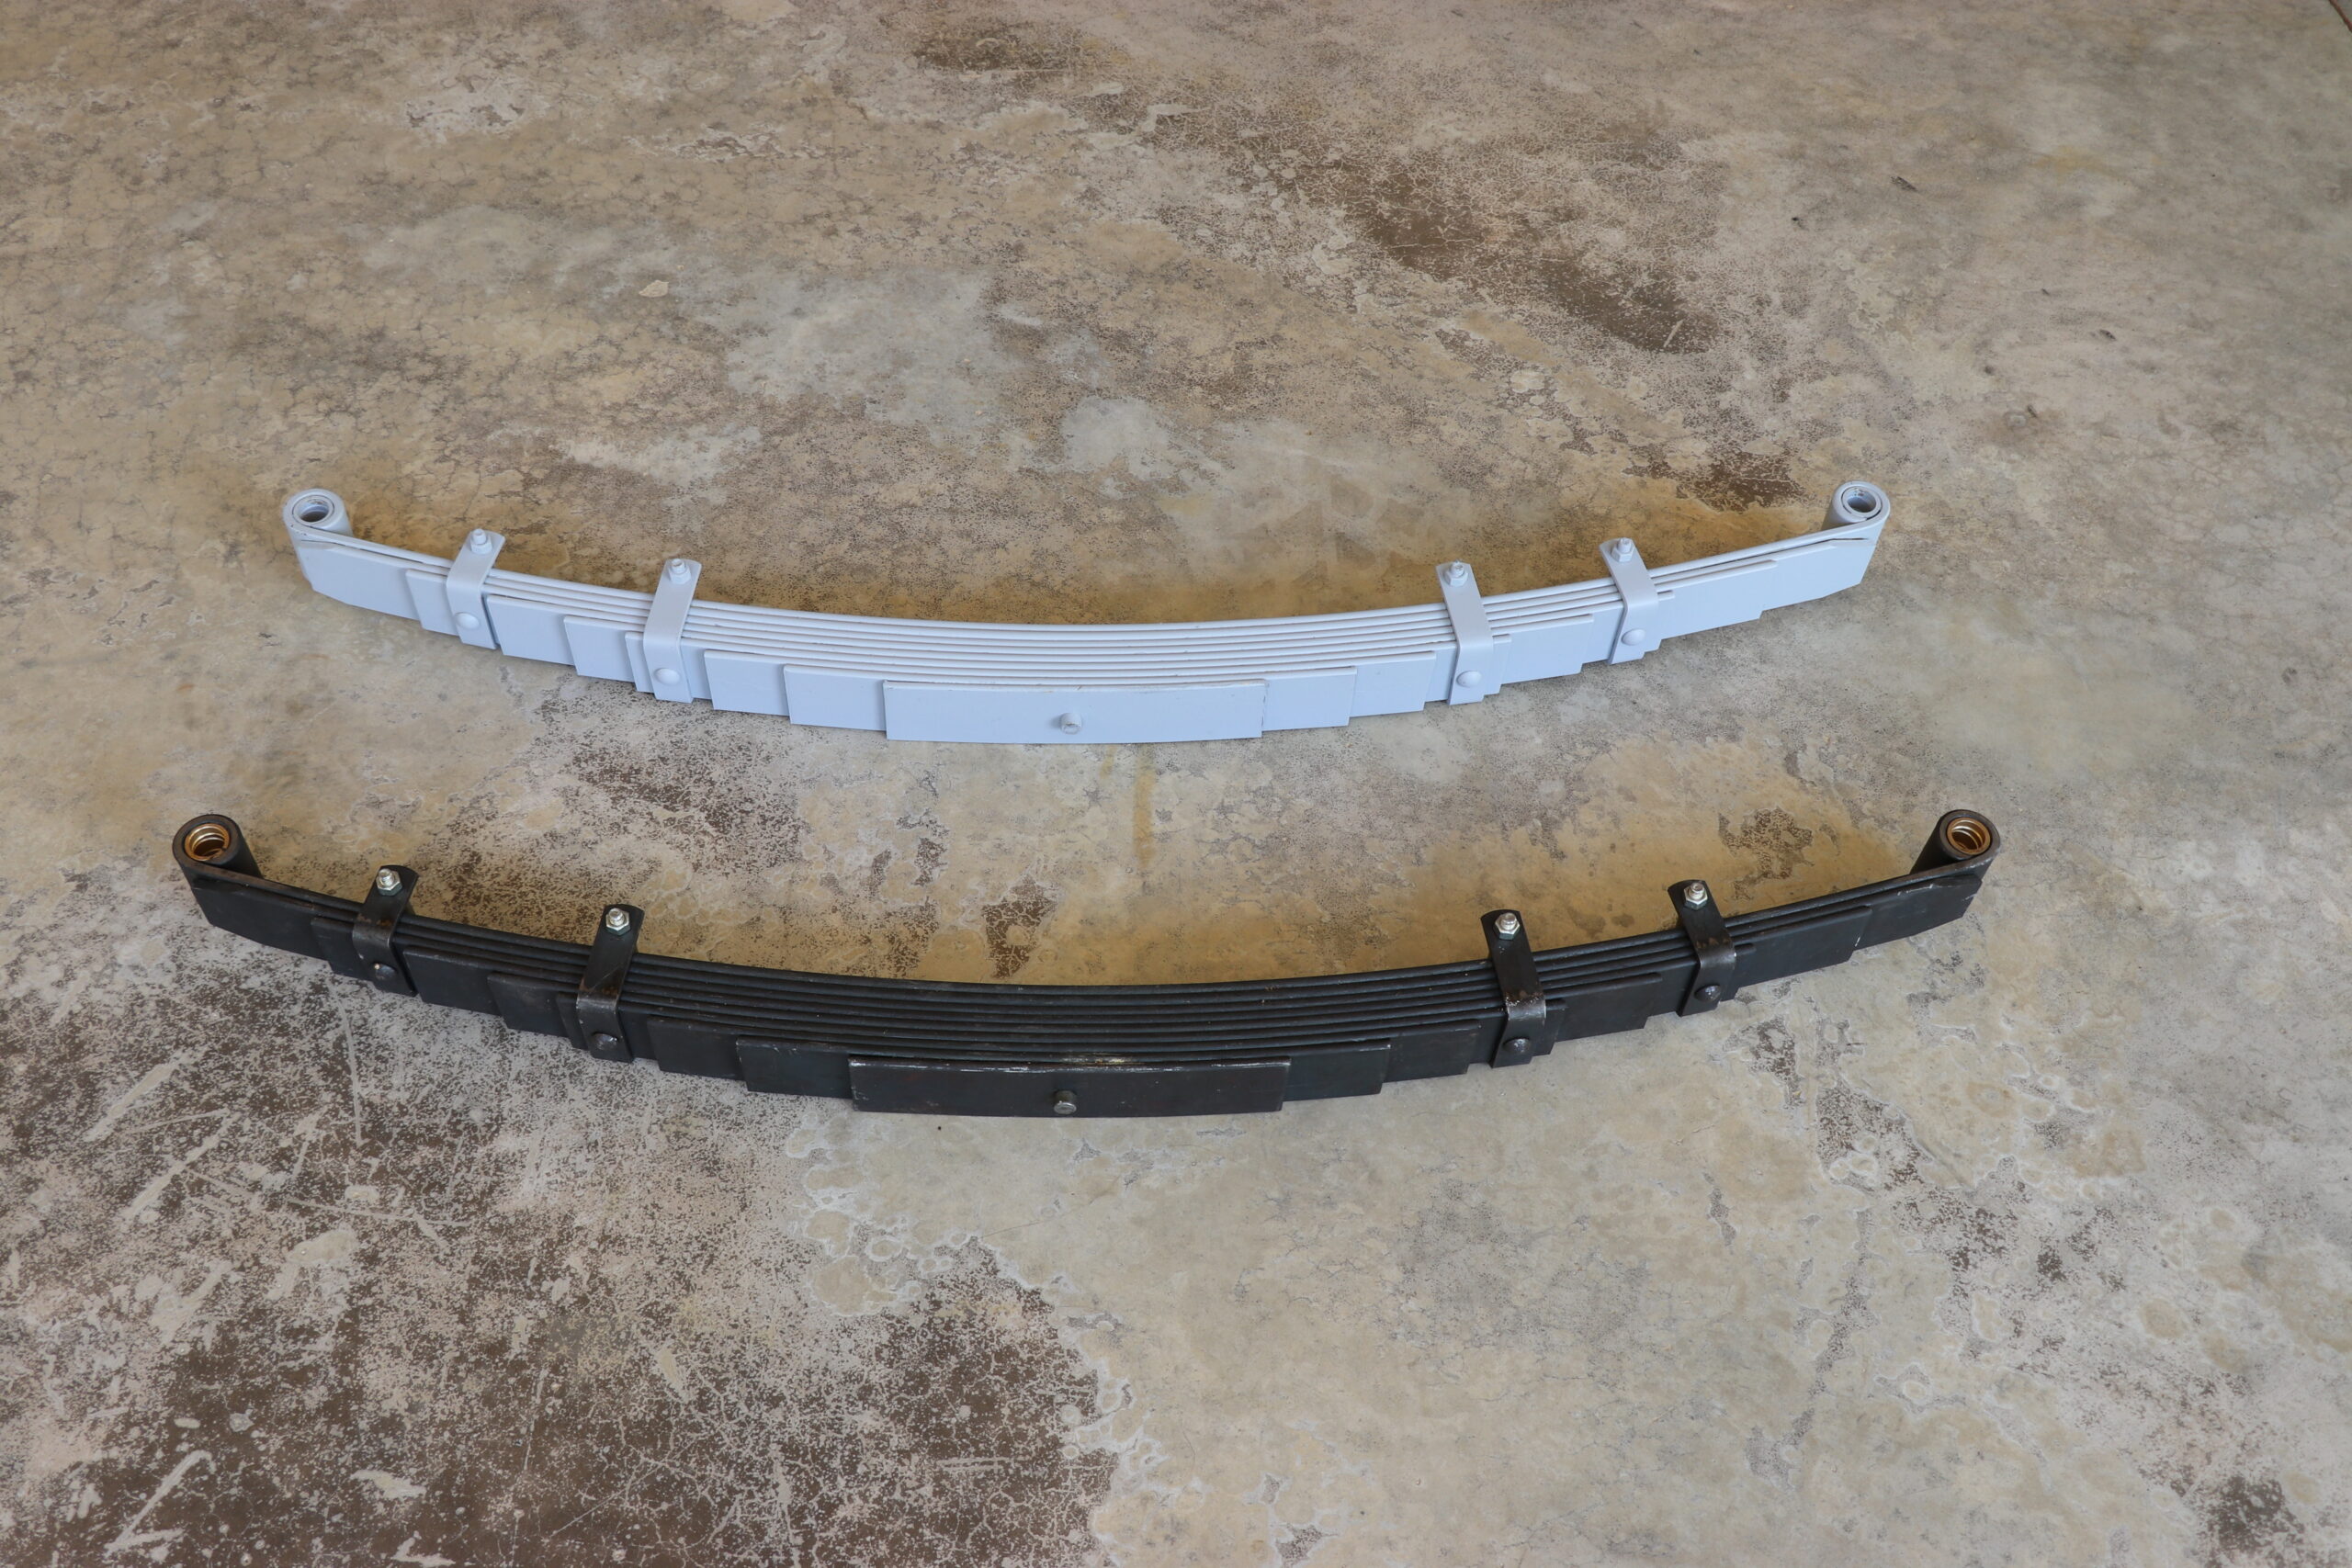
We did paint the springs we purchased from Walck’s 4WD so they would somewhat match the quality of the powder coating. Once the paint was dry, those were the first pieces to go together. Obviously the 5next was to get the axles connected to the springs and with that complete, we were able to get started on the rear disc brake conversion from Kaiser-Willys Supply.
Since this is a build we are sharing with so many, we wanted to share the information on how the conversion goes together. We discussed and decided to do a separate write up and video on exactly how the conversion is installed. If you’re considering an upgrade for your early model Jeep, check out our “How To” section of the website, here for the article itself or our YouTube page for the complete installation of the disc brake upgrade.

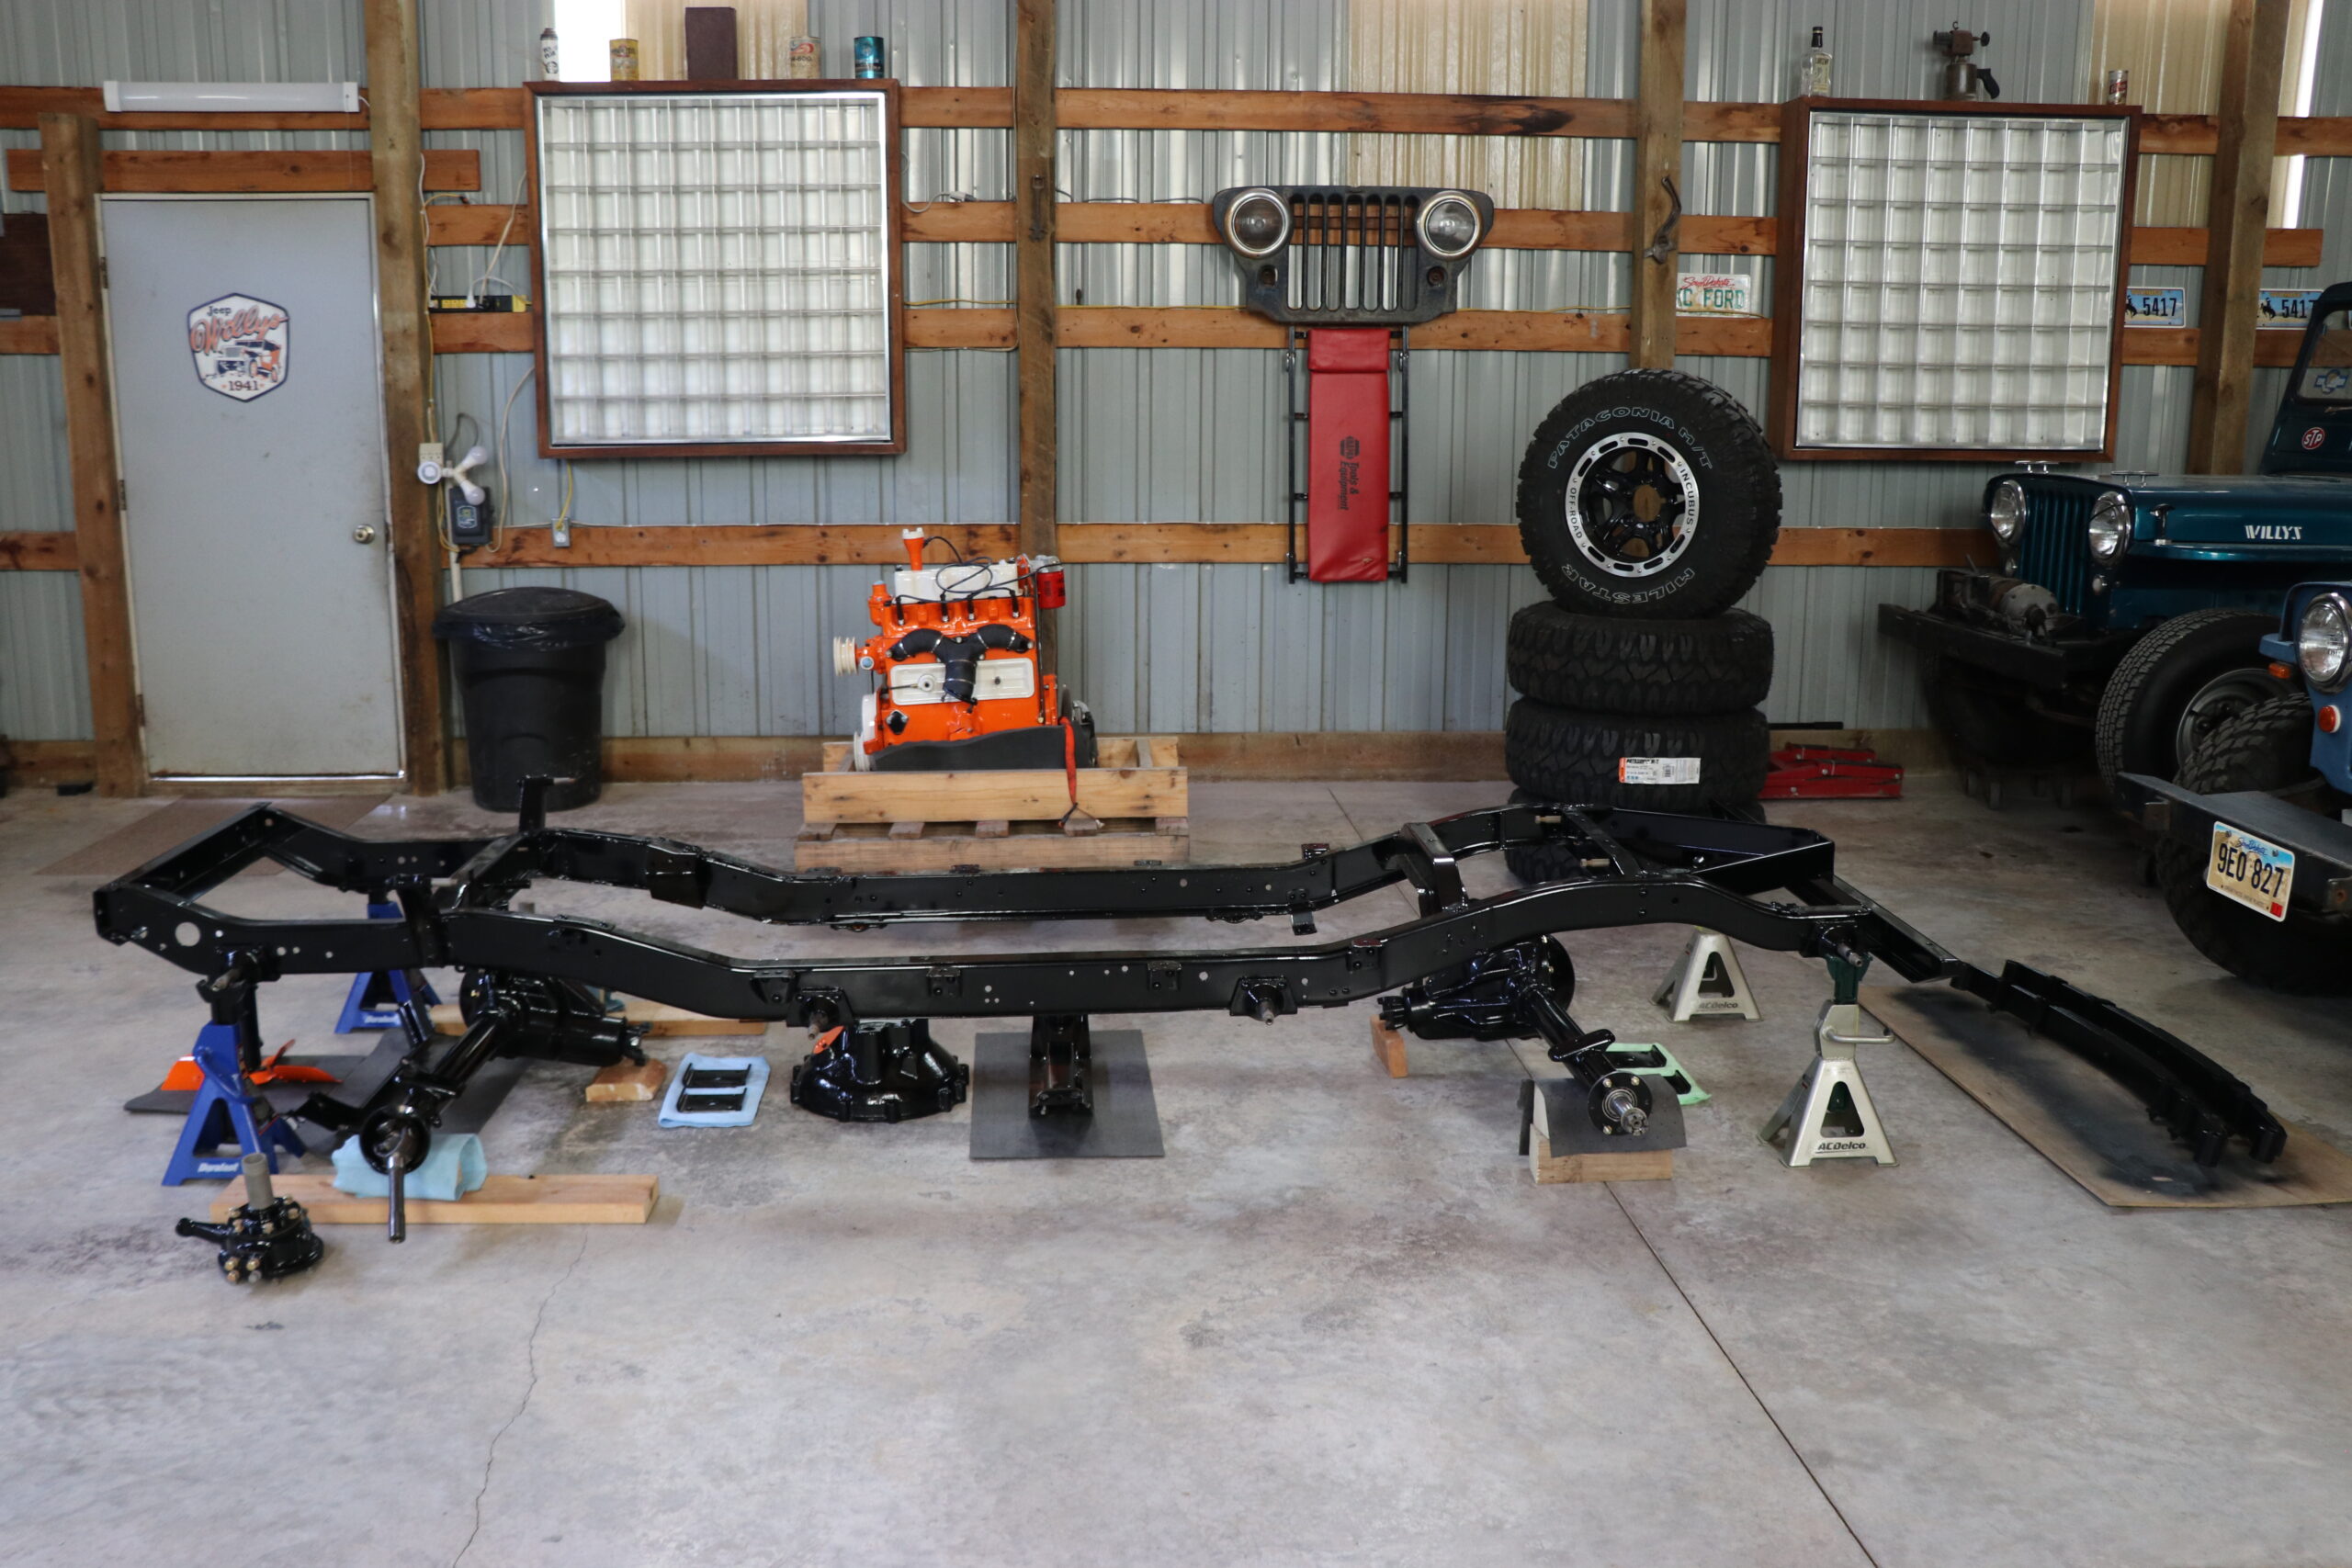
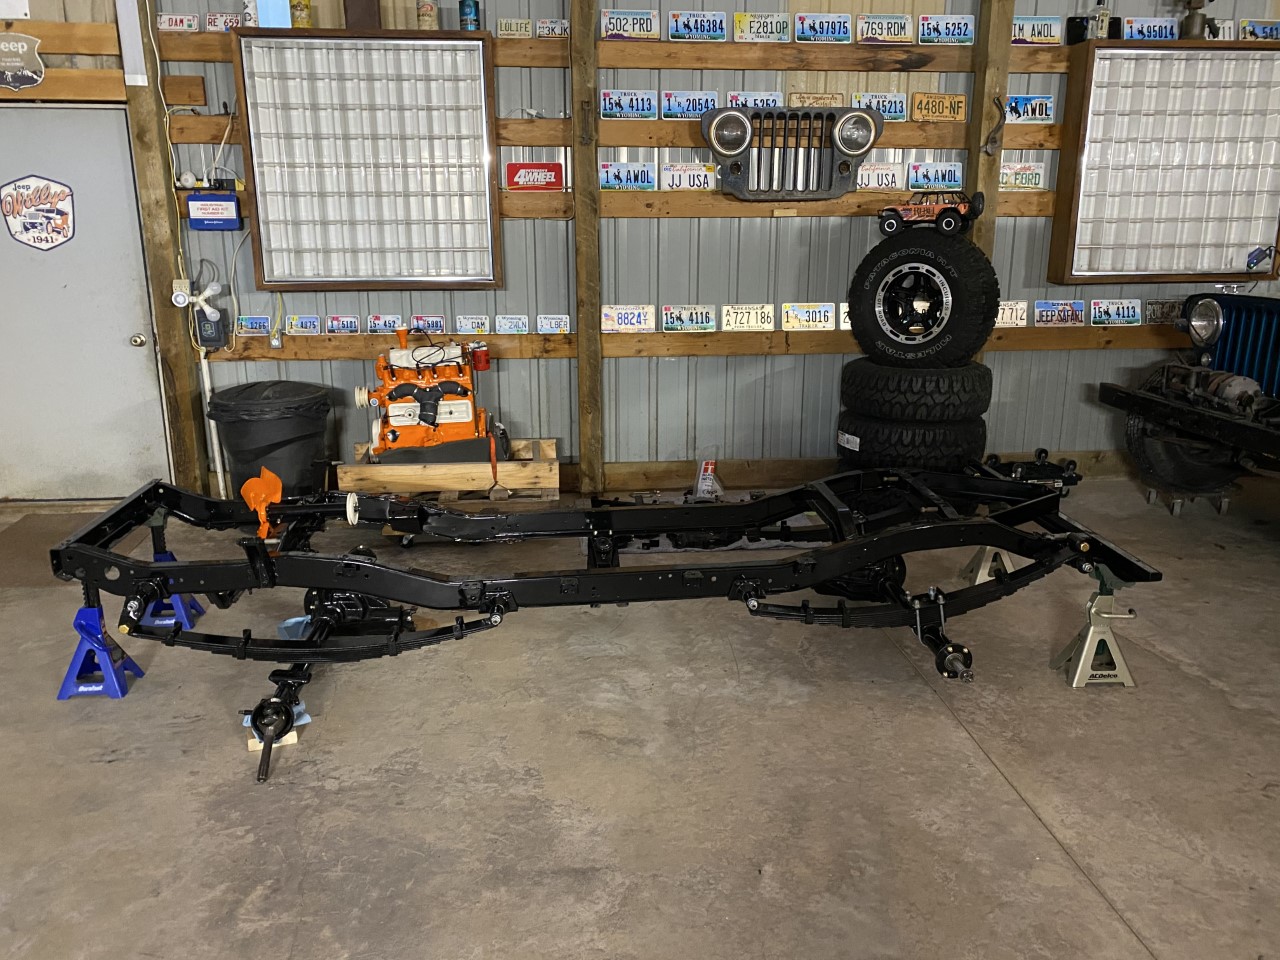


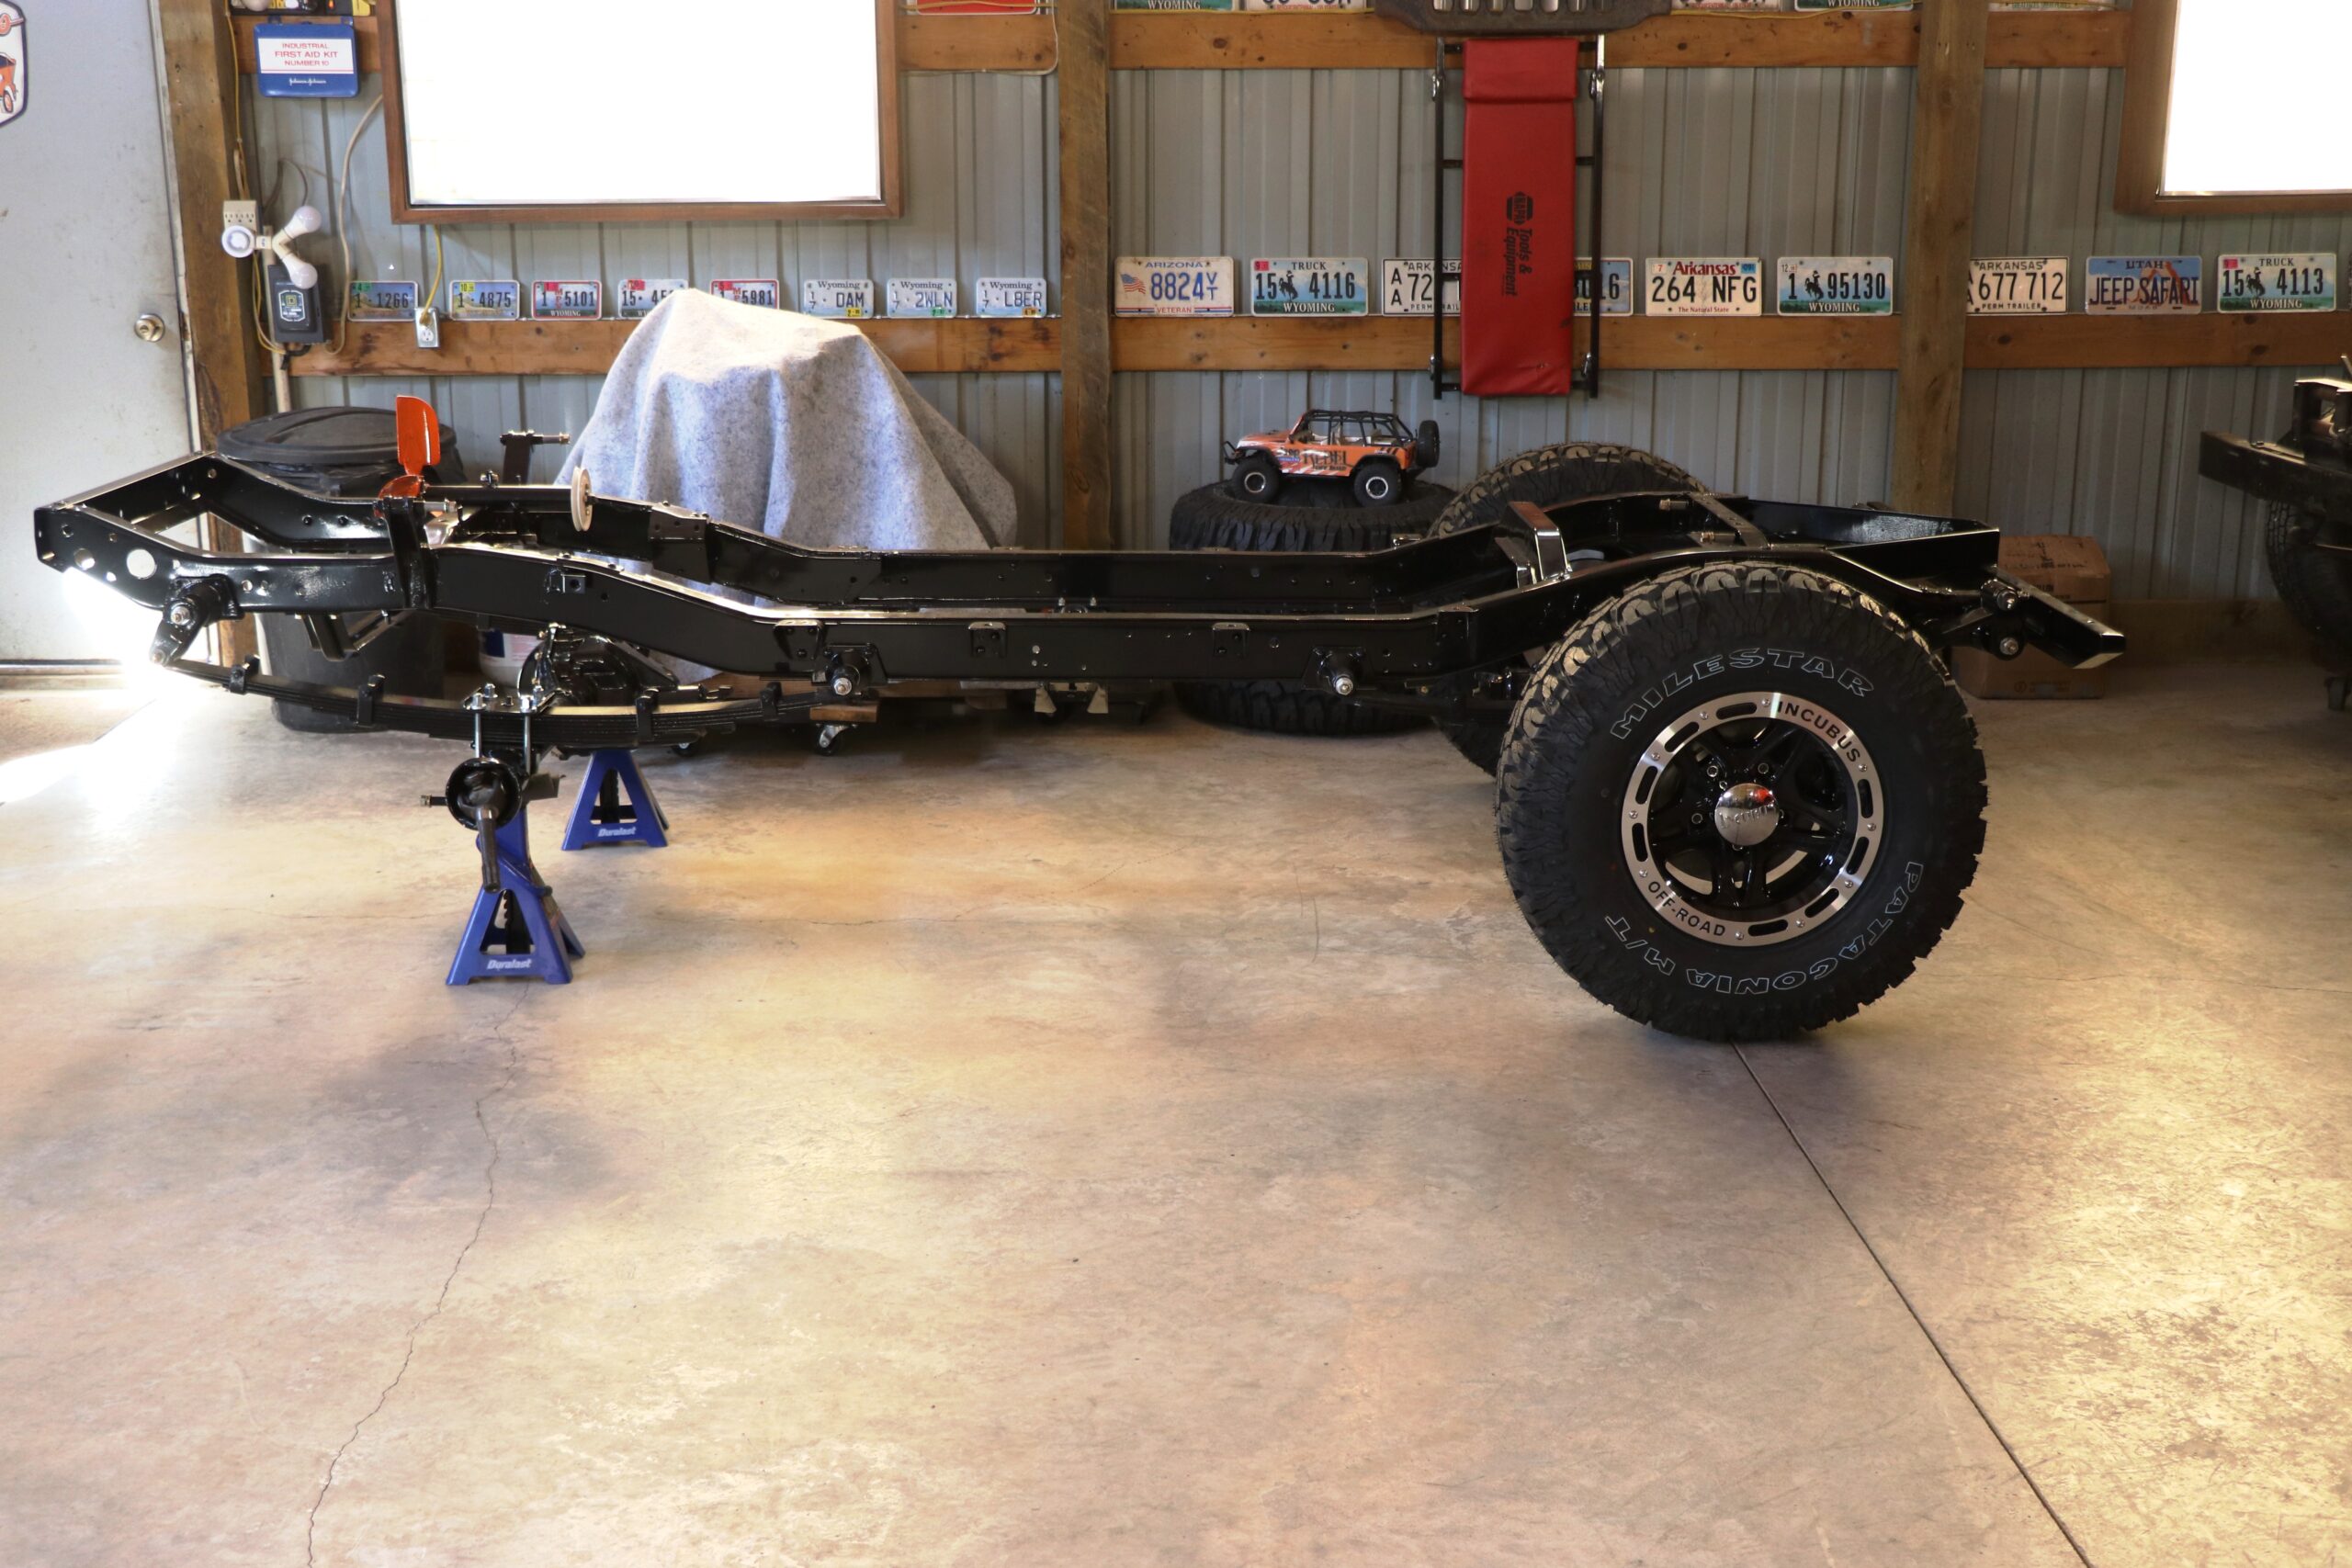


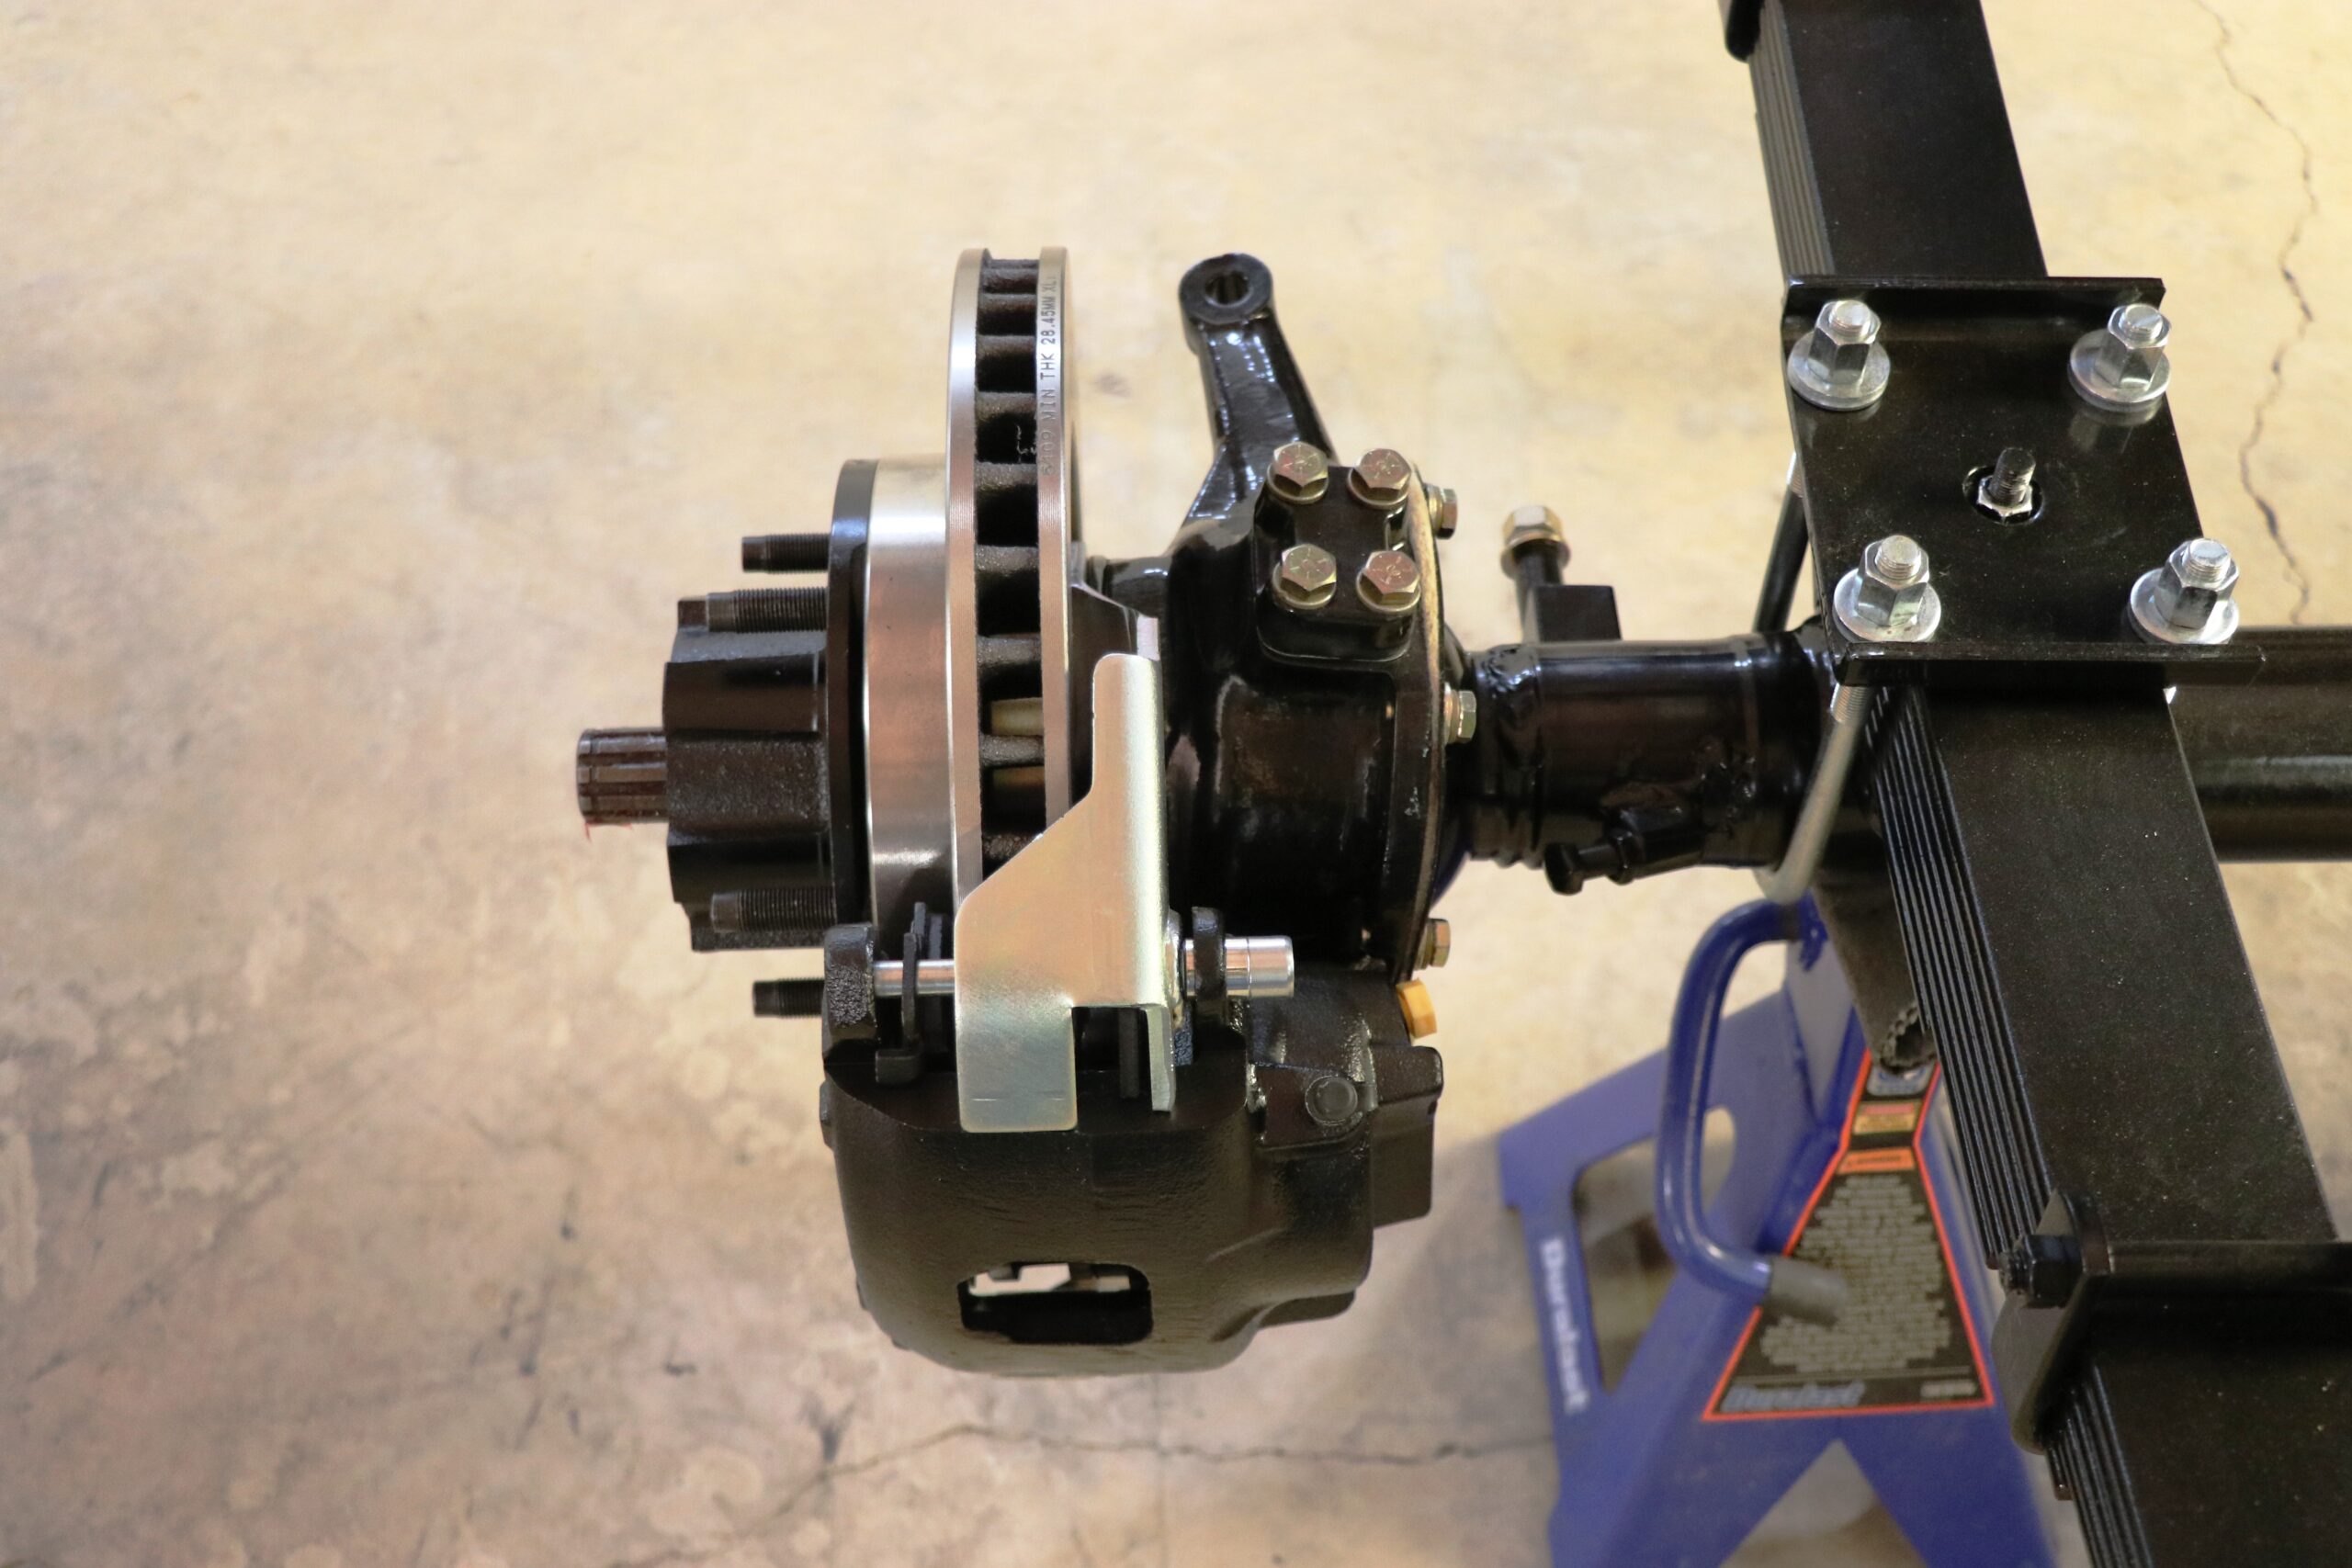
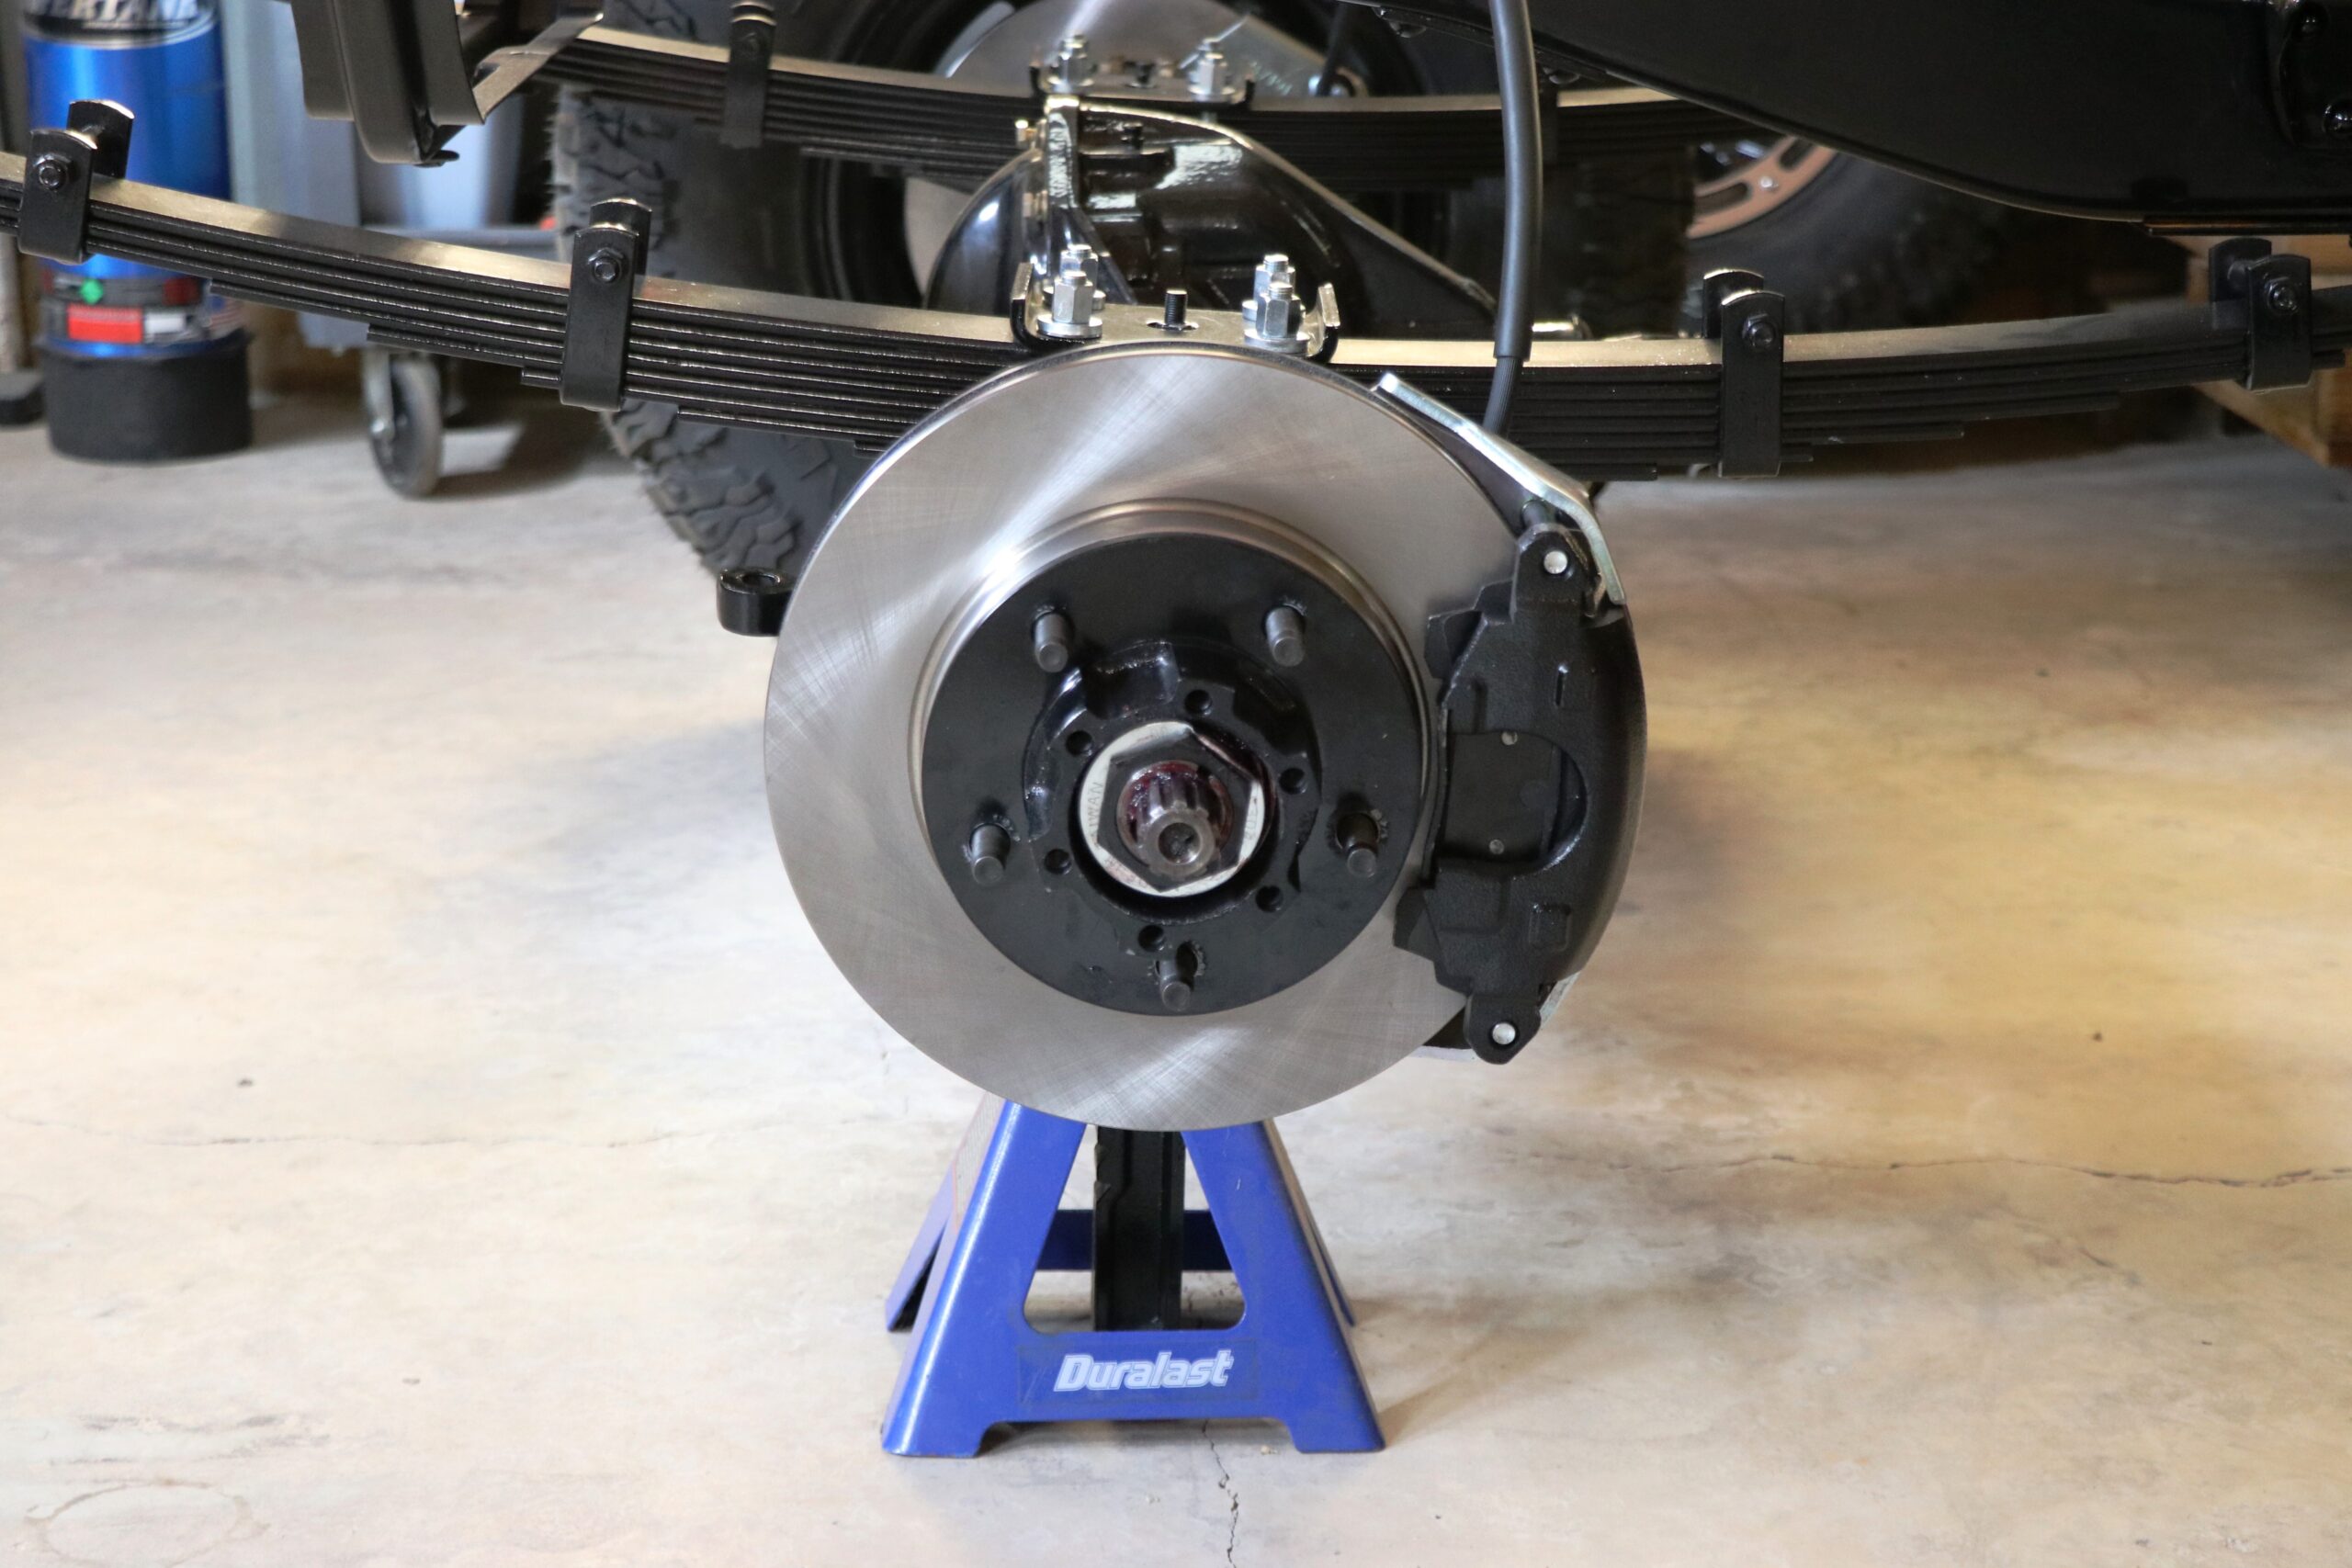

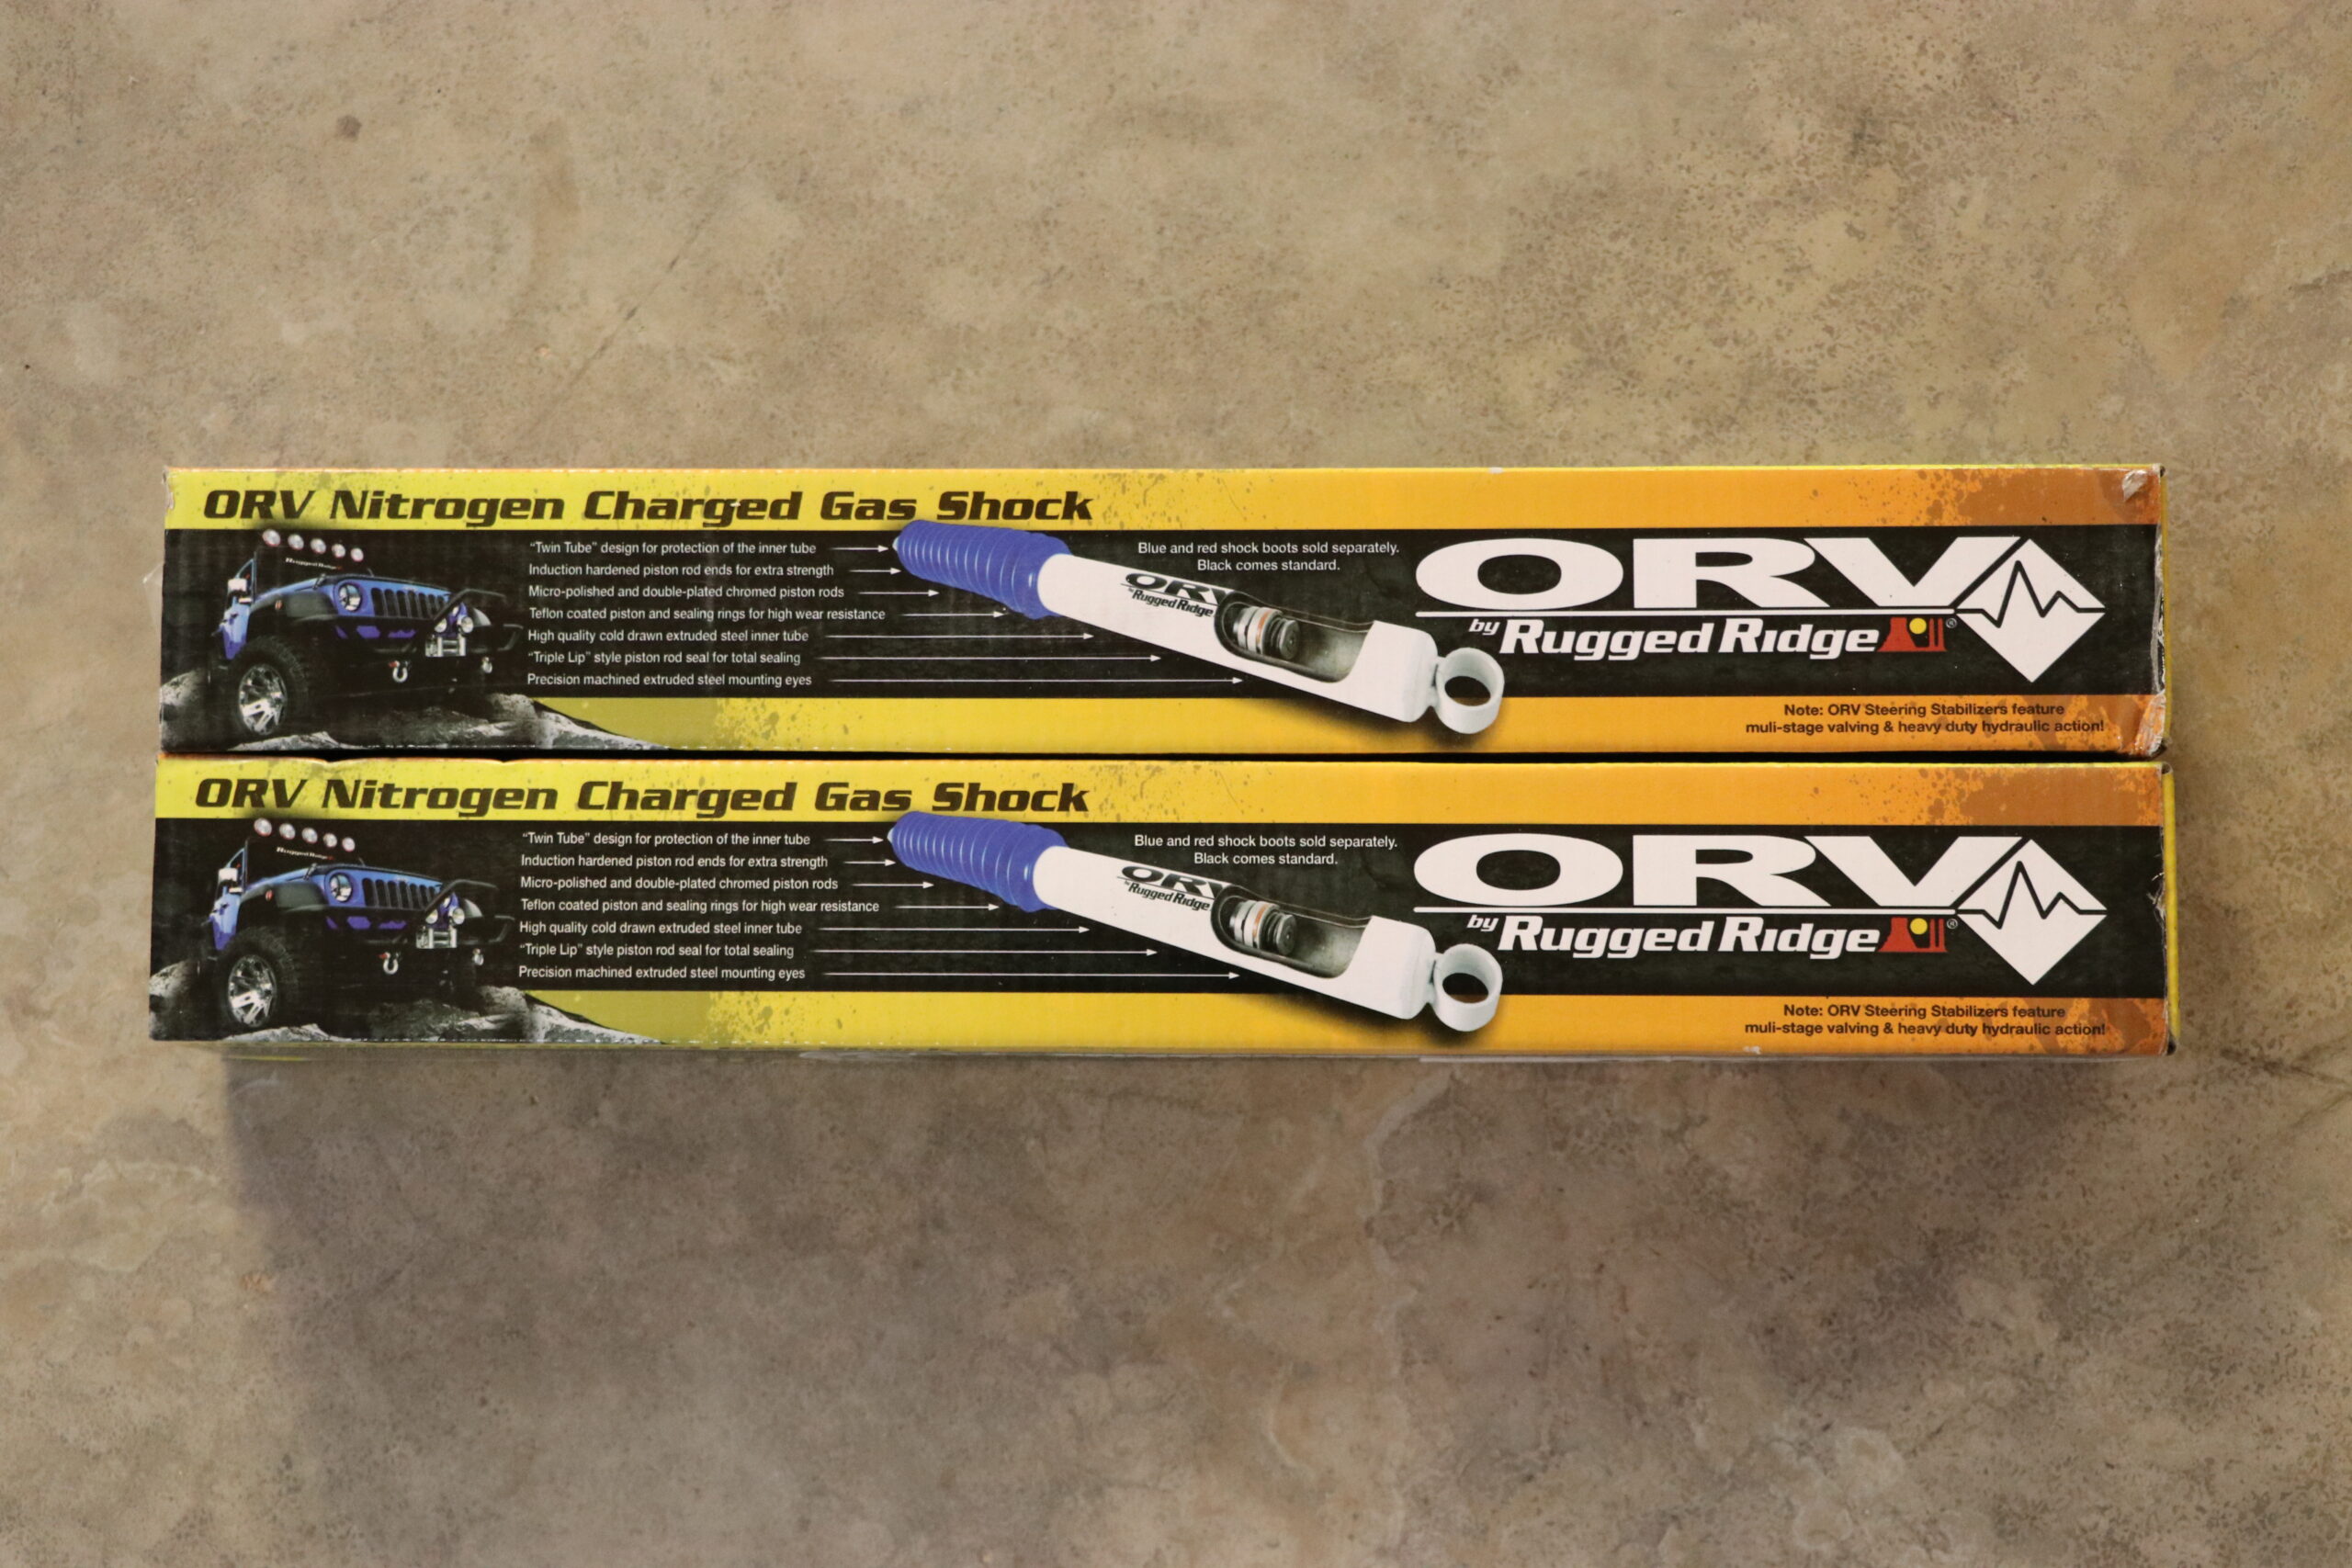
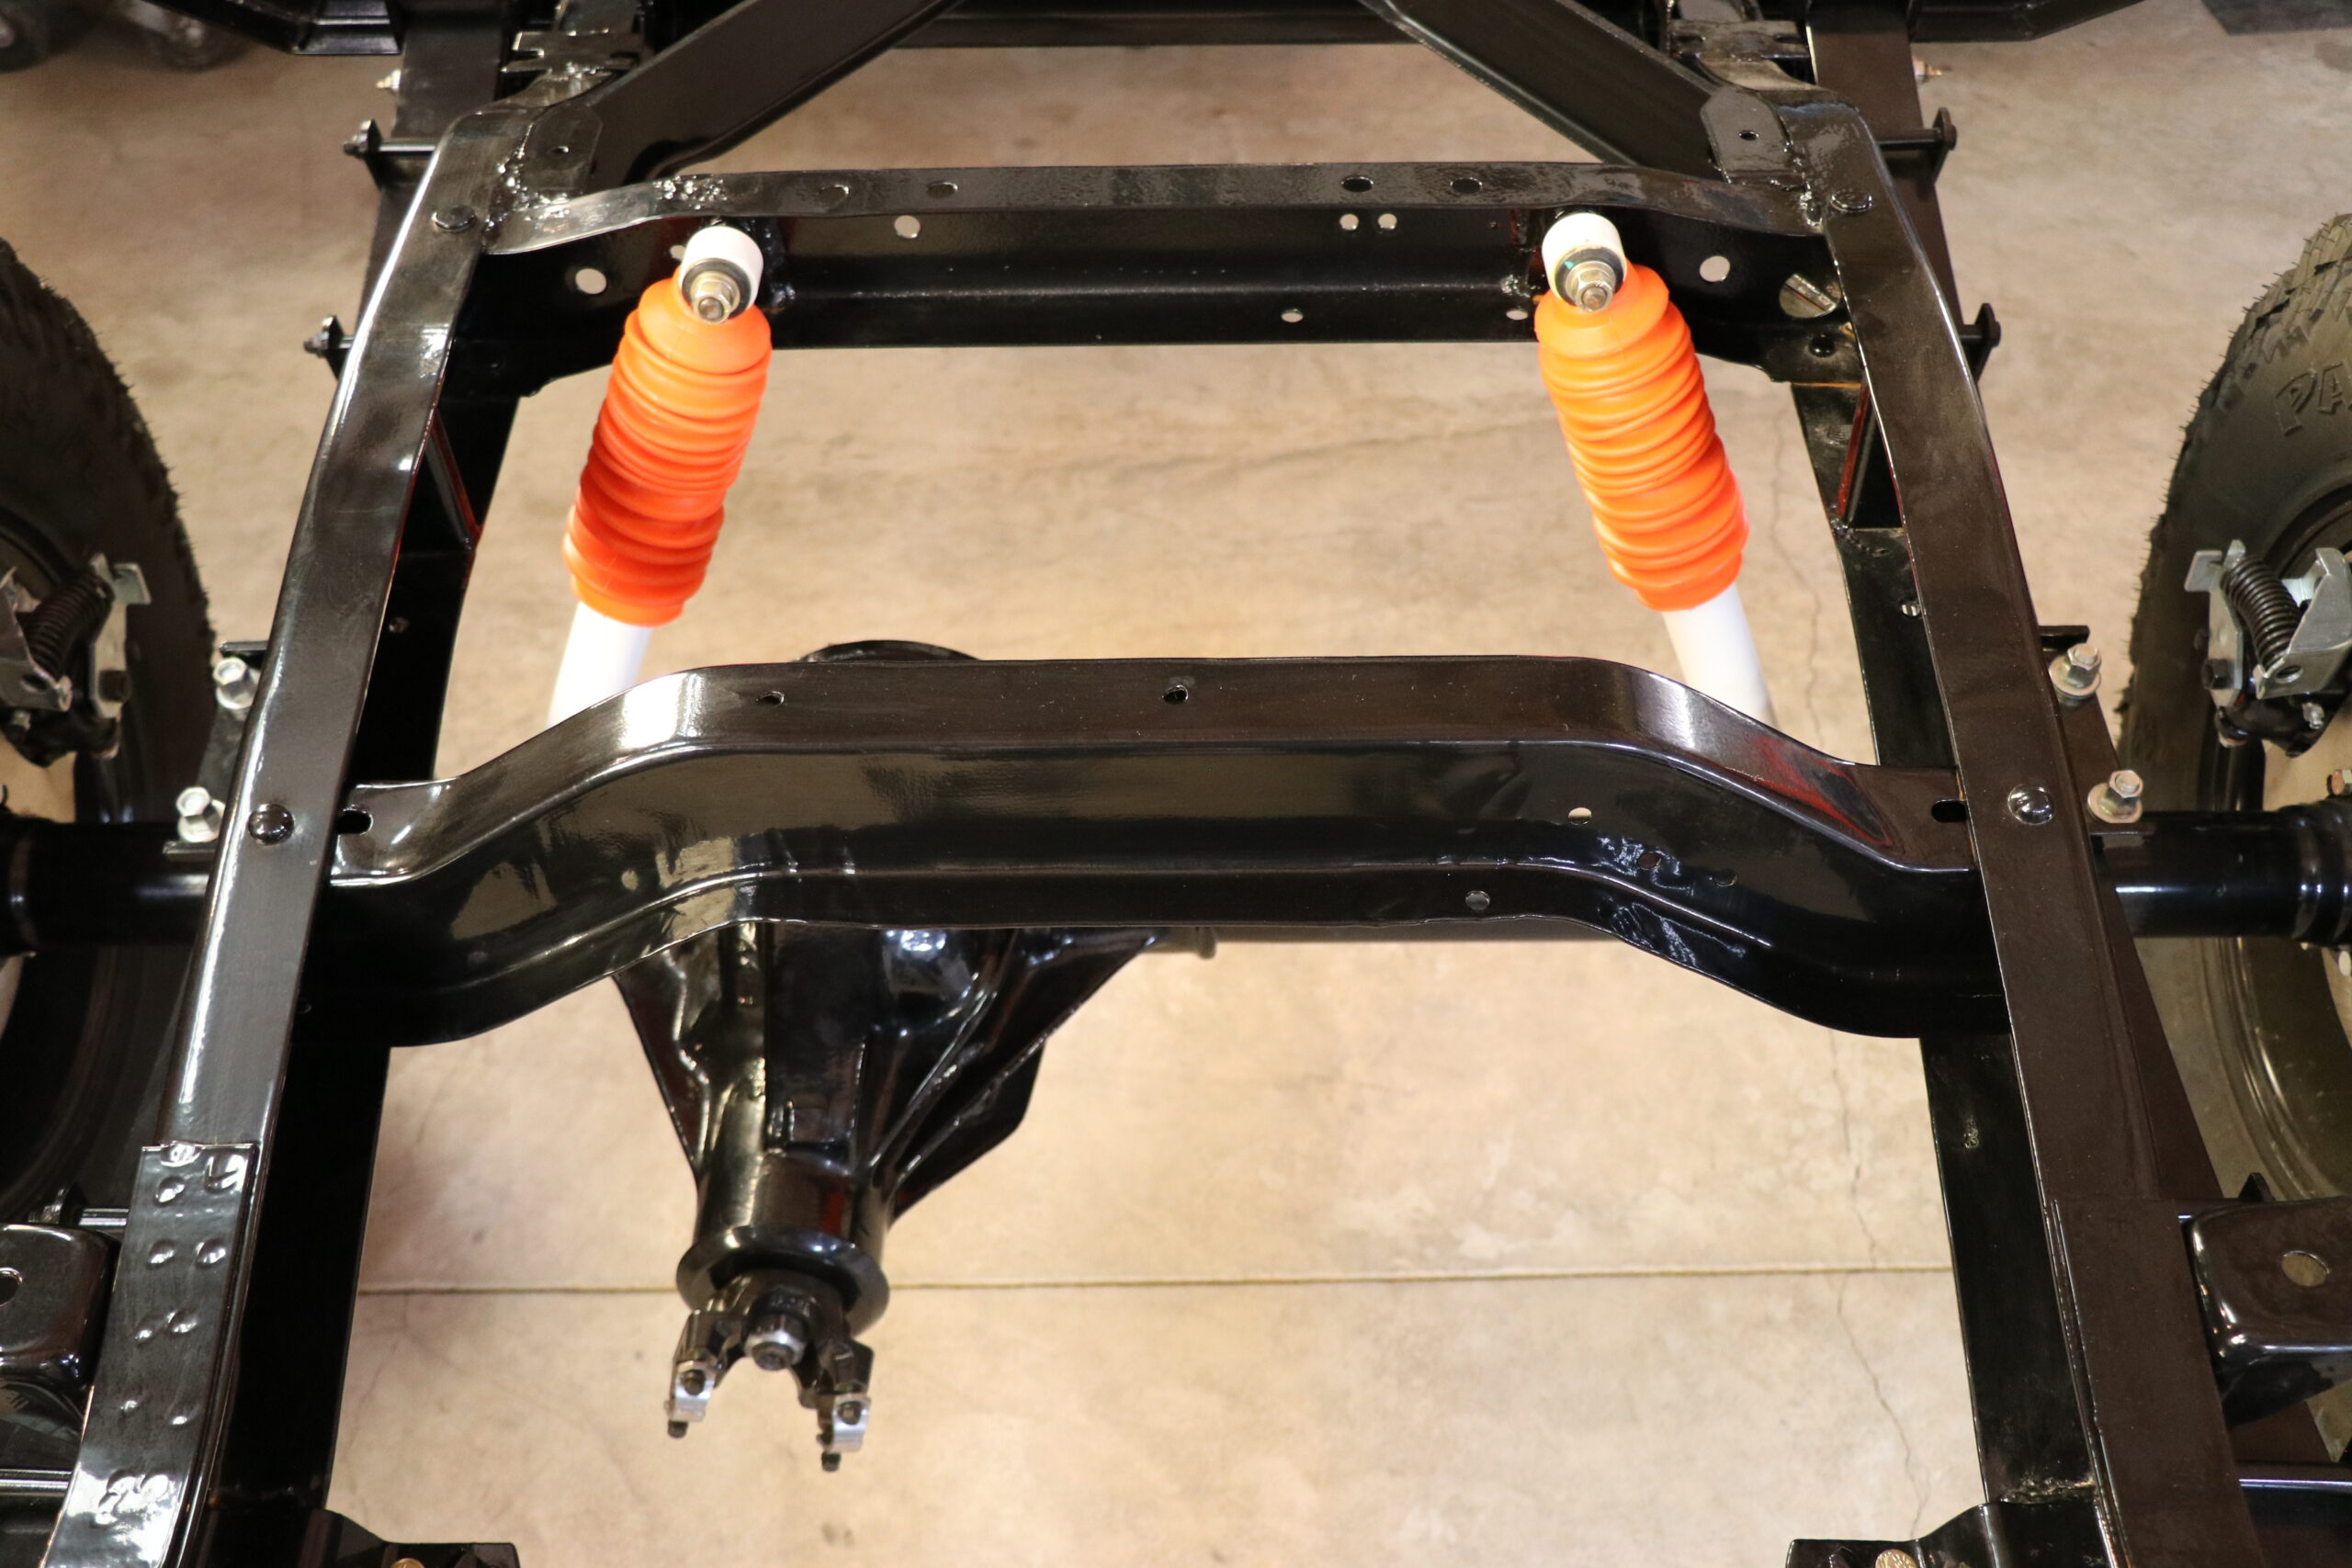
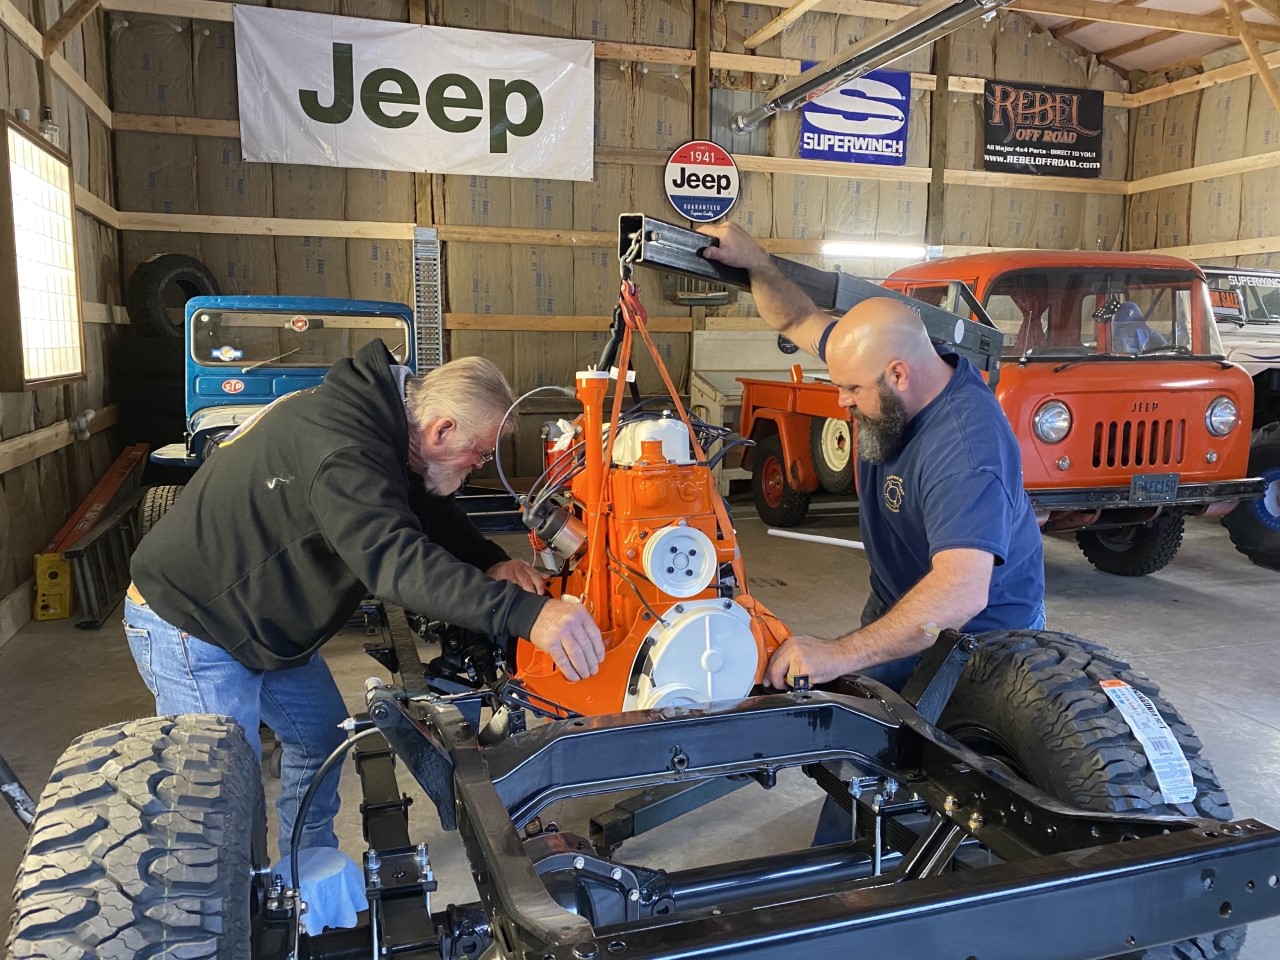
With the roller finally together and on the ground, it was finally looking like a vehicle was being built. We took the easy next step and threw the front and rear shocks on to help bring it together.
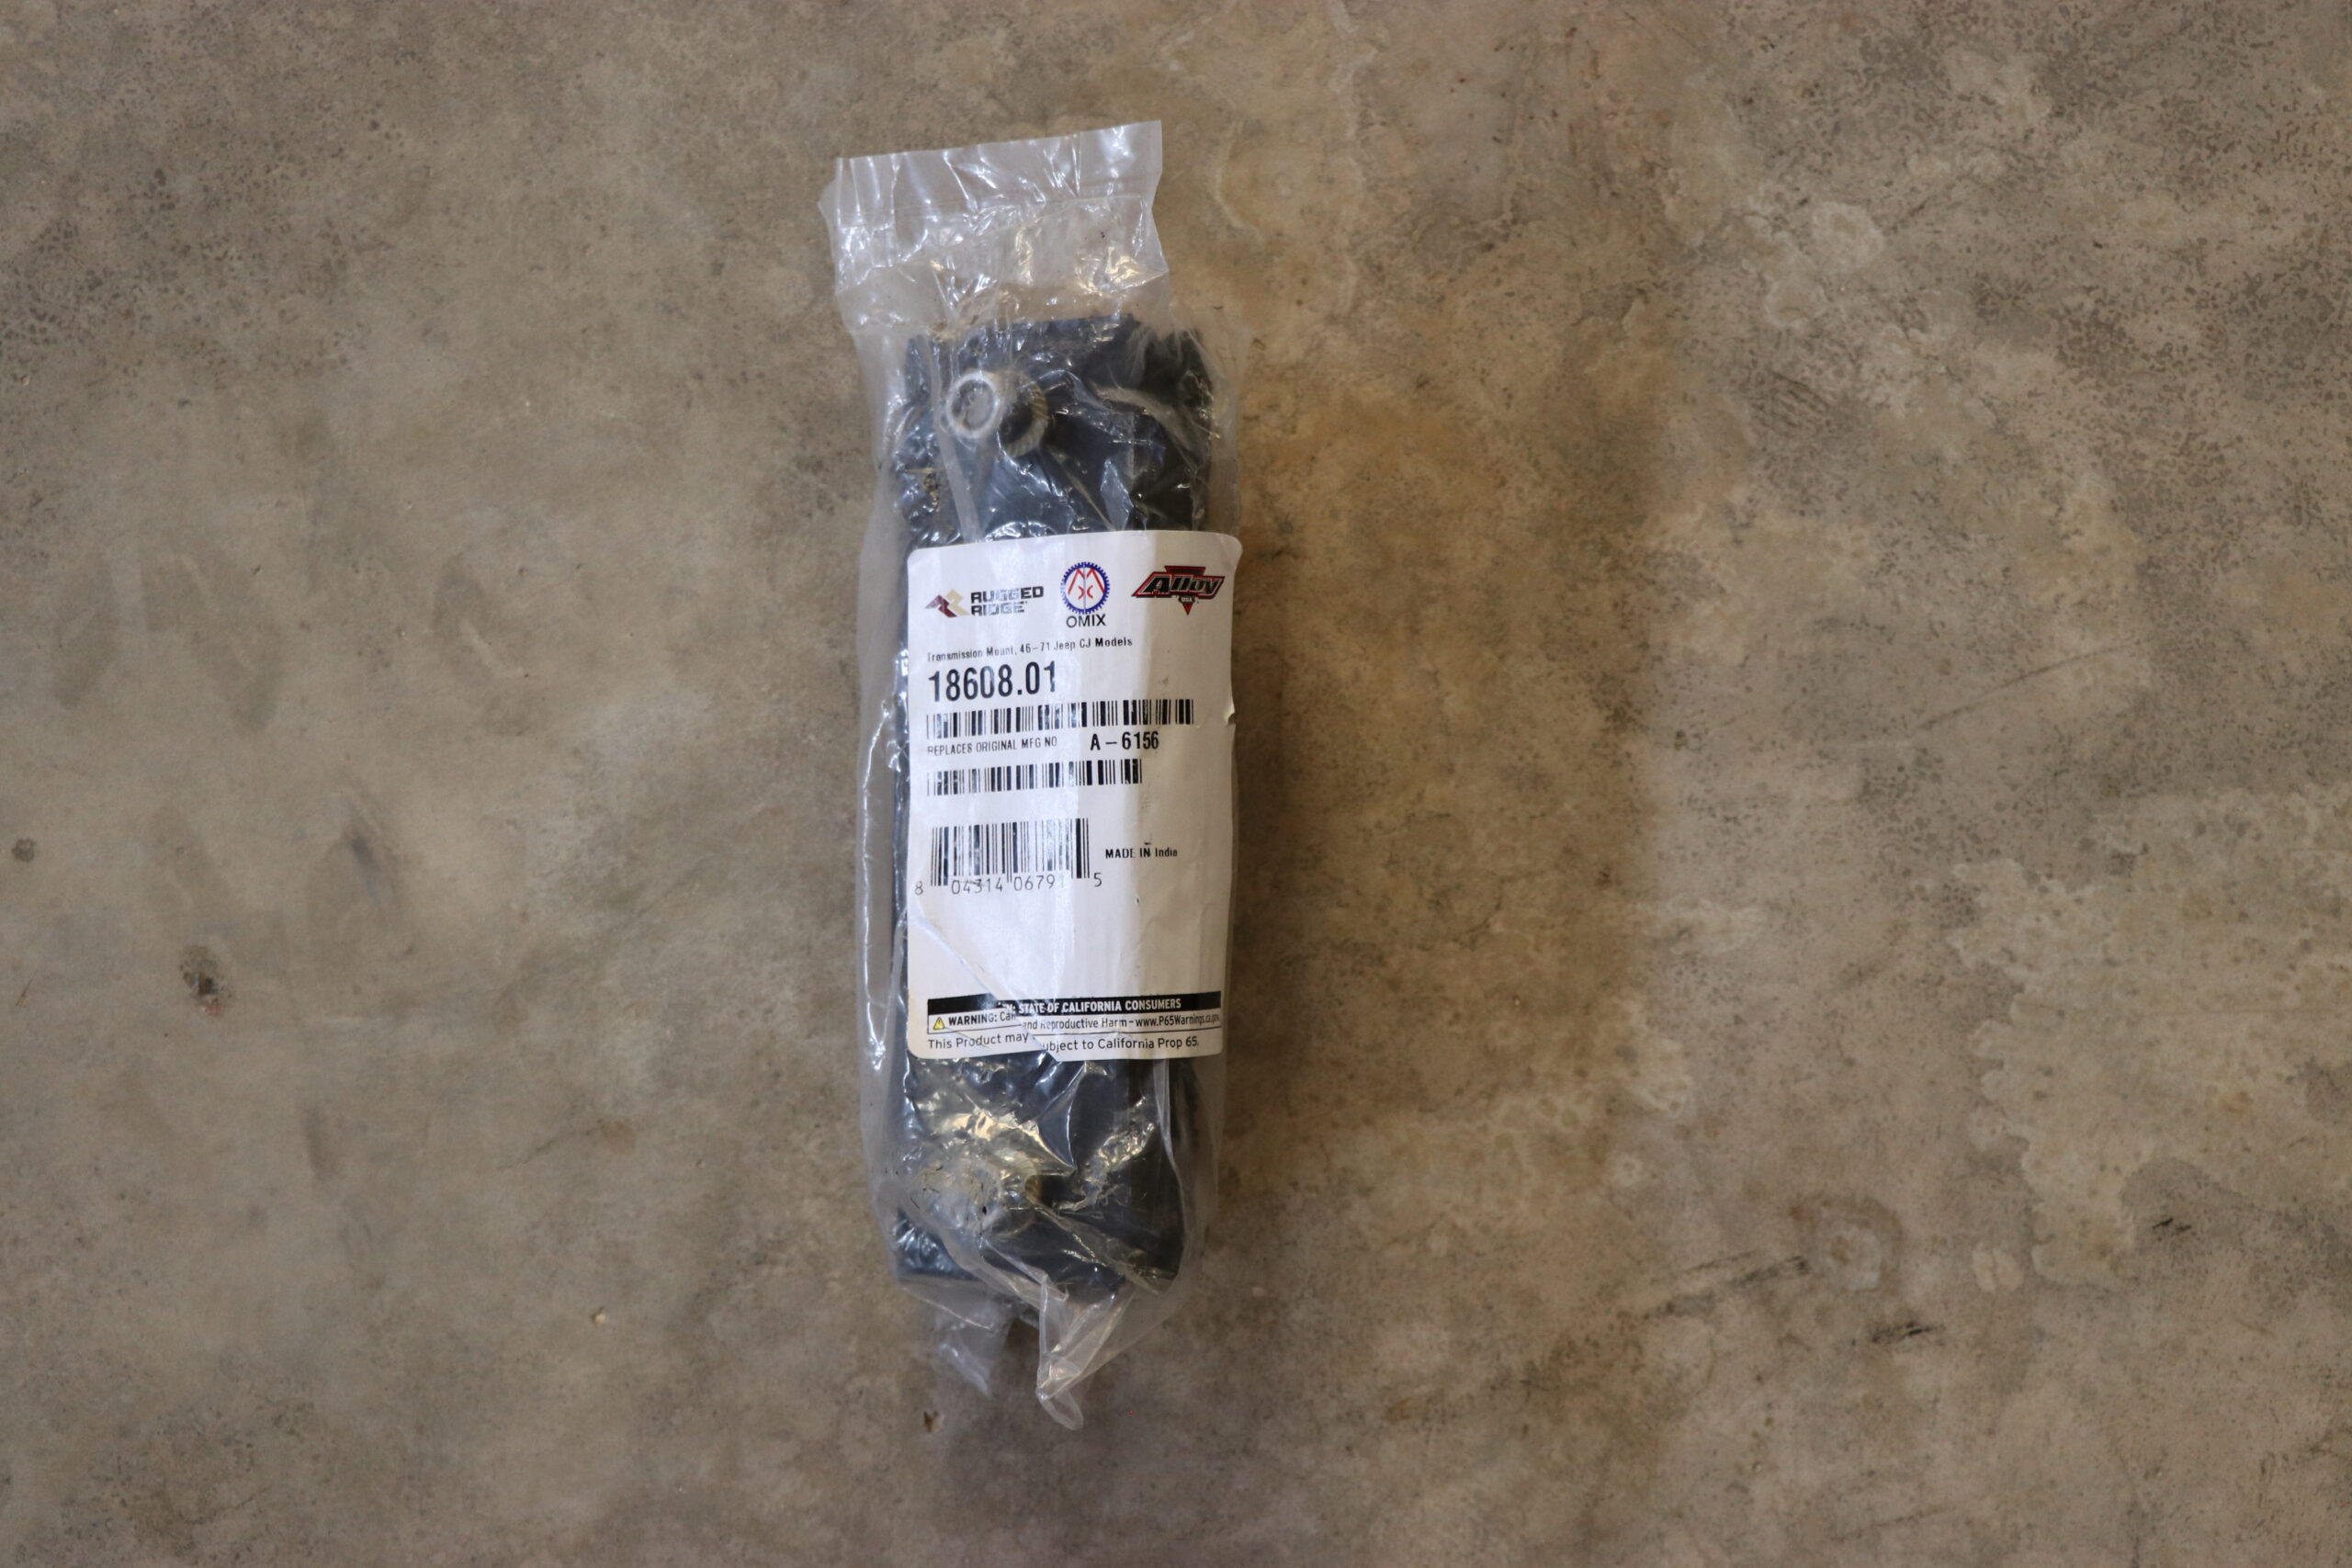
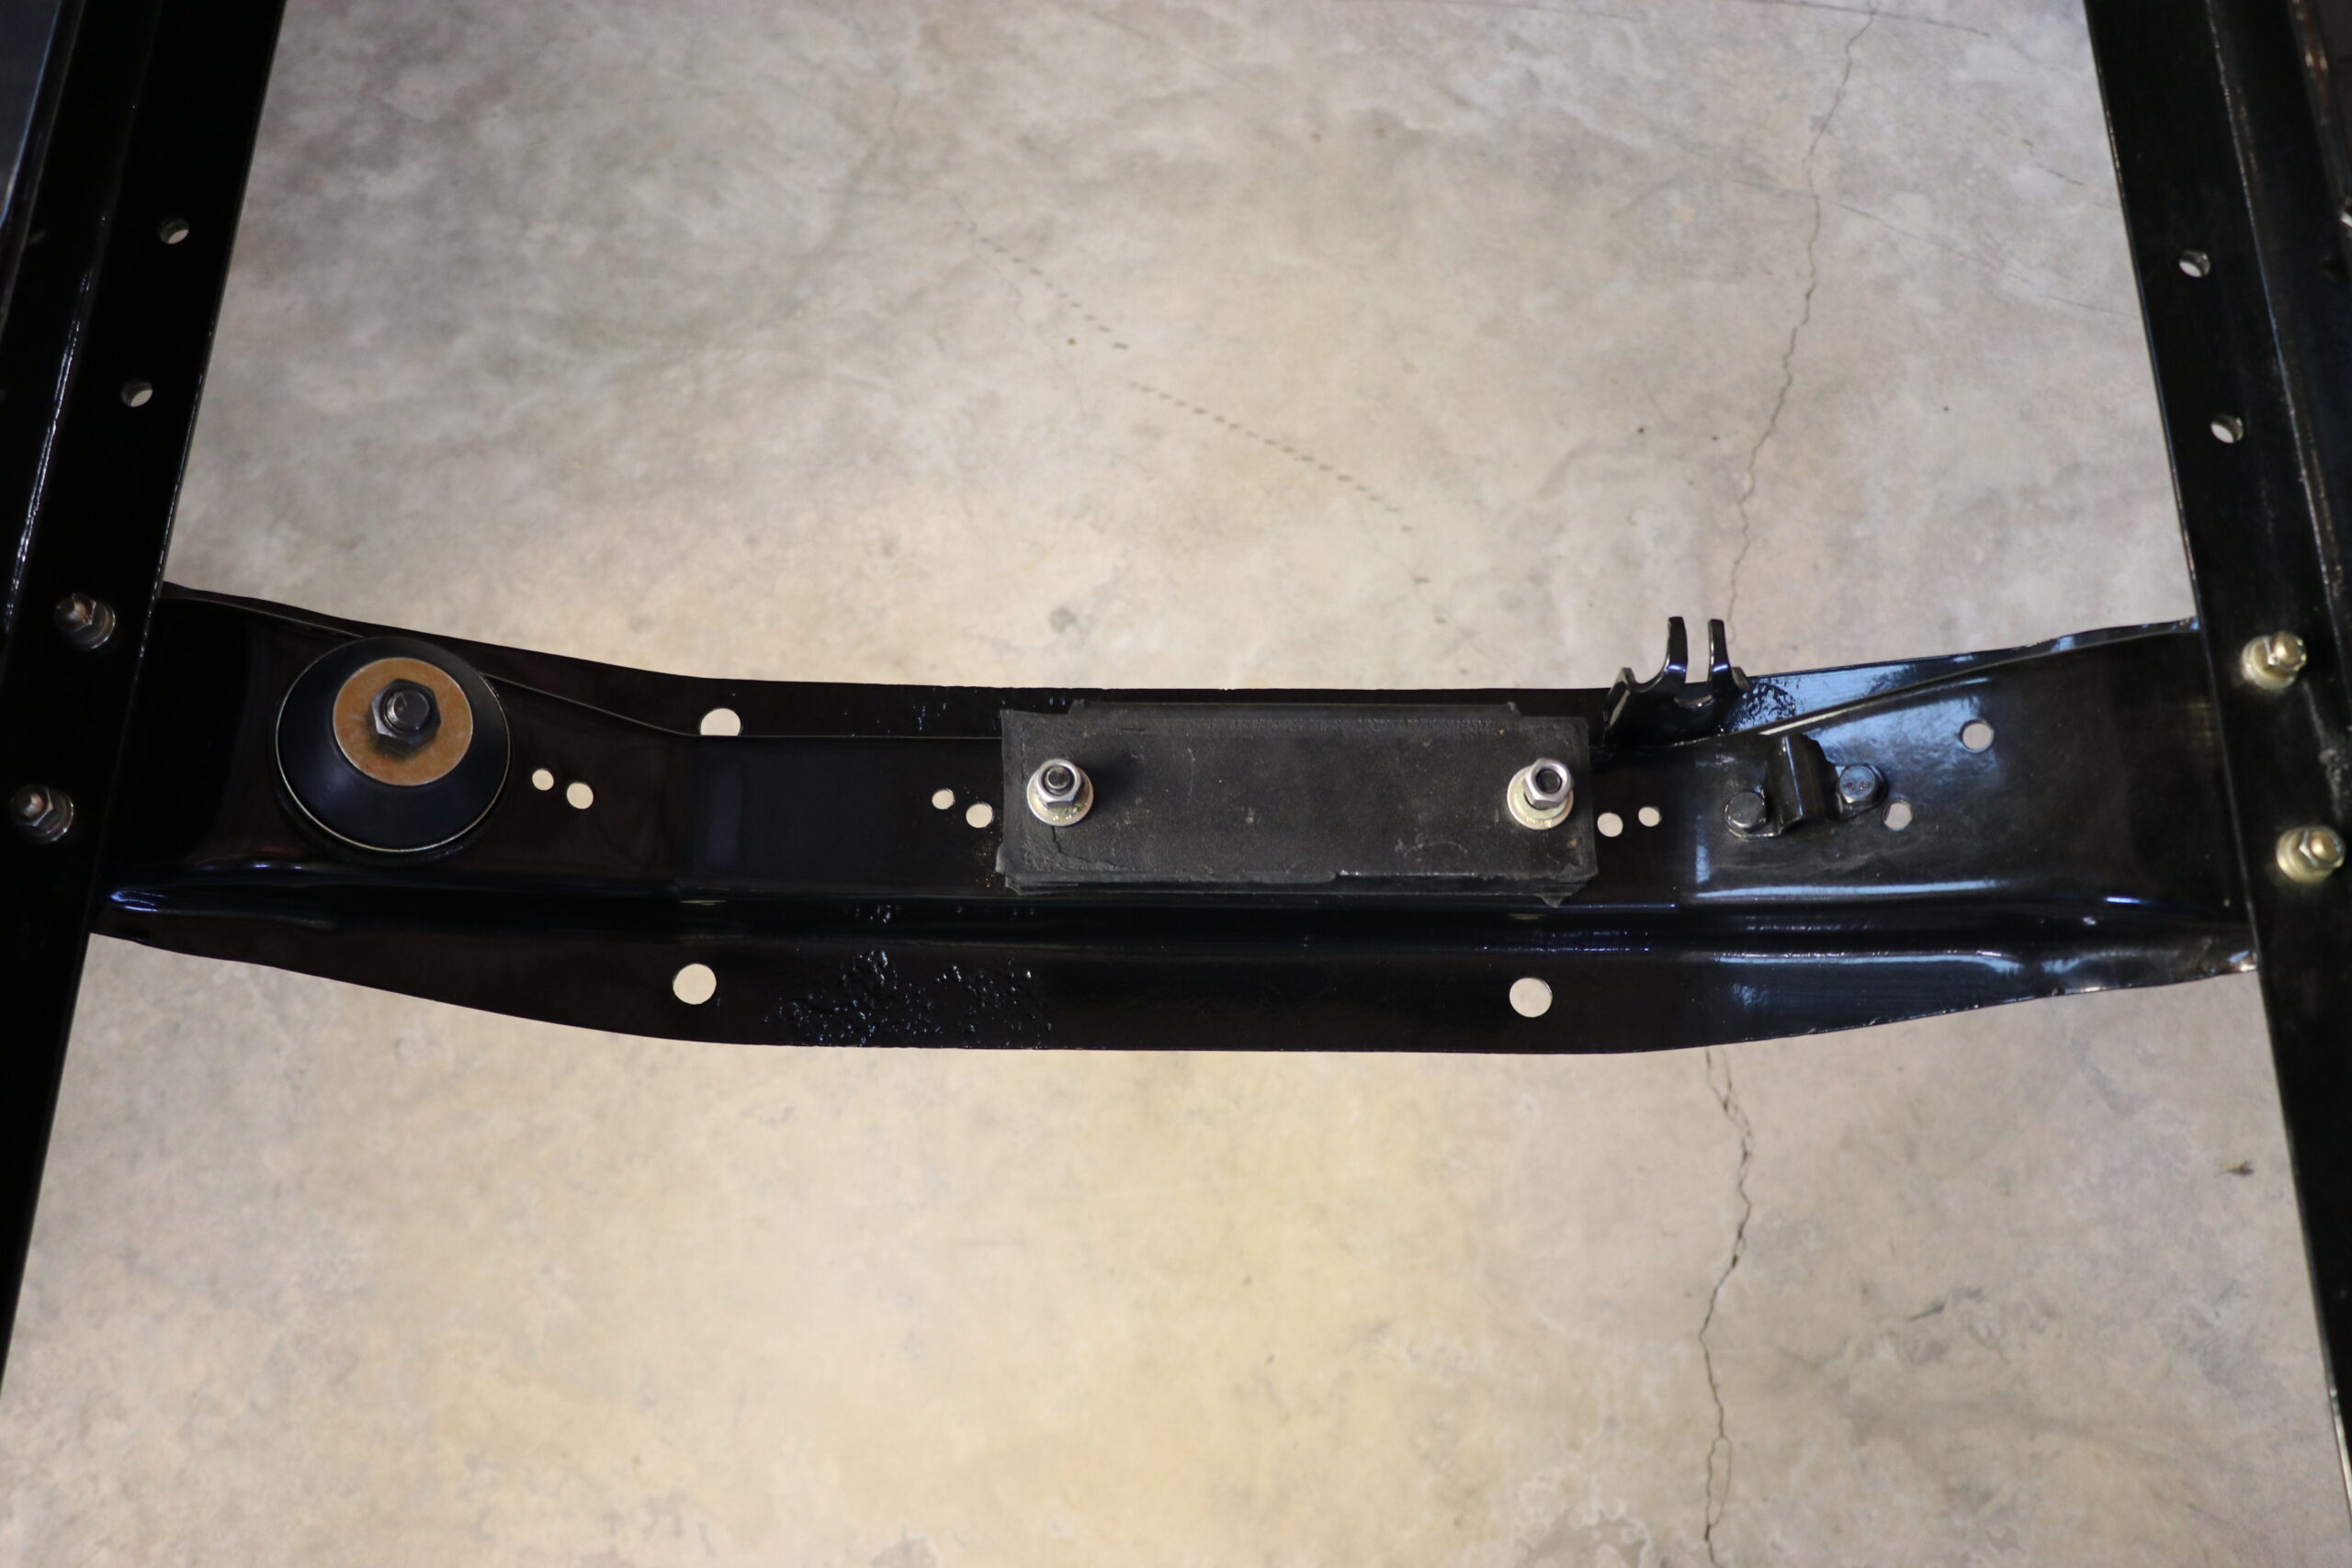
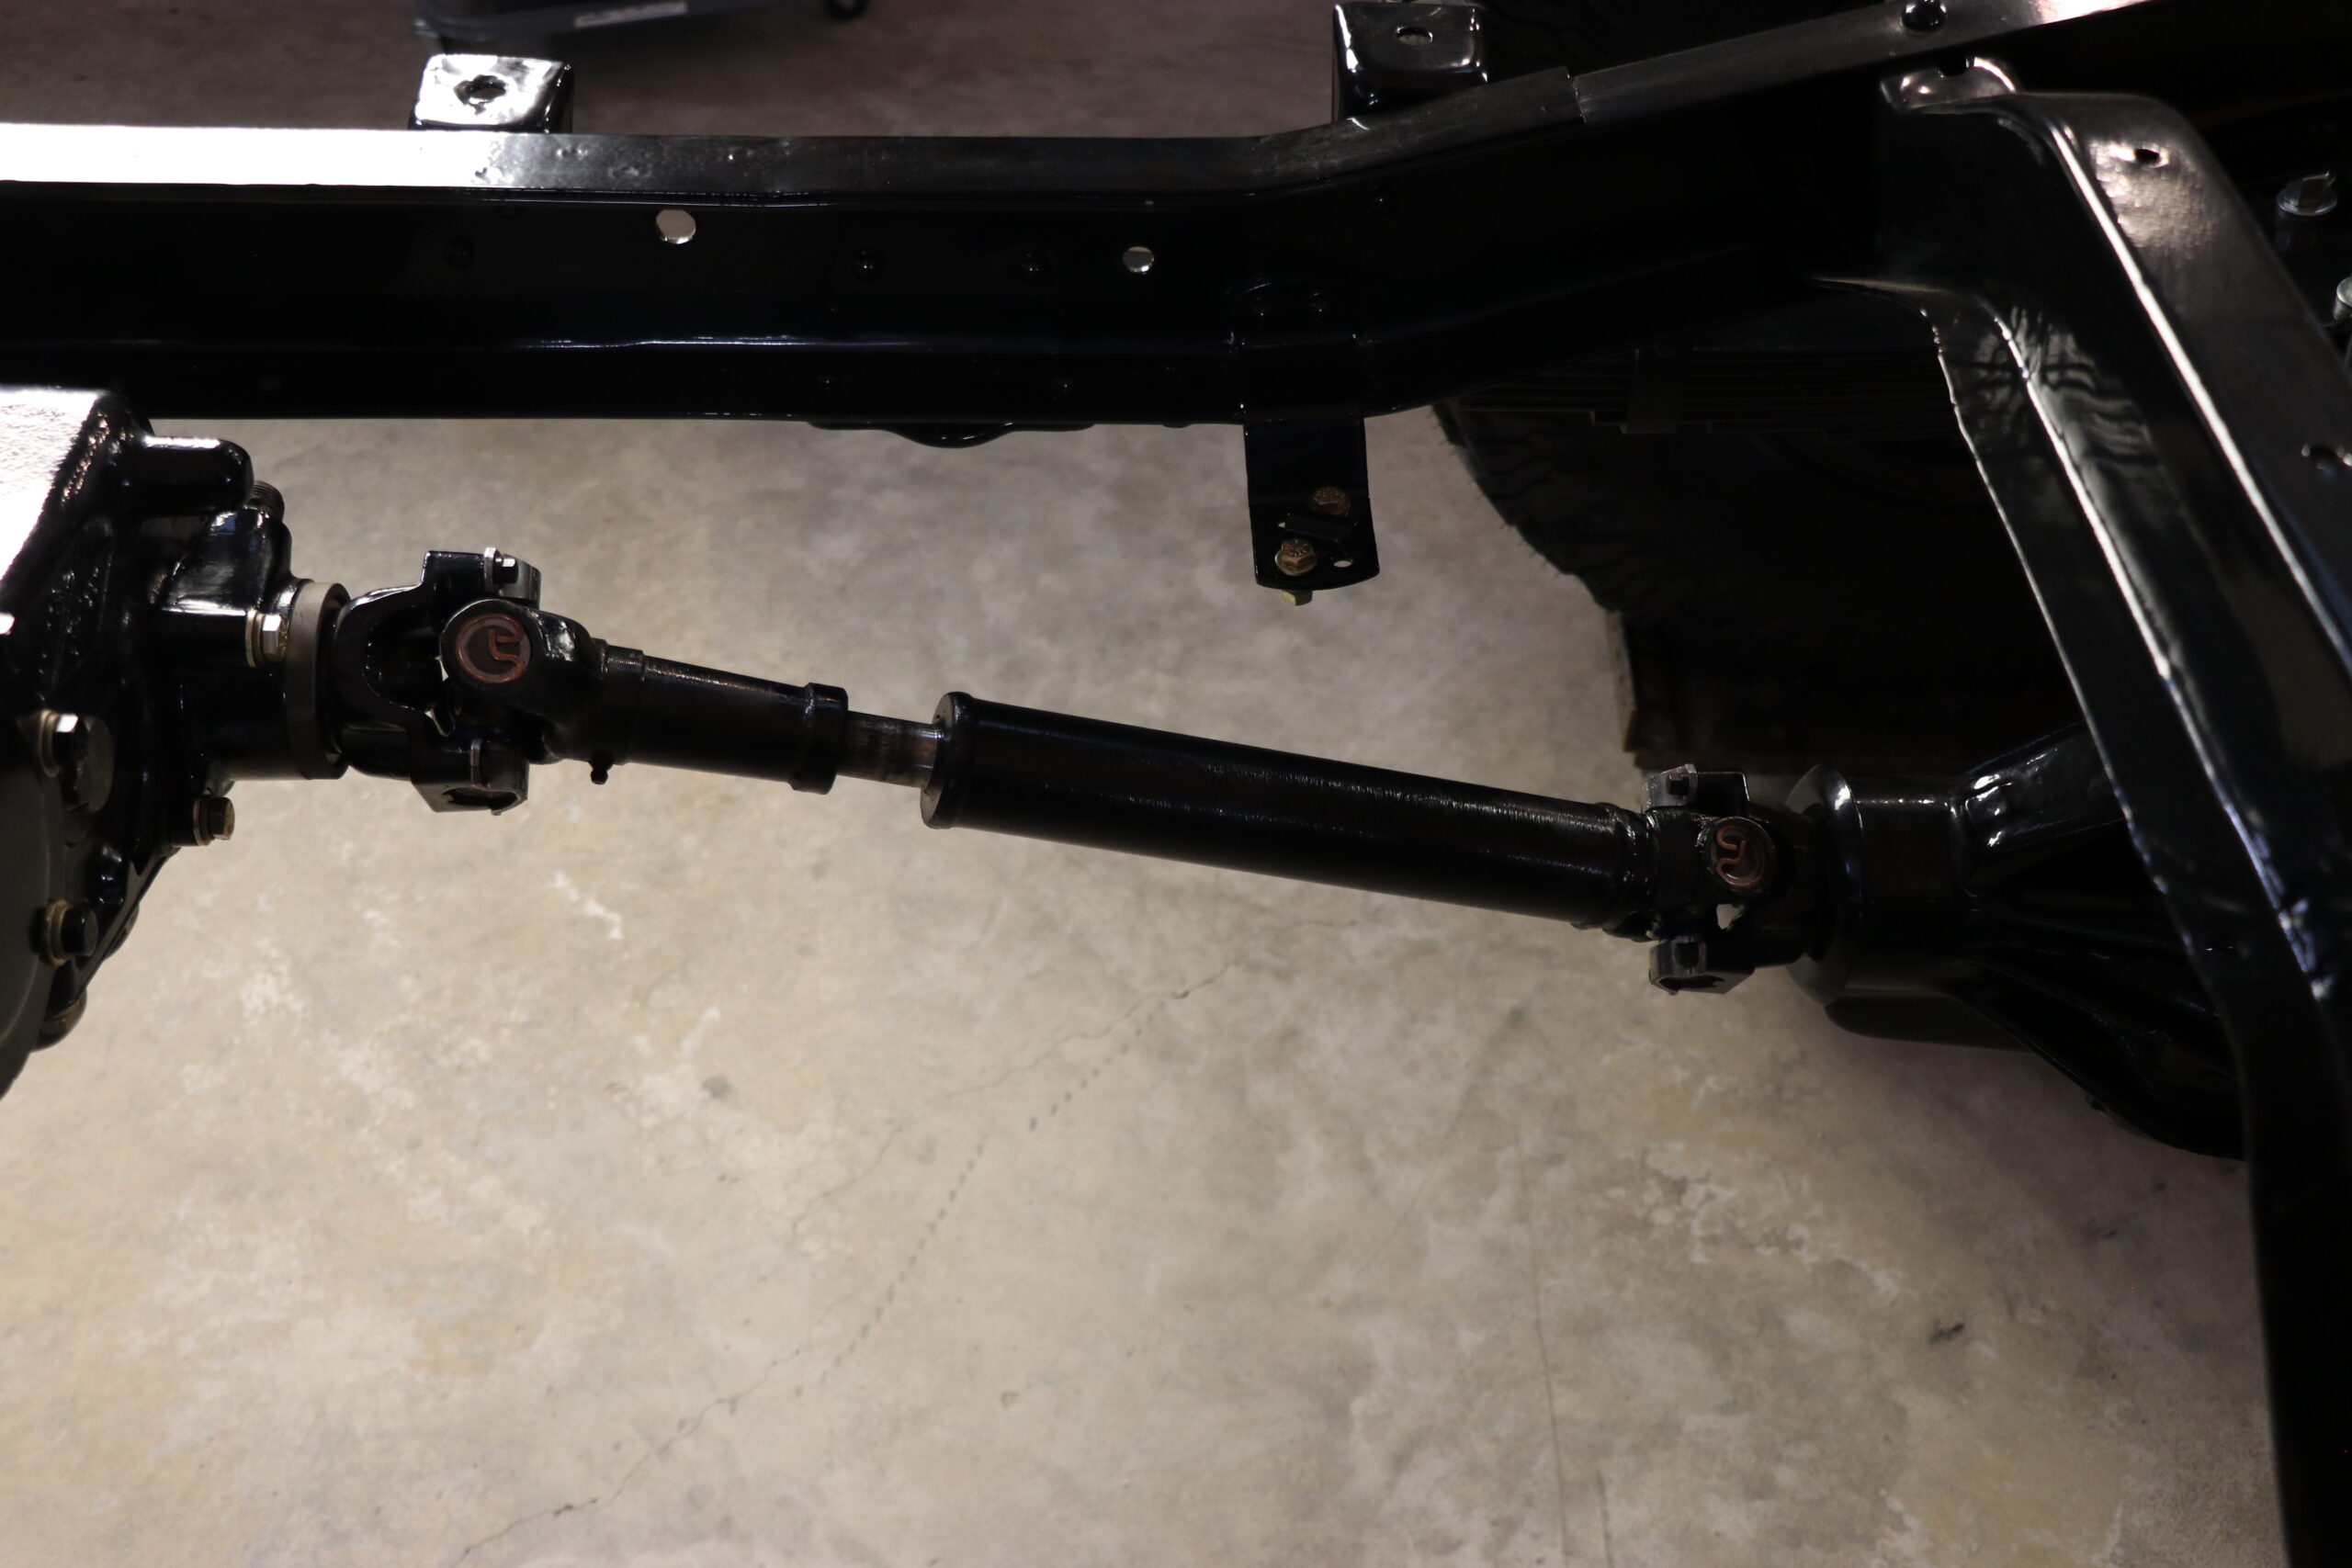
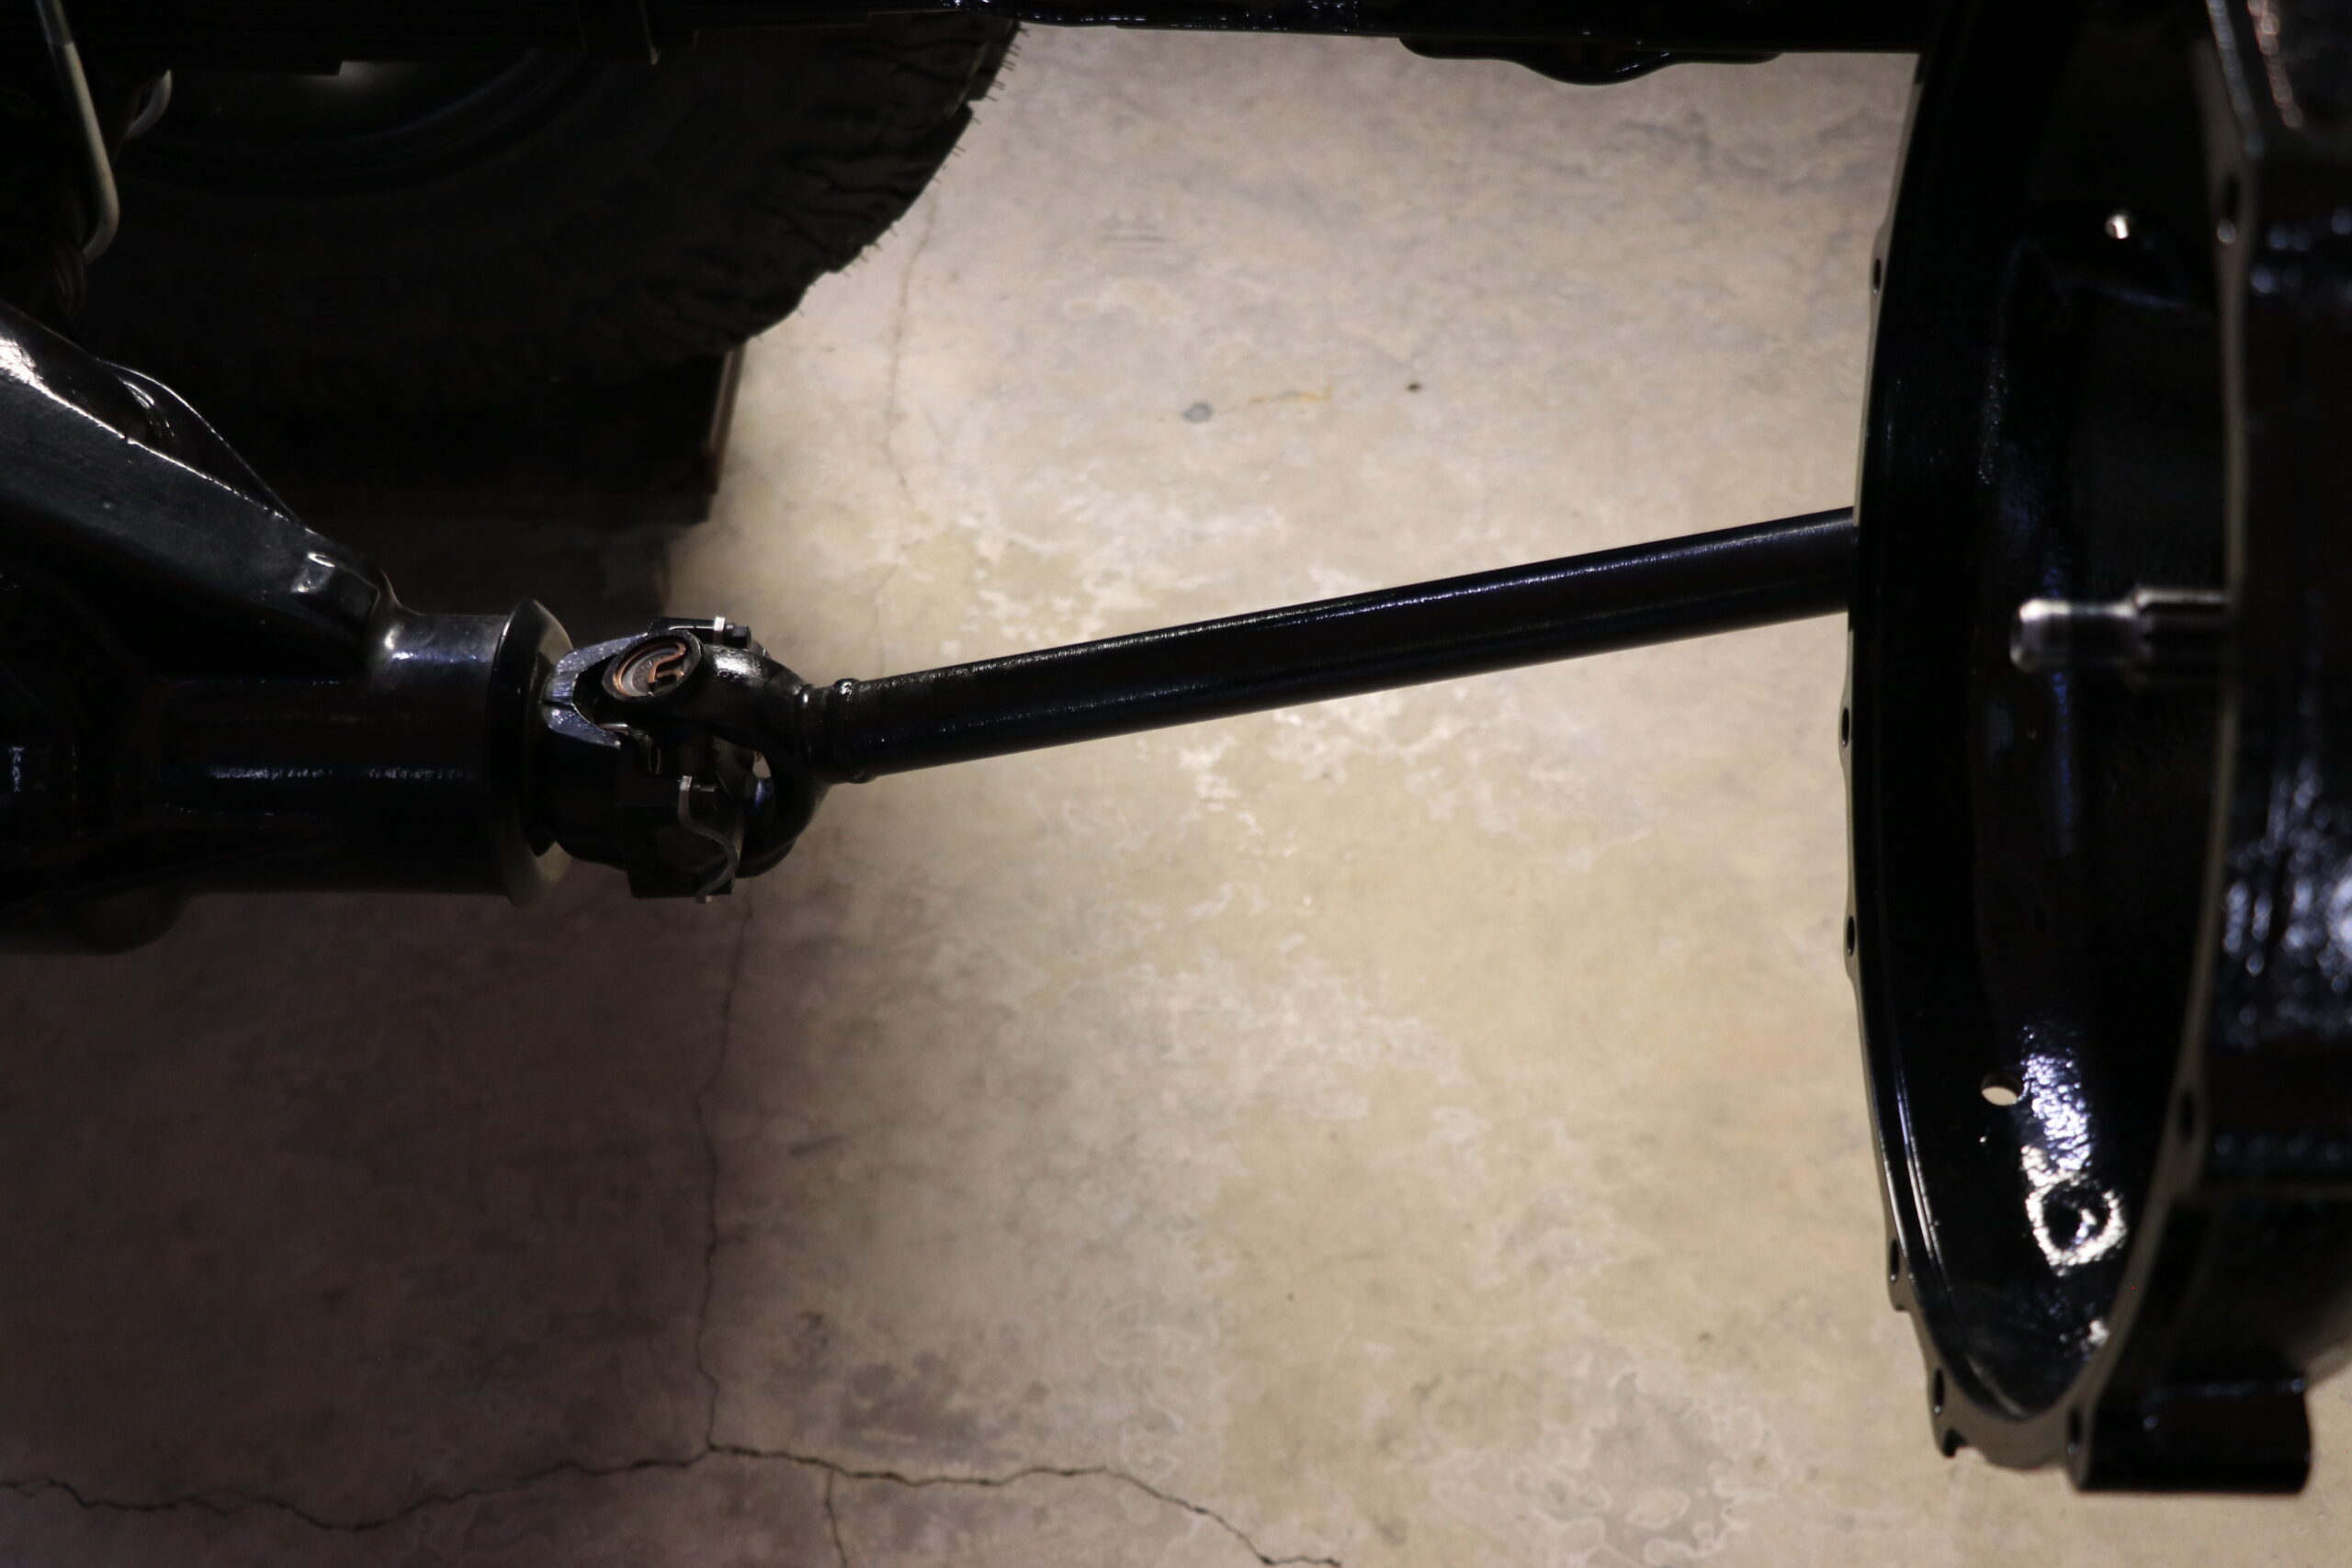
The transmission and transfer case were next, before that could be done, their respective mounts needed to be installed first. Once we had the mounts installed, the transmission and transfer case were bolted in. Next, the rear and then the front drivelines were connected.
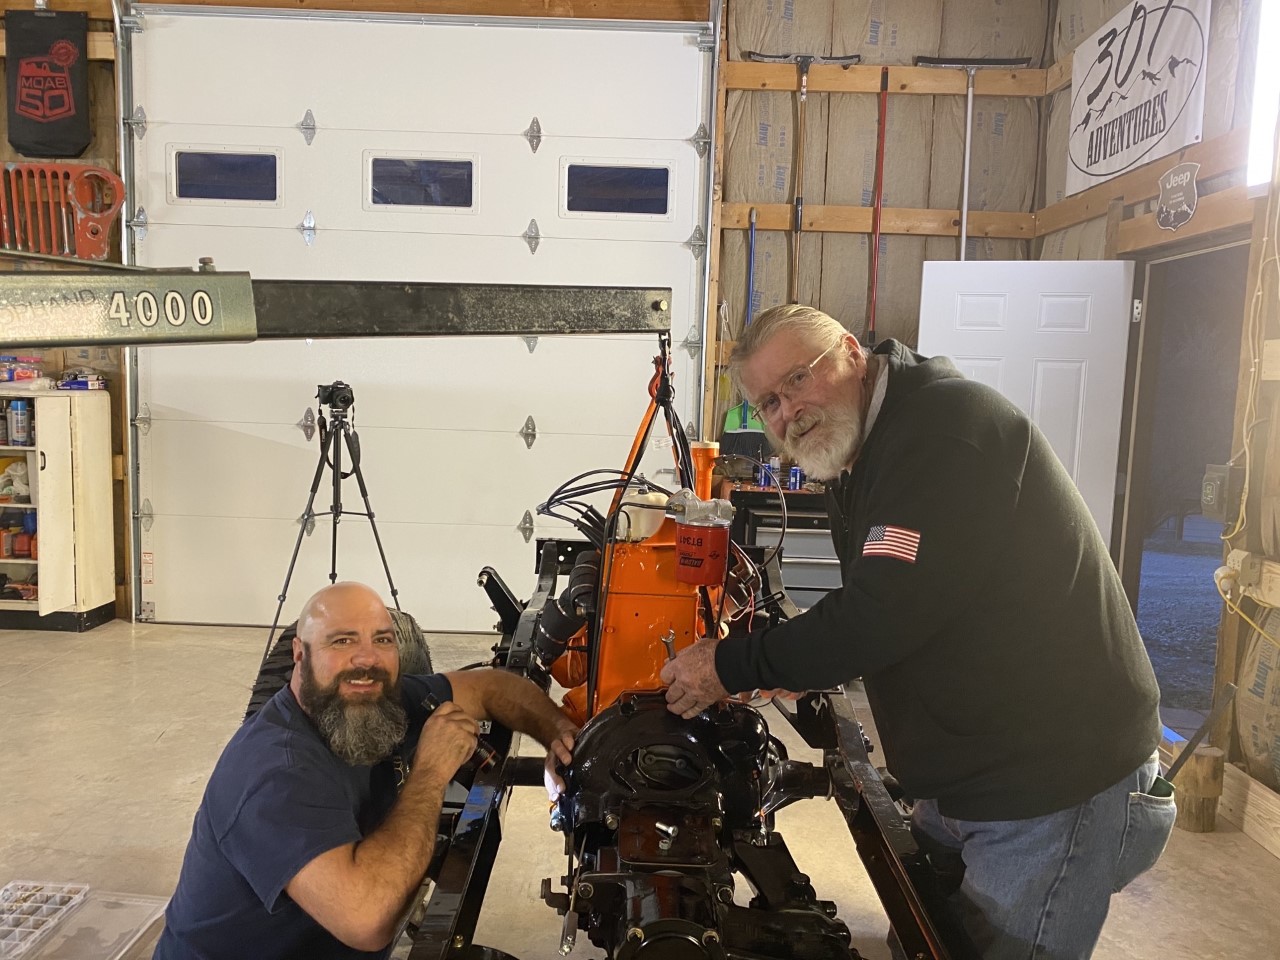
With those simple components in place it was finally time for us to set the engine. It may not sound like much to the average reader but this is a milestone in a restoration project. It takes a lot of time to rebuild the differentials, engine and transmission as individual units. So when they all finally get assembled collectively into the project, that is a milestone that builders can truly appreciate!


This restoration was made possible thanks to these great sponsors and contributors